De Ma Cuisine

storage tips Archive

Thursday

24

April 2014

0

COMMENTS

How To: Asparagus

Written by , Posted in Breakfast, Dinner, How To, Lunch, Storage/Prep, Vegetables

Asparagus-3

It’s asparagus time, friends. I hope you’re as excited about this as I am! Things like asparagus, snap peas, and green beans signify spring to me.

Oh spring.

Here in L.A. it just means a slight shift from cool-warm to warm-hot weather. But, after the winter many on the East Coast have had, I am glad that it’s spring for their sake.

Asparagus-2

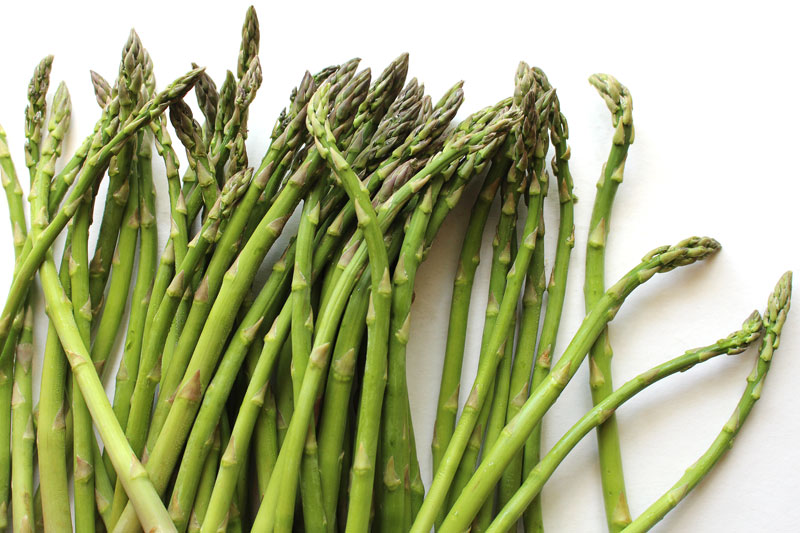
Enough about the weather though. Let’s talk about this bright green vegetable.

Every week when we get our delivery of organic produce from Abundant Harvest Organics there’s an information packed newsletter tucked into the box. I love what Vernon has to say on the front, plus there are great recipe ideas, and such great storage tips.

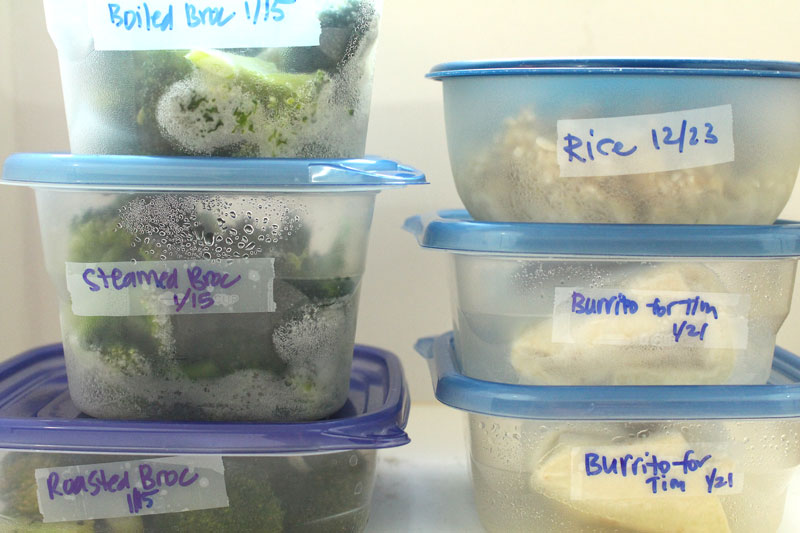
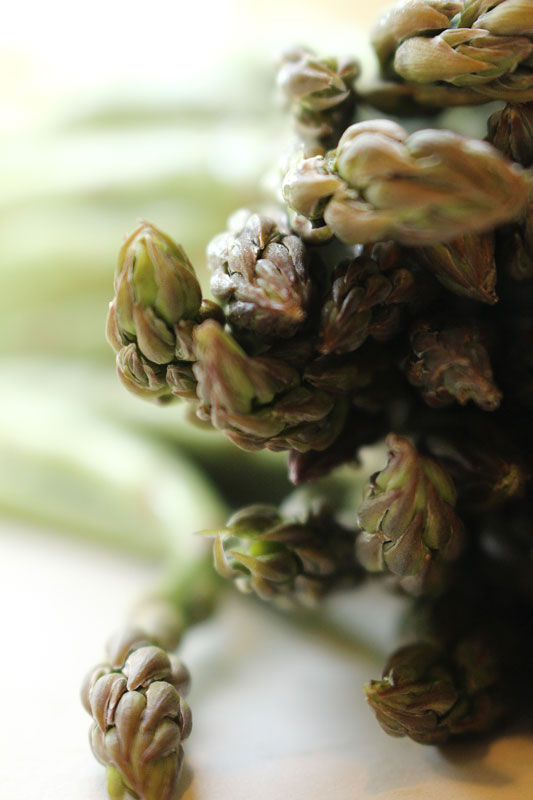
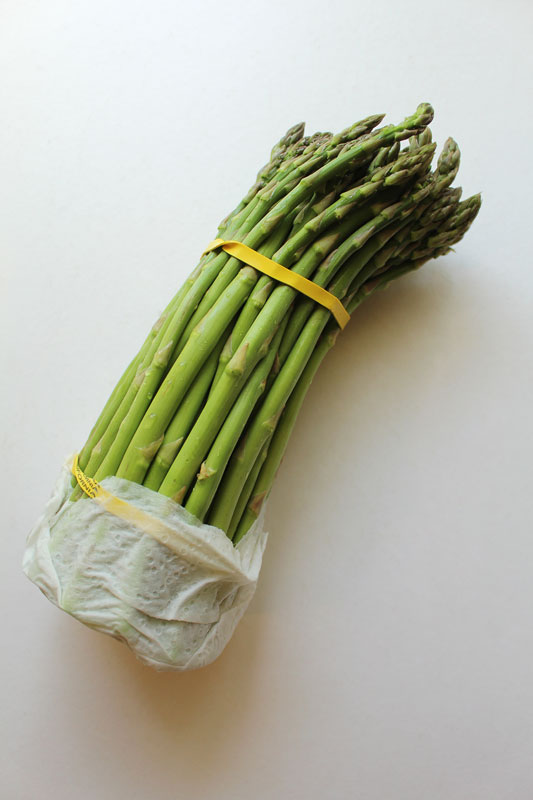
Like, for example, asparagus: I learned to cut off about an inch from the bottom, wrap them in a damp paper towel, and then store them in a plastic bag. Can I share a secret with you? The asparagus photographed were a week old. Yeah. This storage tip worked well.

Asparagus-1

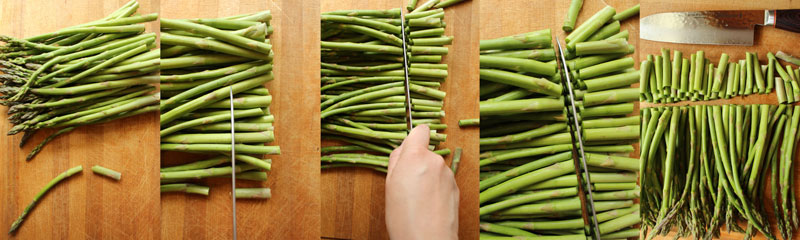
Before using asparagus in any dish, I like to trim the ends (because they can get a little tough, so they are better saved for vegetable stock). To do this, take one stalk and hold it with one hand at each end. Bend it so that it snaps naturally, usually an inch or two from the bottom. That will give you a good idea of how much to remove and you can line up the remaining asparagus and cut them all off at the same time, rather than snapping each individually.

Easy. Now they’re ready to be cooked.

Asparagus-4

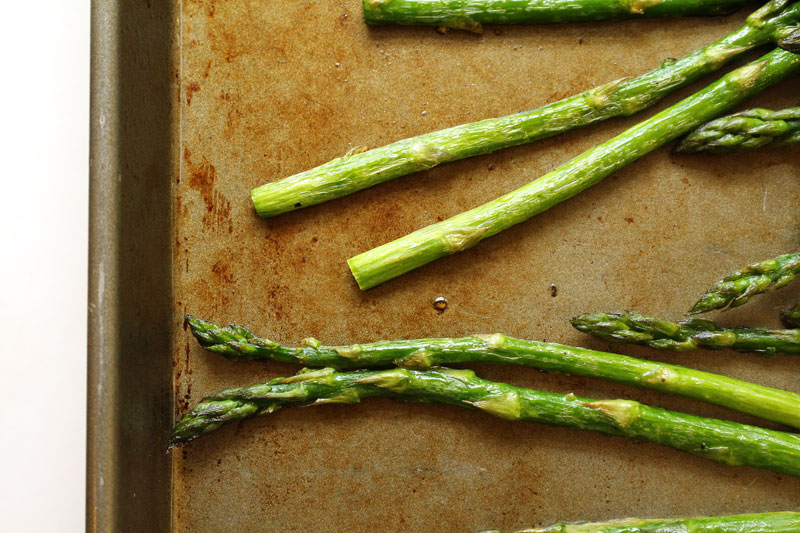
My favorite way to eat almost any vegetable is roasted. Asparagus is no different. They get a little sweeter, crispier outside, and tender inside.

Just perfect, in my opinion.

AsparagusWithCrispyBacon-8

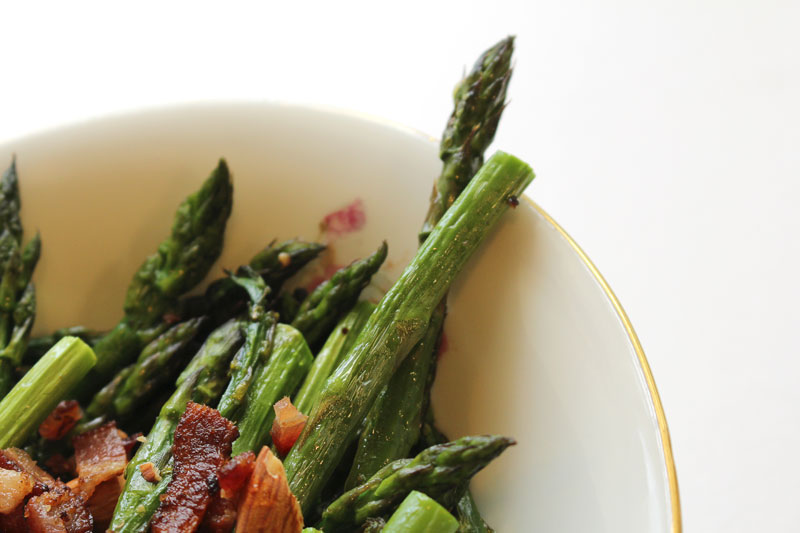
The other week I shared a recipe for Roasted Asparagus with Almonds and Crispy Bacon. It’s like my favorite way to eat veggies taken to a whole new level when bacon, almonds, and a squeeze of lemon juice are added.

SpringFrittata7

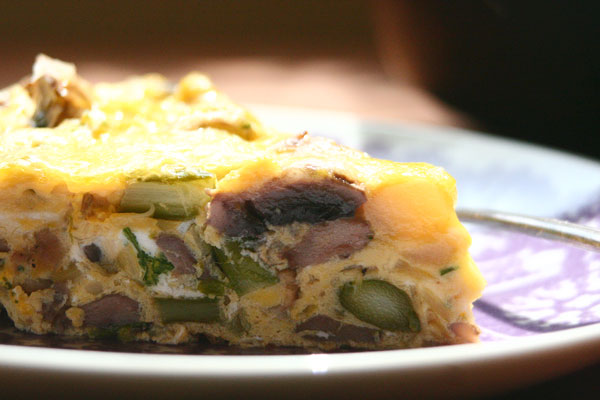
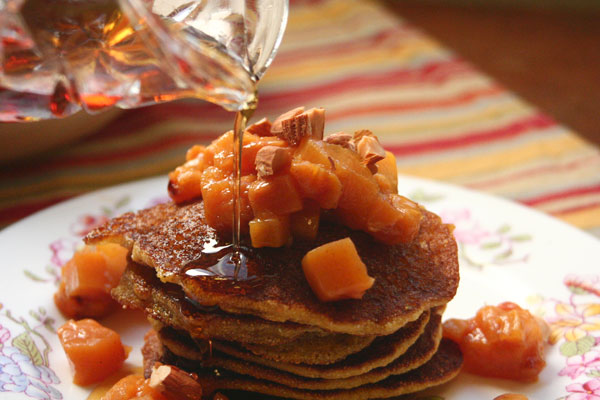
If you’re up for something other than roasting, another favorite is to add asparagus to a Spring Frittata. Seriously good. Invite some friends over for this one. Serve the frittata alongside a Savory Baked French Toast and a Simple Orange Salad. Dark, rich coffee, fresh squeezed orange juice, or mimosas would be very acceptable beverage choices for this meal.

There you go. I’ve planned your next brunch for you.

AsparagusWithCrispyBacon-1

I would totally throw these friendly green stalks into a spring soup with some potatoes, cream/milk, thyme, cayenne, salt, pepper, and onions.

What if you made a cold sauce by mixing a little bit of heavy cream with some dijon mustard, salt, and pepper, then drizzled it over some hot, roasted asparagus?!

You could blanch them (cook in boiling water for about 2 minutes, then submerge into an ice bath to stop the cooking), top them with some of your favorite olive oil, fresh thyme, a squeeze of lemon juice, salt, pepper, and shaved parmesan cheese. Serve them alongside a perfectly cooked fried egg.

You might try either roasting or cooking in a little bit of oil, over high heat for just a few minutes. Then toss with some lemon juice and fresh tarragon.

I think I would like to eat any of these right now… but, we had some friends visiting from Germany, and they brought us an incredible assortment of chocolates. So that’s what I’ve been snacking as I’ve been writing about crispy, crunchy, green asparagus.

Happy Eating!

Friday

31

January 2014

4

COMMENTS

Storage Tips: How To Cook Once a Month

Written by , Posted in Storage/Prep, Thoughts

 OnceMonthlyCooking4

We require a lot of food, as humans. Don’t we? I’m glad we do. If we didn’t, I’d be out of a job. And I love to eat. Love love love to eat. But, food requires cooking, which requires time, ingredients, money… you know, stuff we all have tons of. So what if we tried to save on all of these things and cook just once a month?

Wait! I don’t mean cook once a month and eat out the rest of the time. Silly. You didn’t think that’s what I meant, did you? I meant cook once a month to make aaaaaaall the meals for the month.

Could you do it?

To be honest, I don’t know if I could. I enjoy cooking too much and I’d feel like I was missing out.

Reasons why this is a good idea.

1. You would work hard for a day or two (we’re talking full days of cooking), but your evenings for the rest of the month would be easy breezy.

2. I wonder if you’d save money by doing this. You’d grocery shop once for all the big stuff (or twice if you’d rather cook twice a month and do two week stints), then leave a small budget for the extras (milk, eggs, honey, etc). This would eliminate the common groceryshopaholic syndrome*, with the symptoms being: going to the store every day, shopping while starving, not sure what you’re going to make for dinner so you buy too much.

3. You’d produce a lot less wasted food. You would know how many portions a meal will make so you can properly plan and won’t have to throw out as many leftovers.

4. If you have unexpected guests for dinner, no problem, you’ve got two lasagnas in the freezer. (That was a bonus. We were just thinking about feeding your family. Now you can be all “Oh ya, dinner tonight at our place? No problem. I’ll just throw something quick together.” And then you present a lasagna, homemade by your own two hands… three weeks ago… shhhh they don’t need to know that last part.)

You’re gonna need some supplies.  

OnceMonthlyCooking2

OnceMonthlyCooking-1

  • freezer safe food storage containers
  • tin foil
  • parchment paper
  • freezer bags
  • a sharpie
  • tape
  • baking pans
  • baking sheets

Freezer safe food storage containers – Plastic or glass work for me. Use what you prefer. If you have a plastic brand that you like and are willing to part with them, you can use them to give a meal to someone who has just had a baby/hospital stay/tough time/death in the family… and they don’t have to worry about returning it and finding the lid that matches with it. (If you can’t part with it, just write your name on it and hope that they return it. 😉 )

Tin Foil – To cover the tops of those casseroles in the freezer and in the oven. If you like to put plastic wrap under the tin foil, don’t forget to remove it before baking (maybe leave yourself a little note – even if it seems silly, there’s almost nothing worse than baking up your perfect lasagna only to find that you’ve accidentally baked the plastic in… ok, there’s a lot worse than that… you know what I mean).

Parchment Paper – This goes between raw hamburger patties to prevent them from sticking together. Of course you can also go the “freeze on a baking sheet first” route. That’s fine with me. But then you have to take them off the baking sheet and wash the baking sheet and I’d rather be done a long time ago and on the couch watching Veronica Mars something educational and important.

Freezer Bags – Great for storing liquids. They will save you tons of space. Just be sure there are no holes and that the bag is completely sealed before storing (unless you had been planning to clean your freezer, like now, or didn’t really like the Roasted Butternut Squash Soup that you spent hours making).

Sharpies and Tape – Your labeling system. I like to write on the tape: what the contents are, the date they were prepared, and sometimes how much is in there and when/who they are for. It’s also good to note thawing/cooking time and baking temp, so you don’t have to look it up.

Baking Pans – Disposable ones can be given away. They also don’t use up your cute Le Creuset or Pyrex baking dishes. (Plus, bonus, you don’t risk shattering your glassware in the oven – on that note, I’m wary about putting a glass or ceramic dish that’s just come from the fridge or freezer into a hot oven. When they go from hot to cold (or vice versa) too quickly it’s called thermal shock and the pan could shatter. Could. No guarantees that it will or won’t, just something to be aware of.)

Baking Sheets – Some like to freeze fruits, veggies, burgers, cookies… etc, on a baking sheet before placing in a bag or container.

You’re gonna need to plan your menu.

You read parts 12, and 3 of my menu planning tips series. Right? If not, take a few minutes after you read this to read those. They will help with the planning. (You’re welcome. And I love you too.)

What types of meals do you want? Breakfasts, lunches, dinners? Here are some ideas for all three:

Breakfasts 

Cornmeal-Pancakes2

OnceMonthlyCooking3

Lunches/Dinners

SpaghetttiSoup4

Shepherd'sPieOct1-5

Snacks/Desserts/Extras

  • fruit in bite sized pieces
  • granola bars
  • cookies (pre-baked or raw)
  • fresh herbs
  • pies

Let’s get started!

Anyone want to give it a try? If you do, let us know how it worked for you! Maybe you have some tips and suggestions. Feel free to leave them in the comments section so everyone can benefit from what you’ve learned.

If you want to make it a little more interesting, I’ve heard of people doing this and I think it could be fun: Invite 7 friends to do a meal swap. Each person finds and prepares 4 great recipes (multiplying each one times 8, because you’re keeping one for yourself). Make some space in your freezer, and get together to swap your delicious meals. Now you’re set for a month.)

Ready? Let’s cook!

*This is not a real syndrome. I made it up. Just want that to be clear. Ok. Phew. Now that that’s out of the way…

Monday

11

November 2013

2

COMMENTS

Vegetable Stock Tutorial – Storage Tips

Written by , Posted in Soups, Storage/Prep, Vegetables, Vegetarian

VegetableStock2_6

One of the ways that I love to save money is by making my own stock. So far, my favorites are vegetable stock and chicken stock. Veggie stock gets made from those sad sad items in the produce drawer that just didn’t get eaten. They are about to go bad and need to be used up so they don’t end up in the compost. Chicken stock gets made from the bones, giblets, and skin from a whole chicken (which is how I usually buy them).

Today, let’s talk about the veggie version.

It’s easy.

It will save you money.

It will feel like you’re wasting less produce, because you are.

Oh and bonus, you control what goes in it. I don’t salt my stocks. I leave them pure and simple, and add salt when I’m making the soup.

Whatever your reason for wanting to do it, here’s what I’ve learned to do.

I find some veggies, a few herbs, some water, and a large pot. Most any veggies will do. I’ve used broccoli and cabbage, carrots and parsnips, lettuce ends and kale stems… If you’ve got it, it can probably be stock.

VegetableStock2_5

VegetableStock2_4

Cover the veggies with water. You can always add more later if you need to, but make sure there’s a good amount. Then it’s going to cook away for an hour or so.

VegetableStock2_3

VegetableStock2_2

VegetableStock2_1

That’s it. You just made vegetable stock.

VegetableStock2_9

VegetableStock2_7

If you want to go a step further in the responsible consumer arena, you could use water that you’d used to boil pasta to make your stock. Or water that you’ve used to boil potatoes, or cook beans… Sure, it will be a little bit different, but why not?! And then, an extra extra step, let your dog eat the boiled veggies. Our dog, Brando, loves them (which is weird because he usually prefers his veggies doused in bacon grease).

VegetableStock2_8

Making our own stock is a great way that we can save money, use our resources wisely, and to be even more responsible with our food. Less waste, more taste. Let’s do this!

Vegetable Stock
Recipe Type: Stock, Soup
Author: Rachel Oberg – De Ma Cuisine
Prep time:
Cook time:
Total time:
Serves: 8.5 Cups
Ingredients
  • 3 carrots, roughly chopped
  • 4 radishes, quartered
  • 2 summer squash, quartered
  • 1/2 sweet pepper, chopped
  • 1 lettuce end
  • 3-4 garlic ends and peels
  • 1 lemongrass end
  • 1 sprig fresh sage
  • 1 t dried rosemary
  • 2 T dried parsley
  • 1 sprig fresh savory
  • bunch fresh chives
  • 8-12 C water
Instructions
  1. Place all ingredients in a large soup or stock pot. Cover with water.
  2. Cover with a lid and bring to a boil.
  3. Uncover and reduce to a simmer. Cook for 45-60 minutes.
  4. Strain and let stand to cool on counter for about 30 minutes.
  5. Refrigerate until completely cool and then freeze in freezer safe containers with date and amount written on a label).
Notes
Feel free to substitute with other veggies that you have on hand.