De Ma Cuisine

Storage/Prep Archive

Thursday

30

April 2015

0

COMMENTS

My Top 10 Kitchen Hacks

Written by , Posted in How To, Storage/Prep, Thoughts

The more we do something, the more we know about it. It’s just that simple. I started cooking on a more regular basis when I moved away from home. I subbed for my roommate on her day off at the school we worked at a few times. My roommate was a trained chef. I was not. I’d learned a few things from my mom, who is also a great cook. But, I hadn’t done a lot of cooking.

So, I learned the hard way that you really should soak dried beans before adding them to the pot of Spicy Chicken Chili. It’s easier than having to pick them out by hand after you’ve added the beans. I learned about a year into marriage that putting hot soup into a blender and not removing the plug in the lid will result in the plug falling into the soup and blending with it. A clean tea towel over the hole in the lid works much better.

I’ve learned a lot over the years. And I’m so happy to be able to share these things with you!

Here, in no particular order, are my top 10 kitchen hacks:

KitchenHacks-7

1. Tea Towel in the Produce Drawer

I like to place a clean tea towel in the bottom of the produce drawers. I change it each week, and I think it helps cut down on moisture and mold. Plus, having to remove what’s still in the drawers each week lets me wipe out the drawers, and see what’s in there and make a note of what needs to be used up in the week’s menu.

KitchenHacks-8

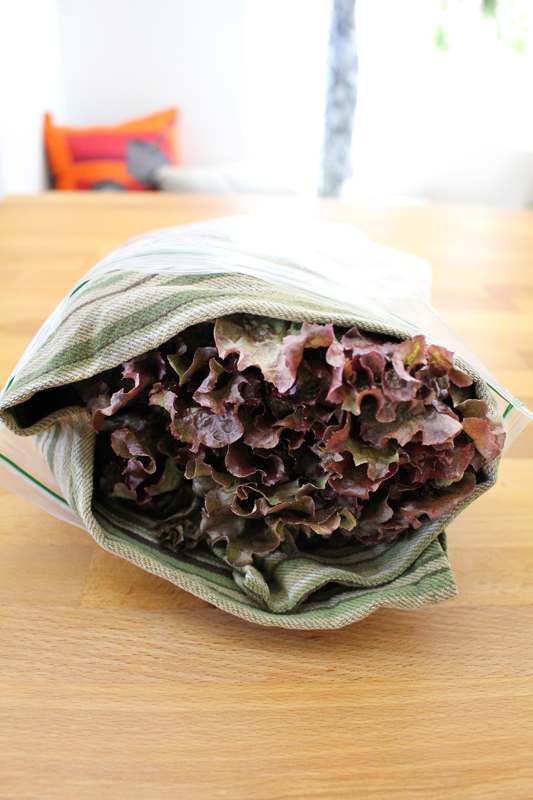
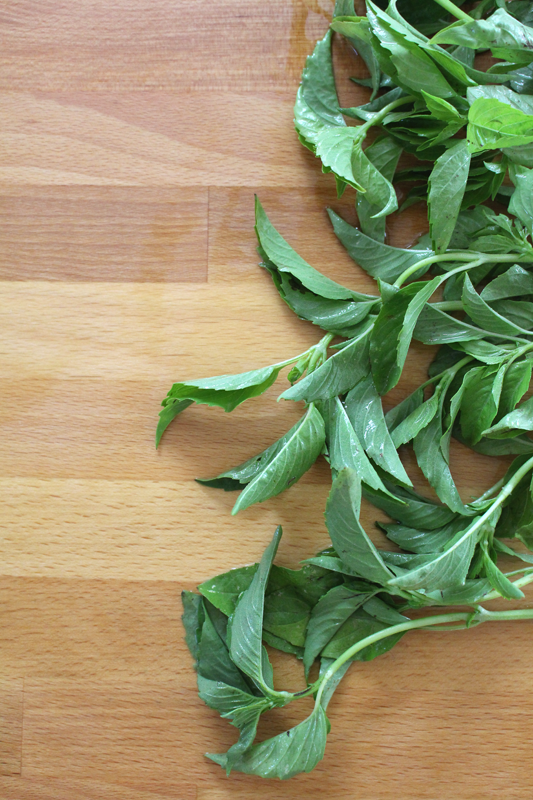
2. Wrap Greens in a Tea Towel Before Bagging

I used to just pop the lettuce or greens into a zip top bag. That works fine if they’re going to be eaten quickly. But, sometimes we don’t go through it as quickly as I’d like. So, I started wrapping each head of lettuce (and chard, kale, collards etc…) fairly tightly in a clean tea towel, then putting it into the zip top bag (and sealing every few inches of the top). When I was photographing for this post I realized that I had three heads of lettuce in the fridge. One from March 24th, one from March 31st, and one from April 14th. They were still all edible – the older ones had a few leaves that went into the compost, but other than that, they were still good. I think that the moisture that the tea towel absorbs helps to delay the decay of the greens.

KitchenHacks-9

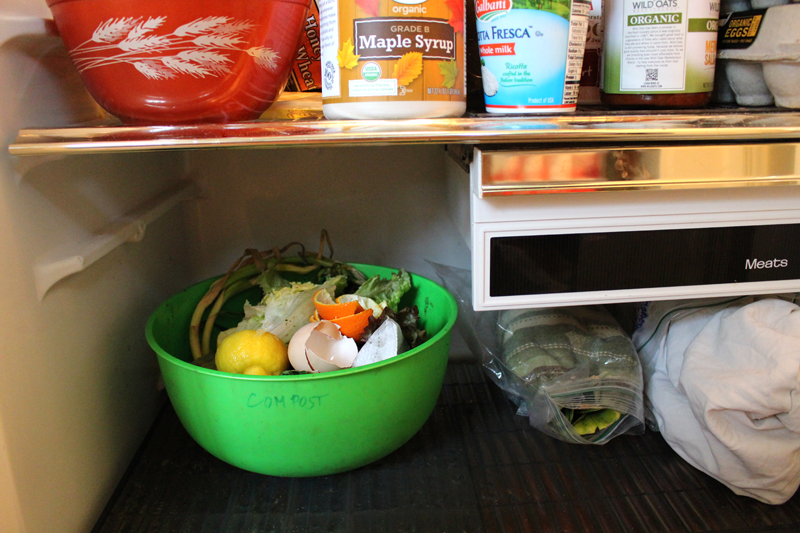
3. Compost Bowl in the Fridge

We’ve been composting for years, but it wasn’t until we moved into a home with a yard that we were able to really take advantage of it. One thing that I’ve always been great at is collecting fruit flies. So, I’ve started keeping a bowl in the fridge where anything compostable sits, sans flies. Our composter is just a few steps outside the door, so it’s not such a chore to empty it often.

KitchenHacks-1

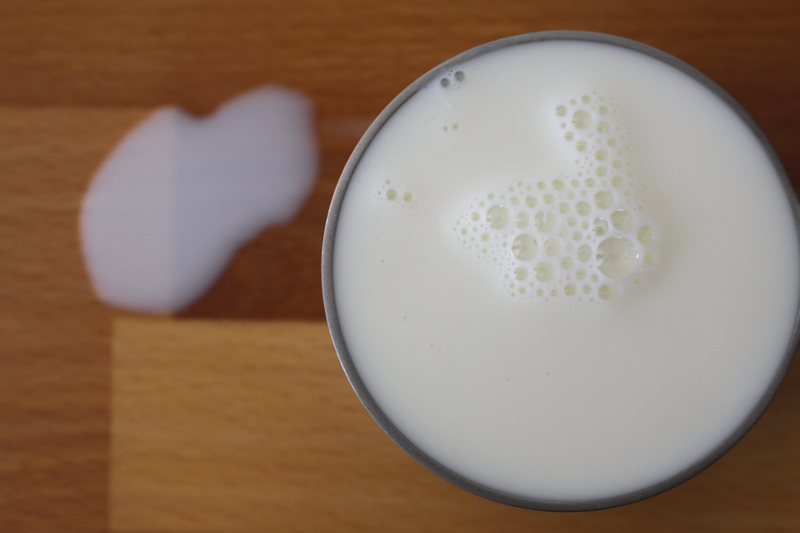
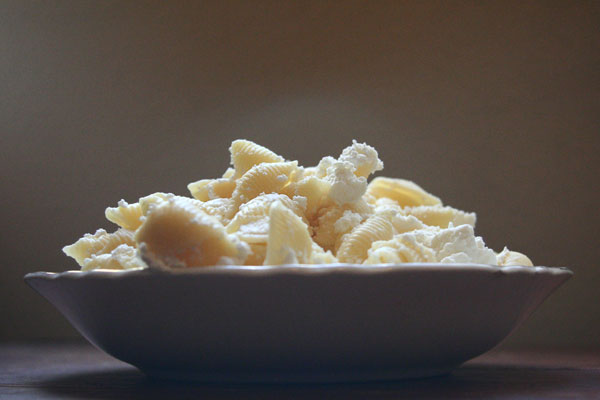
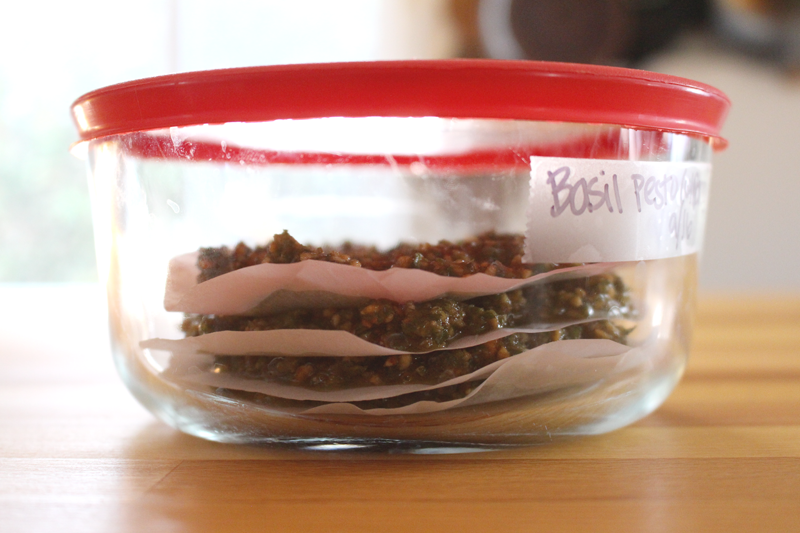
4. Homemade Buttermilk

I don’t think I’ve ever bought buttermilk. It just seems like I’d have to buy too much for what I usually need. Instead, I pour 1 T white vinegar into the measuring cup and fill to the desired amount of milk (you may need a bit more vinegar if you’re doing more than 2 cups of milk). I’ve heard that lemon juice also works.

KitchenHacks-1

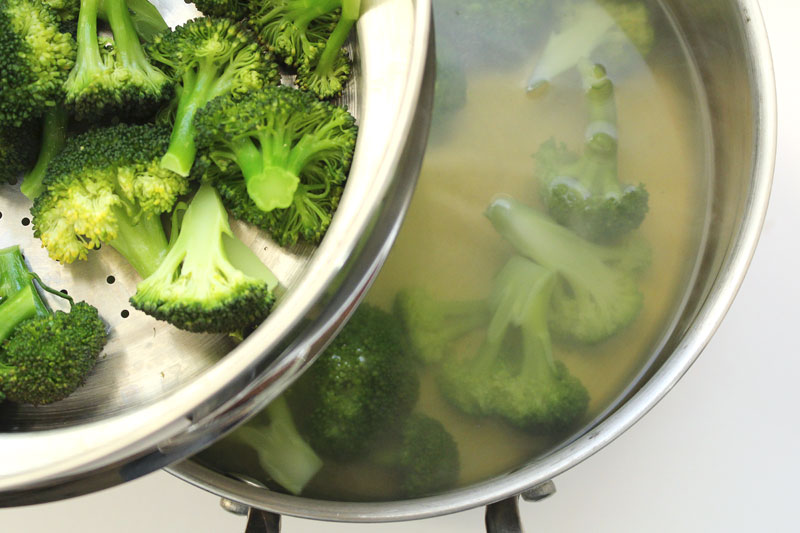
5. Boil Water with the Lid On

This one’s simple – when boiling water, stock, soups etc., they will come to a boil faster if the lid is on. Yeeeeeah science!!

KitchenHacks-2

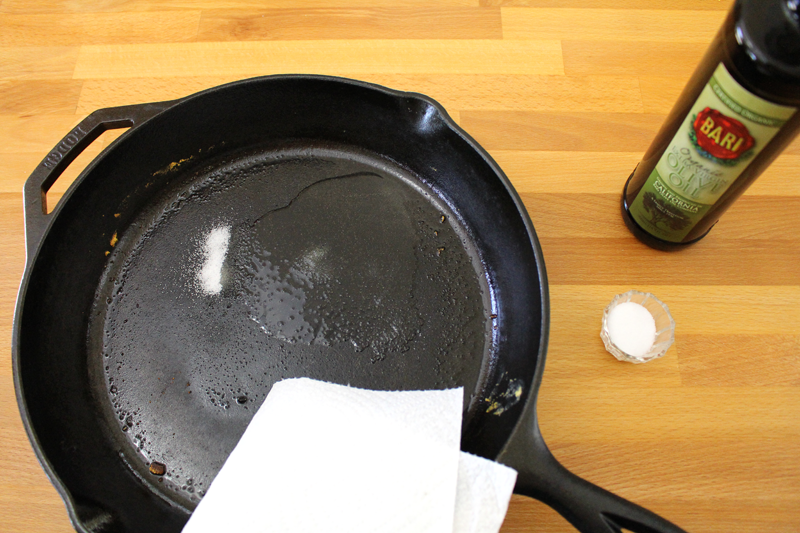
6. Use Salt and Oil to Clean a Cast Iron

I usually just use a scrub brush and hot water to clean a cast iron. But, sometimes I forget to clean it right away and it sits. Or something just gets really stuck on there. What’s worked for me is some coarse salt (table salt works too), oil, and a paper towel or a clean rag. Scrub, scrub, scrub, then rinse and dry. Make sure it’s cooled down before you handle the oil soaked towel. That oil will get hot if the cast iron is still hot, and that hot oil will soak through the towel quickly.

Another cast iron tip – save one for sweet dishes only. That way, if you’re making pancakes or a cake, they won’t taste like onions and garlic.

KitchenHacks-3

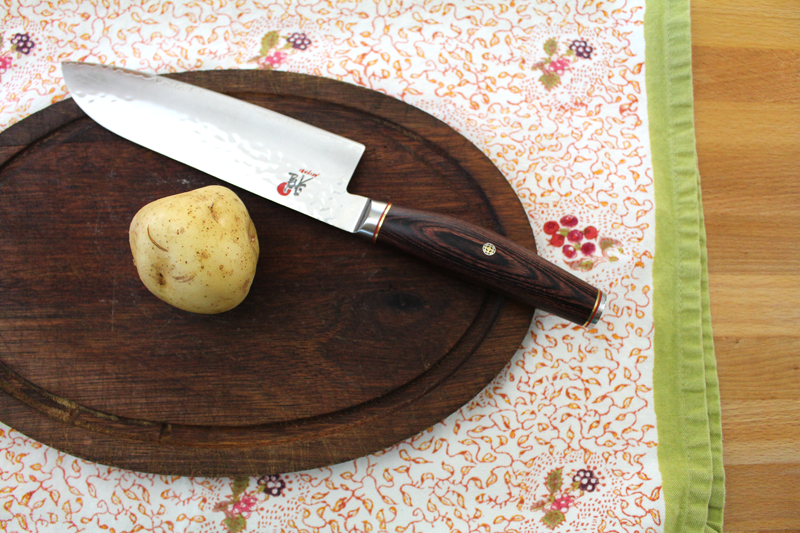
7. Use a Tea Towel to Keep Your Cutting Board From Slipping

Ever start chopping only to have your cutting board slide away? Annoying and super dangerous. Many cutting boards come with non-slip feet, but I have a few that are older – warped by water and time, and they slide and tip. Placing them on a tea towel helps to eliminate both.

KitchenHacks-4

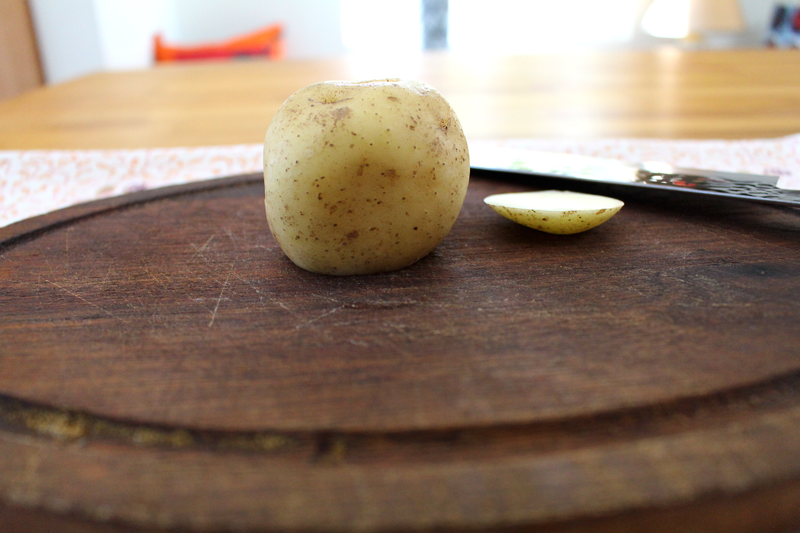
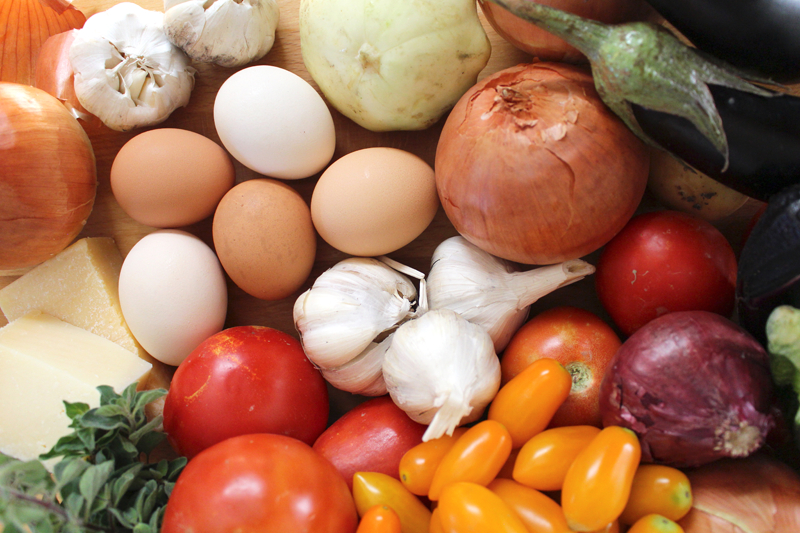
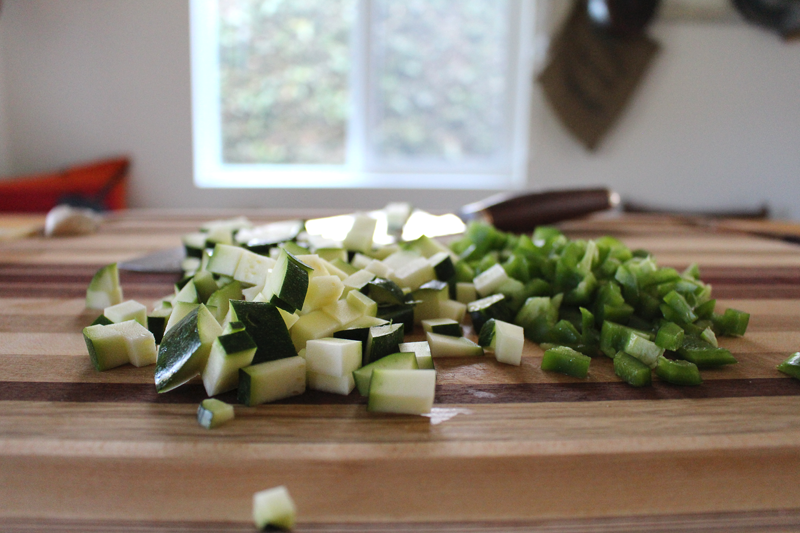
8. Cut the Bottom off Round Fruits and Veggies to Stabilize for Chopping

You know how it is, you set your potato down to chop it up and it rolls away. Since you’re probably going to slice a few bits off anyways (did you know that you can plant those eyes?), the simple solution is to slice off the bottom of the potato, giving it a stable bottom.

KitchenHacks-5

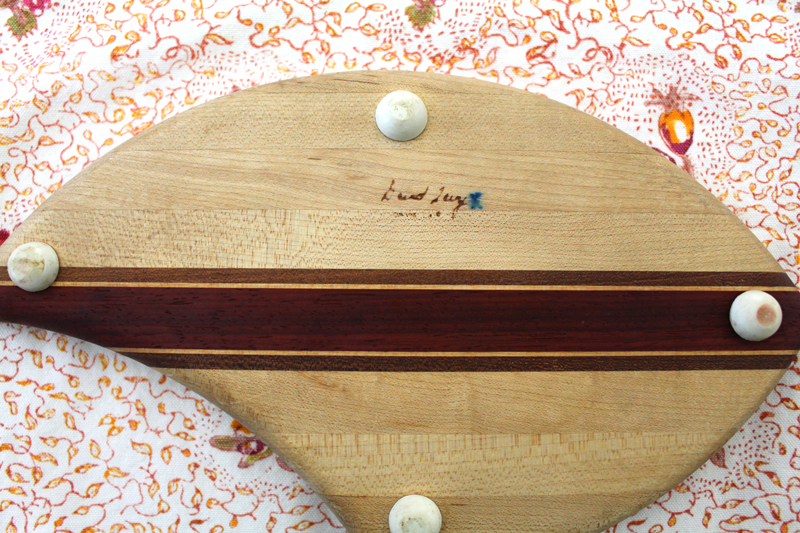
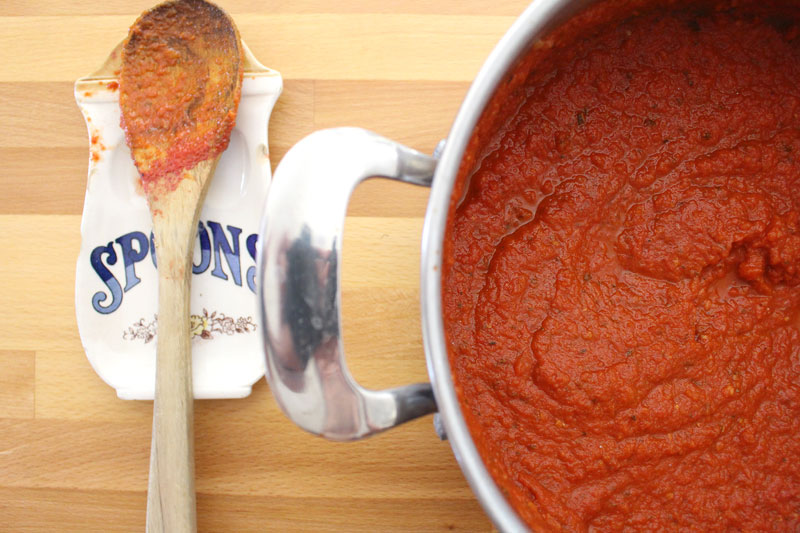
9. Designate a Cutting Board for Onions and Garlic

I love onions and garlic. I do not love it when I’ve cut fruit on what I think is a clean cutting board, but when I’m eating it, it tastes like onion and garlic. Nope. No thank you. So I have two cutting boards with a small X marked on the bottom. Those, and those alone, may be used for cutting onions and garlic. I use the same concept with my wooden spoons. Rounded spoons are for savory foods, squared ones are for sweet.

KitchenHacks-6

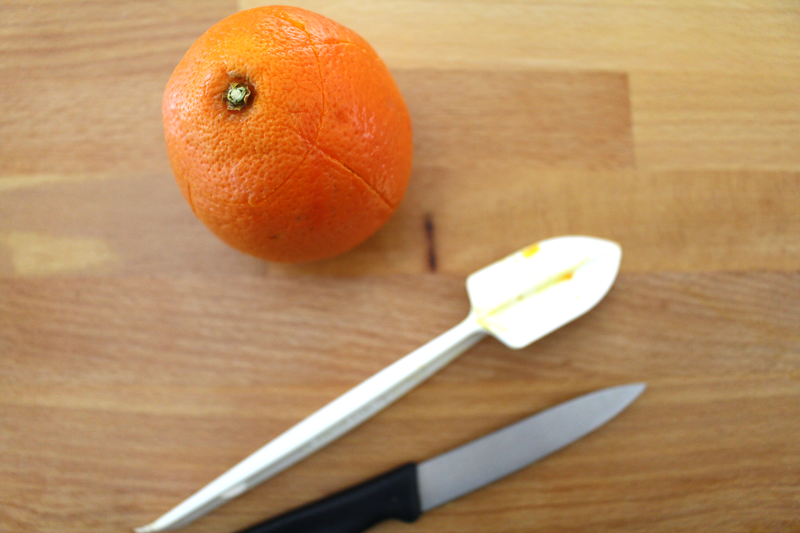
10. Score an Orange so it’s Easier to Peel

We’re just finishing up citrus season, but I’ve still got a fridge full of oranges. I find it easiest to peel them when they’ve been scored with a paring knife, or a special orange knife. Then the flaps can easily be lifted up, so the peel can be removed.

These are some of my favorites. Do you have any tips, tricks, and hacks to share?

Happy Eating!

Monday

2

February 2015

0

COMMENTS

How To Eat Well on a Budget

Written by , Posted in How To, Menu Planning, Storage/Prep, Thoughts

OrganicFoods-1

Sometimes the word “budget” is enough to make me want to hide under the covers. It can be tricky to manage to eat well, whilst keeping the budget in check. When we were first married, we had a very small grocery budget. I started planning our menu in advance, so that I could go to the grocery store with a detailed list, knowing how much I would be spending. I got pretty good at it, and found that I really enjoyed it. In the years since, I’ve tried to keep to it, regardless of the state of our bank account.

It’s not always been easy, but it’s definitely one thing that has helped us to keep our budget a bit lower. (It’s so important to me that I wrote a three part series on it, for the Kitchen Basics section. Have a look! Here’s a link to part 1, part 2, and part 3.)

ChickenPotPie-8

I’ve been eating organic since before it was trendy. It’s always made sense to me. We’re thankful that Abundant Harvest Organics is so affordable. But, since other organic food is often a bit more expensive than conventionally farmed food, it’s not always possible to stock the pantry with all organic ingredients. The advice that I try to follow, is to do the best that I can. So, we eat as much organic food as possible, but during the leaner times, some foods take priority. For me, the foods that I try not to budge on are: fruits and veggies (but even there, there’s some wiggle room if needed – produce with a peel enables you to peel away the chemical laden skin, things that are sprayed directly – think berries, are not as easy to remove the pesticides, even when washed), milk, and meat.

ChickenPotPie-2

Speaking of meat, this is an area where we have cut waaaay back. We love meat. It adds great flavor to soups, it’s so yummy roasted, and the protein it provides is wonderful. But, it’s expensive, especially when you’re choosy about getting the best quality, like I am. So, here’s what we’ve done. We eat meat maybe 2-4 times a week. And when we do, it’s in small portions. For example, I like to buy a whole chicken, and then it will often feed Tim and I for 4-6 meals. The first meal, he might have a thigh and half of a breast, I’ll have the other half of the breast. The rest of the meat will be cooked, portioned out, and frozen, to be saved for 3-5 more meals. I can make it stretch by adding things like lots of veggies, rice, and beans to a dish or a meal. And with the remaining meat, I might be able to make: Chicken Pot Pie, Chicken Bean and Rice Enchiladas (add rice and sub chicken for the beef in the recipe I’ve linked to), Chicken and Rice Soup or Chicken Noodle Soup, Chicken Chili, and Chicken Stir Fry. For the other meals that don’t contain meat, I rely on protein from other sources (legumes, quinoa, dairy, veggies, nuts) to help to fill us up.

VegetableStock2_4

When cooking meat, I try to not only make the most of the meat itself, but also to stretch it even further and save the bones to make chicken stock. It’s not even necessary to use veggies in there (although veggie scraps are great). Just some bones, herbs, water and an hour or two will result in a flavorful stock. Same goes for scraps from our veggies. I keep a compost bucket in the fridge, but I also keep a gallon ziptop bag or two in the freezer, to collect anything that’s worth saving (which is usually most of it). Then about once every month or two I dump the contents of the bag into a big pot, cover it with water, and let it simmer for an hour or two. Then, voilà, veggie stock! At about $4 for a 32 oz. box of stock at the grocery store, the savings adds up quickly.

Tomato-Sauce-6

Other things that I like to make rather than buy: tomato sauce, dried tomatoes, pesto, hummus, pie crust, baguettes, pizza dough, biscuits, and jam. Soon, I’m going to attempt to make sandwich bread. Wish me luck. 😉

There are definitely things that I can’t make, grow, or produce on my own (although some I’d love to try making, just haven’t gotten up the courage yet). So, I keep these staples on hand: brown rice, lentils, quinoa, pasta, nut butters, balsamic and rice vinegar, olive oil, dried or canned beans, eggs, cheese, milk, butter, yogurt, salt, dried spices, garlic, honey, maple syrup, soy sauce, all purpose flour, and whole wheat flour.

It’s a journey, for sure. There are ups and downs, failures and successes, lean months and months with more than we need. But, following all of these self-set guidelines has really helped us to stay within an affordable budget while we continue to strive to eat well, no matter what the situation.

Thursday

22

January 2015

0

COMMENTS

How to Use it Best – Winter Edition

Written by , Posted in How To, Storage/Prep

HoneyRoastedCarrotsParsnips2

It’s no secret that I love to roast veggies. I’ve been known to roast anything from beets, to peas, to cabbage. But, not all veggies are alike. And not all veggies act the same when they’re thrown into a pot of boiling water, sautéed in a skillet, or roasted in the oven.

Here’s some of what I’ve found to work (and sometimes not work), in my experience as a home cook.

In Soups

CannelliniBeetGreenSoup-2

I use potatoes, sweet potatoes, butternut squash, acorn squash, and rutabagas interchangeably in soups. They respond similarly, and, unless I know that one or the other might not pair well with another of the soup’s components, if I have one, but not the other, I’m going to use what I have. Same thing with broccoli and cauliflower – I find them similar enough. And when it comes to soups, I’ll usually add as many veggies as I can. Starting with the harder veggies (think roots like carrots and beets), then adding slightly softer guys (hello broccoli and cauliflower, maybe even cabbage, and herbs like rosemary and thyme), and adding more delicate greens and herbs at the end (kale, chard, dill, parsley).

Cooking 101 – One of the keys to adding things at the same time is to make sure they’re chopped/diced/cubed the same size as all the other components. This will ensure that someone doesn’t burn, while someone else is still raw. This goes for any method of cooking.

In Salads

RoastedRadishes1

I love lots of different textures in a salad. I will often combine a nice butter lettuce with tuna, a hard boiled egg, some chopped nuts, croutons, dried fruit, and grated or chopped veggies.

I prefer to grate hard root veggies like carrots and radishes. If you’re ok with raw beets, grate them too. But, you can also roast for salads. Roasted beet chips and crispy potatoes are some of my favorite salad toppers.

Cooking 101 – If you want to tame a spicy radish a bit, grate it. You won’t bite into a big chunk of burning, if that’s not what you were hoping to get from your salad.

In the Oven

RoastedButternutSquashSoupVegan-5

As Fries

I love to cut potatoes, sweet potatoes, parsnips, and winter squash into sticks to make fries. Mostly, because I want to dip them in yummy sauce.

In Smaller Pieces

A head of broccoli or cauliflower cut into bite sized chunks, some cubes of potato, winter squash, or sweet potato; wheels of carrot, one inch pieces of beet all make a great side when roasted. Just toss them with some olive oil, salt, and pepper before they head into the oven, and you’re good to go.

Cooking 101 – The stem of the broccoli doesn’t need to be discarded. Simply peel the tough outer layer, then slice the inner portion and use as you would the florets.

Roasting Whole

Beets are my favorite to roast whole. Recently, I’ve discovered that it’s best to put them in a pan, with about a cup of water, then tightly cover with foil. They will take about an hour (for small-ish beets) at around 425F, and maybe 10 to 20 minutes more if they’re larger.

Obviously, potatoes are kinda famous for being roasted whole. Sweet potatoes are the same story. You can leave them as they are, or wrap them in foil if you want. If you’re gonna do the foil method, before you wrap them up, drizzle them with some olive oil, and sprinkle with salt, so the skin is extra tasty. I like things extra tasty, so I’m all over the oliveoilsaltextrayummyskin.

And there’s the winter squash, which technically I don’t roast whole, I cut them in half, but they’re so huge that I think they count. Sometimes, when I have a whole bunch on the counter I will roast them all, then scrape the roasted flesh out of the skin and freeze it. It makes soup prep incredibly easy. (And, save this tip for summer: I do the same thing when I have loads and loads of eggplant.)

Cooking 101 – You don’t have to peel beets before you roast them. Once they’re soft, leave them to cool slightly (covered or uncovered, I haven’t noticed much of a difference either way), then using gloves, a paper towel, a paring knife, or your fingers, peel the skin off – it should be pretty easy (and oddly satisfying).

On the Stove Top

BoiledSteamedBroccoli-5

Steaming

I find that most veggies respond pretty well to steam. By this, of course, I mean veggies that are meant to be eaten cooked. I probably wouldn’t steam lettuce… although at the moment, that’s the only one coming to mind that I wouldn’t… But, you know, use your judgement on this one.

Some of my favorites to steam are: carrots, potatoes, broccoli, cauliflower, and green beans.

I prefer steaming over boiling, because I think the veggies retain more of their nutrients.

Cooking 101 – Save leftover steaming or boiling water to cook pasta, or to make veggie stock with the scraps that would have gone in the compost.

Boiling

My Oma always boiled the potatoes for special dinners. They tasted great. I know that boiling is the way people often cook potatoes when they’re going to be mashed. When I took that cooking class in Paris, that’s how we boiled the potatoes. It’s a tried and true method. And you can really pop quite a few veggies in a bunch of really hot water and get good results. Just beware that if you leave them too long, they can become water-logged and mushy, and may just fall apart in the pot (and then you adapt and pretend that you’d always planned to make soup).

Cooking 101 – So that you can save the boiling water for pasta cooking or stock, use a slotted spoon to pull out the veggies, rather than just dumping the water out. Or, if you don’t have anything else to cook, let the water cool completely, then take it outside to water your plants.

Sautéeing

Aren’t veggies just so versatile?! I mean, we’ve gone from roasting, to steaming, and now sautéeing, and there are some veggie-friends that are good with any option. So, I’d say, that things like broccoli, brussels sprouts, cauliflower, are an easy yes. If you want to do potatoes, carrots, parsnips… you know, the harder roots, that’s awesome too, just smaller pieces, and plenty of time. And then, if you want to go with the more delicate greens, like kale, chard, mizuna, mustard greens, and spinach, you’ll start with what feels like way too much, and end up with the perfect amount. If you’re starting with some harder veggies, once they’re a few minutes from being done, add the greens. They won’t take long and add a lot to a dish.

Cooking 101 – Don’t throw away those beet greens! They’re delicious sautéed, in salads, and in soups.

However you prepare them, have fun with your veggies!

Thursday

9

October 2014

0

COMMENTS

How to Create the Perfect Pasta Dish

Written by , Posted in How To, Menu Planning, Pasta, Storage/Prep

EnglishPeasPasta4

Joy to the… pasta.

I’m practicing Christmas songs for a concert in December. Mostly I have a really high screechy “eeee”  sound in my head. Along with a medley of the other seven or eight songs that we’re going to be singing.

So far the dog has yet to look at me with that alert, head tilted, ears perked up look… So far.

And then there was pasta. What I meant to tell you about, but Christmas is bouncing around my brain instead. Also banana bread. Because that’s what I’m eating.

Are you still there?

For the three of you still reading, what I really want to talk about is what I want for Christmas pasta and how to successfully make a great pasta dish.

You’re thinking that it doesn’t take much. Right? Ok, maybe it doesn’t take much to make a pasta dish. But, let’s talk about making it a fabulous dish. Also, Erh mah gawsh! I just finished my last bite of banana bread that was topped with some salted butter and I’m having a hard time not just shoving the entire loaf into my face.

I digress.

You can start with any category and build from there. Maybe you’ve got some ground beef and tomatoes that you want to use. From there, you can add some other veggies, figure out the sauce, and choose the best noodles. You might have some jars of Tomato Sauce in the freezer and need to make space for something else. Then you’ll figure out maybe some chicken, zucchini, parmesan, and wide, flat noodles to go with it. Or, you might just be craving pasta. Any kind of pasta. Elbow macaroni sounds good, and you could add heaps of cheese to a bechamel.

I usually start with what’s going in to the pasta. The veggies and if there’s meat, that too. Then I figure out the sauce, the noodles, and then the toppings. I use The Flavor Bible all the time. It’s a great helper for figuring out what foods pair well together. But, if you don’t have this book, listen to your taste buds. Think about foods that you enjoy eating together.

Here are some suggestions for how to put your perfect pasta dish together:

EndOfTheWeekPasta-1

The Additions

1. Broccoli + Cauliflower + Garlic + Thyme

2. Carrots + Spinach + Chicken

3. Pumpkin

4. Tomatoes + Zucchini + Onions + Mozzarella + Ricotta + Chicken

5. Eggplant + Garlic + Onion + Thyme + Red Pepper Flakes

6. Dried Tomatoes + Bell Peppers + Garlic

7. Ground Beef + Onions + Garlic + Celery + Capers

8. Beets + Parmesan + Shallots + Garlic

9. Radish + Cabbage + Kale + Meatballs

10. Roasted Fennel + Salmon + Garlic + Zucchini

11. Lentils + Carrots + Celery + Bacon

Tomato-Sauce-6

The Sauce

1. Broccoli + Cauliflower + Garlic + Thyme + Brown Butter Sauce + Salt + Pepper

2. Carrots + Spinach + Chicken + Salt + Pepper + Cream Sauce

3. Pumpkin + Salt + Pepper + Cheddar + Parmesan + All Spice + Red Pepper Flakes

4. Tomatoes + Zucchini + Onions + Mozzarella + Ricotta + Chicken + Salt + Pepper + Pesto

5. Eggplant + Garlic + Onion + Thyme + Red Pepper Flakes + Salt + Pepper + Olive Oil

6. Dried Tomatoes + Bell Peppers + Garlic + Salt + Pepper + Olive Oil + Lemon Juice + Balsamic Vinegar

7. Ground Beef + Onions + Garlic + Celery + Capers + Butter Sauce + Salt + Pepper

8. Beets + Parmesan + Shallots + Garlic + Balsamic Vinegar + Salt + Pepper

9. Radish + Cabbage + Kale + Meatballs + Tomato Sauce + Salt + Pepper + Italian Seasonings

10. Roasted Fennel + Salmon + Garlic + Zucchini + Cream Sauce + Salt + Pepper

11. Lentils + Carrots + Celery + Bacon + Salt + Pepper + Tomato Sauce

OrzoPastaKaleSausage_5

The Noodles

1. Broccoli + Cauliflower + Garlic + Thyme + Brown Butter + Salt + Pepper + Linguini

2. Carrots + Spinach + Chicken + Salt + Pepper + Cream Sauce + Penne + Parsley + Dill + Fusilli

3. Pumpkin + Salt + Pepper + Cheddar + Parmesan + All Spice + Red Pepper Flakes + Elbow Macaroni

4. Tomatoes + Zucchini + Onions + Mozzarella + Ricotta + Chicken + Salt + Pepper + Pesto + Lasagna

5. Eggplant + Garlic + Onion + Thyme + Red Pepper Flakes + Salt + Pepper + Olive Oil + Egg Noodles

6. Dried Tomatoes + Bell Peppers + Garlic + Salt + Pepper + Olive Oil + Lemon Juice + Balsamic Vinegar + Orzo

7. Ground Beef + Onions + Garlic + Celery + Capers + Butter Sauce + Salt + Pepper + Ziti

8. Beets + Parmesan + Shallots + Garlic + Balsamic Vinegar + Salt + Pepper + Penne

9. Radish + Cabbage + Kale + Meatballs + Tomato Sauce + Salt + Pepper + Italian Seasonings + Spaghetti

10. Roasted Fennel + Salmon + Garlic + Zucchini + Cream Sauce + Salt + Pepper + Farfalle

11. Lentils + Carrots + Celery + Bacon + Salt + Pepper + Tomato Sauce + Orecchiette

MelanzaneAndPasta5

The Toppings

1. Broccoli + Cauliflower + Garlic + Thyme + Brown Butter + Salt + Pepper + Linguini + Gruyère = Winter Veggie Linguini with Brown Butter

2. Carrots + Spinach + Chicken + Salt + Pepper + Cream Sauce + Penne + Parsley + Dill + Basil = Baked Fusilli with Carrots and Spinach in a Creamy Sauce

3. Pumpkin + Salt + Pepper + Cheddar + Parmesan + All Spice + Red Pepper Flakes + Elbow Macaroni + Homemade Croutons + Caramelized Onions + Parmesan + Bacon = Pumpkin Pasta

4. Tomatoes + Zucchini + Onions + Mozzarella + Ricotta + Chicken + Salt + Pepper + Pesto + Lasagna + Fresh Basil + Parmesan Cheese = Presto Pesto Lasagna

5. Eggplant + Garlic + Onion + Thyme + Red Pepper Flakes + Salt + Pepper + Olive Oil + Egg Noodles + Basil + Lemon = Melanzane with Pasta

6. Dried Tomatoes + Bell Peppers + Garlic + Salt + Pepper + Olive Oil + Lemon Juice + Balsamic Vinegar + Orzo + Parmesan = Orzo with Dried Tomatoes and Garlic

7. Ground Beef + Onions + Garlic + Celery + Capers + Butter Sauce + Salt + Pepper + Ziti + Fresh Tomatoes = Beef and Capers Stuffed Ziti

8. Beets + Parmesan + Shallots + Garlic + Balsamic Vinegar + Salt + Pepper + Penne + Parmesan + Lemon = Beet and Parmesan Penne

9. Radish + Cabbage + Kale + Meatballs + Tomato Sauce + Salt + Pepper + Italian Seasonings + Spaghetti + Parmesan + Basil = Spaghetti and Meatballs

10. Roasted Fennel + Salmon + Garlic + Zucchini + Cream Sauce + Salt + Pepper + Farfalle + Lemon + Chives + Parsley = Farfalle with Roasted Fennel and Salmon

11. Lentils + Carrots + Celery + Bacon + Salt + Pepper + Tomato Sauce + Orecchiette + Parsley + Fresh Tomatoes = Orcchiette with Lentils and Bacon

The Banana Bread

Right, I’m still thinking about banana bread. I think I’ll go get another slice, and then make Mac and Cheese for dinner… Except that we’re out of cheese. Wah wah.

Happy Eating!

Thursday

25

September 2014

0

COMMENTS

How to Make Pesto – Part 1 – Basil Pesto

Written by , Posted in Appetizers, Cheese, Condiments, Gluten Free, Herbs, How To, Nuts, Quick and Easy, Snacks, Storage/Prep, Vegetables, Vegetarian

BasilPesto-7

This is gonna be one of the simplest things you’ve never made. At least that’s what I thought when I made it for the first time about a month ago.

I don’t know why I’d waited this long.

I was missing out.

BasilPesto-6

It literally takes about 10 minutes.

It takes nuts (I had almonds).

It’s great with cheese (I used parmesan).

Garlic is essential (as it is to most things).

Olive oil holds it together.

And something green rounds it all out.

BasilPesto-5

In this case, the green is basil.

We will get into other types of pesto on another day.

For today, let’s stick to the basics.

BasilPesto-4

It’s important to use good olive oil… always, not just for pesto. I know the people at Bari. They’re awesome. I’ve gone in to their mill and seen them in action. I’ve tasted oil that was olives that same morning. This is seriously spectacular stuff.

BasilPesto-3

You can use whatever blending device you prefer. I have a great KitchenAid hand blender that is perfect for pesto. It came with this cute little food processor attachment, which works well for this task.

BasilPesto-2

Now, here’s a little trick I’ve tried.

Two tricks actually.

The first one is: To get the parchment paper to lay flat, scrunch it into a ball, wrinkle it all up, then smooth it out. No more curling up and rolling away.

Second: By portioning out the pesto in advance, there’s no need to wait for the whole container to thaw to use it. Just pop off a layer and leave it in the fridge overnight (in a sealed container), or on the counter for a little while, to bring it to room temperature.

BasilPesto-1

You could stand there eating it out of the bowl (your significant other may ask you if you’ve been eating salami, because of the garlic breath… no big deal… yes, this has happened at our house before). Raw garlic is good for your immune system, so go ahead! Or, ahem, get some good bread and slather it with pesto. I mean, c’mon. That’s dinner right there.

If you want a little more than just pesto and bread for dinner, how about a twist on a Caprese Salad to start with? Layer some sliced tomatoes with fresh mozzarella and top with pesto. Or, on the salad note, you could add it to a Panzanella if you’d like – mix it in with the dressing. You could follow that with some Chicken Parmesan topped with Pesto alongside some Roasted Bell Peppers and Squash.

If you want a vegetarian dinner, Eggplant Parmesan would be great topped with pesto. Serve it with some Roasted Zucchini and Crusty Bread for mopping up.

I could eat pizza most days. You could go simple and do mozzarella and pesto. You could add some chicken to the mozz and pesto. You could keep it vegetarian and add tomatoes or zucchini.

Basil always works in soups. You could top a Roasted Eggplant Soup with pesto. Add it to a Minestrone Soup. Serve it on toast alongside (and be sure to save a few bites to mop up any last drops of soup).

You could mix it in to some wild rice. Serve that alongside the Chicken or Eggplant Parmesan for a nice meal.

And finally, for breakfast, you could poach some eggs and drizzle them with pesto. Serve with your favorite toast.

Happy Eating! 

Basil Pesto
Recipe Type: Condiment, Sauce, Topping, Basil, Gluten-Free
Author: Rachel Oberg – De Ma Cuisine
Prep time:
Total time:
Ingredients
  • 1/2 C almonds or pine nuts
  • 2 C packed down (about 1 bunch) fresh basil
  • 2-3 cloves garlic
  • 1/4 to 1/2 C olive oil
  • to taste salt
  • 2 T to 1/4 C parmesan cheese
Instructions
  1. Place all ingredients in a blending apparatus (food processor, hand blender, blender) and blend, adding more olive oil and scraping down the sides as needed.
  2. Taste and adjust seasoning if needed.
  3. Divide into 4 and spread on four pieces of parchment paper, which can be stacked in a freezer safe container.