De Ma Cuisine

How To Cook Archive

Friday

8

November 2019

0

COMMENTS

Breakfast Burritos

Written by , Posted in Beans, Breakfast, Brunch, Cheese, Dairy-Free, Eggs, Gluten Free, Herbs, Kid-Friendly, Low Carb, Lunch, Main Dishes, Quick and Easy, Vegan, Vegetables, Vegetarian

Monday was a very bad day. Tuesday morning started out kinda the same. Remnants of the crappy yesterday had stuck around. I hadn’t been this angry about something in a while.

My response to crisis is usually food. Food is comfort. That can lead to mindless eating. But, sometimes it leads to a really good breakfast that makes for a better start to the day.

I had cereal for lunch with zero plans for dinner. But, at least breakfast was good.

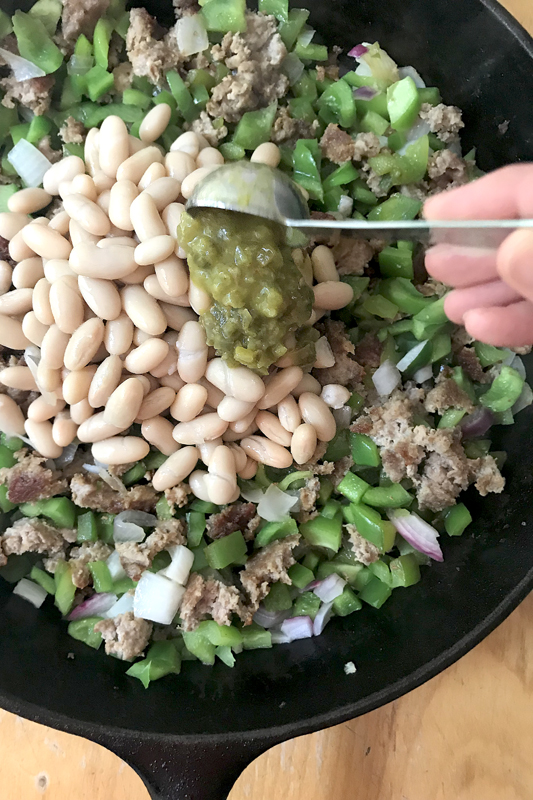
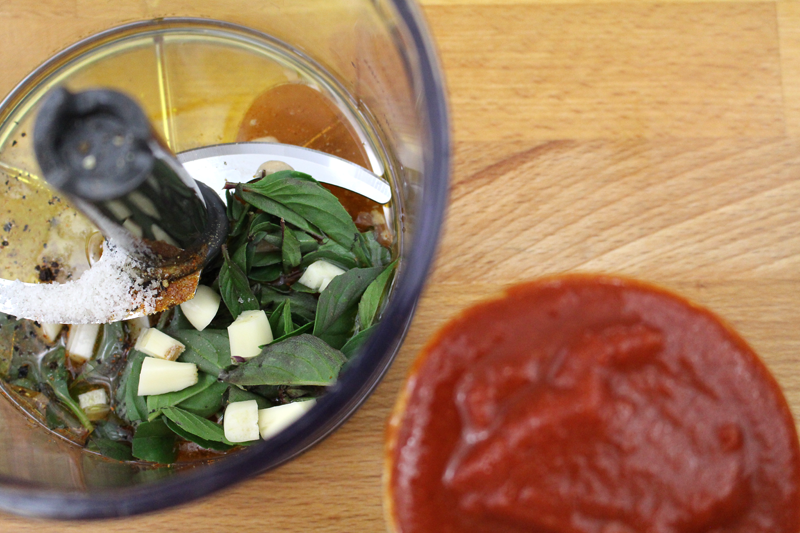
I started it simply, with chopped bell pepper and some minced cayenne pepper from the garden. I don’t know why they didn’t turn red. But, the seed pack said cayenne, so that’s what they are.

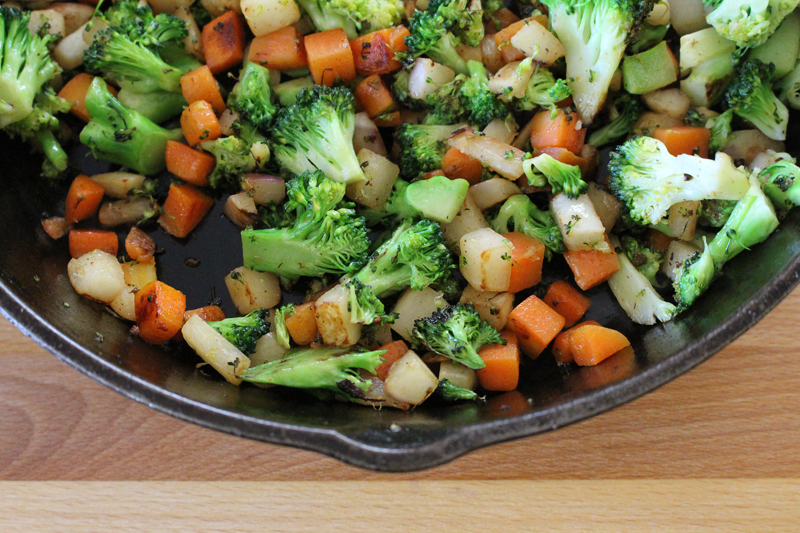
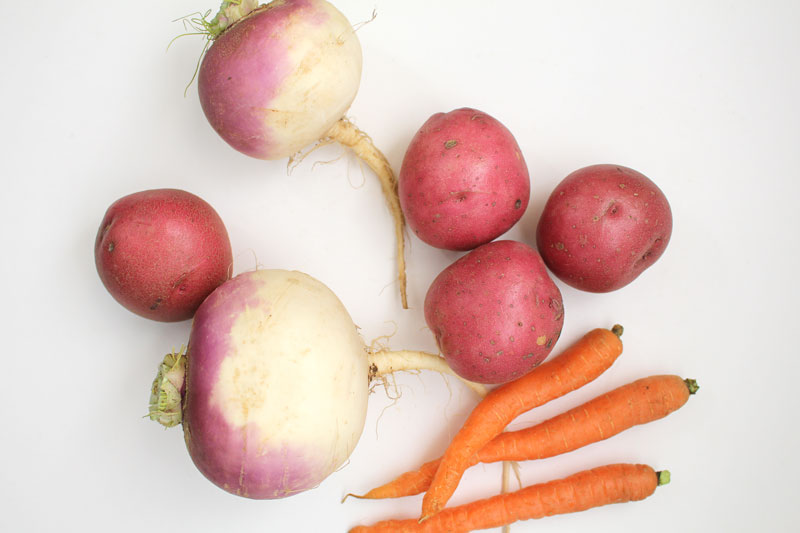
You could add a million other things in there too. Leftover potatoes, chopped onions, broccoli, leftovers from last night’s dinner… pretty much any veggies you think would be great probably will be.

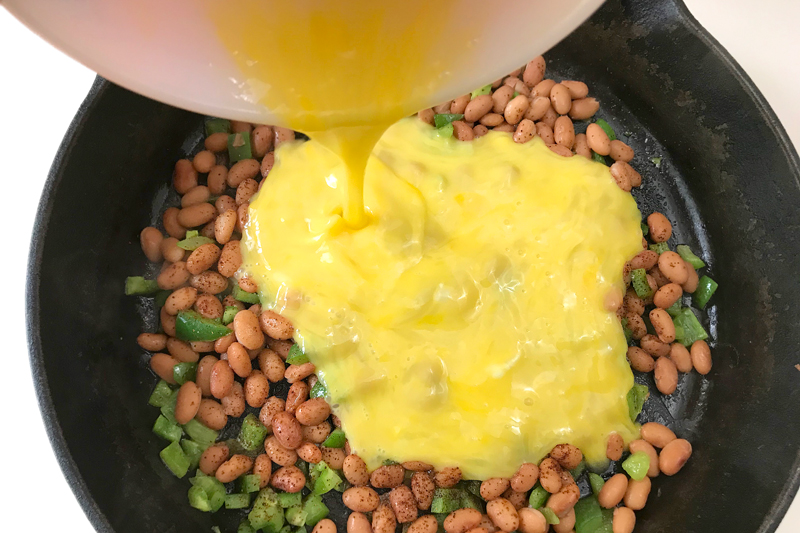
After the peppers cooked in some oil for a few minutes I added some beans. I had pinto on hand. Yum. Black beans would also be great. And if all you have are kidney, or cannellini, use them! Why not?!

After the beans got hot, I added some whisked eggs. To keep it vegan, add in some crumbled tofu. Easy.

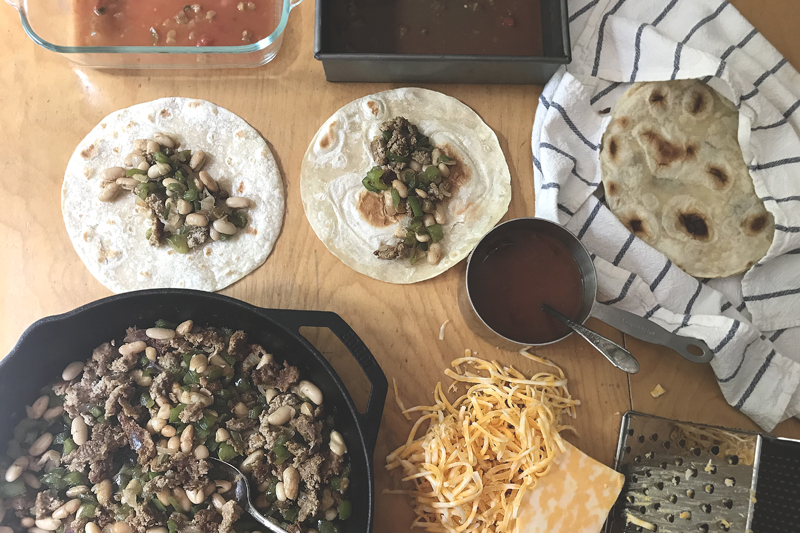
I took a pic of the tortilla being topped. It looked not amazing. The eggs had turned a bit grey from being cooked with everything else. If you want them to look amazing and yellow, scramble them separately. And then wash that extra dish. Yeah. No thank you. Less dishes is always the best option.

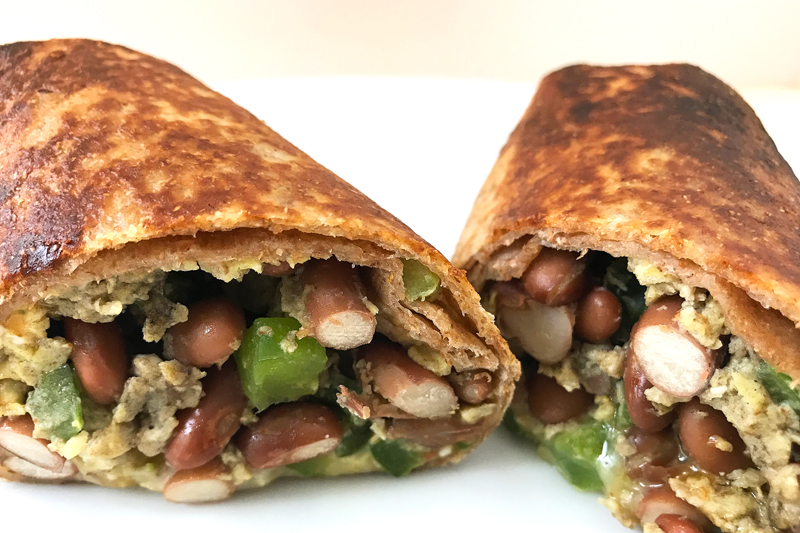
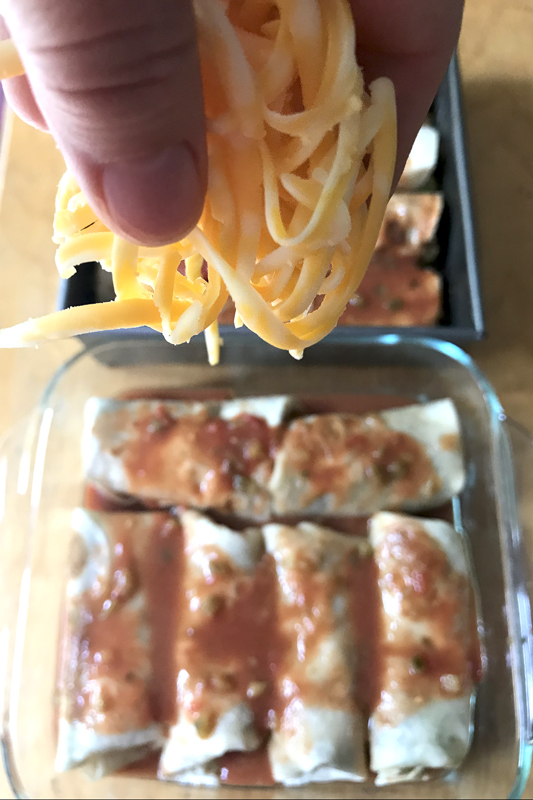
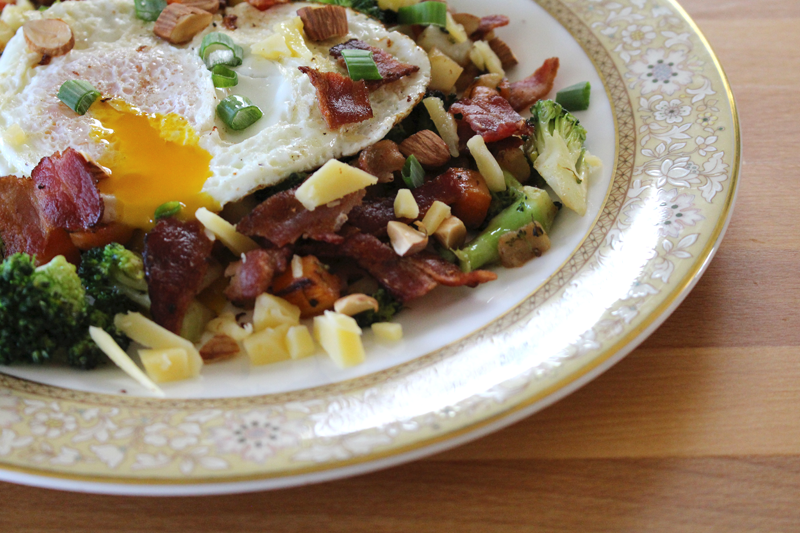
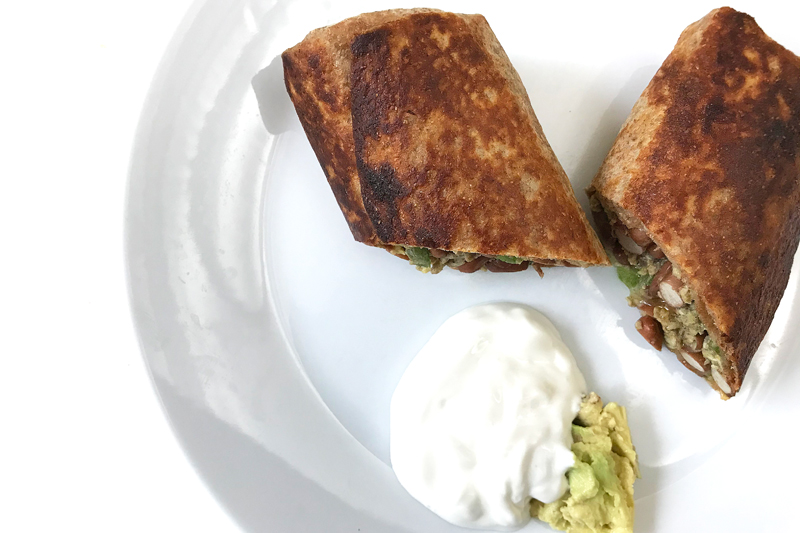
I laid out the tortillas, topped them with a handful of cheese, then the bean mixture. I used a mixture of cheddar and monterey jack, but if you’re going vegan, my favorite is Violife (just like cheddar or just like mozzarella shreds are great!). They got rolled up and then, the best part. A clean skillet with hot oil, cook that burrito on all sides until it’s shatteringly crisp. Yes please!

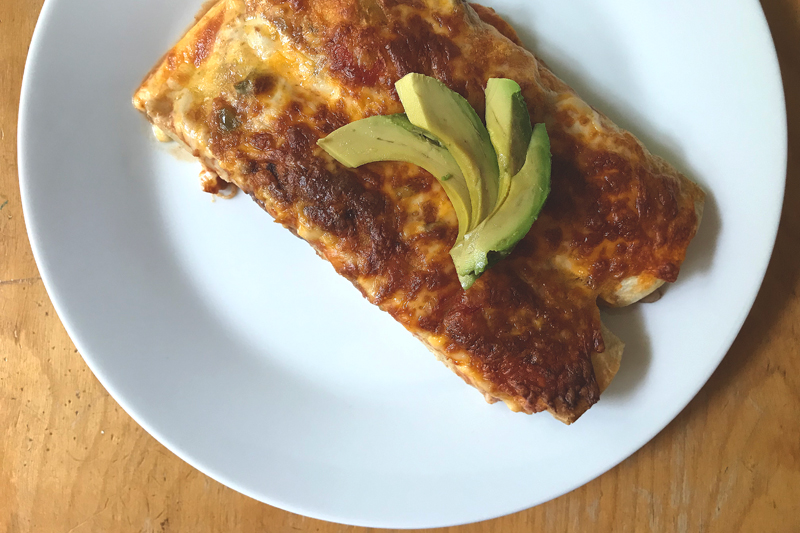
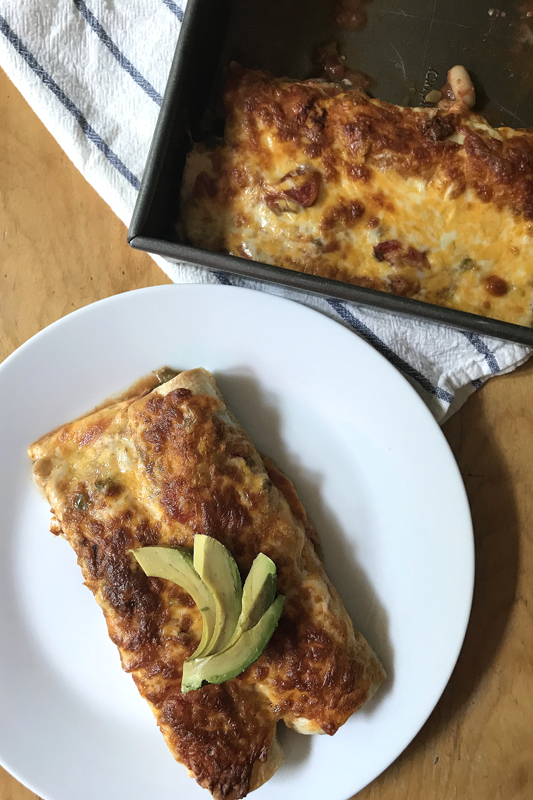
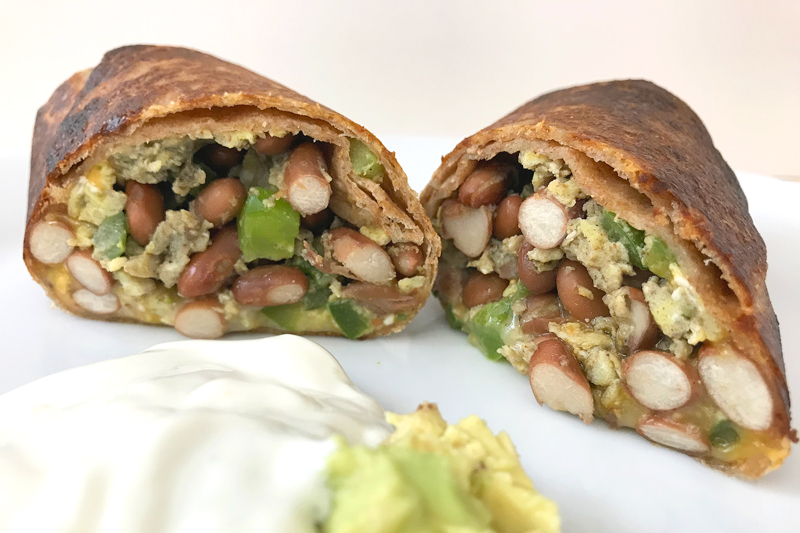
For topping or dipping, I like avocado with a bit of salt, and some sour cream. Tim likes salsa. Some people might like cilantro or some diced tomatoes.

However you serve them, they’re pretty quick and easy and make for a great start to the day.

Happy Eating!

Breakfast Burritos

Yields 3 burritos

Ingredients

  • 1 tablespoon oil (I used grapeseed)
  • 1/2 of a medium-sized bell pepper, diced (could also use: onion, cooked potatoes, cubanelle pepper, broccoli… whatever you have on hand)
  • 1/2 of a small hot pepper (I used cayenne), ribs and seeds removed, minced
  • pinch of salt
  • 1-14 ounce can of beans (pinto or black), drained
  • 4 eggs or half a brick of firm tofu
  • a little more salt
  • sprinkle of chili powder
  • handful of shredded cheese for each burrito, vegan (I like Violife) or conventional (I like a mixture of cheddar and monterey jack)
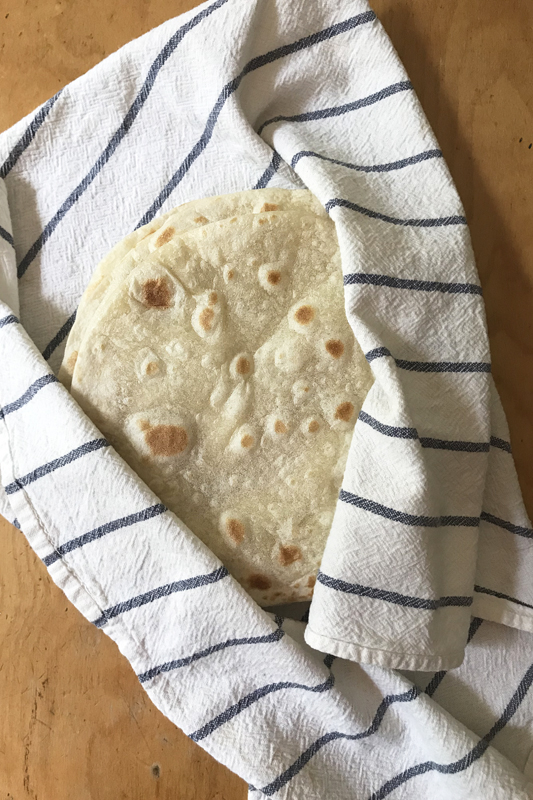
  • 3 burrito-sized tortillas (whole wheat, white, or gluten-free)
  • topping options: salsa, sour cream, cilantro, avocado, diced tomato, Sir Kensington’s Chipotle or Sriracha Mayo
  • a bit more oil, for crisping

Directions

  1. Heat the oil in a skillet over medium heat. Add the bell pepper, hot pepper, and any other veggies, and a pinch of salt. Cook until the veggies are tender, about 4-5 minutes, stirring occasionally. Add the beans and cook until the beans are heated through, about 4 minutes.
  2. Whisk the eggs, or crumble the tofu, in either case, with a pinch of salt and a sprinkle of chili powder. Add to the skillet with the beans and cook until eggs are set or tofu is hot (or you can cook the eggs separately if you want them to stay yellow – have fun washing that extra pan). Taste for seasoning.
  3. Top each tortilla with some cheese. Divide the bean filling between the tortillas and roll them up.
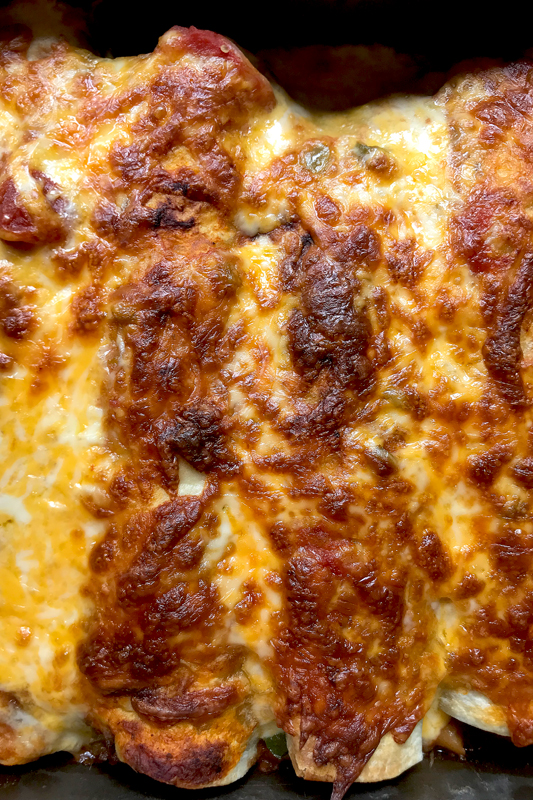
  4. In a clean skillet, add a bit of oil and crisp up the burritos, turning until they’re golden brown and delicious.
  5. Serve burritos cut in half with desired toppings.

Tuesday

17

September 2019

2

COMMENTS

Red and Green Enchiladas

Written by , Posted in Baking, Beans, Cheese, Dinner, Main Dishes, Meat, Poultry, Vegetables

Today didn’t go as I’d planned. I had some work that I was supposed to do. It didn’t happen. Not by choice. But then, I got to choose to not be frustrated. Do you hate the expression “It is what it is”? I know some people do. But, sometimes, it’s really the only thing that works. I could be mad that things didn’t go as I’d planned. I’d organized my week accordingly. Instead, I got to have a low key day. I watered the garden and gave the dog a long drink from the hose without hurry. I listened to the sound of food cooking in the skillet. I had a glass of wine at 4pm while I washed the dishes. It was a good day.

I had intended to make these enchiladas for dinner tomorrow. But, they looked too good to wait. I have our meals planned for the rest of the month. For tomorrow, now I have no idea. It might be tater tots dipped in chipotle mayo. Or sushi from the grocery store (our chef is amazing). Maybe cereal. I’ll worry about that tomorrow. For now, I’m here, and this is exactly what I’m supposed to be doing.

I always want to hurry into the future, only to get there and want to move on to the next thing. Ever since I was a kid… I don’t know that I’ve enjoyed as much of the present as I could have. Until this summer. For the first time, maybe ever, I’ve been here, in the now.

I don’t like summer. I hate hate hate being hot. Sweaty is for workouts, but not for regular living. Humidity could leave forever and I’d be glad. I’m sure it’s great for my skin. Whatev. I don’t like that so many tourists come to here. I mean, I get it, it’s important for the economy blah blah blah… Many of them are quite lovely yada yada yada. But, it’s busy, it’s loud, it’s claustrophobic. I like quiet and cold. I like the hibernating times more than the big, busy, social events. I like a small, but meaningful life… And, I don’t like summer.

Everyone likes summer. Especially around here. But, every once in a while I’ll come across a kindred spirit who can’t wait for the chill of autumn.

This year, I’ve embraced it. Summer and I became friends-ish. It could be that it’s easier now that we live somewhere with seasons. I know it’s not going to be hot forever. So I can enjoy it while it lasts. There’s something to be said for weekends spent in the garden, glass of rosé in hand, nose in a book. For watering the garden, and then pointing the hose heavenward and gasping as the freezing water hits my skin. I found joy in summer this year. I’m glad it’s feeling more like fall, but summer was more than ok.

When we lived in Burbank, I missed things like soup in the summer. Because summer lasted for like ten months. This year, I didn’t think about it at all. I was too busy eating green beans in the garden. This summer we discovered pizza on the grill. We don’t want to turn the oven on, but who can go three months without pizza?! Solved that one. But, then I made an amazing potato chowder the other day. And I was ruined. Summer can be over. I’ve made soup again.

Today, I wanted enchiladas. I had a jar of salsa verde in the pantry that needed to not be in there anymore and a frozen plomp of ground turkey taking up the bacon’s space in the freezer. Seemed like it was time. The oven, alas, was ready to turn back on.

Enchiladas start with humble ingredients: onion, bell pepper that has seen better days, white beans, and salsa verde from Arcadia’s Kitchen.

The salsa is delicious. And sooooo spicy. I used only two tablespoons in the filling and I could feel the heat. I was originally going to make just salsa verde enchiladas. But, I wasn’t sure if our faces would burn off if I added enough to make a sauce. So I added some tomato sauce to balance it out. It was perfect. Spicy, but not too.

We’ve discovered a company called TortillaLand that makes fresh tortillas. They contain five ingredients and are ready to cook. We haven’t bought regular tortillas since we found these.

Enchilada assembly isn’t difficult. Scoop some filling on a tortilla. Fold in the ends and then roll it up. Or don’t fold in the ends and just roll it. I did a pan of each. I poured some of the tomato-salsa verde mixture into the bottom of the pan, added the rolled enchiladas, then poured the rest of the sauce overtop.

Once I topped everything with cheese, they went into the oven. It’s just the cheese that needs to melt and the sauce that needs to bubble. The filling is already hot, so twenty minutes was perfect.

I had two problems with this dinner. I finished cooking at like 3:30pm, because I wanted to photograph with the natural light. So I took a bite, cooled them down, then reheated them for later dinner. Second problem, I’d eaten all the sour cream a few days ago. I’d def add some to this. It would help with the heat from the salsa verde, and it just tastes good. Tim thinks I use a weird amount of sour cream on tacos and enchiladas. But, I like it. So I use what I use, and sometimes then I don’t have enough for my spontaneous blog post. But, it is what it is. Right?

Happy Eating!

Red and Green Enchiladas

Serves 4

Ingredients

  • 2 T oil
  • 1 pound ground meat (I used turkey)
  • salt
  • 2 1/2 C bell peppers (about 2), chopped
  • 1 C onion, chopped
  • 1-15 oz. can white beans
  • 2 T salsa verde
  • 8 fresh tortillas
  • 1/4 C salsa verde
  • 1 C tomato sauce
  • 1/2 t cumin
  • 1/2 t salt
  • stock or water
  • 1-2 C grated colby jack cheese
  • toppings: avocado and sour cream

Directions

  1. Pre-heat the oven to 350°F. Heat a skillet over medium heat. Add the oil. Add the meat and cook until it’s cooked through, about 5-7 minutes. Add the salt, bell pepper, and onion. Cook until the veggies are tender, about 5-7 minutes. Add the beans and 2 tablespoons of salsa verde. Cook until the beans are hot, about 2-3 minutes more.
  2. While the filling is cooking, cook the tortillas in a separate skillet, keeping them warm once they’re done in a clean tea towel. In a 2 cup measuring cup, stir together 1/4 cup salsa verde, 1 cup tomato sauce, 1/2 teaspoon cumin, and 1/2 teaspoon salt. Then fill with stock or water up to the 2 cup line.
  3. Taste the filling and add more salt if needed. Pour a few scoops of the salsa verde-tomato mixture into the bottom of a 9×13 (or around that size) pan. Divide the filling between 8 tortillas. Roll them up and place them into the pan. Top with the remaining filling and sprinkle with cheese.* Bake until sauce is hot and cheese is bubbly and browned, about 20 minutes. Let them cool and set for a few minutes, then serve topped with avocado and sour cream.
  4. *(The enchiladas can be cooled, covered, and frozen at this point. I prefer to use a metal pan if freezing. It can go right into the oven from the freezer – take plastic wrap off and cover the pan with tinfoil. From frozen will obviously take longer to bake than the original. Give it an hour-ish and check it on your instant read thermometer to make sure it’s come to a safe temp. If not, bake it some more.)

Tuesday

10

September 2019

0

COMMENTS

Kale and Farro Salad with Bacon

Written by , Posted in Dairy-Free, Dinner, Fruit, Grains, Lunch, Main Dishes, Meat, Pork, Quick and Easy, Salads, Vegetables

I have eighteen kale plants in my garden. That’s a lot for a family where only one of us likes kale. I’ve got everything from huge three foot wide plants, to a couple that I transplanted later in the season that are still pretty small. It was definitely the most successful thing I planted this summer.

I have plenty of uses for kale on here. Some of my favorites are: Massaged Kale and Tuna Salad, Hearty Kale and White Bean Quesadillas, and turning it into pesto to go alongside Spicy Twice Baked Sweet Potatoes. I prefer it when it’s smaller, tender, baby kale. Tim, I believe, prefers it when it’s not served at all.

Today, I’m craving bacon, but feel a bit guilty about how much kale I have grown and not eaten. So, I’m gonna use them together. They’ll go alongside farro and some apples from our tree to make a quick lunch.

The dog is reverse hiccuping. Anyone else have a dog that does this? It freaks me out, even though our vet says it’s not dangerous.

I got advice for farro cooking from Bon Appètit. Their technique treats it like pasta. I can do that. I started with six cups of water, added a good amount of salt, and brought it to a boil. I toasted the farro in a dry skillet while the water heated. It ended up taking five minutes. Oh, and I rinsed the farro, before I toasted it (just gonna work backwards for a sec). I’m not sure if I was supposed to. But, I think that’s a thing with other grains, so I did it. I’m quite the authority on food.

I may not know a lot about farro, but when it comes to bacon, I know what I like: Mazzeo’s Danish bacon, cut pretty thick. Prefect for BLTs or cutting into lardons, like I did today. I totally didn’t cook enough though. I made two slices. I should have done six. What even was I thinking?!

I cooked the bacon and left about a tablespoon of the grease for the kale. I know that kale will wilt down considerably, but still I second guess myself when I add the whole salad spinner’s worth of kale to the pan. It will work. Right?!

Yes. It will.

Here’s what I like about this salad: the kale is bitter. Wait, I don’t like that. But, bitter kale, when accompanied by sweet apples, nutty farro, and salty, crispy bacon, mellows. And then I do like it.

If I’m honest, I mostly just want to eat the bacon. But, the rest of it is pretty good too. Ok, really good.

Top it all with Sir Kensington’s Golden Citrus Vinaigrette and, well, you’re golden… (are puns still allowed?). If you can get your hands on Sir Kensington’s products, I’d strongly recommend them. If you can’t, I’d whisk together some lemon juice, balsamic vinegar, and extra virgin olive oil. I’d add a splash of maple syrup, a plomp of dijon mustard, and a pinch of salt. That’s my go-to dressing and I think it would taste great here too.

Sometimes after I eat a meal like this I feel so healthy that it makes me want to eat a huge pizza. You know, for balance.

Happy Eating!

Kale and Farro Salad with Bacon

Serves 2

Ingredients

  • 1 C rinsed farro
  • 6 C water
  • 1-2 T salt
  • 2-4 bacon slices, cut into lardons
  • 6-8 C kale, stems removed, leaves washed and torn
  • 1/2 t salt
  • 1/4 C Sir Kensington’s Golden Citrus Vinaigrette
  • (Or whisk together some lemon juice, balsamic vinegar, and extra virgin olive oil. Add a splash of maple syrup, a plomp of dijon mustard, and a pinch of salt.)
  • 1 chopped apple, for topping

Directions

  1. Bring the 6 cups of water and 1-2 tablespoons salt to a boil. While it’s heating, toast the farro in a dry skillet until it gets a bit nutty smelling, about 3-5 minutes. Add the farro to the boiling water and cook until it tastes good, about 15-30 minutes (yeah, it can vary a lot – for me, 15 minutes was perfect). Drain the farro and set it aside.
  2. While the farro cooks, cook the bacon. Then drain on a paper towel lined plate. Reserve 1 T of the bacon grease and leave it in the pan.
  3. To the grease add the kale and sprinkle with 1/2 teaspoon salt. Toss it until it wilts down (it will, I promise) and gets darker green and tender.
  4. Toss the kale with the farro and 1/4 cup of dressing. Top with bacon and apple slices.

Thursday

9

July 2015

0

COMMENTS

Turnips Five Ways

Written by , Posted in How To, Vegetables

TurnipHash-8

Turnips. They can be challenging for some. With their bitter-sweet flavor, they can add a lot to a dish, especially when paired well. So I have some ideas for how to prepare them. In some, the turnips are the star. In others, they lend a great background note. In all, they’re a great addition to any menu plan.

Turnip Hash – Where Turnips are the Star

TurnipHash-1

This was the first dish that I made with turnips where I really really liked them. Like I crave this dish, I make it as often as I can. I accept turnips from friends who don’t like them, so I can add this to my menu (although I should probably just encourage them to make this, or any of these dishes… selfish much?!). Turnips are totally the star here. Their sweet and bitter flavor is ever present. But, the bacon’s saltiness, the cheese’s creaminess, the runny egg yolk (at least that’s the way I prefer it), and the crunch from the other veggies, they all compliment the turnips so well that I almost can’t stand it.

Almost.

Grilled Cheese with Gruyère and Turnips

GrilledCheese4

Wait, don’t leave… I think this is gonna be good. I’ve made grilled cheese sandwiches with apples and ham. So let’s change this up a bit. The key here is that you’re gonna sauté the turnips first, so they won’t be raw. While you’re at it, throw some greens (turnip greens if you have ’em), some salt, and a splash of maple syrup into the pan. Spread some olive oil or butter on the bread, add a sprinkle of salt. Top the bread with gruyère, some dijon mustard, and the turnips and greens. Then grill it all up until the bread is crispy and browned and the cheese is melted.

Serve this with a Creamy Mushroom and Turnip Soup (totally acceptable to dip your grilled cheese in soup!). Sauté some mushrooms, turnips, potatoes, and onion (and ya know, salt and pepper). Add some garlic, thyme, and savory. Add some stock. Cook until everything is tender. Add some cream, and parsley. You could blend this up for a creamy soup, or leave it as is. But, for sure serve it with these sandwiches.

Mashed Turnips and Potatoes

TurnipPotatoGratin-1

Mashed potatoes are great. Fabulous. Love them. So why not spice them up a bit. I’m thinking that adding turnips and carrots would be a fabulous idea. Maybe even some rutabagas too? And parsnips? Why not?! Here’s what I’d do: Steam the veggies (whatever you’ve got on hand of those listed). Mash to desired lumpiness. Add olive oil or butter, milk/cream/yogurt/sour cream/buttermilk/almond milk, chives, roasted garlic, salt, and pepper. Done. Let’s eat!

Turnip Fries with Homemade Ketchup

GreenBeanFries-2

The other week I wrote about Green Bean Fries with Ketchup. They were tasty. I’ve heard that they’re a hit with grownups and kids alike. So let’s try something else in this style: turnips! Slice like you would a potato that you were going to treat as a French fry. Toss with olive oil, salt, and pepper. Roast at 425F for 10 minutes, flip, and roast for about 7-15 minutes more (or until they’re crispy). Blend the “ketchup” ingredients from the Green Bean Fries recipe and dip away!

Stir Fry with Turnips Almonds and Tofu

CrispyTofuBlackBeanPureeMicrogreens-4

Turnips pair well with greens, carrots, tofu, and almonds. So I think they’d be great added to the Red Choi Stir Fry with Almonds and Tofu. Or, try this: stir fry some turnips, carrots, garlic, leeks or onions, mushrooms, peas, kohl rabi, turnip greens, and tofu. Add some soy sauce and sesame seeds. Serve with chopped almonds and parsley, over your favorite rice or rice noodles.

So, those are my suggestions. If you want to come up with your own dish, here are some things that turnips pair well with: Parsley, carrots, gruyère, lemon, parmesan, chives, garlic, thyme, leeks, butter, lentils, potatoes, cream, dill, winter squash, greens, mushrooms, onions, parsnips, bread, ginger, balsamic vinegar. (1) Be sure to let us know what you create!

Happy Eating!

(1) Paring ideas from The Vegetarian Flavor Bible.

Friday

24

January 2014

0

COMMENTS

How To Cook: Broccoli

Written by , Posted in Dinner, Gluten Free, Roasting, Storage/Prep, Thoughts, Vegetables

BoiledSteamedBroccoli-3Let’s talk about three ways to cook broccoli: steaming, boiling, and roasting.

I definitely have a favorite. Do you?

I tasted all three after I’d cooked them and wasn’t surprised that roasted was my preference. Also wasn’t bewildered that steamed was second. And, it was no shock to me that boiling was my least. That’s not to say that I won’t eat broccoli all three ways. I have and will probably do so again. But, I think that the taste and ease of preparation, hands down, goes to roasting.

Let’s begin.

Wash broccoli, then cut off a bit of the stem, up about an inch (save discarded stem to make vegetable stock).

BoiledSteamedBroccoli-10

Make a second cut where the florets start to branch out. Cut away the tough outside edges of that piece of stem (saving for veggie stock) – you can eat the inside just like you’ll eat the rest of the broccoli.

BoiledSteamedBroccoli-7

If you’re roasting, now’s the time to toss the broccoli with some olive oil, salt, pepper, and any other seasonings (like the thyme I used this week). Pour them out onto a baking sheet. I usually do about a head of broccoli per person, because we reeeally like roasted broccoli.

BoiledSteamedBroccoli-9

Roast the broccoli at 350F for 15-25 minutes. If you want just a hint of color, go for closer to 15. If you like ’em crunchier, stick to 20-25 minutes. (Times may vary slightly depending on your oven, so be sure to check at around 15 minutes.)

Scoop them off the tray and serve just like they are.

BoiledSteamedBroccoli-8

Roasted-Broccoli-1

If you’re boiling, plunk the broccoli in a pot that’s got some water in it.

BoiledSteamedBroccoli-2

My method for boiling is to put broccoli into cold water and bring it up to a boil. It will cook for just a few minutes (around 3-5). I like to salt the water for veggies like this, because, as with pasta, then you are able to flavor the food itself. You are not obligated to do this though.

BoiledSteamedBroccoli-5

If you’re steaming, place the broccoli in a steamer basket above a pot with about an inch or inch and a half of water in it (and if you’re doing like I did, steaming and boiling, use the boiling water that’s cooking the broccoli to steam the second floor broccoli).

BoiledSteamedBroccoli-1

I like to place veggies in the steamer and bring the water up to a boil. It makes for less steps and fewer minutes spent watching the pot to see if it’s boiled. Once the water has boiled it will take about 4-5 minutes until they’re tender. Less time if you want a bit of a crunch, more time if you want them really soft.

BoiledSteamedBroccoli-6

When you’re done steaming or boiling, throw any stems, leaves, peels, and any other veggie scraps, or older veggies that need to be used up into the pot, add a little more water, and an hour later you will have homemade veggie stock. (If you’ve salted your boiling water and use it for vegetable stock, just make a note on the label so you know when using it later on.)

From left to right we have steamed, roasted, and boiled broccoli. I love the difference in color that results from each cooking method.

Each technique is fairly simple to prepare. Roasting takes a bit longer, because you have to wait for the oven to pre-heat. But, like I said earlier, I enjoy the results best, so it’s worth the wait. However, even I could get tired of roasted broccoli, so I love to change it up.

BoiledSteamedBroccoli-4

Broccoli, be it roasted, boiled, or steamed, will go well with pasta (I really enjoy this pasta that gets topped with a fried egg), on sandwiches, topping a roasted potato, alongside polenta, risotto, or roasted chicken. It’s great topped with chopped almonds, red pepper flakes, and lemon juice. It is delicious in a stir-fry, alongside some fried rice. Or, never underestimate a big plate of broccoli, just on it’s own, with a drizzle of good olive oil, some shaved parmesan cheese, a sprinkle of salt, and some freshly ground pepper.

Can you guess what I’m having for dinner tonight?!

Happy Eating!