De Ma Cuisine

Kid-Friendly Archive

Monday

3

August 2020

0

COMMENTS

Nachos

Written by , Posted in Beans, Beef, Cheese, Dinner, Fruit, Gluten Free, Herbs, Kid-Friendly, Legumes, Main Dishes, Meat, Pork, Poultry, Quick and Easy, Red Sox, Snacks, Vegetables

Baseball is back. I’ve missed it, mostly. During the off season the Red Sox let Mookie and Brock get away. They’ve been favorites in our house, so it’s a little sad. I’m excited for the other guys to get to shine though. Benny, Bogaerts, Chavis, JD… they have a good offensive team.

I’ve been a baseball fan for as long as I can remember. I was a diehard Jays fan during the “Touch ’em all Joe” World Series. My brothers and I screamed and jumped so hard that the VCR fell off the TV.

Tim and I fell in love with the Red Sox in 2007. After nearly a decade of not paying much attention to baseball, we were on a fall anniversary trip and the Red Sox were in it. I started planning our outings around the playoff schedule. It was Dustin Pedroia’s rookie year. What a time to join Red Sox Nation! Dustin and Papi will forever be my all time favorites. I cried when Papi retired. If Pedroia ever plays again I’ll cry too.

It’s gonna be a weird season (#ThanksCorona). But, whatever it looks like, however short it may be, we will be cheering on the Red Sox. It’s a bit of brightness during a dark time. I like to plan fun foods to eat during the games. Things that we might eat at the ballpark: nachos, pizza, popcorn, hotdogs, fries… So if you need us for the next while, we’ll be eating all the baseball food, yelling at the TV, and texting LeBlanc about how much we love having Jerry Remy back in the booth.
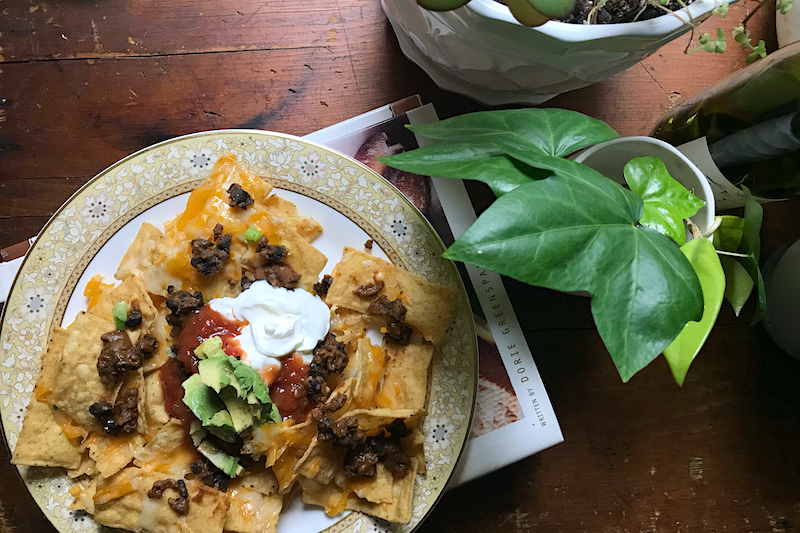
Our Favorite Nachos

Ingredients

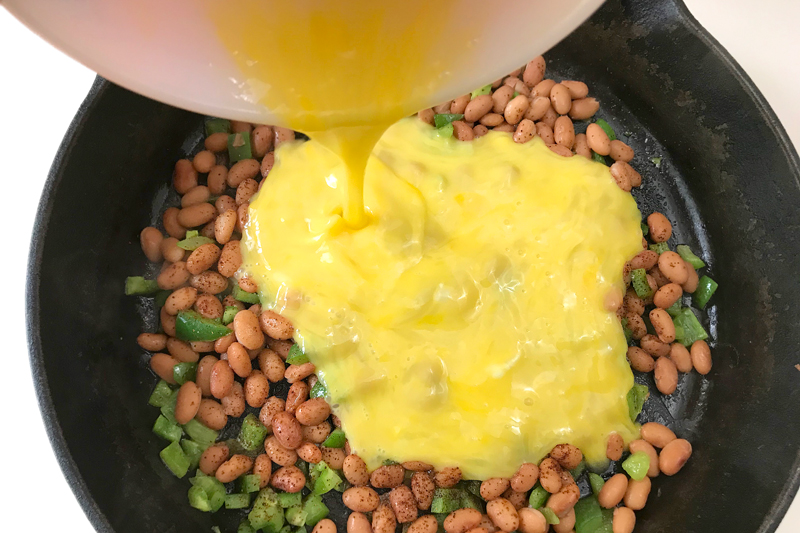
  • our favorite hot toppings: sautéed onions and bell peppers, ground meat, pinto beans, black beans
  • taco seasoning
  • salt, to taste
  • tortilla chips, lots of them
  • grated cheese, a lot, like more than you think you’ll need
  • cold toppings: sour cream, salsa, avocado or guacamole, chopped tomatoes, chives/red onions/scallions

Directions

  1. Pre-heat the oven to 350°F (toaster oven please bc summer!).
  2. Cook or re-heat any hot toppings. Stir in some taco seasoning and a pinch of salt.
  3. Arrange the chips in a layer with no gaps for cheese to fall through. This is important. Sprinkle with a ton of evenly distributed cheese. Layer with more chips. Add more cheese. This is like chip lasagna. Do a third layer if you want. We usually stick to two. But, it’s 2020, nothing makes sense. Maybe we’ve been making nachos all wrong by omitting the third layer. Bake for a few minutes, check on the cheese, bake a little longer if it’s not all the way melted. You can always do more melting. You can never un-melt burnt cheese.
  4. When the nachos are perfect, take them out of the oven. Plomp them onto some plates. Top with those cooked hot toppings. Add the sour cream, salsa, avocado, tomatoes, and anything oniony. Did I forget anything? Oh! Tim likes thinly sliced black olives. I think it’s weird, but if he’s in charge I’ll eat it without complaint and will probably like it.

Saturday

11

July 2020

0

COMMENTS

Pasta with Otamot

Written by , Posted in Affiliate Post, Beans, Beef, Burlap & Barrel, Dairy-Free, Dinner, Gluten Free, Kid-Friendly, Main Dishes, Meat, Otamot, Pasta, Pork, Poultry, Quick and Easy, Sauces, Sausage, Vegan, Vegetables, Vegetarian

The flavor of a tomato that’s been warmed by the sun. It’s simultaneously bright and deep, acidic, sweet, and deeply rich. The warmth of the sun mellowing its sharp acidity, turning it into a gentle escape. I know these tomatoes. I can still taste them on my tongue. A childhood memory that’s grown up.

This summer I will consider it an accomplishment if I can coax tomatoes out of what last spring was just lawn. The cherry tomatoes will be eaten out of hand. Dirt brushed off while the sun kisses our cheeks. Each tomato bursting as we bite into it. Beefsteaks will be sliced thick and served on toasted bread with a smear of mayo or a drizzle of very good olive oil, topped with fresh basil leaves and a sprinkle of Maldon salt. San Marzanos will be saved for sauce. Thick, rich, flavorful sauce that will envelop penne, luxuriate over meatballs on a sub, or gently braise meat. I love to make my own sauce. I think I’m good at it too. But, the other day I tried a sauce that gives mine some tough competition.

Otamot.

The Brooklyn based company started because the founder, Andrew Suzuka, wanted fewer battles over food with his daughter. (That’s fair.) So he created a tomato sauce that doesn’t have added sugar or preservatives and packed it with veggies and nutrients.

Tomato, carrot, red bell pepper, sweet potato, butternut squash, spinach, red beet, sweet onion, garlic, and shiitake mushroom are blended up to a thick purée that begs to have crusty garlic bread swiped through. (Have you tried Burlap & Barrel’s Purple Stripe Garlic yet?? It makes the most amazing garlic bread!)

I compared Otamot to another popular sauce brand. The other one could be fine. But, I want more than that. Otamot is a nutrient dense food that’s got 25% of your daily recommended vitamin E, 10% vitamin C, 20% vitamin A, 15% vitamin B3… Read the label. It’s really good stuff.

Sometimes I don’t have the energy to make food that’s this healthy and delicious. Or I don’t have all the ingredients on hand. Maybe it’s 5:30pm and I’m still working on a blog post and dinner needs to be quick and right now. I’m thankful that there are companies out there making truly high quality food that allows us to easily feed ourselves well.

I learned about Otamot at the virtual Yellow Co conference in June. A free jar was in our virtual goodie bag. Yes please! I used the entire jar to make a simple pasta. I’m regretting not saving some for pizza night though. ¯\_(ツ)_/¯ Next time I think I’ll get the Otamot Organic Mixed Sauce 4-Pack. It’s a good deal and I’d get to try all the flavors. And, youguys, Otamot is offering 10% off to my readers (code RACHO10)!

Here’s an easy dinner to make with your Otamot. Use the veggies that you have on hand. Sub any type of ground meat, or try a meat free option like cannellini beans, seitan, or vegan sausage.

Happy Eating!

Pasta with Otamot

Serves: 4

Prep: 10 minutes Cook: 15 minutes Total: 25 minutes

Ingredients

  • 1 pound penne or rigatoni pasta (wheat or rice)
  • 1 pound ground beef/pork/chicken/turkey, vegan sausage, seitan, or 1 can cannellini beans (drained)
  • 1 bell pepper, chopped
  • 1 yellow onion, chopped
  • 8 button mushrooms, chopped
  • 1-16 ounce jar Otamot (Organic Essential) sauce
  • 1 cup pasta water
  • to taste salt
  • 1 t unsalted butter or olive oil (optional)

Directions

  1. Bring salted water to a boil in a large pot.
  2. Cook your protein in a large skillet for about 3-5 minutes. Add the bell pepper, onion, and mushrooms. Cook until the veggies are tender, stirring occasionally, about 5 minutes more. Add the Otamot sauce and cook until it’s bubbly.
  3. While the veggies cook, cook the pasta to just shy of al dente. Add 1 cup pasta water to the sauce before draining the pasta. Stir the pasta into the sauce and let it finish cooking. Add salt if desired. Stir in butter, if using. If not, drizzle each serving with a bit of olive oil.

Otamot and Burlap & Barrel are affiliate links. I get a small commission for any sales generated from these referrals.

Thursday

26

March 2020

0

COMMENTS

Black Bean and Cheese Quesadillas

Written by , Posted in Appetizers, Beans, Cheese, Dairy-Free, Dinner, Gluten Free, Herbs, Kid-Friendly, Leftovers, Legumes, Lunch, Main Dishes, Meat, Quick and Easy, Rice, Vegetables, Vegetarian

There’s a little more time to think these days. Sometimes my brain gets overrun with thoughts about the what-ifs, the economy, the future. This is weird. It’s like nothing I’ve ever experienced before. It’s the only thing we want to talk about. For good reason. I’ve been trying to distract myself with cookbook writing, furniture rearranging, and, as our supplies dwindle a bit, using what we have well, and returning to a lifestyle where we’re making things from scratch again.

We usually have a well stocked pantry. I rely on things like beans and tuna and pasta. I love having jars of homemade jam, dilly beans, and dill pickles to get us through winter. And I almost always have at least one extra jar of Sir Kensington’s Chipotle or Sriracha mayo on hand. A few weeks before COVID-19 became a pandemic we stocked up a little more. We set aside some food in a plastic bin that we can grab and take with us in an emergency. There isn’t a can opener in there, so we have no way to eat it. But, it’s there if we need it. And between the pantry and what’s in cold storage, I think we could eat for two or three months using just what we have on hand. I think many people have done the same. Our pantries are stocked. We’re ready to ride this thing out at home. But, what to do with all those supplies now that we’re here… There’s the open can, eat with spoon option. Provided you didn’t forget the can opener. But, maybe we could try something a little more fun?

Today, we had Black Bean and Cheese Quesadillas. They could be eaten as a very basic quesadilla. Beans, cheese, tortilla, and something to dip them in. Great. But, you could also make them into something more.

To start, Tim made the flour tortillas from scratch. We are ruined. We should never buy store bought tortillas again. You can use corn tortillas too. Either way you’re winning.

We mashed up some black beans with some taco seasoning (Tim makes this from scratch too) and a pinch of salt. Easy. You could switch it up and use pinto or cannellini beans or even chickpeas.

We added colby and cheddar cheese. You could use queso fresco or try a great vegan cheese if you like. I like colby for the meltyness and cheddar for the taste. If we had pepper jack I’d add that for some spice.

Leftover chicken, pork, or beef? Add it. Some crispy bacon left from BLTs? Perfect. I wanted leftover chicken in these quesadillas. But, we didn’t have any. Next time.

Jarred roasted bell peppers? Good idea. Scallions that are getting a little wilty in the fridge. Do it. Onions and fresh bell peps? Sauté and add.

Leftover rice from dinner last night? Reheat it and mix it in with the beans. Oh! You made chili for dinner? Plomp it onto the tortilla and top it with cheese. Save the cans of beans for another time. Fold. Heat. Done.

Have a little leftover cream cheese and no bagels to eat it with? Smear it on the tortilla before you top it with the beans. Add a little sprinkle of garlic powder for good measure.

There are a million ways to quesadilla. And a zillion ways to use your pantry treasures for good. Oh, and if you feel like you may have over bought, our local food banks are hurting right now. So, grab some sanitizer wipes, clean those cans, find your local food bank, and drop them off (while you know, social distancing) and help someone in need.

I’ve got lots more ways to use those pantry items creatively. If you want help, send me an email at demacuisine@racheloberg.com. I always love to talk about menu planning.

Happy Eating!

Black Bean and Cheese Quesadillas

Serves 2

Ingredients

  • 8 (8-inch) cooked flour or corn tortillas (for ours, Tim used the recipe for flour tortillas from America’s Test Kitchen’s Bread Illustrated cookbook. There’s an almost identical recipe here.)
  • 1 1/4 cups mashed black beans
  • 1 1/2 teaspoons taco seasoning
  • 1/8 teaspoon salt (Morton’s Kosher)
  • 1/2 cup grated colby or pepper jack cheese
  • 1/2 cup grated cheddar cheese
  • additional goodies: meat, rice, roasted bell peppers, scallions, green chiles, rice, cream cheese etc…

Directions

  1. Re-heat anything that needs to be very hot (like meat and rice), or cook any fresh veggies or meat that you want to add. Set it aside.
  2. Mix the black beans with taco seasoning and salt. Heat it over low until it’s hot, and then mash well. Divide the beans and the cheese between the tortillas. Top half of a tortilla with the black bean mixture and top with a bit of each type of cheese. Add any of the additional goodies, then fold the un-topped side of the tortilla over the topped side.
  3. Heat a skillet over medium. Add the quesadillas and cook, flipping once, until the tortillas are browned and a bit blistered, the filling is hot, and the cheese is melted.

A great paring for these quesadillas is corn chips with some homemade guacamole, made with avocados that you bought last week and forgot about.

Friday

8

November 2019

0

COMMENTS

Breakfast Burritos

Written by , Posted in Beans, Breakfast, Brunch, Cheese, Dairy-Free, Eggs, Gluten Free, Herbs, Kid-Friendly, Low Carb, Lunch, Main Dishes, Quick and Easy, Vegan, Vegetables, Vegetarian

Monday was a very bad day. Tuesday morning started out kinda the same. Remnants of the crappy yesterday had stuck around. I hadn’t been this angry about something in a while.

My response to crisis is usually food. Food is comfort. That can lead to mindless eating. But, sometimes it leads to a really good breakfast that makes for a better start to the day.

I had cereal for lunch with zero plans for dinner. But, at least breakfast was good.

I started it simply, with chopped bell pepper and some minced cayenne pepper from the garden. I don’t know why they didn’t turn red. But, the seed pack said cayenne, so that’s what they are.

You could add a million other things in there too. Leftover potatoes, chopped onions, broccoli, leftovers from last night’s dinner… pretty much any veggies you think would be great probably will be.

After the peppers cooked in some oil for a few minutes I added some beans. I had pinto on hand. Yum. Black beans would also be great. And if all you have are kidney, or cannellini, use them! Why not?!

After the beans got hot, I added some whisked eggs. To keep it vegan, add in some crumbled tofu. Easy.

I took a pic of the tortilla being topped. It looked not amazing. The eggs had turned a bit grey from being cooked with everything else. If you want them to look amazing and yellow, scramble them separately. And then wash that extra dish. Yeah. No thank you. Less dishes is always the best option.

I laid out the tortillas, topped them with a handful of cheese, then the bean mixture. I used a mixture of cheddar and monterey jack, but if you’re going vegan, my favorite is Violife (just like cheddar or just like mozzarella shreds are great!). They got rolled up and then, the best part. A clean skillet with hot oil, cook that burrito on all sides until it’s shatteringly crisp. Yes please!

For topping or dipping, I like avocado with a bit of salt, and some sour cream. Tim likes salsa. Some people might like cilantro or some diced tomatoes.

However you serve them, they’re pretty quick and easy and make for a great start to the day.

Happy Eating!

Breakfast Burritos

Yields 3 burritos

Ingredients

  • 1 tablespoon oil (I used grapeseed)
  • 1/2 of a medium-sized bell pepper, diced (could also use: onion, cooked potatoes, cubanelle pepper, broccoli… whatever you have on hand)
  • 1/2 of a small hot pepper (I used cayenne), ribs and seeds removed, minced
  • pinch of salt
  • 1-14 ounce can of beans (pinto or black), drained
  • 4 eggs or half a brick of firm tofu
  • a little more salt
  • sprinkle of chili powder
  • handful of shredded cheese for each burrito, vegan (I like Violife) or conventional (I like a mixture of cheddar and monterey jack)
  • 3 burrito-sized tortillas (whole wheat, white, or gluten-free)
  • topping options: salsa, sour cream, cilantro, avocado, diced tomato, Sir Kensington’s Chipotle or Sriracha Mayo
  • a bit more oil, for crisping

Directions

  1. Heat the oil in a skillet over medium heat. Add the bell pepper, hot pepper, and any other veggies, and a pinch of salt. Cook until the veggies are tender, about 4-5 minutes, stirring occasionally. Add the beans and cook until the beans are heated through, about 4 minutes.
  2. Whisk the eggs, or crumble the tofu, in either case, with a pinch of salt and a sprinkle of chili powder. Add to the skillet with the beans and cook until eggs are set or tofu is hot (or you can cook the eggs separately if you want them to stay yellow – have fun washing that extra pan). Taste for seasoning.
  3. Top each tortilla with some cheese. Divide the bean filling between the tortillas and roll them up.
  4. In a clean skillet, add a bit of oil and crisp up the burritos, turning until they’re golden brown and delicious.
  5. Serve burritos cut in half with desired toppings.

Wednesday

26

October 2016

0

COMMENTS

Eating on the Road – Nutella Raspberry Shake

Written by , Posted in Breakfast, Brunch, Dairy-Free, Drinks, Fruit, Gluten Free, Kid-Friendly, Lunch, Quick and Easy, Thoughts, Travel, Usana, Vegan, Vegetarian

nutellashake2rt

Life on the road has been great. It’s been filled with adventure and relaxation, smooth highways and bumpy gravel roads, time with people and time alone. It’s been a joy to be on this journey. We’ve loved it all. Part of what’s been fun is getting away from the norms of our everyday life.

phillycssandrt

Our normal routine includes a weekly menu, planned so that the grocery shopping is done efficiently and practically, so that there is something planned for all meals. We don’t eat out a lot. Eating out doesn’t agree with our budget or our healthy lifestyle choices. However, life on the road includes a lot more eating out than normal. It’s not the norm-norm, but for a while it’s a bit more so. I thought about menu planning before the trip. I could have figured out exactly what we’d eat and where. But, we wanted to have lots of freedom as we travel. Plus, we had such a short amount of time to plan that it got left off of the to-do list. So we’re doing the best we can with what we have. And it’s been great!

pizzartWhen we’re staying with people and are invited to share a meal, we gladly accept. When we’re asked out to a meal, it’s a fun treat. We’ve had delicious pizza in Boston, fabulous barbecue in Texas, and Philly Cheesesteaks in West Philadelphia.

rudysrtSince about half of our time has been spent in the car, we generally munch on a mix of healthy, homemade foods and of course snacks (with a smattering of DQ and Steak’n Shake stops).

rachdqrt

Before we left I prepped as much as I could. I made granola bars, sourdough bread, and scones. We bought crackers, cheese, and fruit, jerky, chips, and chocolate covered gummy bears (ok, not all that we brought was healthy). We even had a small pantry that included items like canned beans and tomatoes, tuna, olive oil, and a few of my favorite kitchen tools (we totally brought some cast irons). We borrowed a camping stove from some friends so we have options, which means freedom. Nevermind that we have yet to use it – I’m determined that we will before the end of the trip so that it’s worth it to have lugged it all this way. 😉

eggmuffinrt

Our stays with both sets of parents have been more extended stays (thanks a million moms and dads!). So we’ve had time to unpack and relax. Tim loves English muffins with ham and eggs, so he made those one morning. We’ve also baked quite a bit, using some great recipes from our friend John Park, and made one of my favorite comfort foods, Texas Stuffnutellashake1rtOne thing that we’ve enjoyed while on the road are protein shakes. They’re great for sipping while reading a good book as we listen to the wind rustle the leaves on the fall trees. They’re also a great breakfast to grab when we’re in a rush to get on the road (because let’s be honest, we almost always leave way later than we’d planned). While it’s just fine to use water and a powdered shake mix, I love to add a little more and make a meal that will really keep me full until lunchtime. My favorite shake includes banana and peanut butter. Tim’s includes Nutella. His is the recipe I’ve shared below. I’ll share mine another time.

trzorbasrt

We’re exercising moderation, trying to make wise decisions, and showing ourselves grace. All of which has added up to a wonderful trip. Lots of great times together that we will cherish for a long long time.

Nutella Raspberry Shake

Ingredients

  • 1/4 C Nutella (or your favorite vegan hazelnut spread)
  • 1/2 C raspberries (frozen or fresh)
  • 5-6 oz milk (any type)
  • 5-6 oz water
  • 2 scoops protein powder (whey, plant, or soy)
  • splash maple syrup

Instructions

  1. Place all ingredients in a container and blend with a hand blender or regular blender.