De Ma Cuisine

Roasting Archive

Thursday

21

November 2019

1

COMMENTS

Roasted Brussels and Bacon

Written by , Posted in Dairy-Free, Dinner, Gluten Free, Holiday, Main Dishes, Meat, Pork, Quick and Easy, Roasting, Sides, Vegetables, Vegetarian

As I park the brussels in the oven, my mind goes to what I can do while they cook. I could start the laundry, do the dishes, plan next week’s Thanksgiving table decor… Dishes first. Then laundry. Then some quick pics of the dish before it inevitably becomes my lunch. Such is the life of a food writer who works from home. I’m constantly torn between the work and home to-do lists.

I can’t imagine that this is uncommon, for those who work from home. I have a dedicated office space. But, it’s in our house. So, I will hear the washer stop washing and know it’s time to change the load. I will see the full dishwasher and empty it.

This isn’t a complaint. I love working from home. I just need to be better at prioritizing work during work time, and home stuff during home time. I’m getting there. Slowly.

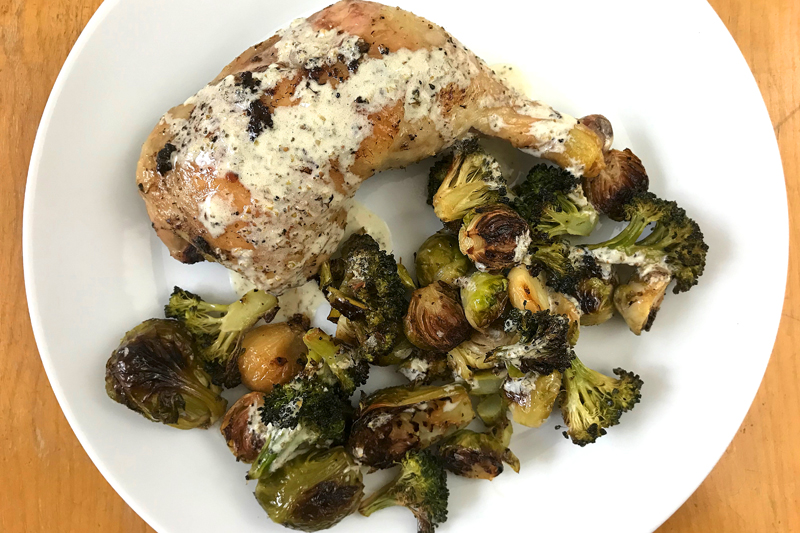
This dish is a mish mash of work and home. It may end up on our Thanksgiving table. But, I wanted to share it here in case you need some help with your menu. It’ll be great alongside the turkey and stuffing. But, it will also make a great, easy weeknight dinner. I might serve it alongside some polenta, or with a big salad and some cornbread.

If you’re gonna make it for Thanksgiving, it may be the easiest Thanksgiving side dish. Ever. Unless you’re a can of cranberry sauce lover. Are you? I’m not, but I’ll eat it gladly if it’s served to me.

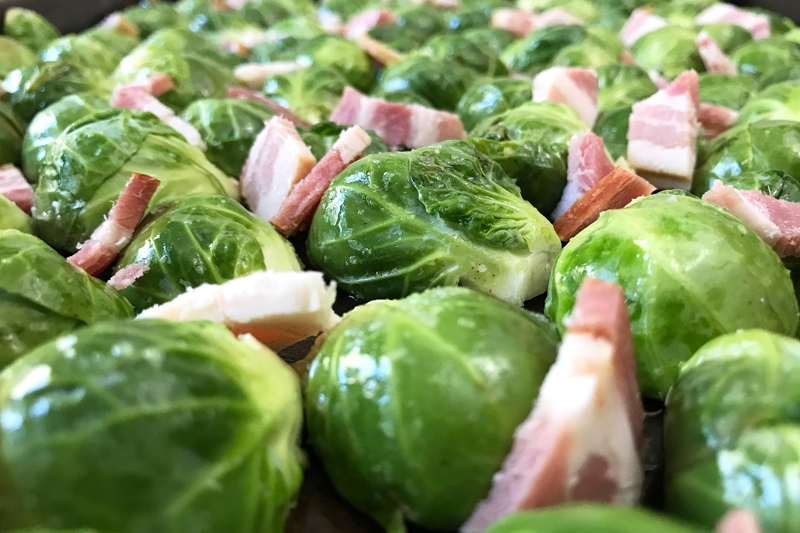
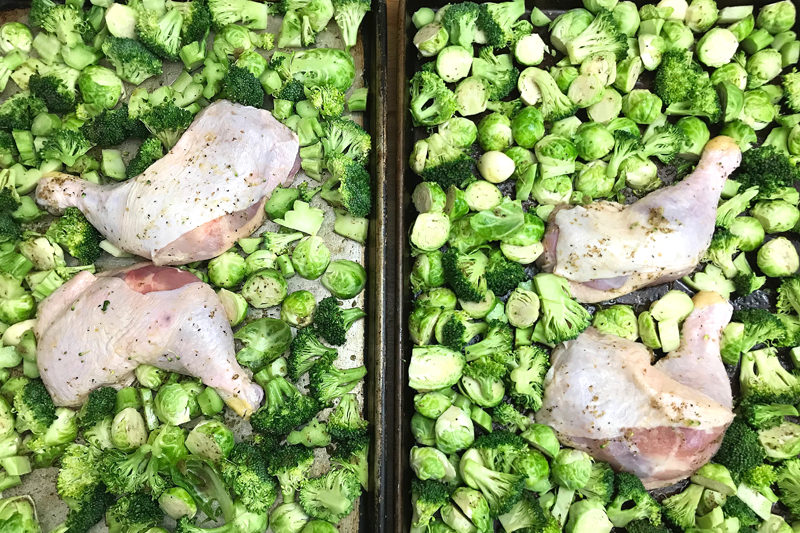
I tossed some halved brussels sprouts with oil and salt. Then I added some chopped bacon. Optional, but delicious. If you don’t eat bacon, you could throw in some tempeh bacon at the end.

My brussles were a little old. Read: farty smelling. Opt for the freshest brussels possible.

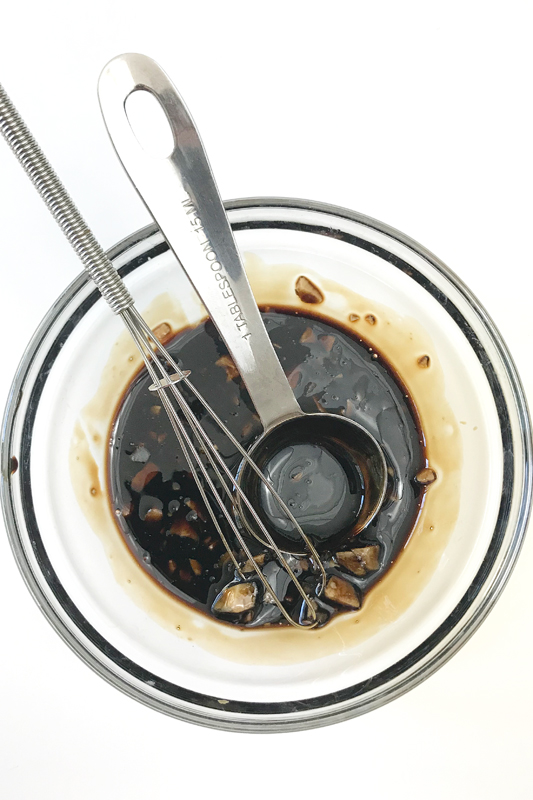
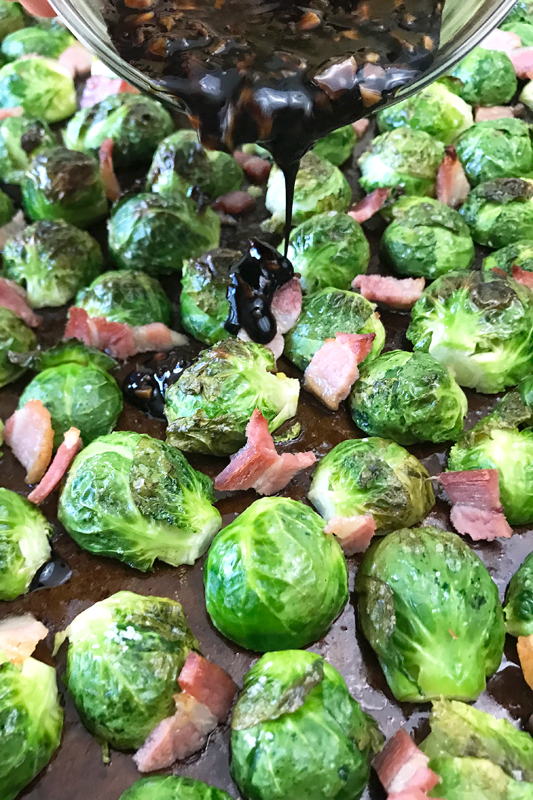
I roasted them on high heat for a bit, then tossed them with some balsamic vinegar, maple syrup, and garlic.

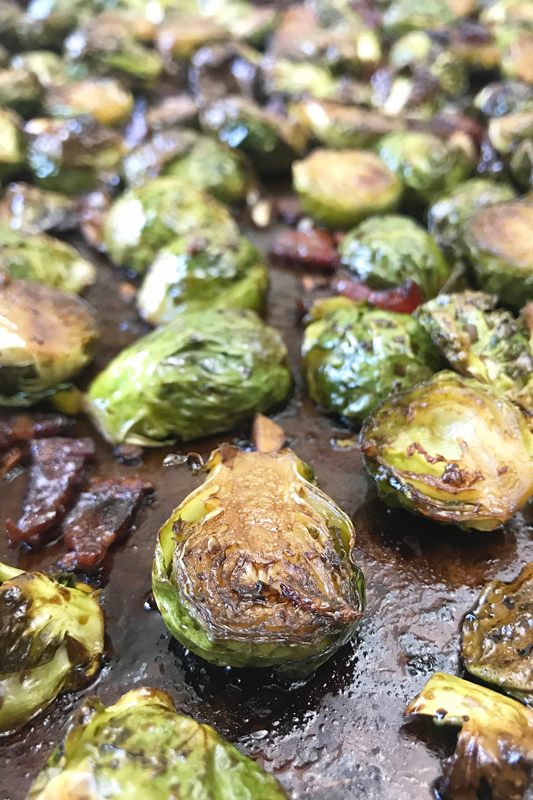
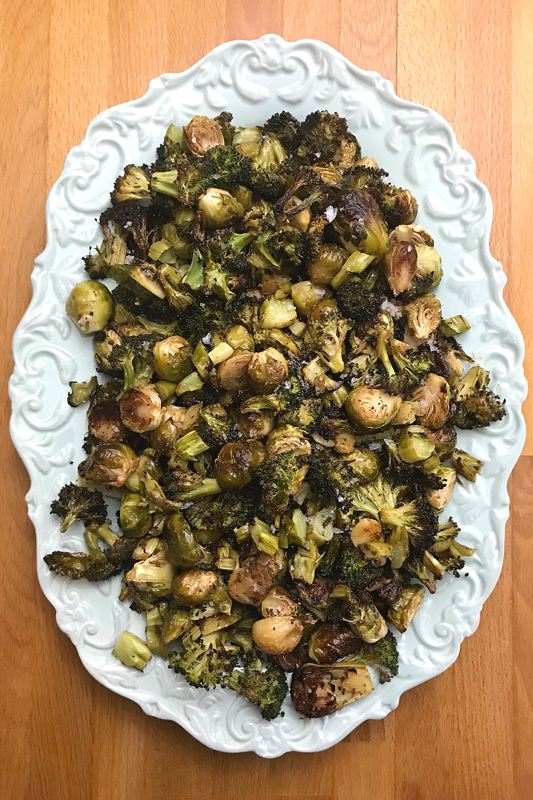
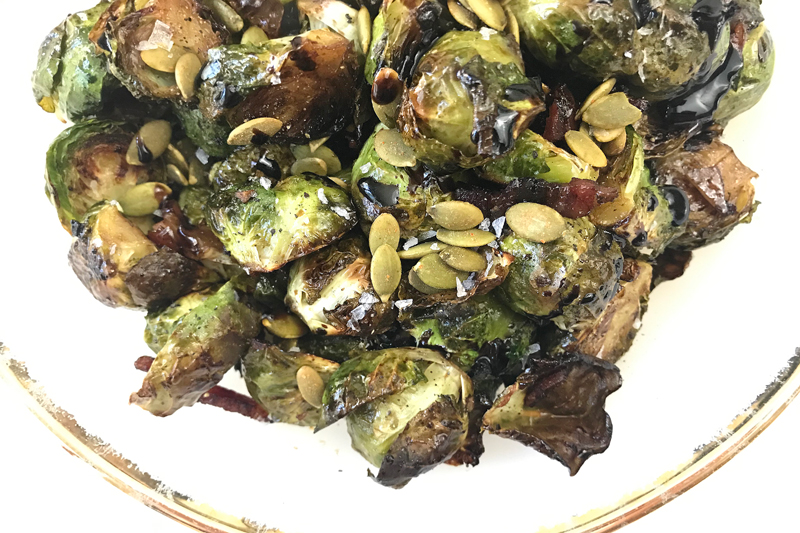
After their tossing, they roasted for a bit longer. Then, done. I added a bit more balsamic, some spicy pepitas, and a bit of Maldon salt. It made for an easy, sweet and savory dish.

Happy Eating!

Roasted Brussels and Bacon

Serves: 4

Ingredients

  • 1.5 pounds brussels sprouts, ends trimmed, halved
  • 1 tablespoon oil (I used grapeseed)
  • 1 teaspoon salt
  • 4 strips bacon, chopped (optional)
  • 1/4 cup balsamic vinegar
  • 1 tablespoon maple syrup
  • 1 tablespoon minced garlic
  • topping: more balsamic vinegar, Maldon salt, spicy pepitas

Directions

  1. Pre-heat the oven to 425°F.
  2. Toss the brussels sprouts with the oil and salt. Lay them cut-side down on a baking sheet and sprinkle the bacon around the pan. Roast until they’re beginning to brown, about 15 minutes.
  3. Whisk the balsamic vinegar, maple syrup, and garlic. Pour over the brussels sprouts and toss so they’re evenly coated and spaced out. Return to the oven and bake until sprouts and bacon are crispy, about 10 minutes more.
  4. Serve topped with a drizzle of balsamic vinegar, a sprinkle of Maldon salt, and some spicy pepitas.

Tuesday

5

November 2019

0

COMMENTS

Sheet Pan Chicken Dinner – A Cooking Show with Rachel O – Ep. 3

Written by , Posted in A Cooking Show with Rachel O, Contests, Dinner, Gluten Free, Main Dishes, Meat, One Dish Dinners, Poultry, Roasting, Sauces, Vegetables

This is going to be easy. Like, not as easy as making toast from store bought, pre-sliced bread. But, not as difficult as making toast from homemade bread. More like making toast from store bought not sliced bread.

The only difficult thing is waiting for the oven to heat up (ours takes twelve years) and making sure the chicken isn’t still frozen (ugh, mine is).

So while I wait for both of those things to correct themselves, I’m gonna halve some brussels sprouts and think about whether or not I could write a cookbook.

It’s something I’ve wanted to do for a while now. Just recently it’s been on my mind a little more. I was talking to Maggie Green about it last week and she asked “Why not you?” Yeah, why not me?!

So I’m putting this out there. Not for any reason but to tell you, so you can know first. “I’m gonna do the thing that scares me. Let my dreams be big enough to scare me.” –Arielle Estoria (paraphrase)

Ok, I think the oven’s ready. Remember, this is easy. You can swap out the veggies if you want to. I’m using brussels sprouts and broccoli, because it’s what I have on hand. I’d also like to make it with cauliflower, carrots, or even just a simple chicken and potatoes dinner. You could try rutabagas or parsnips, beets (chioggia beets would be super pretty), maybe even some cabbage wedges?? You’re the boss of your dinner, so make it how you want, use what you have on hand, and use this recipe as a guide, not something you have to follow exactly.

Since I’m the boss of my dinner, I’m using one of my favorite things: Sir Kensington’s Pepperoncini Italian Vinaigrette AND giving it away!! Winner winner chicken dinner!

The giveaway has now closed. Congratulations to the winner: @brambleberrybear!

To Enter:

  1. Follow both @De_Ma_Cuisine and @sirkensingtons on Instagram.
  2. Leave a comment on the @De_Ma_Cuisine Instagram post announcing the giveaway or on this blog post. You can comment about sheet pan dinners, whether or not you’d buy my cookbook, what Sir Kensington’s products you love the most, or anything else you find interesting.

Rules:

  1. Giveaway is open to residents of the United States.
  2. Winner will get to select any two Sir Kensington’s vinaigrettes.
  3. Giveaway will close Wednesday November 13, 2019 at 3pmEST.
  4. Winner will be chosen through random drawing.
  5. Winner will be contacted to get their shipping address.

Thanks for sponsoring the giveaway, Sir Kensington’s!

Happy eating and bonne chance!

Sheet Pan Chicken Dinner

Serves 4-6 (with leftovers)

Ingredients

Directions

  1. Pre-heat the oven to 350°F.
  2. Using two baking sheets, toss the chicken and all veggies in 1 cup of Sir Kensington’s dressing. Spread everything out evenly. It’s good if it touches. I like to keep the chicken skin side up, keeping the bottom in contact with the baking sheet. Bake, turning sheets once and stirring the veggies, until the chicken is fully cooked and the veggies are tender inside and browned and crispy outside, about 50-60 minutes (depending on your oven).
  3. While everything roasts, whisk together the remaining vinaigrette and the mayo to make a sauce.
  4. Top veggies with Maldon salt. Serve the veggies and chicken with the sauce poured overtop or on the side for dipping.

Wednesday

2

October 2019

0

COMMENTS

Roasted Grain Bowls

Written by , Posted in Breakfast, Brunch, Condiments, Dinner, Eggs, Grains, Herbs, Leftovers, Lunch, Main Dishes, Quinoa, Rice, Roasting, Vegan, Vegetables, Vegetarian

I’m sitting here shoveling this food into my face hole and I keep wondering what that B.O. smell is… Oh. It’s the unused scallions. Why even do they smell like that?! It’s kinda gross.

Not quite as yucky as dog toots, rotten stuff, or humidity. But, off-putting none-the-less.

Speaking of humidity, it’s kinda warm and rainy and humid today. Buuuuuut, tomorrow it’s gonna be in the 50s, Friday night it could freeze, and that, plus the blanket of leaves on our lawn, is making it feel like fall. Which makes me want to eat all the soup and bake all the things.

Today I baked an apple cake and some sandwich bread. I also roasted cauliflower for my lunch, even though what I really wanted were the Red and Green Enchiladas that I made a few weeks ago. But, I don’t have any tortillas and I didn’t want to go to the store or make them. I had the oven on and a bit of time before while the bread rose. I figured I should do something with the very old cauliflower that I’d forgotten about in the crisper. I tossed it with olive oil and salt and let it roast for a while.

I had frozen the leftover farro from the Kale and Farro salad that I made at the beginning of September. It was thawed and in the fridge, ready to be used. I added it to the baking sheet when the cauliflower was browned and delicious. Plus the stinky scallions, a smidge more salt, some Italian Hot Salt, and a grind of black pepper. It just needed to get warm and a bit crispy.

I’m sorry I said “stinky scallions”. That doesn’t make things sound delicious.

I wanted one more element, so I fried an egg in butter and popped it on top. Over-medium, so the yolk could run through the farro. Everything got topped with some local Sriracha and a bit of Maldon salt.

You could skip the egg and top it with a plomp of Fabanaise, to make it vegan. You could use brown rice, barley, or bulgur wheat instead of farro (maybe quinoa?? not sure how it would do – it could end up as tiny crispy bits… nope, that still sounds delicious). Just adjust your baking time accordingly. If you have broccoli, that would be perfect, carrots might be great, you could even use those green beans that are still growing in your garden. Treat this recipe as a starting point. Remember, you’re the boss of your meal. Make it how you want.

Happy Eating!

Roasted Grain Bowls

Serves 2

Ingredients

  • 1 small head cauliflower, core removed, chopped into medium-sized pieces
  • 1 1/2 T olive oil
  • 1/2 t salt, divided
  • 2 C cooked farro (can sub: brown rice, barley, or bulgur wheat)
  • 1/2 T chopped scallions
  • freshly ground black pepper
  • Italian Hot Salt (or a pinch of cayenne)
  • 1/2 T unsalted butter or olive oil (optional)
  • 2 eggs (optional)
  • Sriracha, for serving
  • Maldon salt, for serving

Directions

  1. Pre-heat the oven to 350°F.
  2. Toss the cauliflower with the olive oil and 1/4 teaspoon salt. Roast, turning once, until cauliflower is tender and browned, about 30 minutes (time may vary depending on your oven).
  3. Add the farro, the remaining 1/4 teaspoon salt, the scallions, black pepper, and Italian Hot Salt or cayenne. Toss with the cauliflower. Bake until the farro is hot and a bit crispy, about 5 minutes.
  4. Fry the eggs in hot butter to desired doneness.
  5. Divide the farro and cauliflower mixture between two plates and top each with a fried egg, some Sriracha, and some Maldon salt.

Wednesday

12

October 2016

0

COMMENTS

Food and Family – Roasted Garlic Three Squash Soup

Written by , Posted in Dairy-Free, Dinner, Gluten Free, Lunch, Main Dishes, Roasting, Soups, Vegan, Vegetables, Vegetarian

souprtSomething my family does really well is food. We like to eat it, talk about it, think about it… We live to eat, we don’t eat to live. Usually as we’re finishing up one meal discussion about the next meal begins.

As is the custom in many places, many of our events take place around food. Christmas morning means brunch. Birthday dinners mean a special meal to celebrate the birthday person. Watching a movie in the evening means popcorn and snacks.

While we were in town an aunt and uncle from Mom’s side were also visiting. So we got together with some of the extended family for a meal. Many in our family have dietary restrictions. So we just said we’d do it potluck style and people could contribute with something they can eat. All the diets were accounted for. We range from gluten-free to vegan. But, one thing that all of our restrictions can tolerate is veggies. So I made soup.

The summer veggies were on their way out. The lighter, less nutrient dense summer squash being replaced with the heartier winter varieties. I used both. I roasted them, along with some onions, and a whole head of garlic. It was simple – olive oil and a hot oven for all of them. An hour later I plomped the roasted veggies into a soup pot with some water and let them simmer for a while. Simple and delicious.

Let’s talk about the roasted garlic again for a second. I used a whole head. I wouldn’t have done that had it been raw (unless I wanted to be the only one to enjoy the soup ;)). Roasting garlic mellows out the sharp, strong flavor. It’s one of my favorite things. It’s perfect if you need something to spread on toast, to mix in to hummus, and to add to soup.

I like to add a bit of acid to most recipes. I add it near the end, or just after it’s come off the heat. It adds a bit of brightness and finishes off a dish really nicely. Lemon or lime juice works well, so does white vinegar.

The soup was a success. My family loved it (unless they were just being polite). Squash soup is one of my favorite ways to usher in fall and soup season.

Happy Eating!

Roasted Garlic Three Squash Soup

Roasted Garlic Three Squash Soup

Ingredients

  • 2 large pattypan squash, halved, seeds scraped out
  • 1 large summer squash (zucchini or any other type), halved, seeds scraped out
  • 1 large spaghetti squash, halved, seeds scraped out
  • 3-4 onions, peeled and halved
  • 1 head garlic, top sliced off
  • oil
  • 10-12 C water or vegetable stock
  • 1 t mustard powder (or 1 T grainy mustard or dijon)
  • sprinkle cayenne
  • 2 C (approx.) coconut milk
  • 1 t honey
  • to taste salt
  • 2 1/2 t lemon juice

Instructions

  1. Pre-heat the oven to 350F. Drizzle the squash and onions with oil and place cut side down on a baking sheet. Drizzle the garlic with oil and wrap in tin foil. Roast summer squash for about 30 minutes (or until tender and flesh pierces easily with a fork) and onions, garlic, and spaghetti squash for about 60 minutes (or until tender and flesh pierces easily with a fork).
  2. Let garlic cool a bit before handling. Scrape squash out of skin. Add veggies through cayenne to a soup pot. Bring to a boil, then reduce to a simmer for 1 hour or so. Add coconut milk through salt. Heat for a few minutes. Blend until very smooth (using a hand blender, or in a blender with the plug in the lid removed and the hole covered with a clean towel). Add lemon juice. Taste for seasoning.

http://www.de-ma-cuisine.com/search-obergness-pt-4-squash-soup/

Friday

26

February 2016

0

COMMENTS

Baked Onion Rings with Herb Dip

Written by , Posted in Baking, Condiments, Dairy-Free, Eggs, Gluten Free, Herbs, Quick and Easy, Roasting, Sides, Snacks, Vegan, Vegetables, Vegetarian

OnionRings-3

I’m not a sweets person. I don’t often crave chocolate, I can go without candy, and if given the option, I’d take potato chips over a donut. I do really love ice cream, but I think that’s because Tim is so good at making it. But, even then, I might take onion rings over ice cream. Because I really really love crunchy deep fried foods. French fries, tempura, onion rings… They’re so tasty.

We don’t need to talk about the dangers of fried foods. I’m well aware. You’re well aware. We’ve got that covered. It’s a treat, not an everyday thing.

OnionRings-1

When it comes to guilty pleasures, these onion rings seem like they’d fit in. But, they’re actually pretty innocent. They’re dipped in eggs (you could use coconut or almond milk if you want to keep them vegan), then coated in flour. I double dipped some (you know, egg, flour, egg, flour). I’m not sure which turned out better. They all tasted great.

All.

I ate them all.

OnionRings-2

The first secret to this delicious treat is baking them at a high temperature for a short amount of time. We’re talking 425°F for 18-20 minutes total. The second secret is the dip. It’s made up of things like yogurt or silken tofu or mayo or avocado (or ALL!) blended up with some blanched greens, herbs, garlic, and olive oil. I fully submerged each onion ring in the dip before devouring.

If you wanted to make a huge platter and call this dinner, you might also do some green beans, par-cooked potatoes or root veggies (and in a few months summer squash), and add the beans to the dip. Serve it with a big salad and some other fun finger foods (like nachos with refried bean dip) and you’ve got a winner. In fact you’ll most likely find us eating this for dinner sometime this weekend.

Happy Eating!


Baked Onion Rings with Herb Dip

Prep Time: 15 minutes

Cook Time: 25 minutes

Total Time: 40 minutes

Yield: 2-4

Baked Onion Rings with Herb Dip

Ingredients

  • 2 C any of your favorite greens
  • 2.5 C any combo of: yogurt/crème fraîche/mayo/sour cream/avocado
  • 1 T dijon
  • 1 T olive oil
  • 1 t lemon zest, chopped
  • 1 t lemon juice
  • to taste salt
  • to taste pepper
  • 1-2 cloves garlic, minced
  • pinch cayenne (optional)
  • handful chopped herbs like: parsley, basil, thyme, rosemary, oregano
  • 1-2 onions, sliced
  • 2 (or more) eggs, whisked (or coconut, almond, or cow's milk)
  • 2 C flour (AP or GF)
  • to taste salt*
  • to taste pepper

Instructions

  1. Pre-heat the oven to 425°F.
  2. Blanch greens in boiling water for 1 minute. Transfer to an ice bath to cool. (Or, use leftover sautéed greens.)
  3. Whisk yogurt through cayenne. Add herbs and blanched or leftover greens. Blend. Taste for seasoning. Refrigerate until ready to serve.
  4. Mix flour with salt and pepper. Taste (for real). Separate onion into rings. Dip veggies in egg/milk then flour. Repeat if desired. Tap off excess flour. Place on a parchment or Silpat lined baking sheet. Do not let the veggies touch. Bake for about 10 minutes, flip, bake about 8-10 minutes more (or until crispy and browned).
  5. Serve with dip.

http://www.de-ma-cuisine.com/baked-onion-rings-with-herb-dip/