In my life, I haven’t experienced another relationship like the one between a dog and their humans. Can you imagine what life would be like if we got as excited as they do when our favorite person came home from work, or asked us if we wanted to take a walk with them? They forgive our bad attitudes and forget the grumpy mornings. They just want to be around us. Their tails flap excitedly when we walk into the room. They love us so much.
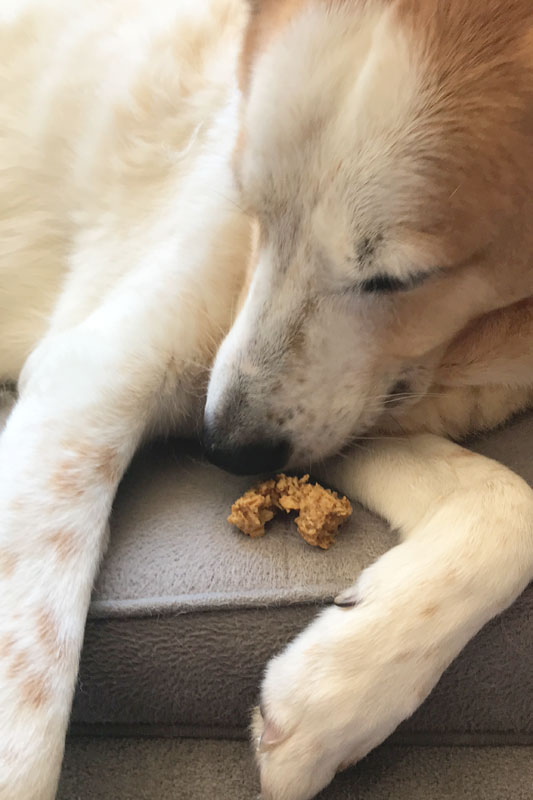
It was our best dog’s birthday the other day. He turned twelve. We tried to return some of the love he has shown us for all these years with treats and homemade cookies. And we let him dictate the plan for the day, which meant everyone lounged around until like 6pm then got hyper and went for a walk.
I winged it with the cookies. I’m not a baker, but sometimes I try. I’ve baked enough that I’ve got a general idea of what to do to make a cookie. Still, it’s a bit of a guessing game.
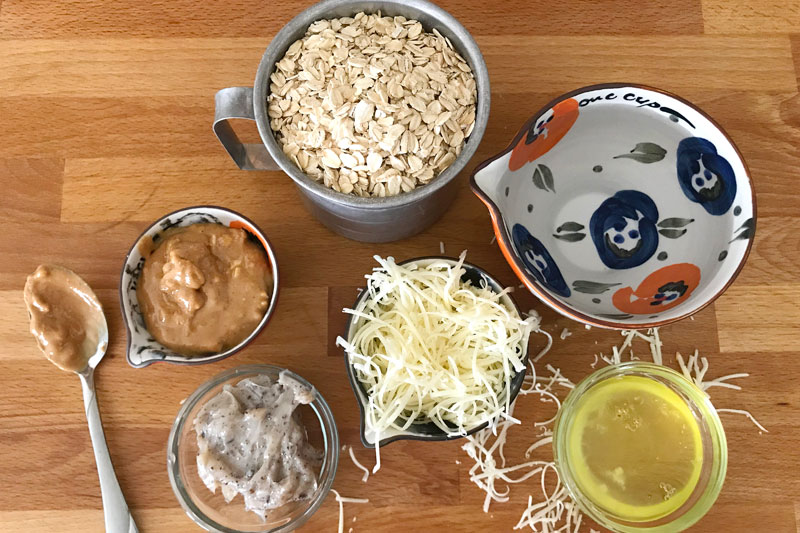
I wanted to incorporate some of Brando’s favorite things: bacon, cheese, and peanut butter. We don’t have a lot of flour left, so I did without. I made oats into oatmeal. And I used egg whites to bind it all together.
Brando ate his cookies while we watched the tiger show. Are you watching it? I can’t decide if I’m glad that we did. I guess it’s given us something to think about besides the Coronavirus. ¯\_(ツ)_/¯
(Singing and clapping) “THIS IS YOUR BIRTHDAY SONG. IT ISN’T VERY LONG.” Happy birthday Brando. We love you a lot!!
Peanut Butter Bacon and Cheddar Dog Cookies
Yield: 40 small cookies
Ingredients
2 cups rolled oats
2 cups water
1/4 cup crunchy peanut butter
3-4 tablespoons egg whites
2 1/2 tablespoons bacon grease (or olive oil)
1/3 cup grated cheddar cheese
Directions
Pre-heat the oven to 300°F with an oven rack in the middle position.
Cook the oats and the water in a medium-sized saucepan until the oats have softened, about 10 minutes.
In a medium-sized bowl, whisk together the peanut butter, egg whites, and bacon grease. Then add the cheese. Fold in the cooked oats and mix until combined.
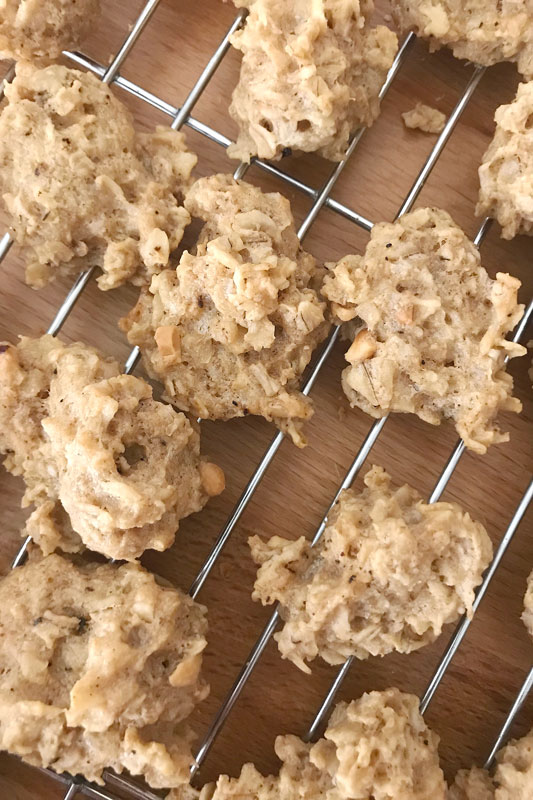
Using a spoon, drop the dough onto un-greased baking sheets, about 1 1/2 tablespoons per cookie. Leave a bit of space between cookies, but they don’t need too much. Bake until the cookies are set and a bit browned, about 35-45 minutes, rotating the pans every 15 minutes. Cool for 5-10 minutes on the baking sheet, then transfer to a cooling rack to cool completely, about an hour.
Today didn’t go as I’d planned. I had some work that I was supposed to do. It didn’t happen. Not by choice. But then, I got to choose to not be frustrated. Do you hate the expression “It is what it is”? I know some people do. But, sometimes, it’s really the only thing that works. I could be mad that things didn’t go as I’d planned. I’d organized my week accordingly. Instead, I got to have a low key day. I watered the garden and gave the dog a long drink from the hose without hurry. I listened to the sound of food cooking in the skillet. I had a glass of wine at 4pm while I washed the dishes. It was a good day.
I had intended to make these enchiladas for dinner tomorrow. But, they looked too good to wait. I have our meals planned for the rest of the month. For tomorrow, now I have no idea. It might be tater tots dipped in chipotle mayo. Or sushi from the grocery store (our chef is amazing). Maybe cereal. I’ll worry about that tomorrow. For now, I’m here, and this is exactly what I’m supposed to be doing.
I always want to hurry into the future, only to get there and want to move on to the next thing. Ever since I was a kid… I don’t know that I’ve enjoyed as much of the present as I could have. Until this summer. For the first time, maybe ever, I’ve been here, in the now.
I don’t like summer. I hate hate hate being hot. Sweaty is for workouts, but not for regular living. Humidity could leave forever and I’d be glad. I’m sure it’s great for my skin. Whatev. I don’t like that so many tourists come to here. I mean, I get it, it’s important for the economy blah blah blah… Many of them are quite lovely yada yada yada. But, it’s busy, it’s loud, it’s claustrophobic. I like quiet and cold. I like the hibernating times more than the big, busy, social events. I like a small, but meaningful life… And, I don’t like summer.
Everyone likes summer. Especially around here. But, every once in a while I’ll come across a kindred spirit who can’t wait for the chill of autumn.
This year, I’ve embraced it. Summer and I became friends-ish. It could be that it’s easier now that we live somewhere with seasons. I know it’s not going to be hot forever. So I can enjoy it while it lasts. There’s something to be said for weekends spent in the garden, glass of rosé in hand, nose in a book. For watering the garden, and then pointing the hose heavenward and gasping as the freezing water hits my skin. I found joy in summer this year. I’m glad it’s feeling more like fall, but summer was more than ok.
When we lived in Burbank, I missed things like soup in the summer. Because summer lasted for like ten months. This year, I didn’t think about it at all. I was too busy eating green beans in the garden. This summer we discovered pizza on the grill. We don’t want to turn the oven on, but who can go three months without pizza?! Solved that one. But, then I made an amazing potato chowder the other day. And I was ruined. Summer can be over. I’ve made soup again.
Today, I wanted enchiladas. I had a jar of salsa verde in the pantry that needed to not be in there anymore and a frozen plomp of ground turkey taking up the bacon’s space in the freezer. Seemed like it was time. The oven, alas, was ready to turn back on.
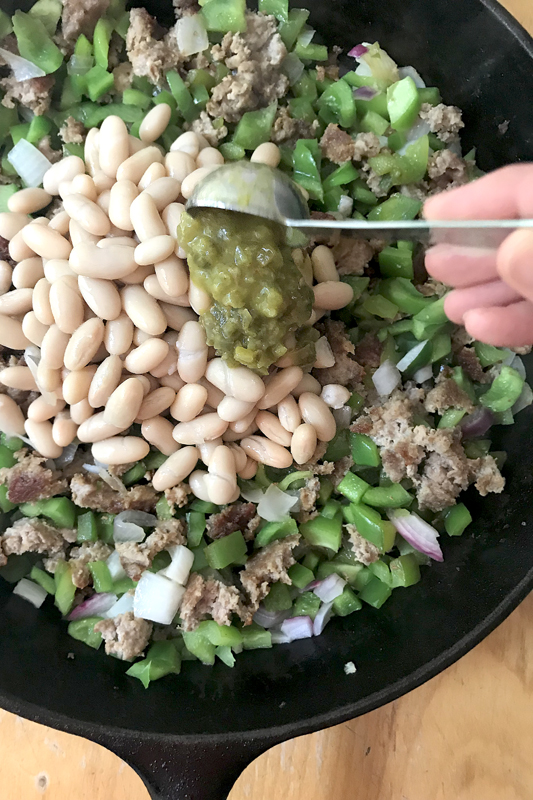
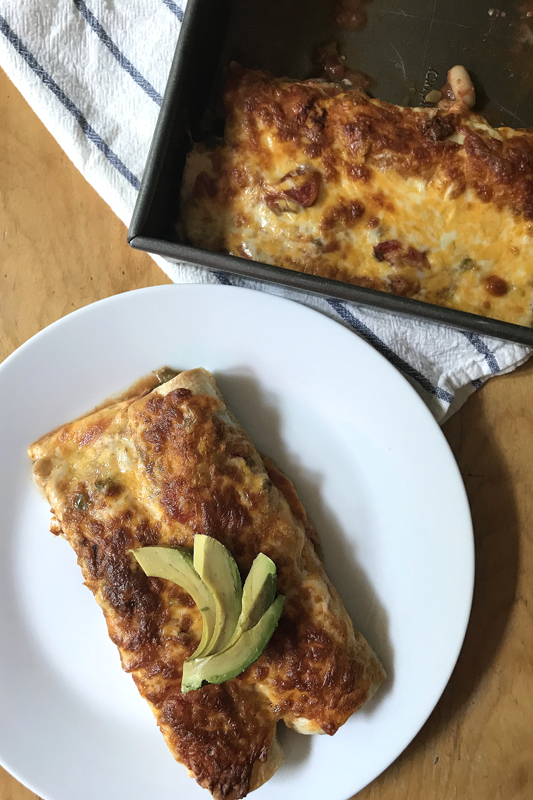
Enchiladas start with humble ingredients: onion, bell pepper that has seen better days, white beans, and salsa verde from Arcadia’s Kitchen.
The salsa is delicious. And sooooo spicy. I used only two tablespoons in the filling and I could feel the heat. I was originally going to make just salsa verde enchiladas. But, I wasn’t sure if our faces would burn off if I added enough to make a sauce. So I added some tomato sauce to balance it out. It was perfect. Spicy, but not too.
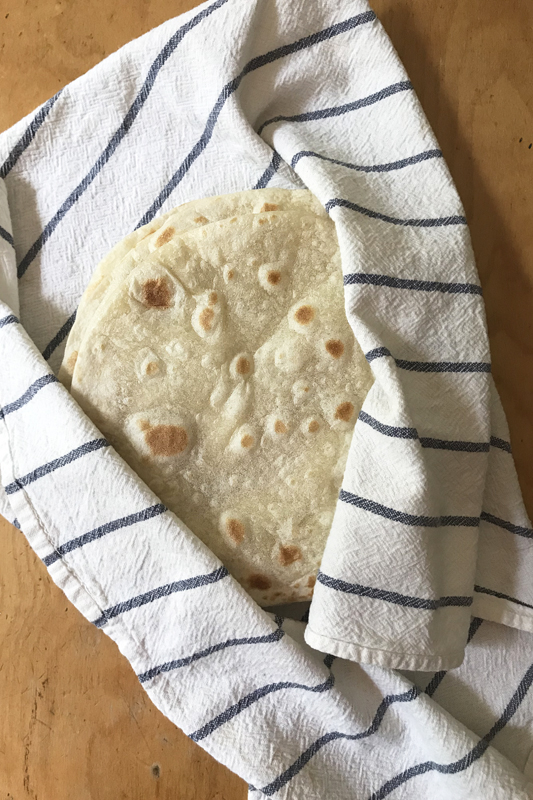
We’ve discovered a company called TortillaLand that makes fresh tortillas. They contain five ingredients and are ready to cook. We haven’t bought regular tortillas since we found these.
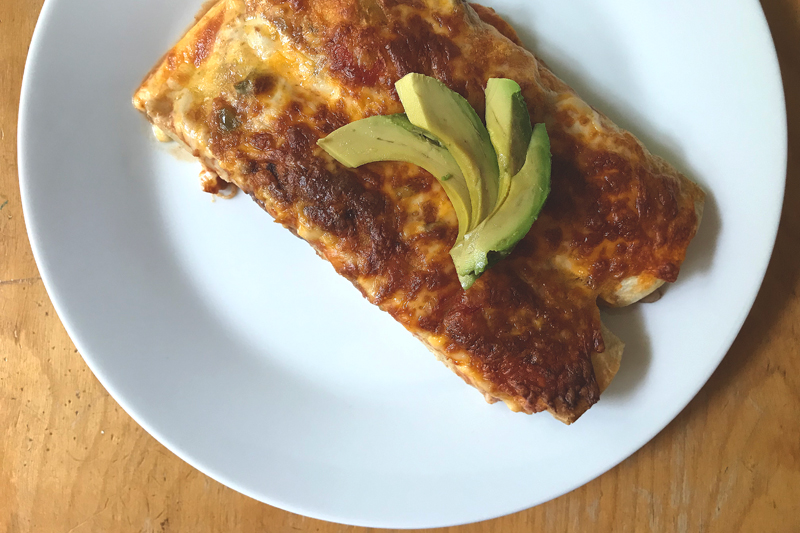
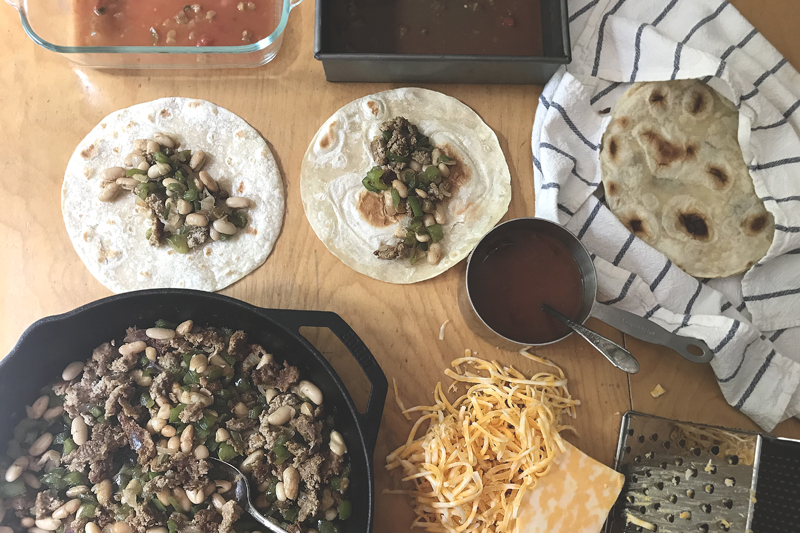
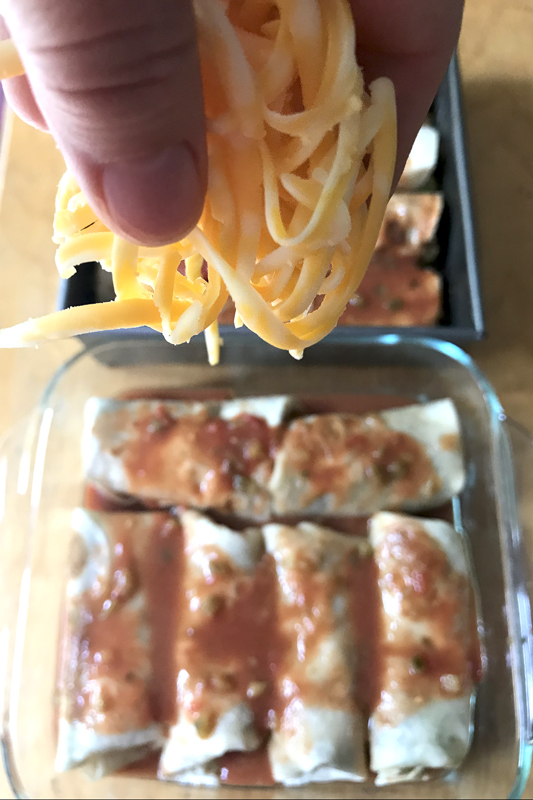
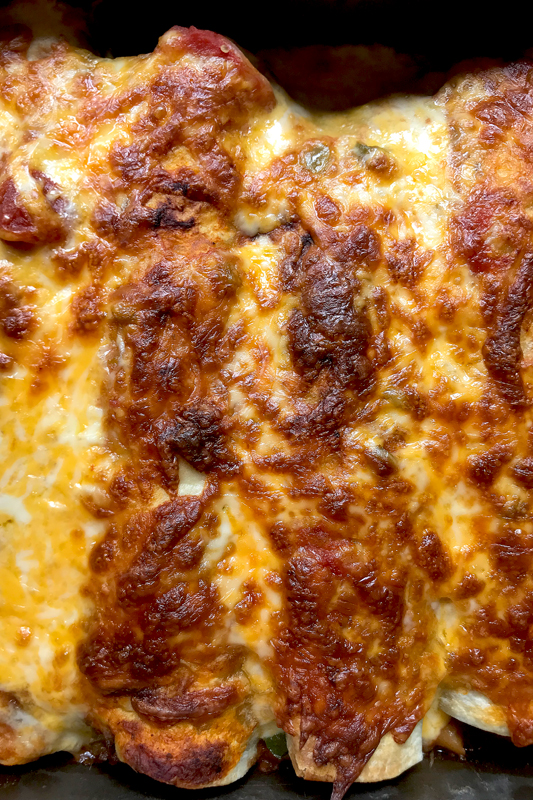
Enchilada assembly isn’t difficult. Scoop some filling on a tortilla. Fold in the ends and then roll it up. Or don’t fold in the ends and just roll it. I did a pan of each. I poured some of the tomato-salsa verde mixture into the bottom of the pan, added the rolled enchiladas, then poured the rest of the sauce overtop.
Once I topped everything with cheese, they went into the oven. It’s just the cheese that needs to melt and the sauce that needs to bubble. The filling is already hot, so twenty minutes was perfect.
I had two problems with this dinner. I finished cooking at like 3:30pm, because I wanted to photograph with the natural light. So I took a bite, cooled them down, then reheated them for later dinner. Second problem, I’d eaten all the sour cream a few days ago. I’d def add some to this. It would help with the heat from the salsa verde, and it just tastes good. Tim thinks I use a weird amount of sour cream on tacos and enchiladas. But, I like it. So I use what I use, and sometimes then I don’t have enough for my spontaneous blog post. But, it is what it is. Right?
Happy Eating!
Red and Green Enchiladas
Serves 4
Ingredients
2 T oil
1 pound ground meat (I used turkey)
salt
2 1/2 C bell peppers (about 2), chopped
1 C onion, chopped
1-15 oz. can white beans
2 T salsa verde
8 fresh tortillas
1/4 C salsa verde
1 C tomato sauce
1/2 t cumin
1/2 t salt
stock or water
1-2 C grated colby jack cheese
toppings: avocado and sour cream
Directions
Pre-heat the oven to 350°F. Heat a skillet over medium heat. Add the oil. Add the meat and cook until it’s cooked through, about 5-7 minutes. Add the salt, bell pepper, and onion. Cook until the veggies are tender, about 5-7 minutes. Add the beans and 2 tablespoons of salsa verde. Cook until the beans are hot, about 2-3 minutes more.
While the filling is cooking, cook the tortillas in a separate skillet, keeping them warm once they’re done in a clean tea towel. In a 2 cup measuring cup, stir together 1/4 cup salsa verde, 1 cup tomato sauce, 1/2 teaspoon cumin, and 1/2 teaspoon salt. Then fill with stock or water up to the 2 cup line.
Taste the filling and add more salt if needed. Pour a few scoops of the salsa verde-tomato mixture into the bottom of a 9×13 (or around that size) pan. Divide the filling between 8 tortillas. Roll them up and place them into the pan. Top with the remaining filling and sprinkle with cheese.* Bake until sauce is hot and cheese is bubbly and browned, about 20 minutes. Let them cool and set for a few minutes, then serve topped with avocado and sour cream.
*(The enchiladas can be cooled, covered, and frozen at this point. I prefer to use a metal pan if freezing. It can go right into the oven from the freezer – take plastic wrap off and cover the pan with tinfoil. From frozen will obviously take longer to bake than the original. Give it an hour-ish and check it on your instant read thermometer to make sure it’s come to a safe temp. If not, bake it some more.)
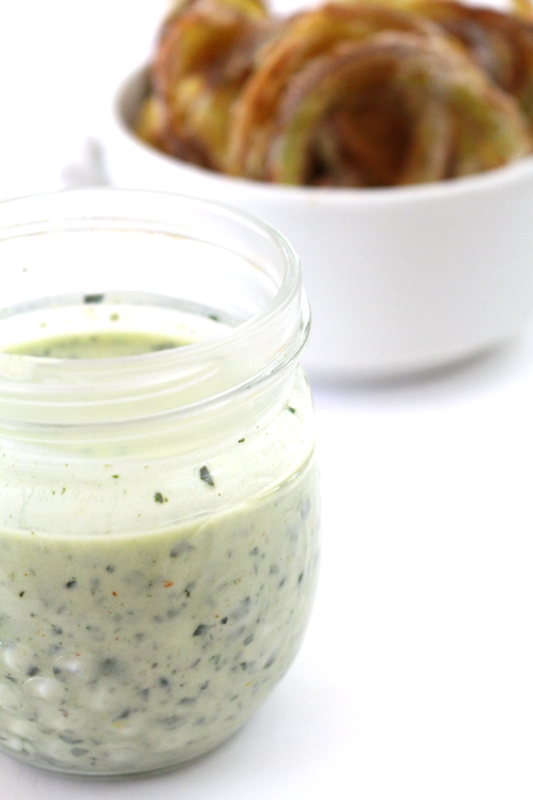
I’m not a sweets person. I don’t often crave chocolate, I can go without candy, and if given the option, I’d take potato chips over a donut. I do really love ice cream, but I think that’s because Tim is so good at making it. But, even then, I might take onion rings over ice cream. Because I really really love crunchy deep fried foods. French fries, tempura, onion rings… They’re so tasty.
We don’t need to talk about the dangers of fried foods. I’m well aware. You’re well aware. We’ve got that covered. It’s a treat, not an everyday thing.
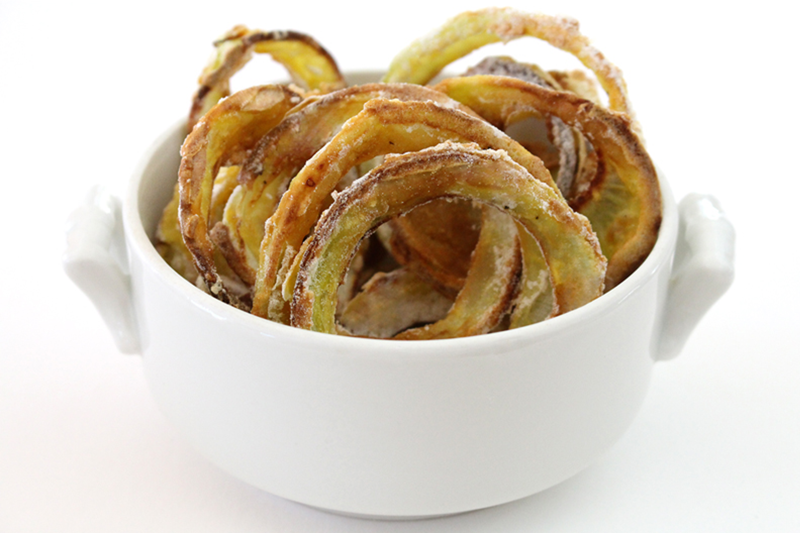
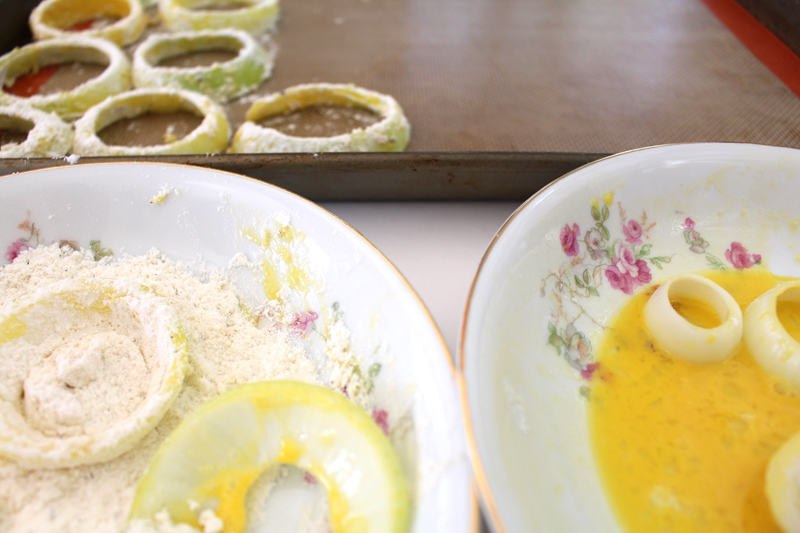
When it comes to guilty pleasures, these onion rings seem like they’d fit in. But, they’re actually pretty innocent. They’re dipped in eggs (you could use coconut or almond milk if you want to keep them vegan), then coated in flour. I double dipped some (you know, egg, flour, egg, flour). I’m not sure which turned out better. They all tasted great.
All.
I ate them all.
The first secret to this delicious treat is baking them at a high temperature for a short amount of time. We’re talking 425°F for 18-20 minutes total. The second secret is the dip. It’s made up of things like yogurt or silken tofu or mayo or avocado (or ALL!) blended up with some blanched greens, herbs, garlic, and olive oil. I fully submerged each onion ring in the dip before devouring.
If you wanted to make a huge platter and call this dinner, you might also do some green beans, par-cooked potatoes or root veggies (and in a few months summer squash), and add the beans to the dip. Serve it with a big salad and some other fun finger foods (like nachos with refried bean dip) and you’ve got a winner. In fact you’ll most likely find us eating this for dinner sometime this weekend.
Blanch greens in boiling water for 1 minute. Transfer to an ice bath to cool. (Or, use leftover sautéed greens.)
Whisk yogurt through cayenne. Add herbs and blanched or leftover greens. Blend. Taste for seasoning. Refrigerate until ready to serve.
Mix flour with salt and pepper. Taste (for real). Separate onion into rings. Dip veggies in egg/milk then flour. Repeat if desired. Tap off excess flour. Place on a parchment or Silpat lined baking sheet. Do not let the veggies touch. Bake for about 10 minutes, flip, bake about 8-10 minutes more (or until crispy and browned).
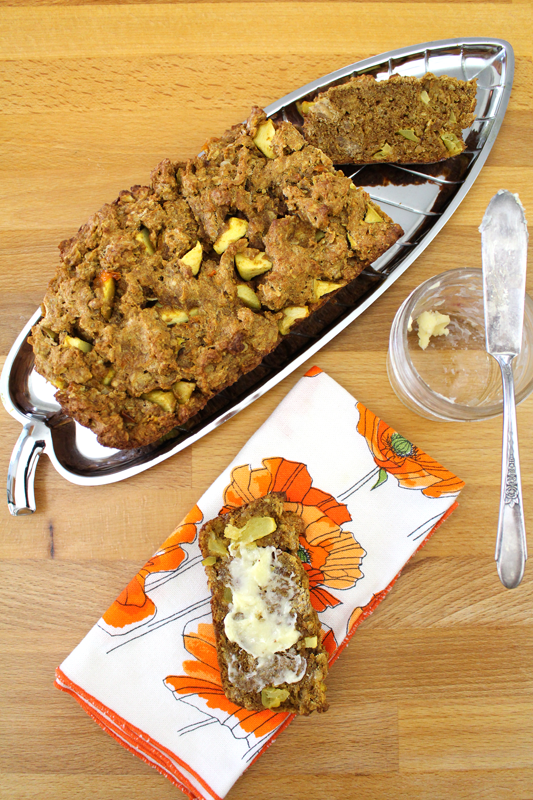
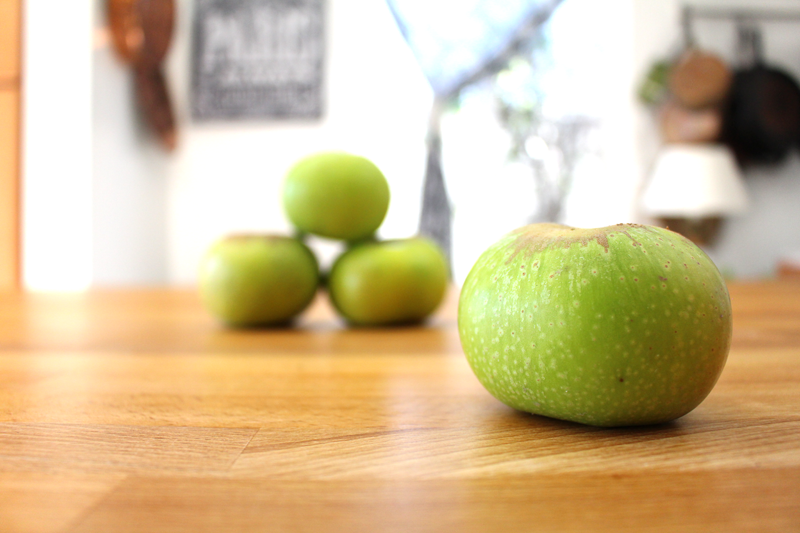
I don’t know if the old adage, “An apple a day keeps the doctor away” is true. But, apples have always been a favorite of mine, so if I can eat an apple every day that makes me happy. My favorite way to enjoy them is raw. Sliced, whole, chopped… it doesn’t matter. Since we go through apples pretty quickly, they don’t often get cooked. We either don’t feel the need, or there just aren’t any left. But, sometimes, I need to bake bread, and the bread needs to be studded with apples.
For this recipe I used Pippins. But, in my kitchen, I’d use whatever I have on hand. I’m sure the experts would disagree. There are some apples that are better for baking (Granny Smiths), and some that are best eaten out of hand (Fujis and Galas). But, as I’ve mentioned before, I’m a frugal cook, so I prefer to make do and adapt to what I’ve got, if at all possible.
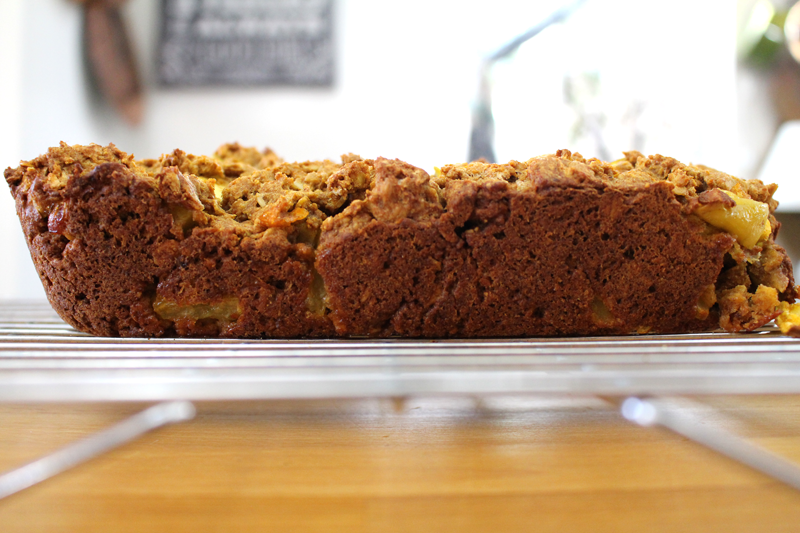
This bread is a dense, muffin-like bread. You could call it an Apple Snack Cake if that’s more appealing to someone that you’re trying to convince to try it. You could bake it in muffin tins if that’s easier or more manageable.
When persimmons are no longer in season you could add a super ripe (or frozen then thawed) banana. When apples are no longer in season, you could sub pears, Asian pears, persimmons, figs, cherries, or stone fruit. If you wanted to add some grated veggies, carrots, parsnips, or summer squash could be easily hidden (ok, maybe not the carrots, but you wouldn’t taste them too much). You could add nuts and seeds, raisins, dried cherries or cranberries (why don’t we call raisins “dried grapes”?), or maybe even chocolate chips.
What I’m trying to say is, it’s pretty versatile.
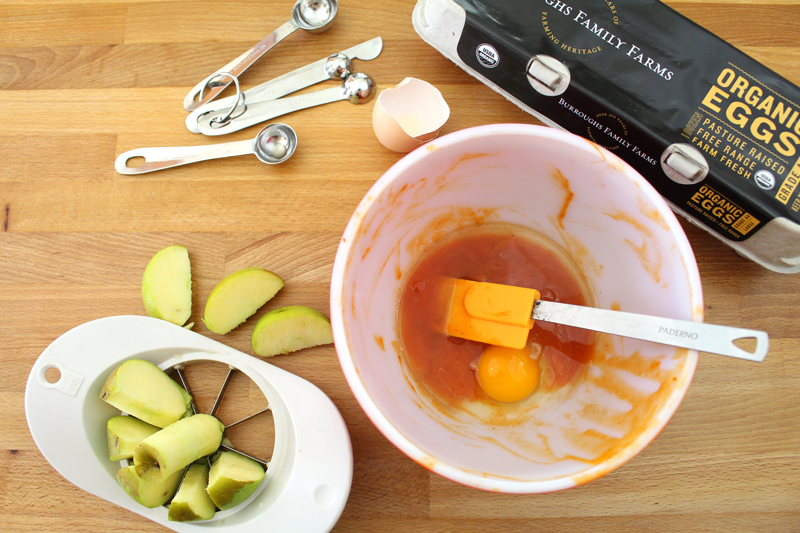
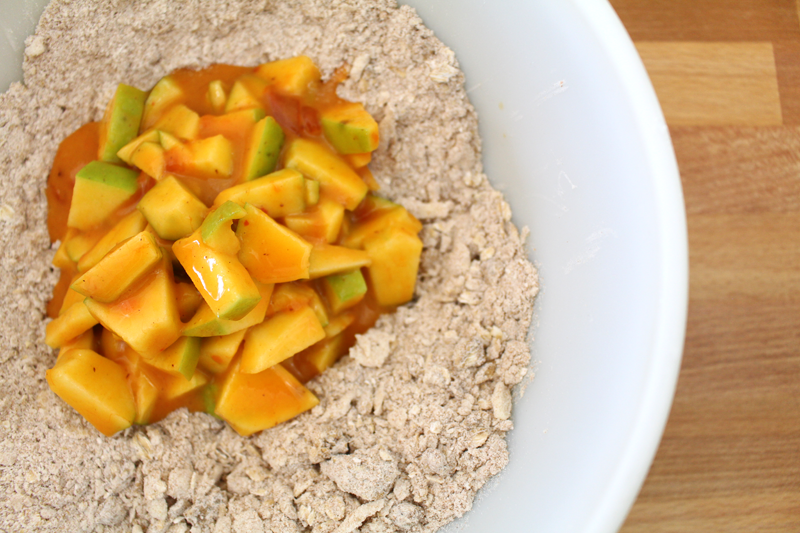
Like many baked goods, the dry ingredients are combined first, then set aside. The wet ingredients come together next. Everyone jumps into the bowl, then into a greased loaf pan. Easy. Quick. Snack attack time is near.
I would suggest letting the bread cool completely before slicing. If it’s still warm it may be a little too crumbly (although still yummy).
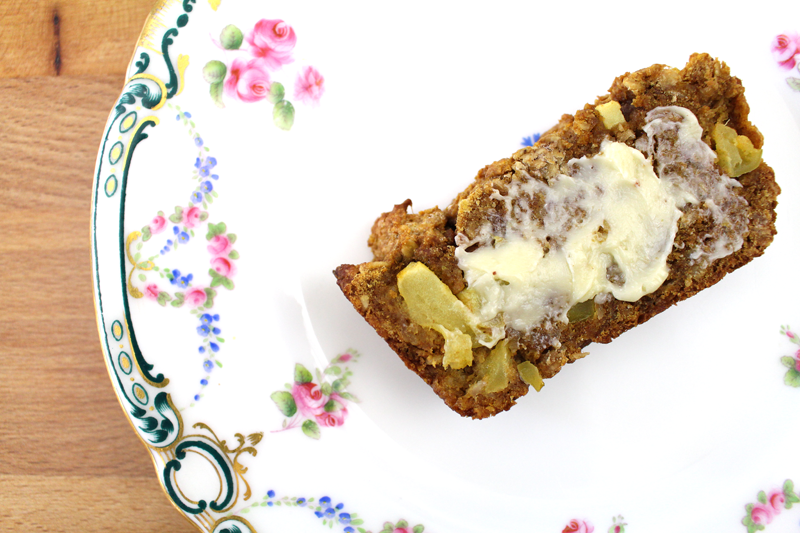
I opted for simple, and topped it with some homemade butter. But, you could also top it with caramel and serve it for dessert. You might spread some cream cheese on a slice, or top the whole thing with cream cheese frosting. Or, as an ode to one of my favorite snacks, eat it for breakfast topped with some crunchy peanut butter.
Peanut butter and apples. Apples and cheese. Apples and almonds… apples and almost anything.
1/2 C cold unsalted butter (could sub cold coconut oil), cut into small chunks
1 C oats (can also use granola)
1 1/4 C apples (or chopped pears, Asian pears, persimmons, figs, cherries, stone fruit, or grated carrots, parsnips, or summer squash), chopped
1/2 C persimmon pulp
1 egg
1 t apple cider vinegar
1 t vanilla extract
1 T maple syrup
optional, for topping: seeds or chopped nuts
Instructions
Pre-heat the oven to 350F.
Whisk the flour through ginger. Mix in butter or oil with a pastry blender or hands (until it resembles a coarse meal or pea sized chunks). Stir in oats and fruit. Set in the freezer while you assemble wet ingredients.
In a separate bowl, whisk together the persimmon pulp through maple syrup. Add dry ingredients and stir to combine.
Scoop into a greased loaf pan (or into greased muffin tins). Top with nuts and seeds if using. Bake for 35-40 minutes (20-22 for muffins), or until a toothpick inserted in the center comes out clean.
Remove from the oven and cool in the pan for 5 minutes. Remove from the pan and cool completely on a cooling rack.
I’m a sucker for pie crust. But, confession, I’m not actually crazy about pie itself. I just love a good crust. When I make Chicken or Veggie Pot Pie, it’s my favorite part. I make it in big batches and keep it in the freezer for days when I’m in the mood to bake.
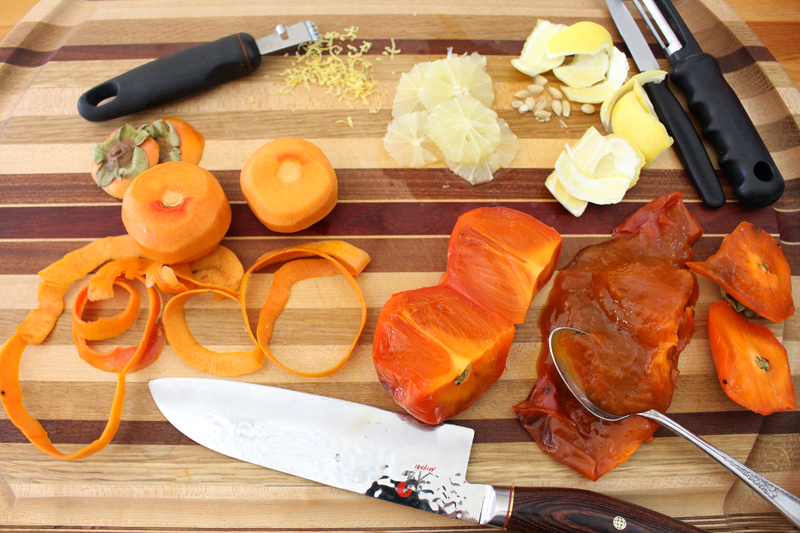
Today, it was time for a tart. I’ve been waiting and waiting for my hachiya persimmons to ripen. Finally, they’re ready. If you’ve ever wondered if you could use a hachiya persimmon before it’s ripe, wonder no more. Just don’t do it. It will make your mouth pucker and get that gross dry feeling that you might not understand if you’ve never experienced it. Trust me, you’re better off heeding my warning. Wait. Until. They’re. Ripe.
You can hasten the ripening process by placing them next to, or in a paper bag with, apples and bananas, which give off ethylene gas. You can also put them in the freezer. Or, just leave them on the counter for a few weeks like I did. You’ll know they’re ready when they feel like a water balloon and you think your fingers are going to break through the skin without even squeezing.
Ready. Ready. Ready.
While this recipe makes enough filling for two tarts, I saved half for another recipe. But, maybe you want to make two because this would be the perfect dessert for Thanksgiving dinner (you’re welcome), or for breakfast the next day (double welcome).
It would be a great idea to switch out the ingredients depending on what you have on hand. No persimmons? No problem. Try apple sauce and apple slices. No lemons (or maybe they’re too tart for your taste)? Use oranges. Want to go vegan? Skip the egg wash or try coconut milk. Oh, and use a butter-free crust. Gluten-free? There are lots of GF options these days, so find one at your local market, or visit the Gluten-Free Girl’s site to find out how to make your own.
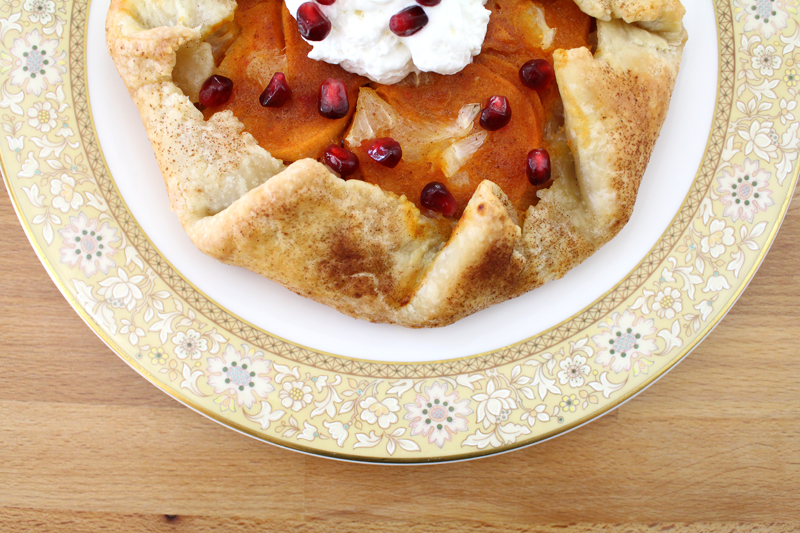
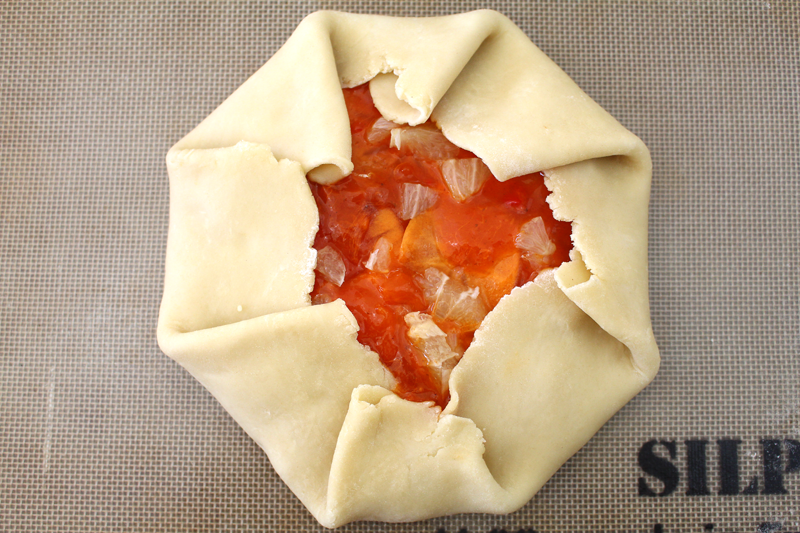
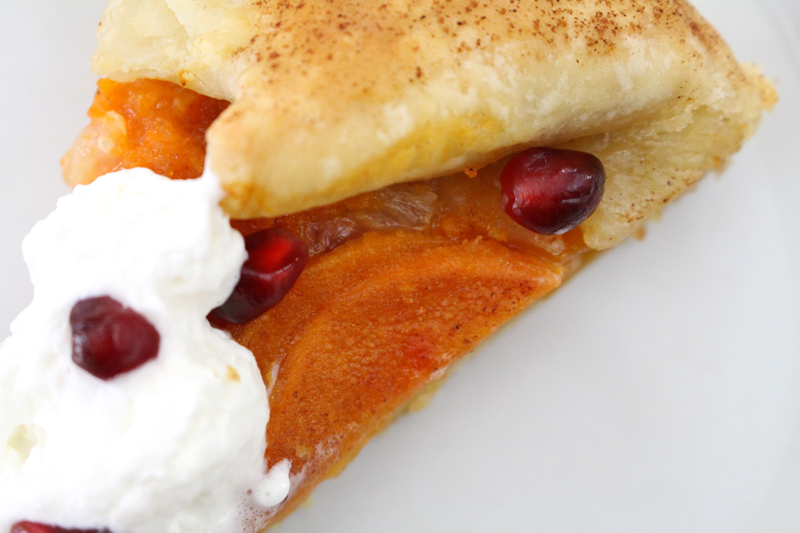
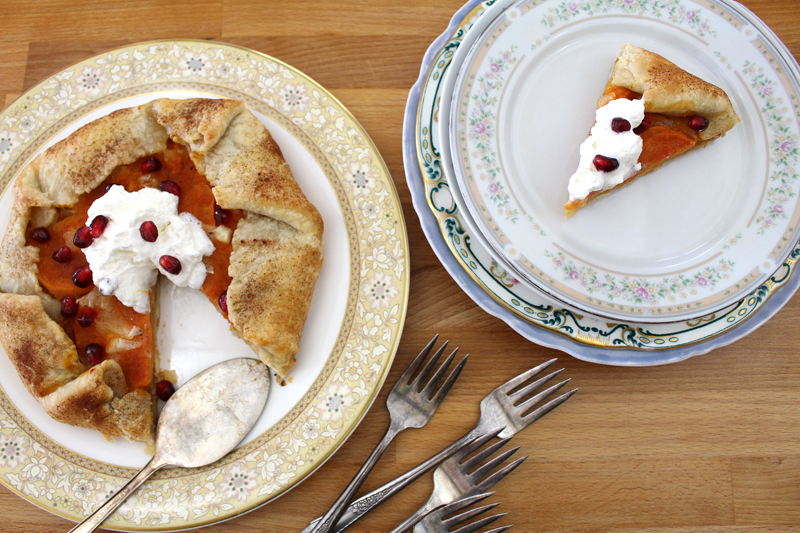
I like the rustic look of this tart, otherwise known as a galette. You get to see the pretty filling with the edges folded up all around. Plus, after it cools (yes, let it cool completely before eating), it’s easy to slice up and eat it out of hand. No plates required. That’s winning to me (because the dishes! always with doing the dishes!).
I topped the tart with a dollop of maple syrup sweetened whipped cream and some pomegranate seeds. The seeds add a juicy burst of flavor that’s the perfect compliment to the flaky crust, and deep, sweet filling.
2 C persimmon pulp (super ripe) (about 2 hachiya persimmons)
1 T orange juice
1 T maple syrup
1/8 t cinnamon
pinch nutmeg
pinch salt
2 pie crusts
4 fuyu persimmons (could also use apples, pears, figs, cherries, berries, grapes, or stone fruit), peeled and sliced
2 lemon or small orange, peeled and chopped
egg white, (optional), for brushing
cinnamon
whipped cream (optional), for topping
pomegranate seeds, for topping
Instructions
Pre-heat the oven to 375F.
Combine lemon/orange zest through salt. Taste for sweetness.
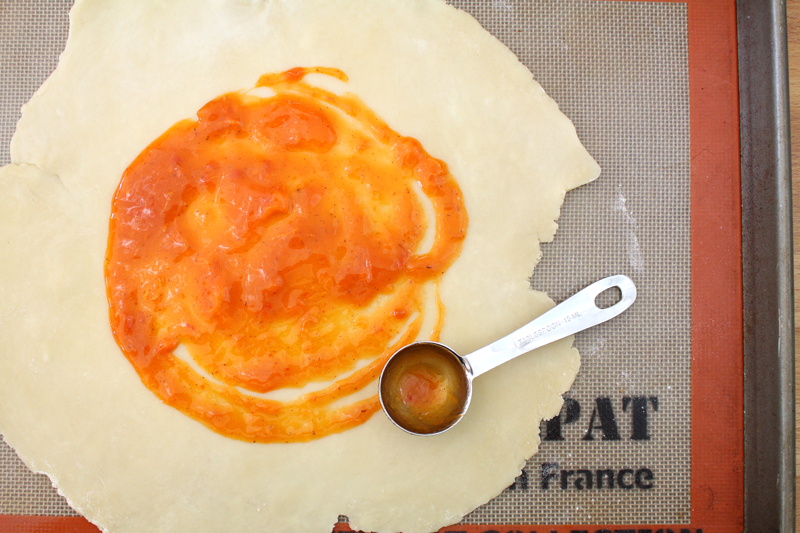
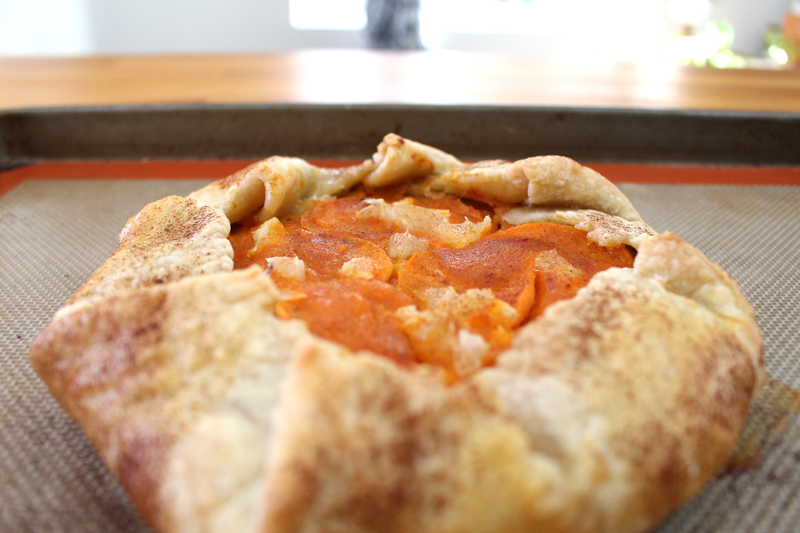
Roll out pie crusts in a circle on a lightly floured surface. Place on a parchment or Silpat lined baking sheet (use one with edges in case the filling runs). Spread about 3 T at a time of the hachiya mixture in the center of each crust. Top with some fuyu slices and lemon/orange chunks. Repeat until all of the hachiya mixture and slices are gone. Gently fold the edges of the crust up and around the filling, leaving the center open. Brush crust with egg and sprinkle everything with cinnamon. Bake for 25-30 minutes, or until crust is golden and flaky and filling is hot and bubbly.
Remove from the oven and cool to room temperature.
Serve topped with whipped cream and pomegranate seeds.