De Ma Cuisine

Vegetables Archive

Friday

7

February 2014

1

COMMENTS

Heart Healthy Chard Wraps with Quinoa and Walnuts

Written by , Posted in Dinner, Fruit, Gluten Free, Grains, Lunch, Main Dishes, Quick and Easy, Quinoa, Sides, Vegan, Vegetables, Vegetarian

ChardWraps-1

I’ve read that leafy greens are good for you. Some of you might be sighing and wishing I was wrong. But, it’s just true. So let’s all cheer for greens!

ChardWraps-7

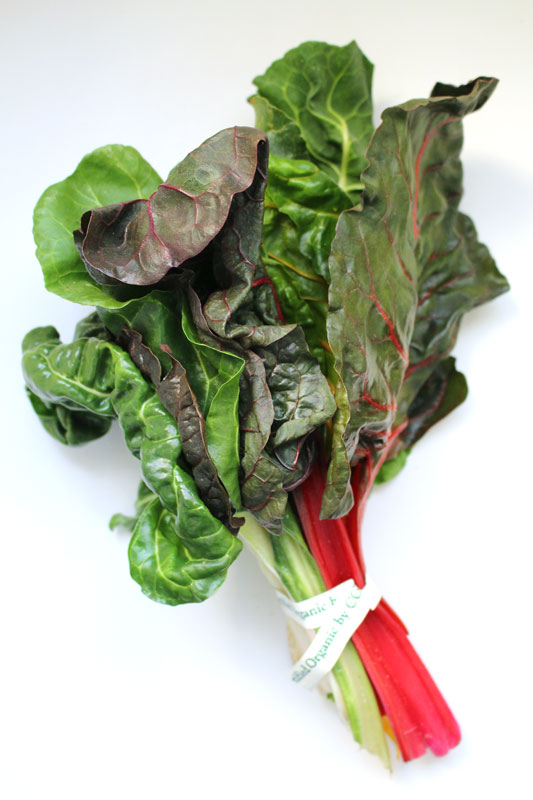
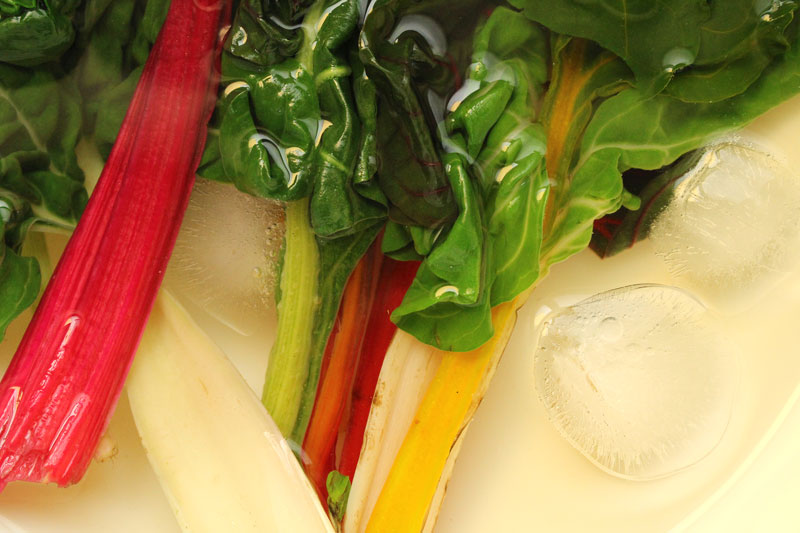
Specifically, let’s go crazy for chard.

Want to know why it’s great for you?

One cup of chard has: 1.8 mg vitamin C (antioxidant, protects LDL cholesterol)‚ 18 mg calcium (strong bones), 30 mg magnesium (conducts electrical impulses of muscles and nerves), 136 mg potassium (“regulates water balance in the body” and “stimulates nerve impulses for the heart”) (1)‚ …to name just a few.

What it doesn’t have: a lot of fat and cholesterol (0.08 g fat, and 0 mg cholesterol ). (1)

Chard and other fruits and veggies contain antioxidants, which, along with other compounds, “prevent plaque from building up on the arterial walls, reduce blood pressure, and strengthen heart muscles.”‚ (1)‚ 

Let them eat chard.

ChardWraps-4

Let’s talk about quinoa.

One cup of quinoa has: 22 g protein, 10 g fiber, 83 mcg folic acid, 4.98 mg niacin (vitamin B3) (“important for blood circulation and reducing cholesterol levels in the blood”) (1), 102 mg calcium, 357 mg magnesium, 697 mg phosphorus, and 1258 mg potassium. (1)

Know what it doesn’t have a lot of? Fat and cholesterol (9.9 g fat – 1 g saturated – the bad kind, 2.6 unsaturated – the good kind, 4 g monounsaturated – the good kind, 0 g cholesterol) (1).

Hello heart health.

ChardWraps-5

Walnuts, walnuts, walnuts.

One cup has: 14.8 g protein, 6.7 g fiber, 98 mcg folic acid, 99 mg calcium, 380 mg phosphorus, 450 mg potassium, 47 g unsaturated fat, and 8.9 g monounsaturated fat. (1)

Know what they don’t have a lot of? Saturated fat (4.5 g) and cholesterol (0g). (1) 

Walnuts contain omega-3 fats, which “inhibit blood clotting, encourage activity of the parasympathetic nervous system, increase blood flow, protect against heart arrhythmia, dissolve clots, lower blood triglycerides, raise HDL cholesterol, and have anti-inflammatory properties.” Omega-3 = clearer arteries. (1)

Notice a trend?

ChardWraps-3

Why do these things matter? Why should you care?

Here’s why…

It’s simple, the heart is a necessary component for life. So let’s treat our hearts to wonderful fruits and veggies, good fats and lean proteins, and plenty of vitamins and minerals.

ChardWraps-2

Happy Eating!

Heart Healthy Chard Wraps with Quinoa and Walnuts
Recipe Type: Main Dishes, Side Dishes, Healthy, Quick and Easy, Greens, Dinners, Vegetarian, Vegan, Gluten-Free, Dairy-Free
Author: Rachel Oberg – De Ma Cuisine
Prep time:
Cook time:
Total time:
Serves: 4-6
These quick and easy wraps are full of nutrients and heart healthy goodness.
Ingredients
  • 1 T olive oil
  • 3-4 small or 2 large leeks, washed well and chopped
  • 1 spring onion, chopped
  • 1 C quinoa
  • 1 lemon, zested
  • 1/4 C raisins, chopped
  • dash cayenne
  • to taste, salt
  • to taste, pepper
  • 2 C water
  • 1/2 C walnuts, chopped
  • 1 lemon, juiced
  • toothpicks
  • 6-8 large chard leaves (leave 1″-2″ of stem)
  • salt
  • water
Instructions
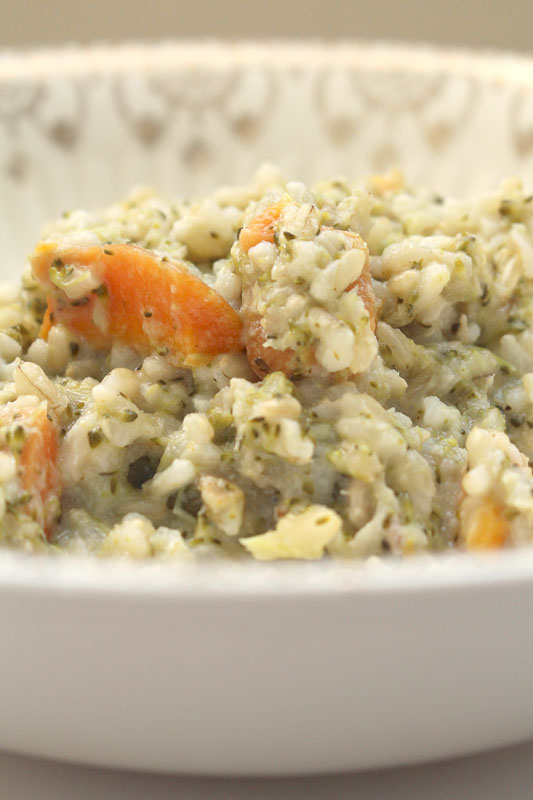
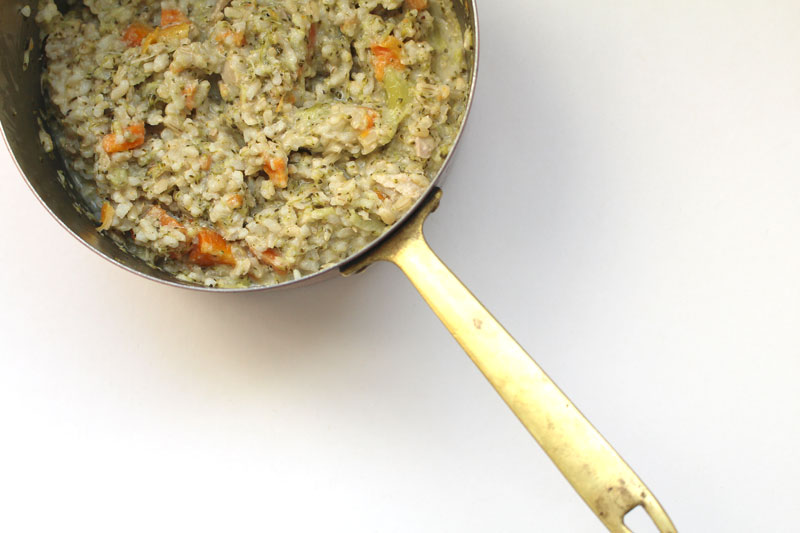
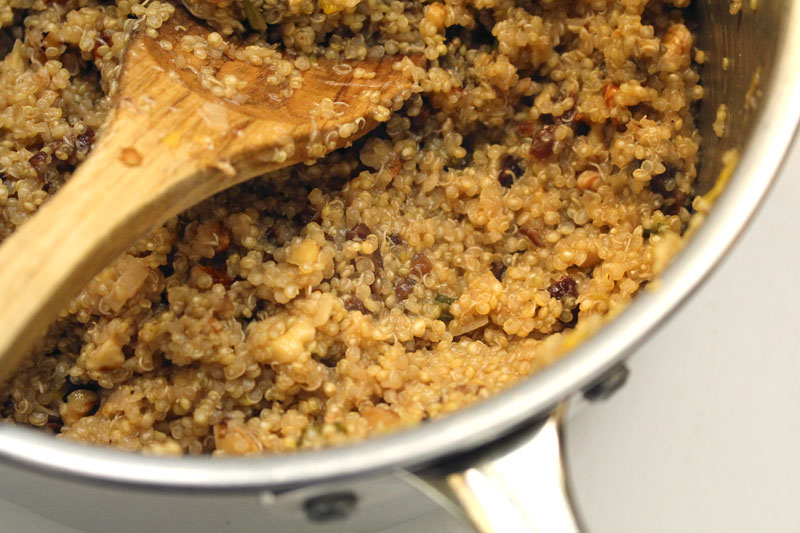
  1. Heat a medium saucepan and add oil. Add leek and onion. Cook over medium heat for 3-5 minutes.
  2. Add quinoa, lemon zest, raisins, cayenne, salt, and pepper. Cook for about 2 minutes.
  3. Add water, cover, and bring it to a boil. Uncover and cook for 10 minutes, or until quinoa is cooked.
  4. Stir in walnuts and lemon juice. Taste and adjust seasoning.
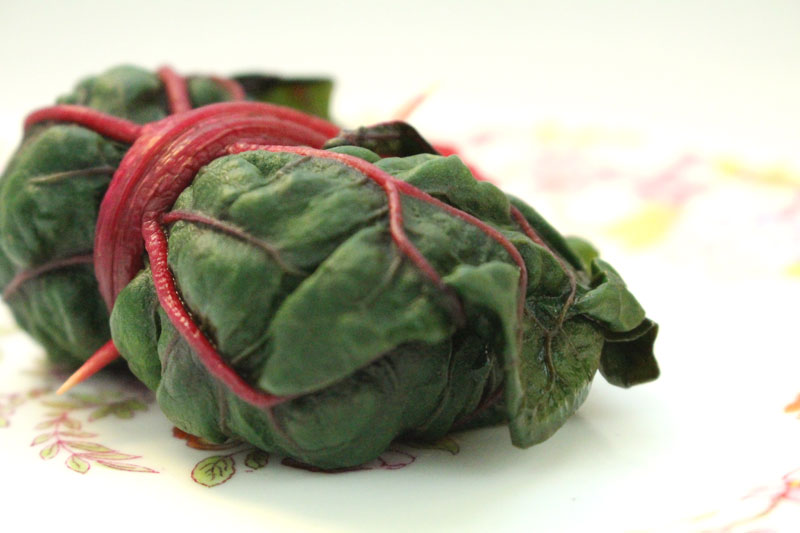
  5. Heat a large pot and add water and salt. When water is boiling add chard and cook for 1 minute. Transfer to a bowl of ice water to stop cooking. (Save boiled water to make vegetable stock.)
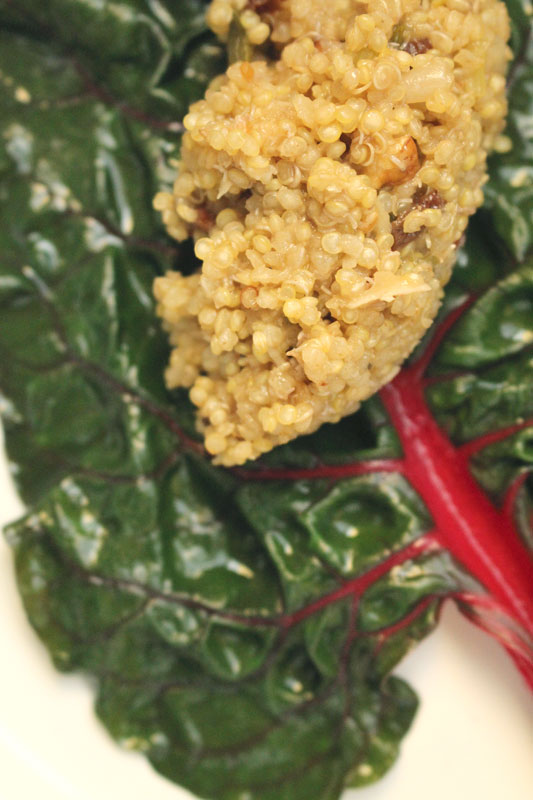
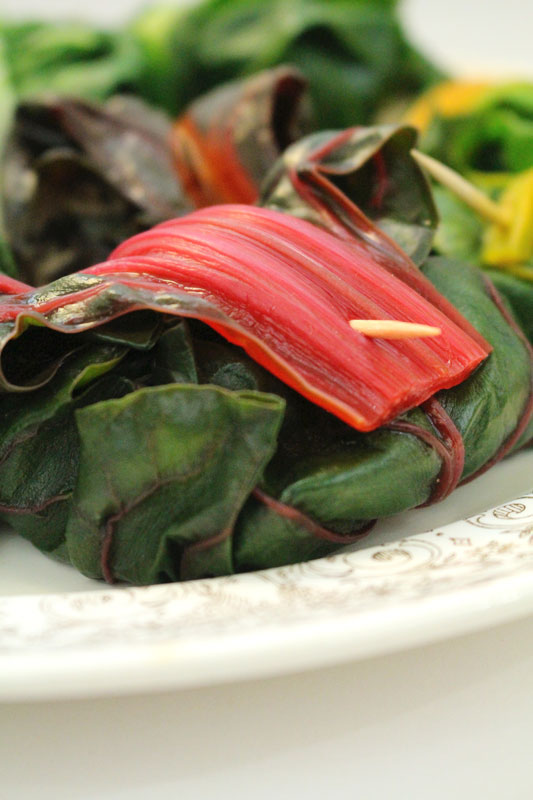
  6. Scoop some of the quinoa filling on to the center of the chard leaf. Wrap the sides inward, then wrap the top and bottom to overlap the sides. Secure the stem with a toothpick.
Notes
To re-heat add a bit of vegetable stock or water to the bottom of a pan. Add the wraps. Cover with foil and bake at 350F for about 45 minutes, or until the filling comes to 165F.

Note: I’m not a healthcare professional. I’ve done a little bit of looking around. These are just some thoughts. Ok? Cool? Cool.

(1) Nutrition Almanac, Mc Graw-Hill 2001, Fifth Edition, Lavon J. Dunne

Monday

27

January 2014

0

COMMENTS

Feel Better Soup

Written by , Posted in Dinner, Herbs, Kid-Friendly, Legumes, Lentils, Lunch, Main Dishes, Pasta, Quick and Easy, Soups, Vegetables, Vegetarian

Feel-Better-Soup-3It seems like every year around this time people get worn down by cold and flu season.

I don’t like that sickness has a season.

As the main cooker and food maker in our home, I try to help us to avoid sickness by keeping our diet full of nutrient rich foods (thanks to Abundant Harvest Organics that’s a simple enough task). I try to be proactive, to supply us with lots of fruits and veggies, whole grains, lean proteins… you know, the good stuff. But, we still sometimes get sick.

I got sick the week after we got back from Paris. The timing could have been much worse, so I didn’t complain too much. But, it’s still no fun (except for the laying around all day watching TV, that’s fun for about a day 😉 ).

Feel-Better-Soup-2

Feel-Better-Soup-1

I wanted to make Chicken Noodle Soup, but didn’t have any chicken or vegetable stock. I figured that rather than make stock and then discard the veggies, I’d make soup and eat the veggies. It was an attempt to force all sorts of nutrients into my body, while cleaning out the fridge. Success!!

Whatever veggies you’ve got on hand will work. At the time I had some onion, kohl rabi, collard greens, roasted garlic, spinach, radishes, and cauliflower that needed to be used up. You could also add broccoli, carrots, turnips, or cabbage.

I added lentils for some lean protein, and pasta just for fun. The pasta soaked up a lot of the broth, so be warned, this is a thiiiick soup. Feel free to add more liquid if you’d like. (If you’re making enough for leftovers, cook the pasta separately and add some to each bowl, but not to the pot of soup… unless you want “Feel Better Pasta”, which is also delicious.)

Feel-Better-Soup-4

I hope you’re feeling great and that this soup makes you feel even better. But, if you are feeling poor, I wish you restored health very soon.

Happy Eating!

Feel Better Soup
Recipe Type: Soup, Main Dish, Dinner, Vegetables, Vegetarian, Stove Top
Author: Rachel Oberg – De Ma Cuisine
Serves: 4
Ingredients
  • 1-2 T olive oil
  • 1 onion, chopped
  • 3 kohl rabi, peeled and chopped
  • 5 red radishes (or any other radish – about 1-2 C), chopped
  • 4 C cauliflower, chopped
  • to taste, salt
  • to taste, pepper
  • 1 t oregano, dried
  • 1 t parsley, dried
  • 1 t thyme, dried
  • 1 t sriracha (or your favorite hot sauce, or a pinch of cayenne)
  • 4-6 cloves roasted garlic (optional), mashed
  • 1 t dijon mustard
  • 1-2 8 oz. can tomato sauce
  • 1/2 C lentils (cooked)
  • 8 C water or vegetable stock
  • 1/2 C uncooked orzo pasta
  • 5 C collard greens, chopped
  • 2 C spinach, chopped
  • 1 T lemon juice
  • 1 t apple cider vinegar
Instructions
  1. Heat soup pot, add oil, when hot add onion through pepper. Cook for about 15 minutes over medium heat, stirring occasionally.
  2. Add oregano through water/stock, bring to a boil. Cook until all vegetables are tender, then add pasta.
  3. When pasta is almost done, add greens.
  4. When pasta is done and greens are wilted, add lemon and vinegar.
  5. Taste and adjust seasoning if needed.
  6. Serve and feel better soon.
3.2.1269


Friday

24

January 2014

0

COMMENTS

How To Cook: Broccoli

Written by , Posted in Dinner, Gluten Free, Roasting, Storage/Prep, Thoughts, Vegetables

BoiledSteamedBroccoli-3Let’s talk about three ways to cook broccoli: steaming, boiling, and roasting.

I definitely have a favorite. Do you?

I tasted all three after I’d cooked them and wasn’t surprised that roasted was my preference. Also wasn’t bewildered that steamed was second. And, it was no shock to me that boiling was my least. That’s not to say that I won’t eat broccoli all three ways. I have and will probably do so again. But, I think that the taste and ease of preparation, hands down, goes to roasting.

Let’s begin.

Wash broccoli, then cut off a bit of the stem, up about an inch (save discarded stem to make vegetable stock).

BoiledSteamedBroccoli-10

Make a second cut where the florets start to branch out. Cut away the tough outside edges of that piece of stem (saving for veggie stock) – you can eat the inside just like you’ll eat the rest of the broccoli.

BoiledSteamedBroccoli-7

If you’re roasting, now’s the time to toss the broccoli with some olive oil, salt, pepper, and any other seasonings (like the thyme I used this week). Pour them out onto a baking sheet. I usually do about a head of broccoli per person, because we reeeally like roasted broccoli.

BoiledSteamedBroccoli-9

Roast the broccoli at 350F for 15-25 minutes. If you want just a hint of color, go for closer to 15. If you like ’em crunchier, stick to 20-25 minutes. (Times may vary slightly depending on your oven, so be sure to check at around 15 minutes.)

Scoop them off the tray and serve just like they are.

BoiledSteamedBroccoli-8

Roasted-Broccoli-1

If you’re boiling, plunk the broccoli in a pot that’s got some water in it.

BoiledSteamedBroccoli-2

My method for boiling is to put broccoli into cold water and bring it up to a boil. It will cook for just a few minutes (around 3-5). I like to salt the water for veggies like this, because, as with pasta, then you are able to flavor the food itself. You are not obligated to do this though.

BoiledSteamedBroccoli-5

If you’re steaming, place the broccoli in a steamer basket above a pot with about an inch or inch and a half of water in it (and if you’re doing like I did, steaming and boiling, use the boiling water that’s cooking the broccoli to steam the second floor broccoli).

BoiledSteamedBroccoli-1

I like to place veggies in the steamer and bring the water up to a boil. It makes for less steps and fewer minutes spent watching the pot to see if it’s boiled. Once the water has boiled it will take about 4-5 minutes until they’re tender. Less time if you want a bit of a crunch, more time if you want them really soft.

BoiledSteamedBroccoli-6

When you’re done steaming or boiling, throw any stems, leaves, peels, and any other veggie scraps, or older veggies that need to be used up into the pot, add a little more water, and an hour later you will have homemade veggie stock. (If you’ve salted your boiling water and use it for vegetable stock, just make a note on the label so you know when using it later on.)

From left to right we have steamed, roasted, and boiled broccoli. I love the difference in color that results from each cooking method.

Each technique is fairly simple to prepare. Roasting takes a bit longer, because you have to wait for the oven to pre-heat. But, like I said earlier, I enjoy the results best, so it’s worth the wait. However, even I could get tired of roasted broccoli, so I love to change it up.

BoiledSteamedBroccoli-4

Broccoli, be it roasted, boiled, or steamed, will go well with pasta (I really enjoy this pasta that gets topped with a fried egg), on sandwiches, topping a roasted potato, alongside polenta, risotto, or roasted chicken. It’s great topped with chopped almonds, red pepper flakes, and lemon juice. It is delicious in a stir-fry, alongside some fried rice. Or, never underestimate a big plate of broccoli, just on it’s own, with a drizzle of good olive oil, some shaved parmesan cheese, a sprinkle of salt, and some freshly ground pepper.

Can you guess what I’m having for dinner tonight?!

Happy Eating!

Monday

20

January 2014

10

COMMENTS

Roasted Broccoli Topped Baked Potatoes

Written by , Posted in Cheese, Dinner, Gluten Free, Herbs, Kid-Friendly, Lunch, Main Dishes, Potatoes, Roasting, Sides, Vegetables, Vegetarian

RoastedBroccoliBakedPotatoes-5Hello friends.

I’m glad you’re here.

I want to tell you about something that I love.

It’s not a person (although I love many). It’s not an object (although I seem to have quite a collection). It’s not bacon (although bacon will always be dear to my heart).

It’s roasted broccoli.

Maybe I’m weird. I don’t know. If I am, I’ll deal.

In any case, I really like broccoli, especially when it’s roasted.

I can be persuaded to like almost any veggie that’s roasted. In fact, I’m not sure I can think of one that I dislike.

Green beans? Delicious. Beets? Totally acceptable. Squash? Absolutely.

Roasting is the way to go.

Roasted-Broccoli-1

And let us not forget the humble potato when we consider vegetables that are suitable for roasting.

For this dish, I sliced the potatoes in half to try to shorten the baking time. It didn’t really help with that. Buuuut, look at that crispy goodness. Well worth the wait.

RoastedBroccoliBakedPotatoes-1

Thyme is a friend of broccoli and potato. So I mixed some with a bit of Greek yogurt to dollop on top. We will also have a nice sprinkling of parmesan cheese. This is like a jazzed up version of a baked potato. There’s nothing wrong with a baked potato. In fact, I could go for a chili, cheddar, chive, bacon, yogurt topped perfectly roasted potato right now. But, for today, let’s pretend we’re fancy. Ok?

RoastedBroccoliBakedPotatoes-2

RoastedBroccoliBakedPotatoes-4

One of the best things about my work is when the cooking and photographing lines up perfectly with meal time.

RoastedBroccoliBakedPotatoes-3

Happy Eating!

Roasted Broccoli Topped Baked Potatoes
Recipe Type: Roasting, Oven, Stove Top, Main Dishes, Dinner, Lunch, Sides, Kid-Friendly, Gluten-Free, Vegetables, Vegetarian, Dairy, Cheese, Broccoli, Yogurt, Easy Meals
Author: Rachel Oberg – De Ma Cuisine
Prep time:
Cook time:
Total time:
Serves: 4
A snazzy take on a baked potato.
Ingredients
  • 2 large red potatoes, halved lengthwise
  • 1/2 T olive oil
  • 5-6 C broccoli (about 3 heads), cut into bite sized pieces
  • 1 T olive oil
  • 3/4 T fresh thyme
  • to taste, salt
  • to taste, pepper
  • pinch cayenne
  • pinch fresh thyme
  • 1/2 C Greek yogurt (for topping)
  • parmesan cheese, grated (for topping)
Instructions
  1. Pre-heat oven to 350F.
  2. Drizzle cut side of potatoes with 1/2 T olive oil. Place oil side down on a baking sheet. Roast for about 50 minutes (or until potatoes are fork tender).
  3. Toss broccoli with remaining olive oil, 3/4 T thyme, salt, pepper, and cayenne. Place on a baking sheet and roast for about 20 minutes (keep potatoes in the oven to continue to roast – potatoes should take about 60-70 minutes total – if they’re done sooner just remove from the oven).
  4. Mix yogurt with a pinch of thyme and a sprinkle of salt.
  5. Top each potato half with parmesan cheese, broccoli, and a dollop of yogurt.


Friday

17

January 2014

1

COMMENTS

A Little Like Paris – Chicken and Rice Casserole

Written by , Posted in Cheese, Dinner, Gluten Free, Inspired By, Kid-Friendly, Leftovers, Lunch, Main Dishes, Meat, Poultry, Rice, Sides, Travel, Vegetables

Chicken-and-Rice-Casserole-3We were in Paris in November. (I will never get tired of remembering that we went to Paris.) In Paris, we had some of the most wonderful food. Ever.

One of the dishes was at a café by the marché aux puces (flea market) called Café Le Paul Bert. We had the most phenomenal dish of chicken, rice, and veggies. It was the creamiest, dreamiest chicken and rice I could ever imagine. It was one of the dishes I most wanted to duplicate upon our return (third on my list of “musts” – after baguettes, which I have now successfully made, and our meal at Au Bon Coin – I have almost mastered the potatoes, but have yet to make the full meal).

Paris-WhatWeAte-17

I don’t know exactly what it is about this dish. It seems like a pretty simple concept. It’s just chicken, rice, and veggies. Buuuut, there’s a whole lot more to it. There has to be, right?

Chicken-and-Rice-Casserole-4

When I made it, about two weeks after we’d returned, I was surprised by how much it tasted like our beloved Paris dish. And I think I may have accidentally discovered the secret: almond milk. I’d been drinking a little more almond milk and a little less cow’s milk lately. Just kinda to see if I like it. At first I did not. At all. But it’s growing on me. One way that I have always enjoyed it is in cooking (same with coconut milk). I use it in soups, oatmeal, even cornbread.

I haven’t made this dish using cow’s milk, so I don’t actually know if the almond milk made it taste so much like our Paris dish. But, it’s more fun to think that I accidentally made something amazing than to just borringly have done it on purpose.

I’d originally called this Drunken Chicken Casserole, because there’s a cup of wine in it. A tribute to the wine drunk with lunches and dinners in Paris. However, this could be made using vegetable or chicken stock and I’m sure it would taste great too.

Chicken-and-Rice-Casserole_1

Chicken-and-Rice-Casserole-2

Chicken-and-Rice-Casserole-5

Let’s talk about the veggies. I used carrots because they were in the Paris dish, and because I had them in the fridge. I used broccoli because it needed to be used. If I’d wanted to try to replicate it more exactly, I would have used carrots and leeks. But, I’m more of a “cook with what I have” kinda cooker, so yeah… You could use whatever veggies you like with chicken and rice. Cauliflower wouldn’t add much to the look of the dish, but it would taste great. Spinach would be yummy. Peas would be fun. Green onions would add a pop of color and a nice flavor. If you wanted to make this sans chicken, you could make it with fennel, carrots, and some mahi mahi. Have a look in your produce drawer. What looks good?

Aaaand now I’m super hungry.

Happy Eating!

Chicken and Rice Casserole
Recipe Type: cheese, dinner, gluten-free, inspired by, kid-friendly, leftovers, lunch, main dishes, meat, poultry, rice, sides, travel, vegetables
Author: Rachel Oberg – De Ma Cuisine
Prep time:
Cook time:
Total time:
Serves: 4
One of our favorite dishes from our time in Paris, recreated at home.
Ingredients
  • 1 t unsalted butter
  • 1 t olive oil
  • 1 C brown rice
  • 1 C white wine (or vegetable or chicken stock)
  • 1 C cold water
  • 1 head broccoli, chopped
  • 1 carrot, cut into long slices
  • water (for steaming)
  • 1 C chicken, cooked and chopped – I used leftovers
  • 1 C almond milk
  • to taste, salt
  • to taste, pepper
  • 1/4 C cheddar cheese, shredded
  • 1/4 C parmesan cheese, shredded
Instructions
  1. Cook rice in water and wine according to package directions (about 35-45 minutes), adding more liquid if needed.
  2. Add water to a pot with a steamer basket, place carrots and broccoli to the steamer. Steam until veggies are tender, about 15 minutes or so (you could add carrots first and broccoli halfway through, since it will take a bit less time to cook). (Save steamer water and freeze, to use at a later time as vegetable stock.)
  3. When rice is done, add chicken, milk, veggies, salt, and pepper. Cook until the chicken is heated through and the milk has been absorbed.
  4. Stir in cheese. Taste and adjust seasoning if needed.