De Ma Cuisine

Baking Archive

Wednesday

9

January 2013

3

COMMENTS

Savory Baked French Toast – Episode 50

Written by , Posted in A Cooking Show with Rachel O, Abundant Harvest Organics, Baking, Bread, Breakfast, Brunch, Cheese, Dinner, Eggs, Fennel Pollen, Fruit, Holiday, Lunch, Main Dishes, Meat, Nuts, Pork, This Week's Feast, Vegetables

Savory-French-Toast5

It’s 2013! It’s a New Year! We all have plans, ideas, resolutions. We, like many of you I’m sure, missed our Abundant Harvest Organics boxes over the break. I’m so glad our produce drawers are full once again so we can get back into our lifestyle of healthy eating!!

This is a special episode, because it’s my 50th!! That’s a big number and I’m excited. I’ve loved doing this show for you. I hope you’re learning, laughing, enjoying, and eating along with me!

Savory-French-Toast1

Savory-French-Toast2

Savory-French-Toast3

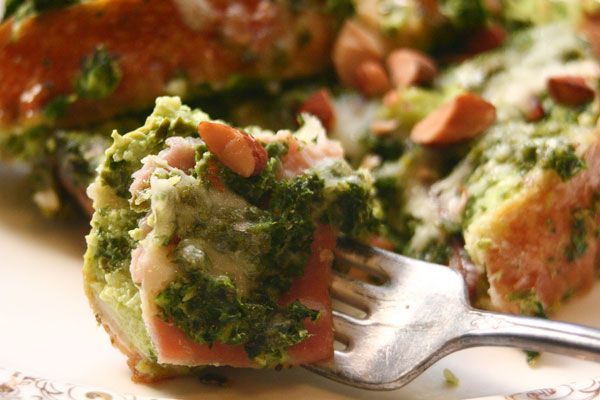
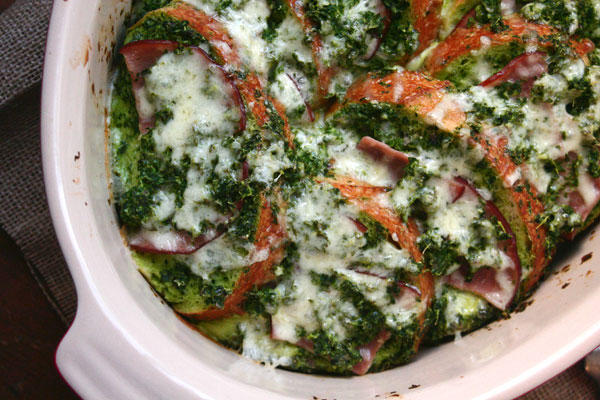
I hope you try this rather yummy dish. It’s perfect for any meal. But, I think it would be awesome at a brunch with family or friends. You can use any kind of bread that you want. To make it a bit healthier, I’d go with a whole grain, whole wheat bread. But, I had some stale French bread, so that’s what I used. It’s a great way to use the greens that are so good for you, and are in season right now. (If you need another way to use greens, my brother gave me his recipe for Green Smoothies. They are delicious and full of healthy ingredients.) I used ham, but bacon would also be amazing (cooked then crumbled over top when serving). Another option would be to omit the meat altogether and add some more almonds when serving, for some lean protein.

This dish comes out super bright green. Kinda like the Incredible Hulk. I like green.

Savory-French-Toast4

I hope your new year has been wonderful so far! And, I’m glad you’re here! Thanks for being a part of my first 50 episodes!!

Happy Eating!

Savory Baked French Toast

Prep Time: 15 minutes

Cook Time: 45 minutes

Yield: 4-5

Savory Baked French Toast

Ingredients

  • 4 eggs
  • 3-4 C kale/spinach/collard greens
  • 1 small onion, chopped
  • 1 clove garlic, chopped
  • 2 C milk
  • 1/4 C cream (reserve a bit for topping)
  • 1 t dijon mustard
  • 1/2 t (or less) salt
  • 1/4 t pepper
  • pinch cayenne
  • 1 to 1 1/2 C cheese, grated (I used Creamy Jack Cheese)
  • pinch fennel pollen
  • 1 t olive oil
  • 10 thick slices of bread (I used a stale loaf of French Bread)
  • 5 slices ham, quartered
  • roasted almonds, chopped (for topping)

Instructions

  1. Pre-heat oven to 350F. In a medium bowl (if using a hand blender), or a food processor, or a blender, blend spinach/kale/collard greens, garlic, eggs, milk, dijon, onion, seasonings, and 1/2 C cheese (I blended up the greens in the chopper attachment of my KitchenAid hand blender first, then transferred to the bowl).
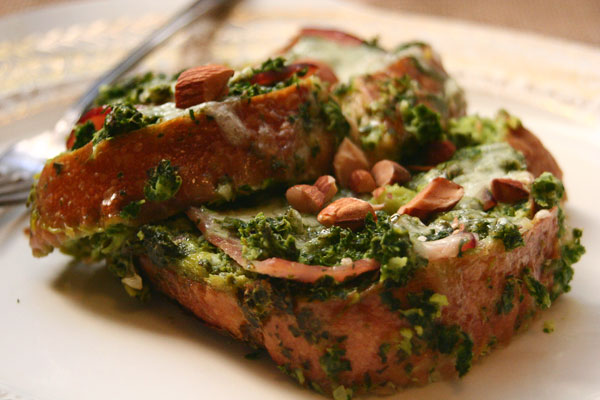
  2. Grease baking dish with olive oil - even on the sides (at least part way up). Soak bread slices in egg mixture. Place in baking dish, overlapping each slice with the next one (if desired). If there is any extra egg mixture, add more to each slice. Top each slice with two pieces of ham.
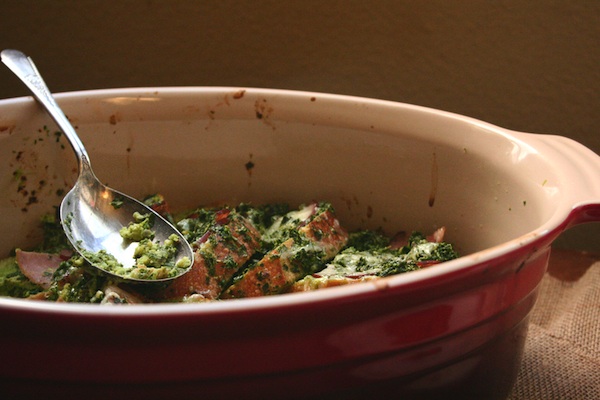
  3. Bake covered for 30 minutes. Uncover, top with remaining cheese, and bake uncovered for 15 minutes more (or until it reaches 160F).
  4. Let it rest for about 10 minutes before serving.
  5. Top with a drizzle of cream and some almonds (a dollop of Greek yogurt would also be good!).
http://www.de-ma-cuisine.com/i-like-bright-green-food-ep-50/

This episode is sponsored by: Burroughs Family FarmsAbundant Harvest OrganicsBari Olive Oil CompanyWaterfall Creative, and Molly Jenson.


Friday

24

August 2012

0

COMMENTS

Slightly Sweet Granola with Quinoa

Written by , Posted in Baking, Breakfast, Brunch, Dairy-Free, Grains, Kid-Friendly, Quinoa, Snacks, Vegetarian


We all know that breakfast is said to be the most important meal of the day. OK with me. I eat it, I like it. I don’t always like to prepare it though. I’m a cereal girl. I go for things with not too many ingredients, that will keep me feeling full for longer. I mean, I love things like bacon and eggs, pancakes, french toast, but I’m just a little too lazy to make them on a regular old weekday morning.

I like to have homemade granola on hand. I like homemade things because I control what’s in them. The amount of sugar, salt, preservatives…

My friend, Sheila, makes great granola. About 6 years ago when I started making granola on my own, I used her recipe. Over the years, I’ve adapted it slightly. Today’s recipe was inspired in part by hers, part by my friend, Genevieve, who added quinoa‚ to her granola a while ago. It’s fun to be inspired by friends who love to cook like I do!

I have a fun idea for something a little different to do with the granola. I mean, I’m going to eat it with milk, or with Greek yogurt sweetened with maple syrup… the usual ways. But, I’m going to try mixing some crunchy peanut butter with it, to make a granola bar-ish treat. Perfect for a snack, or to send along with Tim to eat at work.

Dry ingredients are stirred together.

Sweet liquids are added to the oat mixture.

It’s baked up on two cookie sheets.

Cooled on a tea towel (that was a wedding gift).

granola6

Stored in a jar with a handmade label.

This granola isn’t super sweet. It’s the way I like it, but I know Tim might ask for it to be sweeter. If you want it like he does, just add more of the sweeties! You could also add roasted and chopped almonds, raisins, other nuts, seeds, and dried fruits (I would add them after the granola has baked).

Happy Eating!

Slightly Sweet Granola with Quinoa

Slightly Sweet Granola with Quinoa

Ingredients

  • 8 C oats
  • 1/2 C quinoa, rinsed
  • 2 T coconut oil, melted
  • pinch salt
  • 1 t cinnamon
  • 1/8 to 1/4 t nutmeg (opt.)
  • 1 t vanilla extract
  • 1/4 C whole wheat flour
  • 1/4 C honey
  • 1/4 C raw sugar
  • 3 to 4 T maple syrup
  • 1/4 C brown sugar
  • 1 C hot water

Instructions

  1. Preheat oven to 350F.
  2. Stir together oats, flour, cinnamon, nutmeg, and quinoa.
  3. Whisk together water, maple syrup, honey, sugars, salt, vanilla, and oil.
  4. Add liquid to oat mixture and stir to combine.
  5. Spread over two cookie sheets and bake at 350 F for 15 minutes. Remove from oven, stir, reduce temp to 200F and bake 2 hours more (stirring every 30 minutes and rotating which rack each pan is on).
  6. Cool completely (I use a clean tea towel on the counter).
  7. Store in an airtight container.
http://www.de-ma-cuisine.com/the-most-important-meal-deserves-to-be-yummy/

Friday

16

March 2012

1

COMMENTS

Oma’s Moon Cookies, by Jill

Written by , Posted in Baking, Cookies, Dessert, Guest Posts, Legacy, Thoughts

I’m blessed to have two brothers. But, until I got a sister-in-law last year, I had zero sisters. However, my cousin, Jill and I are as close as sisters. She’s one of my best friends. She lives in Colorado with her family, so we make up for the distance with visits, Skype chats, phone calls, emails, and texts. She and I were devastated at the loss of our Oma a couple of months ago. We both inherited a love for cooking from her. Jill, however, must have inherited the baking side of it much more than I. She’s a great baker. I asked if she would share Oma’s recipe for Moon Cookies.

Here’s Jill.

I know what you are thinking, it’s why are these called moon cookies yet they are shaped like stars?  Well honestly it is just because I don’t have a moon shaped cookie cutter.  Every time I make these cookies I am already far too deep in the process to stop, go to the store and get the proper shape, and every year I seem to forget that I don’t have a moon shape so I choose the next best celestial object, a star.  But Oma, whose recipe this is, always made them in moon shapes, hence the name.  Everyone in the Pries family knows what a moon cookie is.

This recipe is special for many reasons, most importantly because it was Oma’s.  And everything from Oma is special.  Secondly, they are insanely delicious.  One of the ways Oma loved her family was through food. She always had lovely treats and amazing meals waiting for us whenever we would visit.  Some of my fondest childhood memories take place in her kitchen, whether it was baking Zwieback and honey cookies, or sitting under the kitchen table first thing in the morning to warm up by the vent, or having Opa help me crush my crunchy buns into my bowl of “Opa” soup.  Of all the many traditions Oma passed down, a love of the kitchen was definitely one of them.  She was always eager to teach us and to pass down these special family recipes.  She had a servant’s heart and loved her family so much through everything she did.  I can only hope that I can make my family feel as loved and as precious as she made us feel.  Oma – I love you and I will keep trying to learn to crochet dish clothes, even though they always end up looking like cat toys!!

And now a special word of caution…..do not eat these cookies while wearing black.  The evidence will be all over you. And that is especially bad if you happened to indulge yourself when you really shouldn’t have or were flat out told not to, like a certain three year old boy who disappeared behind the sofa for a few minutes and then reappeared with lovely white fluff all down his front.

Oma’s Moon Cookies, by Jill

Oma’s Moon Cookies, by Jill

Ingredients

  • 2 Cups flour
  • 1/2 lb unsalted butter
  • 1/2 cup white sugar
  • 1 1/2 cups ground hazelnuts
  • Icing sugar, about 3 cups

Instructions

  1. Mix together flour, butter and sugar. Add the nuts (use your food processor to grind the nuts if you had to buy whole ones). Mix well. Refrigerate for about 3 hours. Roll out the dough about 1/4 " thick (thicker is better because they can be quite fragile).
  2. Bake at 350 for 8 minutes or until golden.
  3. After the cookies bake you can cool them until warm, them give them a bath in the icing sugar. Not just a light dusting. Carefully place the cookie in the bowl of sugar and gently pack it on so there is a nice coating. Store between layers of wax paper in the freezer.
http://www.de-ma-cuisine.com/omas-moon-cookies-by-jill/

Monday

12

December 2011

1

COMMENTS

Travis’ La Habra Sourdough Bread

Written by , Posted in Baking, Bread, Guest Posts

My brother-in-law, Travis, is a great baker (in addition to being a talented musician!). He makes awesome sourdough bread. Over Thanksgiving, I asked him to teach me, and together we made a starter (which we named, “Olga’s Starter”) and of course he made some of his bread from the La Habra Starter. I asked if he would be willing to share his knowledge with you. I hope you enjoy! (And if you’d like to make your own starter, he will be doing a follow-up post in the new year!) I took Olga’s starter home with me to care for. It’s almost ready to bake with… I can’t wait to try it!

Here’s Travis…

Hello, my name is Travis and Rachel married my brother, so now we’re family. She asked me if I would be into sharing what I’ve learned about bread here and I couldn’t have been more excited to share. I have an interest in bread. I love it. I love it with jam. I love it plain, with a spread of butter or peanut butter, I love it with sandwich things between it. And the smell of baking bread is definitely a favorite of mine. There is nothing better than fresh bread. Except maybe bacon.

So, about ten years ago I started looking into baking my own bread, and being kind of a science nerd I started learning about the way bread starters are used and made. I like sourdough bread and found that essentially a bread starter is a sourdough starter, so I dug a little deeper and found out that with a little patience and time it’s simple to make your own. And with a stable healthy starter you can make so many types of bread it’s crazy. You may also buy many good sourdough starters and each has a different story, which in itself is interesting especially if you like history. Check out the story of San Francisco sourdough.

Like many essential things, when you dig you find a lot of really sweet and interesting things.

Anyway so, here is an easy recipe for a simple sourdough bread, named after a starter I began in La Habra, CA. All good starters should have a good name.

MixingDough

RisingDough

RisingBread

BakedBread

La Habra Sourdough Bread
Author: Travis Oberg
Prep time:
Cook time:
Total time:
Serves: Two Loaves
Ingredients
  • 1 cup “fed” sourdough starter
  • 1 1/2 cups lukewarm water
  • 5 cups flour
  • 1 tablespoon sugar
  • 2 1/4 teaspoons salt
Instructions
  1. Combine the starter, water, and 3 cups of the flour. Beat vigorously.
  2. Cover, and let rest at room temperature for 4 hours. Refrigerate overnight, for about 12 hours.
  3. Add the remaining ingredients, kneading to form a smooth dough.
  4. Allow the dough to rise in a covered bowl until it’s relaxed, smoothed out, and risen. Depending on the vigor of your starter, it may become REALLY puffy, as pictured; or it may just rise a bit. This can take anywhere from 2 to 5 hours. Understand this: sourdough bread (especially sourdough without added commercial yeast) is as much art as science; everyone’s timetable will be different. So please allow yourself to go with the flow, and not treat this as an exact, to-the-minute process.
  5. Gently divide the dough in half.
  6. Gently shape the dough into two oval loaves, and place them on a lightly greased or parchment-lined baking sheet. Cover and let rise until very puffy, about 2 to 4 hours. Don’t worry if the loaves spread more than they rise; they’ll pick up once they hit the oven’s heat. Towards the end of the rising time, preheat the oven to 425°F.
  7. Spray the loaves with lukewarm water.
  8. Make two fairly deep horizontal slashes in each; a serrated bread knife, wielded firmly, works well here.
  9. Bake the bread for 25 to 30 minutes, until it’s a very deep golden brown. Remove it from the oven, and cool on a rack.
Notes
Hands-on time: 15 mins. to 20 mins.[br] Total time OVERNIGHT, about 23 hrs

In keeping a usable starter you use a lot of flour, and are discarding about a cup of starter every three days or so. I started to think about ways to use the removed cup of starter and made up this sweet pancake or waffle recipe.

Wednesday

31

August 2011

1

COMMENTS

Sheila’s Potato Pan Rolls

Written by , Posted in Baking, Bread, Leftovers


Sheila’s Potato Pan Rolls
Author: Sheila Magaña
Prep time:
Cook time:
Total time:
I made these rolls for a ThanksaChristmas dinner that we went to with friends in 2010. They were a big hit. This recipe is not my own, it’s from my friend Sheila (I have the directions written out the way I did them, Sheila’s way might be a tad different).
Ingredients
  • 1 C smooth mashed potatoes
  • 1 C warm water (between 100-110F)
  • 2 pkg or 1 1/2 T yeast
  • 1 t sugar
  • 1/2 C melted butter
  • 1/2 C honey
  • 2 eggs
  • 2 t salt
  • 6-7 C flour
  • 1-2 eggs whites, for egg wash (opt.)
Instructions
  1. Combine yeast, sugar and water. Let it sit for about 5 minutes (or until it gets nice and foamy).
  2. Combine honey, eggs and potatoes; whisk together. Add yeast mixture; whisk. Add 6 cups flour and salt, then butter [I did it in this order so the butter wouldn’t cook the eggs – you could also add the butter first, then temper the eggs (add a little of the warm butter mixture at a time to the eggs, in a separate bowl, and whisk in, to slowly bring it up in temperature, then once it’s warm, add it to the rest of the butter mixture)].
  3. I’m more of a mix by hand baker (I don’t own a stand mixer). If you want to use your mixer, use the dough hook and mix it. If not, mix with a wooden spoon, then knead by hand for about 5 minutes, adding the 7th C of flour as you need it.
  4. Place in an oiled bowl (I use the same one I mixed it in) turning to coat the whole mound of dough; let it rise in a warm place until it’s doubled in size, about an hour or so. Punch down.
  5. Shape into rolls (grab a big hunk of dough, squeeze about a 1 1/2 ” round portion through your pressed thumb and index finger, and pinch it off as you press those two digits together… this is kinda hard to explain, hope it makes sense – works best with oiled hands – use some canola, or mild flavored oil) and place into 2 greased 9×13″ pans leaving about 1″ between each roll (they’re still going to rise).
  6. Let them rise or just bake ’em right away. Do it however works for you with the time you have. If you let them rise, I’d cover them with a clean tea towel.
  7. When you’re ready to bake them, heat oven to 400F; while it’s pre-heating, brush on the egg wash, lightly, covering the tops of the rolls (this will make them nice and shiny). Bake for 20-25 minutes (they will be nice and golden on top, and fluffy on the inside).
Notes
Cooking time doesn’t include rising time.

IMG_4320.jpg (1600×1067)

IMG_4331.jpg (1600×1067)