De Ma Cuisine

lemon Archive

Thursday

3

July 2014

0

COMMENTS

Honey and Maple Syrup Sweetened Berry Jam

Written by , Posted in Breakfast, Brunch, Canning, Condiments, Dairy-Free, Dessert, Fruit, Gluten Free, Kid-Friendly, Vegetarian

StrawberryJamSecondTime-5One of my favorite things about summer is the fruit. The nectarines are amazing, the plums are incredible, and the berries… they are the best!

We had raspberries in the garden growing up, so they are my emotional favorite. Tim’s family has blackberries, so they’re a favorite too. But there’s just something about blueberries and strawberries… I love ’em.

I’m always so sad when their season ends (as it is ending now). I’m thankful for the others, don’t get me wrong. But, I want berry season to last as long as possible.

BlueberryJam-2

There are plenty of ways to preserve these summer treasures. You can freeze washed berries, pitted cherries, and halved stone fruit on a baking sheet, and then pop them into a bag. You can make tons of crisps and cobblers and wrap them up really well and freeze them for November. You can make sauces and smoothies to be pulled out when the weather has turned cold.

And, you can make jam.

Last summer I decided that I would try. Surprisingly, it turned out. The catch was that I wanted to make it sans pectin and sugar. I didn’t know if you could, but I wanted to.

And I did.

I made three kinds: cherry, strawberry, and blueberry.

We ran out a few months ago. This year, I don’t intend to run out. So I made a ton. First strawberry (which follows the same recipe), then blueberry.

StrawberryJamSecondTime-4

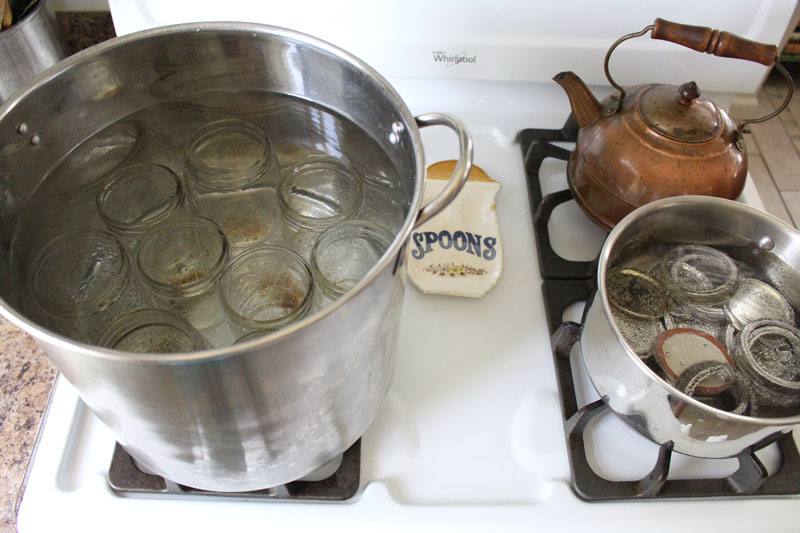
Before you start, make sure you have clean jars and lids (the lid is the flat piece, and is not re-useable if you want them to seal, the band is the part that wraps around the jar and screws into place).

I don’t have a dishwasher, so I used a pot of boiling water and boiled for about ten minutes.

StrawberryJamSecondTime-3

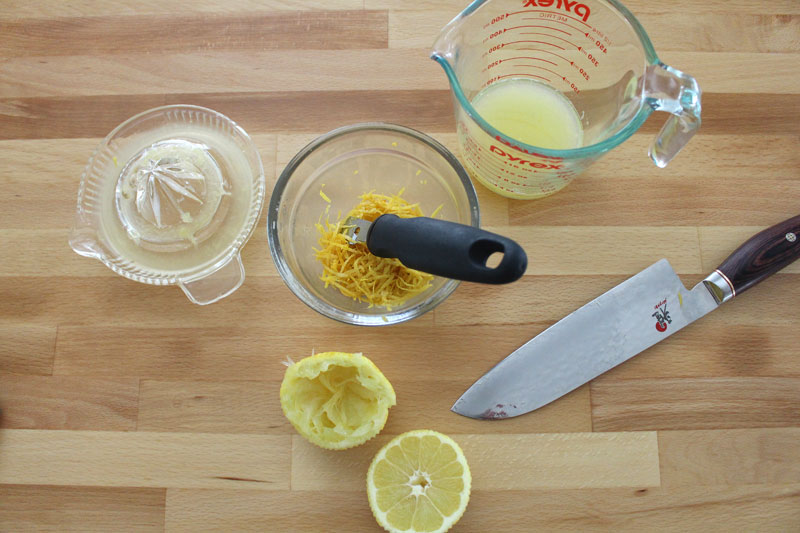
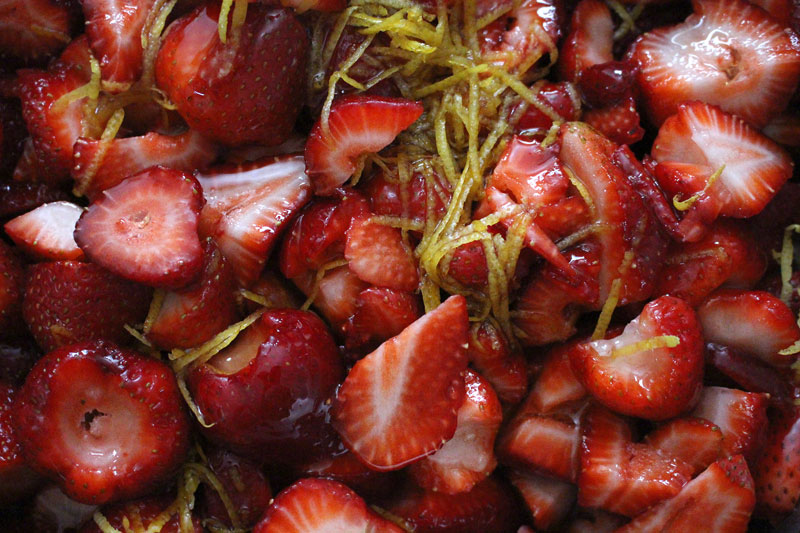
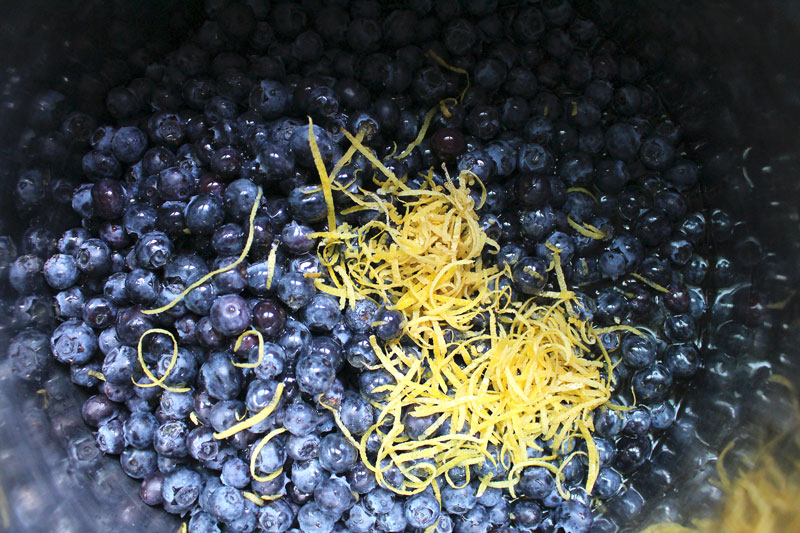
I love lemon zest, so I opted to add a bunch for a hint of brightness, instead of only using lemon juice.

In general, if possible, any time I use a lemon, I zest it first. Why waste such goodness?! If there’s any extra, it goes into the freezer.

StrawberryJamSecondTime-2

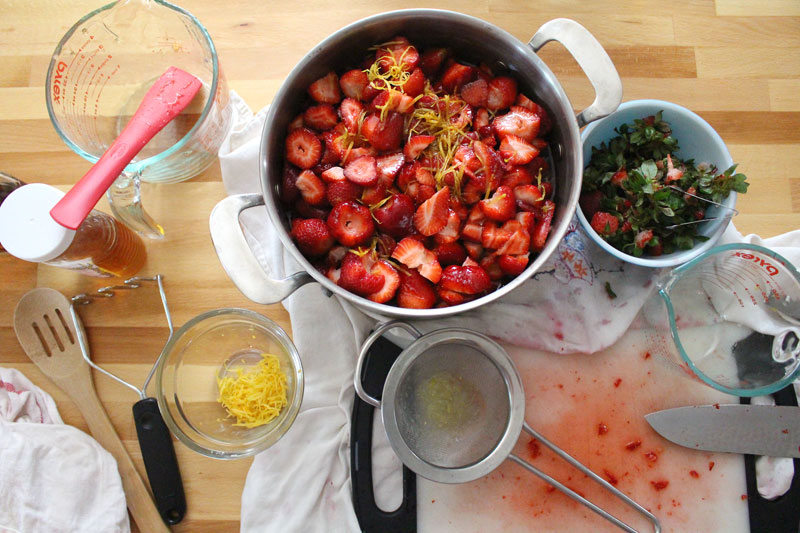
Strawberry jam is a bit more of a process than blueberry. There’s hulling and chopping involved. 

It’s gonna be messy.

But it’s worth it.

StrawberryJamSecondTime-6

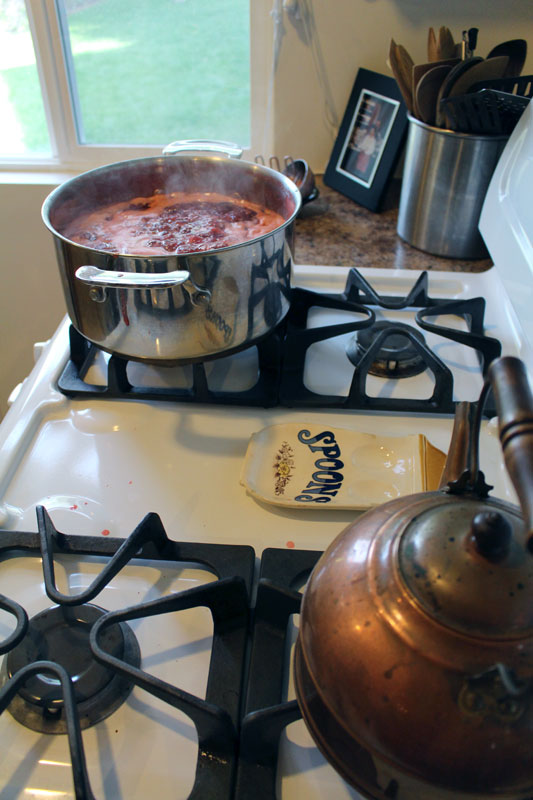
When I was making the strawberry, I forgot how much the stuff bubbles up. I had to move it to two pots, since the one was a bit too small.

I was wiser with the blueberries.

BlueberryJam-3

BlueberryJam-4

It’s not going to be thick thick, like jam made with pectin. But, it will thicken up a bit. Cook it until it’s as thick as you want it (you can test it by putting a plate in the freezer and putting a dollop of jam on it so it will cool quickly, then test to see how runny it is), even if that’s longer than the time listed in the recipe.

StrawberryJamSecondTime-1

BlueberryJam-5

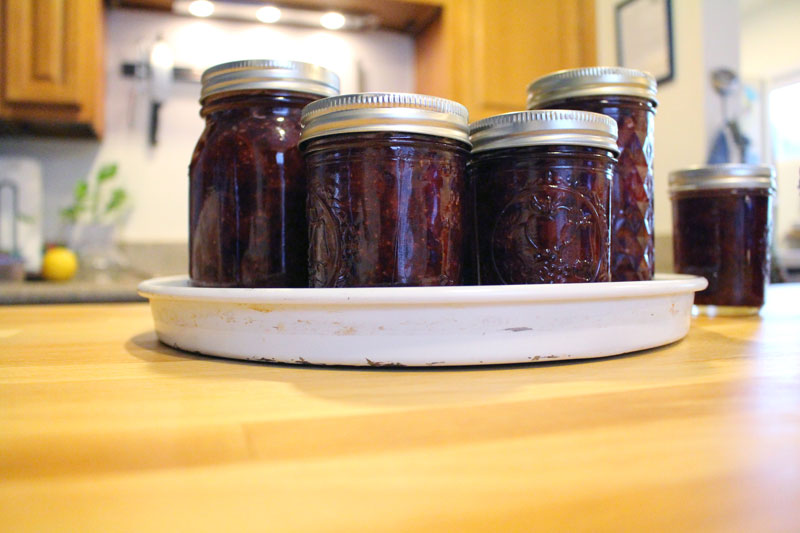
Jars are filled and left to cool on the counter for a bit. You should hear the lids popping as they seal. Sealed or not, I like to store them in the freezer (after fully cooling in the fridge), even after they’re opened. (There are different opinions on how long properly canned homemade jam will last unrefrigerated. (1) Since I didn’t pressure cook or process the jam in boiling water after adding it to the jars, I opted to be extra safe and keep them in the freezer, even if they did seal. In my experience, they have lasted as long as it took to consume them – less than a year, in the freezer. I hope that this summer’s batch will last more than a year, stored in the freezer. Once opened, stored in the fridge, they usually are fine for a month or two, maybe more. Just keep an eye out for mold. Jams with less sugar and that aren’t commercially prepared tend to have a shorter shelf life. (1) So be mindful of that, and whether or not you have pressure cooked them, when deciding where to store them.)

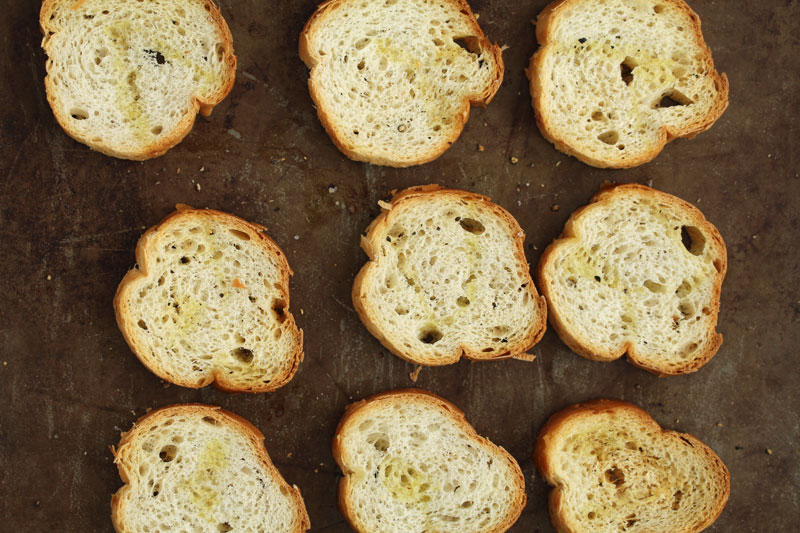
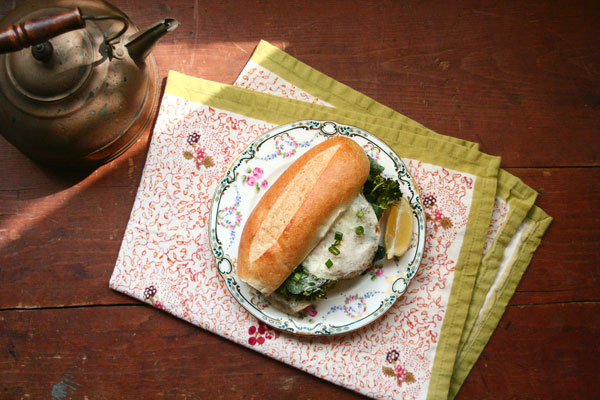
This jam is perfect for the usual toast or English muffin, to top ice cream, or to be eaten by the spoonful by a hungry food blogger.

Happy Eating! 

Blueberry or Strawberry Jam
Recipe Type: Condiment, Fruit, Preserving, Canning
Author: Rachel Oberg – De Ma Cuisine
Ingredients
  • 12 C blueberries or strawberries (strawberries: hulled and chopped)
  • 4 C honey
  • 1 C maple syrup
  • 3 T lemon zest
  • 3/4 C lemon juice
Instructions
  1. Bring berries through lemon zest to a boil. Mash with a potato masher. Once it comes to a rapid boil, cook for 3-5 minutes.
  2. Reduce heat to a simmer and cook for about 20 minutes.
  3. Remove from heat, stir in lemon juice, and let stand for 5 minutes.
  4. Ladle into jars, leaving about 1/2″ of space at the top. Cover with the lid and let stand for 15-30 minutes.
  5. Store at room temperature if they’ve sealed, or in the freezer if they haven’t (or if you just want to).
  6. Makes about 6 pints (or 12 half pints).
Notes
To sanitize jars, place in a large pot and cover with water (about 1 inch over the top of jars). Bring to a boil and boil for about 10 minutes.
3.2.1303

(1) I have referenced this site for information on the shelf life of jam.

Monday

31

March 2014

0

COMMENTS

Crostini with Sausage and Braised Greens

Written by , Posted in Appetizers, Braising, Bread, Dairy-Free, Dinner, Lunch, Meat, Pork, Sandwiches, Sausage, Sides, Snacks, Toasting, Vegetables

CrostiniWithSausageAndBraisedGreens6

I may have a new favorite way to eat greens.

For a second, forget about what I know you must be anticipating as amazingness in the crostini. Ok. Done? Just for a moment… Because we need to talk about greens.

Not too long ago I talked about bitter greens and offered a few suggestions for their unbittering. I mentioned, but didn’t go into detail about braising. But, now that I’ve tried it, I may never go back to any other way of cooking greens. (Ok, that maaaaay be a bit dramatic…)

Braised greens are simply amazing.

Seriously.

CrostiniWithSausageAndBraisedGreens1

Llano Seco sent me a ham hock. I just had to try braising the greens with it. Oooooh boy! What a fun treat. If you can find one, I’d totally recommend it. It will be worth it. If you can’t, vegetarian is wonderful as well. I’ve made braised greens both ways. I’ve enjoyed them all immensely.

The greens braised for about two hours. I’ve tried them after shorter amounts of time and they’re great too. So if you don’t have a lot of time, don’t worry about it. But, if you’ve got a few hours to spare, try it. (And by a few hours I mean a tiny bit of time to get the ingredients into a pot, then just one eyeball on the pot every so often.) The result is tender, flavorful, AWESOME greens.

They’re not only perfect to top our little crostini, but this big batch can be frozen and later added to soups, rice dishes, or used to top some Paris Potatoes.

CrostiniWithSausageAndBraisedGreens5

Now we can talk about the crostini.

Sorry. Wait. I need to interrupt myself again to tell you that I made these, then I stood beside the photography table and devoured them. I just couldn’t stop.

Interruption over.

So there was a ham hock in the greens. Then there’s some Llano Seco Italian Sausage that’s chopped up and heated in a few tablespoons of the braising liquid. You could really just end there with the greens and sausage. Pile it all on some rice or potatoes and call it dinner.

But, I didn’t do that.

CrostiniWithSausageAndBraisedGreens2

I wanted some little toasts. So I sliced up a baguette, drizzled it with olive oil, and sprinkled with salt and pepper. They toasted up in the oven for a few minutes.

CrostiniWithSausageAndBraisedGreens3

They were topped with some of the greens, and a few pieces of sausage. And then… a squeeze of lemon. One of my favorite ways to finish a dish.

CrostiniWithSausageAndBraisedGreens4

If you can, share with friends. They will be glad you did.

CrostiniWithSausageAndBraisedGreens7

Happy Eating!

Crostini with Sausage and Braised Greens
Recipe Type: Side, Snack, Sandwich, Toast, Meat, Sausage, Greens, Vegetables, Pork, Braising
Author: Rachel Oberg – De Ma Cuisine
Serves: 4-5
Ingredients
  • Braised Greens: 2 T olive oil
  • 2 C celery, chopped
  • 1 radish, diced
  • 2 cloves garlic, diced
  • 7 C vegetable stock
  • 1 ham hock
  • 8-9 C greens (mixture of any: chard, kale, collards, spinach…), roughly chopped
  • salt
  • pepper
  • 2 T white vinegar
  • Crostini: 10-20 slices of baguette
  • olive oil
  • salt
  • pepper
  • 1 clove garlic (optional)
  • 3-4 T braising liquid
  • 2-3 Italian sausages, halved and chopped
  • lemon wedges, for serving
Instructions
  1. Heat a soup pot. Add oil. Add celery, radish, garlic, salt, and pepper, and cook over medium-low heat for 5-10 minutes, stirring occasionally.
  2. Add ham hock and cook for 2 minutes. Add greens and vinegar and cook for 2 minutes more.
  3. Add stock and bring to a boil. Reduce to a simmer and cook for 1-2 hours, stirring every once in a while.
  4. Pre-heat oven to 350F.
  5. Drizzle baguette slices with olive oil, and sprinkle with salt and pepper. Bake for 5-10 minutes, or until crispy. Rub with a clove of garlic if desired.
  6. Add 3-4 T of the braising liquid to a skillet and add the sausage. Cook for about 5 minutes, or until heated through.
  7. Top each slice of toasted baguette with some greens (try to avoid too much braising liquid so they don’t get soggy), a few pieces of sausage, and a squeeze of lemon.
  8. Serve immediately.
3.2.1269


Monday

8

April 2013

2

COMMENTS

Joanna – An Ambassador for De Ma Cuisine

Written by , Posted in Dairy-Free, Dinner, Fruit, Gluten Free, Grains, Herbs, Main Dishes, One Dish Dinners, Rice, Vegan, Vegetables, Vegetarian

LentilStewForJo4A long long time ago (or about a year and a half ago), when I first started my blog, I asked a few people if they would be ambassadors. I told them that if they would tell people about my blog, I’d create a dish for and named after them.

Today, it’s Joanna’s turn.

Joanna is a dear friend of mine.

She is one of the most talented graphic designers I know.

She came up with my logo.

She designed business cards for me.

She loves food.

LentilStewForJo

Jo prefers a vegetarian diet. A while ago she asked for suggestions for getting enough protein and iron.

When I was creating a dish for her, lentils and protein were my inspiration.

Lentils are a good source of lean protein. They have lots of folic acid and fiber and are a good source of iron. (1)

LentilStewForJo3

LentilStewForJo2

LentilStewForJo5

I’m thankful for this amazing, beautiful, sweet woman. Jo, I hope you enjoy this dish!!

Lentil and Rice Stew

Lentil and Rice Stew

Ingredients

  • 1 T garlic infused olive oil
  • 1 carrot, diced
  • 1 shallot, diced
  • 2 T tomato paste
  • 1 t dried parsley
  • 1/2 t dijon mustard
  • pepper
  • 1 1/2 t salt
  • 1/2 to 1 t red pepper flakes
  • pinch cumin
  • pinch smoked paprika
  • 1/4 C balsamic vinegar
  • 1 t maple syrup
  • 1 C lentils, sorted and rinsed
  • 1/2 C uncooked brown rice
  • 6 1/2 to 7 C vegetable stock (warmed - opt.)
  • 2-4 C water
  • 2 C spinach, roughly chopped
  • 1 t good olive oil
  • 1 lemon wedge/serving

Instructions

  1. Heat soup pot. Add oil. When oil is hot, add carrot and a pinch of salt. Cook for 5 minutes over medium heat, stirring occasionally. Add shallot and another pinch of salt. Cook 2 minutes more.
  2. Add tomato paste, parsley, dijon, pepper, remaining salt, red pepper flakes, cumin, paprika, balsamic vinegar, and maple syrup. Stir and cook 2 minutes.
  3. Add lentils and rice to pan. Cook 2 minutes, stirring often.
  4. Add stock. Cover and bring to a boil. Uncover, reduce heat to medium and cook for 55-65 minutes, adding more stock if needed, until veggies are tender and lentils and rice are cooked.
  5. In last 5 minutes of cooking time turn heat to low and add spinach.
  6. Remove from heat and stir in olive oil.
  7. Serve with a squeeze of lemon.
http://www.de-ma-cuisine.com/joanna-an-ambassador-for-de-ma-cuisine/

(1) Nutrition Almanac, Fifth Edition, Lavon J. Dunne 2002

Wednesday

6

March 2013

0

COMMENTS

Roasted Broccoli and Fried Egg Sandwich – Episode 58

Written by , Posted in A Cooking Show with Rachel O, Abundant Harvest Organics, Cheese, Eggs, Lunch, Sandwiches, This Week's Feast, Vegetables, Vegetarian

RoastedBroccoliAndFriedEggSandwich2

I have created something.

I think it is wonderful.

Every ingredient is crucial here.

The egg, the broccoli diCicco, the parmesan cheese, the lemon juice, the green onion, the dijon mustard, the crusty sandwich roll… they all need to be together. Need.

Try the sandwich and you will understand why.

For extra goodness add a little extra lemon juice as you eat.

RoastedBroccoliAndFriedEggSandwich6

I’m getting happy all over again as I remember this delicious lunch. It could also be perfect for breakfast or dinner.

When you eat it, you could do as I did, hardly stopping to breathe, for fear the sandwich might disappear before you can finish it. Or, you could eat it like a normal human being. Whatever. The choice is yours.

RoastedBroccoliAndFriedEggSandwich5

RoastedBroccoliAndFriedEggSandwich

I was going to say that if you don’t like roasted broccoli that you could substitute something else. But, then I realized that I don’t really want to. I created this dish is created around broccoli, so it’s obviously best with it. But, if you don’t like roasted broccoli (I’m sorry – I think you’re missing out), or don’t have broccoli on hand, try cauliflower or Brussels sprouts.

RoastedBroccoliAndFriedEggSandwich4

Oh happy day.

Roasted Broccoli and Fried Egg Sandwich

Prep Time: 5 minutes

Cook Time: 18 minutes

Total Time: 23 minutes

Yield: 2

Roasted Broccoli and Fried Egg Sandwich

Ingredients

  • 3-4 C broccoli diCicco (stems too!), cut into small pieces (regular broccoli could also work)
  • 1/2 C broccoli diCicco leaves (spinach could also work)
  • 2 t olive oil
  • to taste garlic sea salt (or regular sea salt)
  • to taste pepper
  • 1/4 C green onion, chopped
  • dijon mustard
  • 2 oz. (1/8 C) parmesan cheese, grated
  • lemon wedges
  • crusty bread or rolls
  • eggs (1 per serving)

Instructions

  1. Pre-heat the oven to 350F. Toss broccoli with 1 t olive oil, a bit of salt, and pepper. Pour onto a baking sheet and bake for 15-18 minutes (or until it's slightly crispy).
  2. Cook egg(s), sprinkled with a pinch of salt, covered, over low heat. Flip, if desired, turn off heat, and let it cook using residual heat from skillet (especially if you're using a cast iron), until yolk is to desired doneness.
  3. Slice roll almost in half (leave one side attached) and scoop out a bit of the middle of the bread (save it to make croutons!). Top with mustard, broccoli, broccoli leaves, a squeeze of lemon, parmesan cheese, egg, and a little more parmesan cheese.
http://www.de-ma-cuisine.com/yes-i-put-broccoli-on-a-sandwich-ep58/

Happy Eating!!

This episode is sponsored by: Abundant Harvest Organics, Bari Olive Oil Company, Burroughs Family Farms, Molly Jenson, Waterfall Creative.

Monday

3

December 2012

0

COMMENTS

Autotunesgiving and Parmesan and Garlic Roasted Yams

Written by , Posted in Cheese, Dinner, Fruit, Gluten Free, Holiday, Nuts, Potatoes, Potlucks, Roasting, Sides, Vegetables, Vegetarian

I know Thanksgiving is over. I know, I know. But, we had such a fun time with our family and friends that I just want to write about it one more time.

You see, each year, for a long time, Tim has been making a Thanksgiving video. Some years it involves the Turkey being driven around the family farm, other years it features us. He’s so creative.

Normally, you see videos of my cooking show on here. But, I feel like giving you a glimpse of our life, our family, our holidays.

We had Thanksgiving dinner with my Uncle Larry and Aunt Gail, cousins: Ted, Jake, Renée, Gracie, Josiah; Tim’s parents, Terry and Cathy, and our friends, Doris, Brad, Mary, Brian, and Sarah. It was a blast!!

I’d planned to make my Roasted Garlic Yams, but ended up making a variation of them, which you can see below. It would work well for any holiday or regular dinner, so keep this one bookmarked!

Happy the holidays! Enjoy a laugh, on us.

Happy Eating!

Parmesan and Garlic Roasted Yams

Recipe Type: Side, Roasting, Oven, Squash, Winter
Author: Rachel Oberg – De Ma Cuisine
Yams are roasted. Parmesan cheese is grated. Almonds are chopped. They are all combined to make a delicious fall dish.
Ingredients
  • 9 yams, cut into large chunks
  • 1 acorn squash, halved and seeded
  • 1/2 to 1 t salt
  • 1/2 t pepper
  • pinch nutmeg
  • pinch cayenne or red pepper flakes
  • 1-2 T olive oil
  • 1/4 C garlic infused olive oil (I used Bari’s)
  • 1 C parmesan cheese, grated (1/4 C reserved)
  • 1 T balsamic vinegar
  • 1 t lemon juice
  • 1/4 C apple cider
  • 1/2 C roasted almonds, chopped
Instructions
  1. Toss yams with 1 1/2 T olive oil, and seasonings. Place on 2 or 3 baking sheets (making sure they are not overcrowded). Drizzle cut side of squash with 1/2 T olive oil. Place cut side down on a baking sheet. Roast at 350F for 60 minutes (at 30 minutes rotate which is on top and bottom oven racks).
  2. Whisk together garlic olive oil, balsamic vinegar, lemon juice, and cider.
  3. When squash is tender, scrape into a bowl, mash a bit, and combine with roasted yams, 3/4 C parmesan cheese, and cider mixture.
  4. Top with remaining 1/4 C cheese and bake for about 15 minutes, or until cheese is melted.
  5. Serve topped with almonds.
Notes

This can be made the day before, up thru step 3. The following day, place in an oven proof pan, covered, and bake at 350F for about 20 minutes. Uncover, and bake an additional 20-40 minutes more (or until it’s heated to at least 165F). In last 15 minutes of baking, top with remaining 1/4 C parmesan cheese. Serve topped with almonds.