De Ma Cuisine

Kid-Friendly Archive

Monday

15

September 2014

0

COMMENTS

Cheesy Chicken and Grapes with Rice

Written by , Posted in Braising, Cheese, Dinner, Fruit, Gluten Free, Grains, Kid-Friendly, Lunch, Main Dishes, Meat, Poultry, Rice

CheesyChickenAndGrapesWithRice-7

We don’t usually have a problem finishing off the grapes (or most any fruit that comes our way from Abundant Harvest Organics). We usually eat it raw. But, sometimes it’s super fun to try something new.

Like grapes with chicken and rice.

Oh yes I did.

CheesyChickenAndGrapesWithRice-1

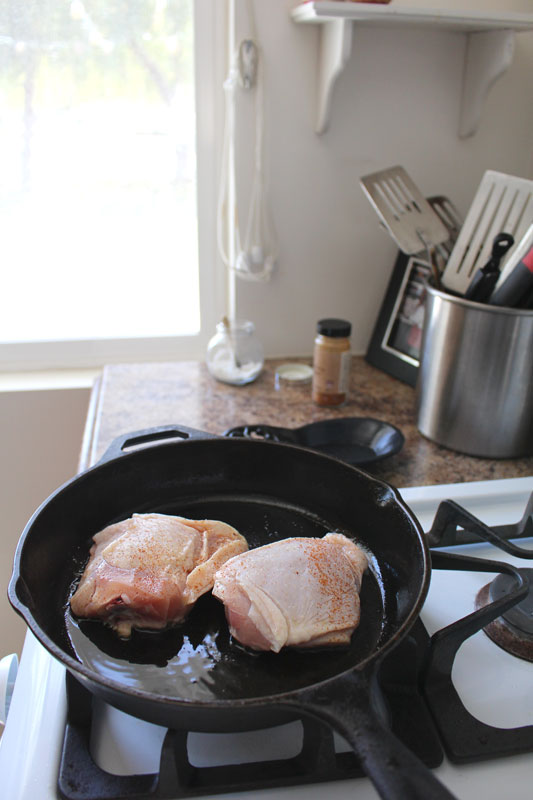
It all starts with some thighs. I had a package of two, so that’s what I used. Add more (using a larger skillet) if your family needs more.

It’s seasoned simply, with cayenne and salt. This is gonna be a simple, humble dish, where the flavors really shine.

Shine chicken shine.

Go grape! Go grape! It’s grrrrrrrrrrrrape!

(I don’t know… Sorrynotsorry. I blame it on the Christmas music I’m listening to, in the 100 degree weather, to prepare for a concert in December… Not really. But, the heat makes my brain a little kooky.)

CheesyChickenAndGrapesWithRice-2

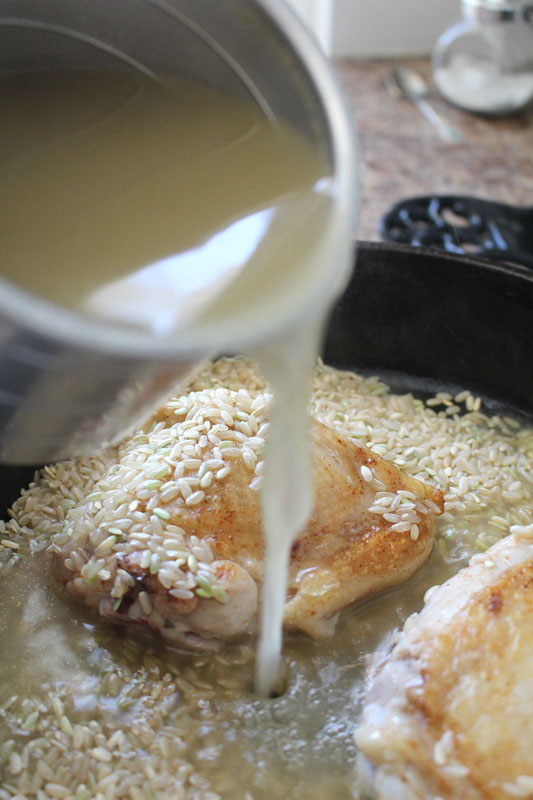
I made chicken stock the other day and then froze it. So, to quickly defrost the stock, I brought it to a boil. I don’t normally use hot stock when cooking rice (except when making risotto). So, you could use cold stock, if you’ve planned ahead and put it in the fridge overnight. I didn’t. Just adjust the cooking time as needed.

CheesyChickenAndGrapesWithRice-3

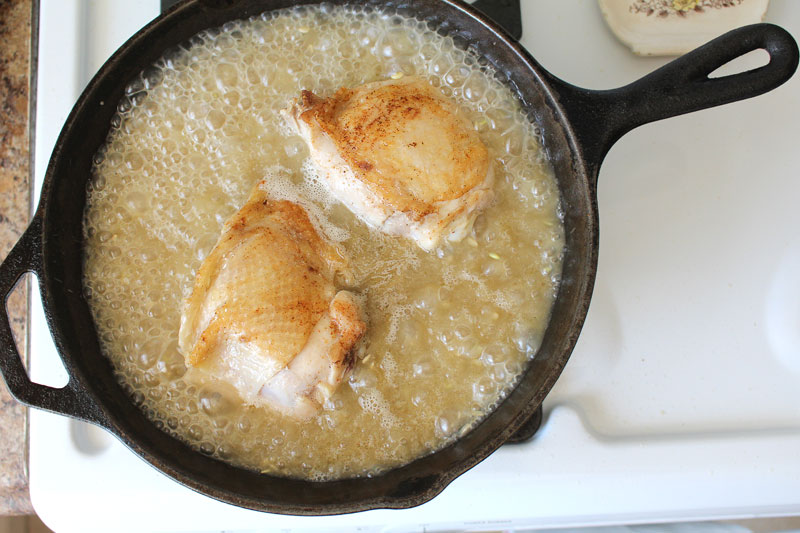
Once the stock + rice + chicken comes to a boil, reduce to a simmer and cook for a few minutes.

CheesyChickenAndGrapesWithRice-4

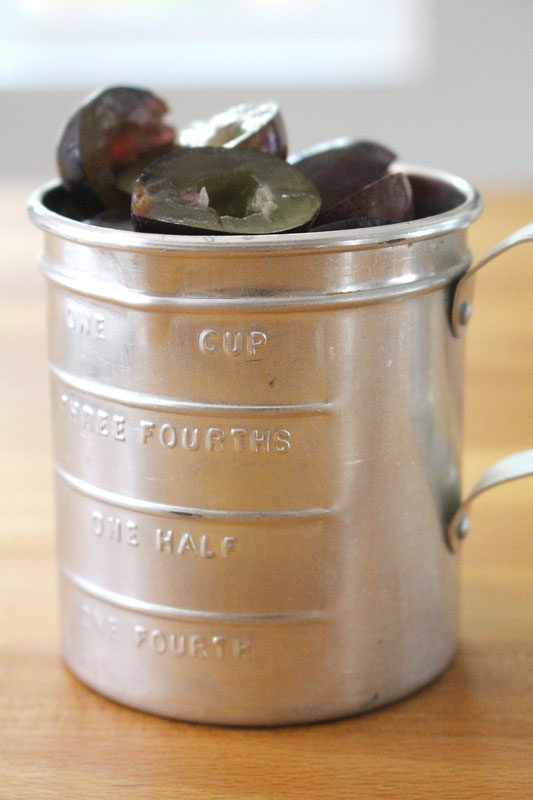
While these few minutes pass, halve and de-seed some grapes.

Eat them all.

Halve and de-seed some more.

CheesyChickenAndGrapesWithRice-5

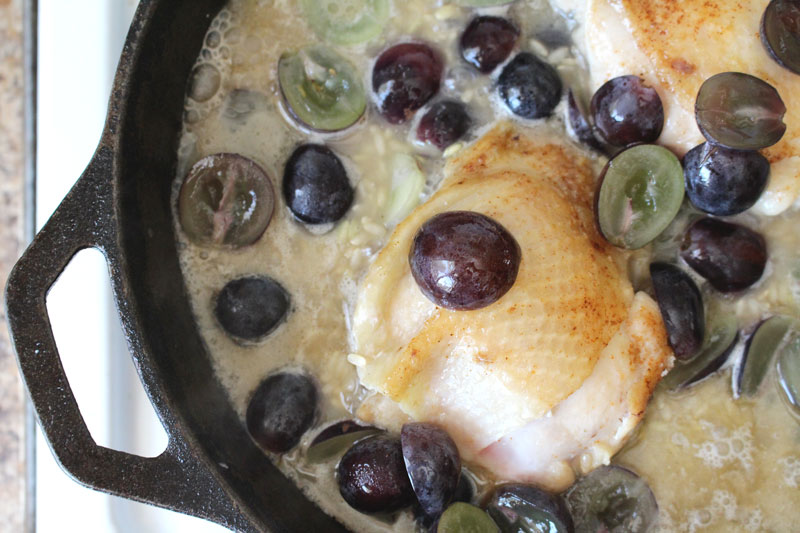
Add the grapes to the skillet. Pick them off the top of the chicken, and stir slightly into the rice. Then cook for a good long while (you know, until the rice is done and the chicken is hot). You may need to add more liquid partway through, and stir every once in a while.

CheesyChickenAndGrapesWithRice-6

Is one of your favorite snacks crackers and cheese with grapes? Do you wait expectantly for fall to arrive, so you can eat this snack as often as possible?

I do.

So, why not add some cheddar to the mix? Right?!

CheesyChickenAndGrapesWithRice-8

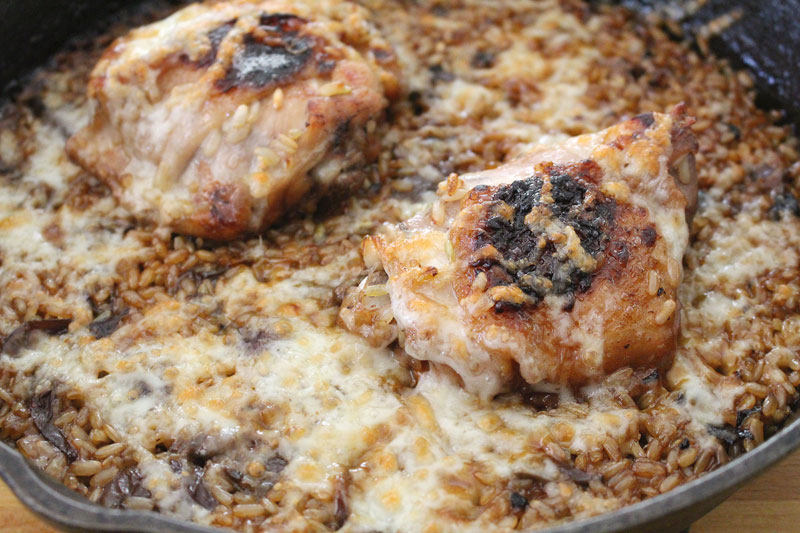
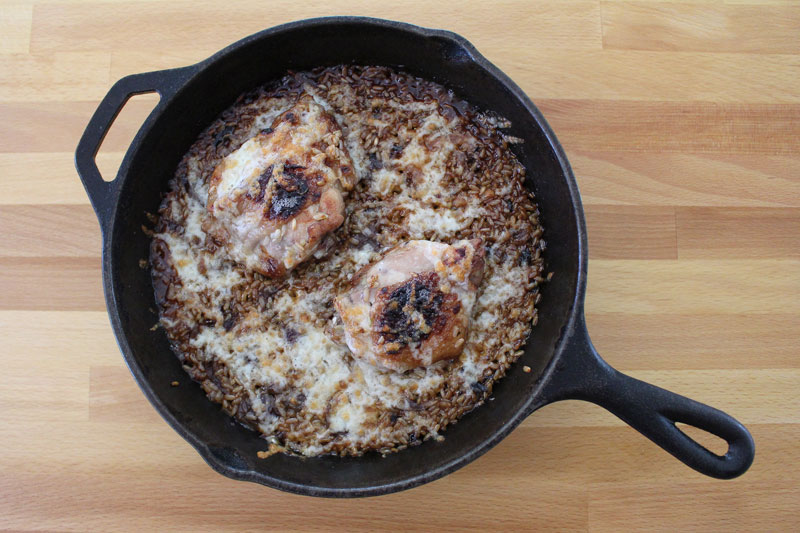
It’s sprinkled on and popped in to the broiler for just about 3 minutes. It’s like a bazillion degrees in there, so it’s not gonna take long. Don’t leave the kitchen to go wash your hair while it broils. You may have a smoky situation on your hands if you do.

Also, you remembered to use an ovenproof skillet, right? I know you did. But, just making sure. ‘Cause if you decided to not use one AND wash your hair while it broils, well, that’d be just disastrous. Let’s avoid kitchen catastrophes when possible.

CheesyChickenAndGrapesWithRice-9

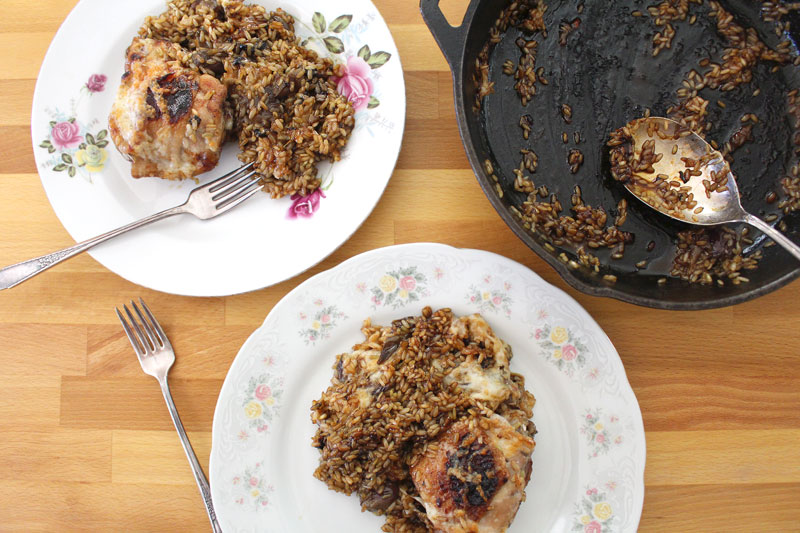
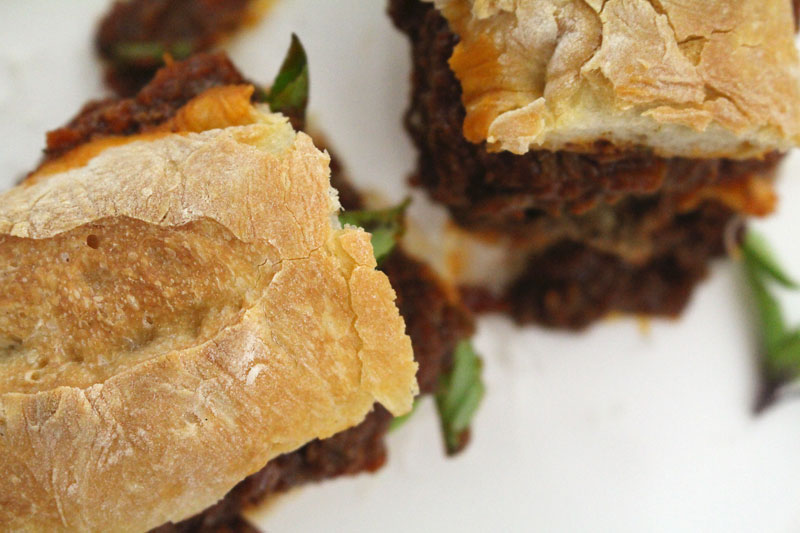
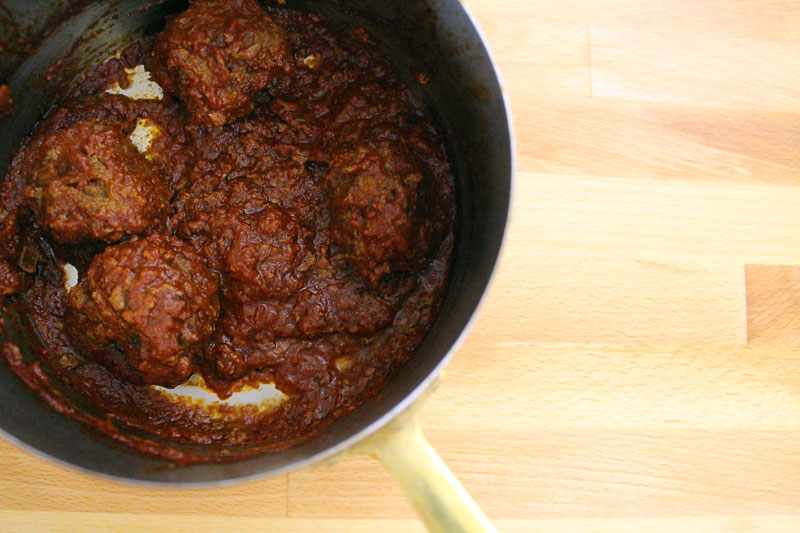
Once the rice is cooked, the chicken and rice all kinda brown a bit, creating this amazing sauce that I just want to soak up with a piece of crusty bread.

CheesyChickenAndGrapesWithRice-10

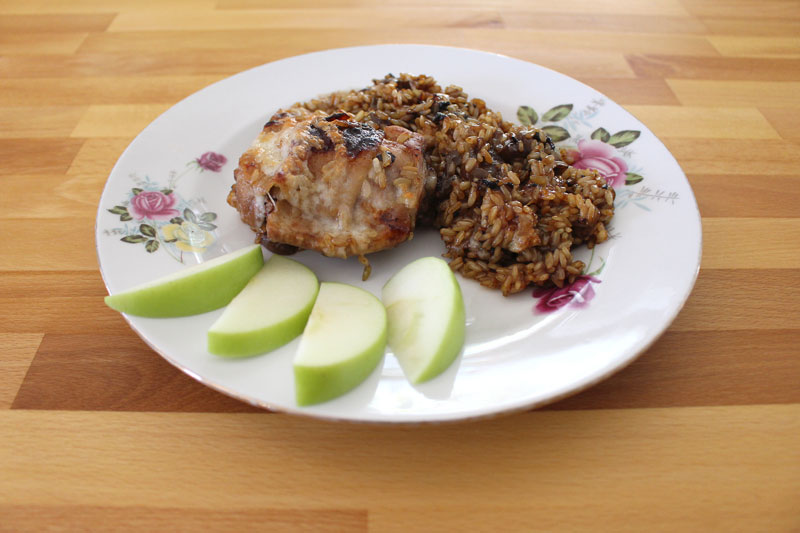
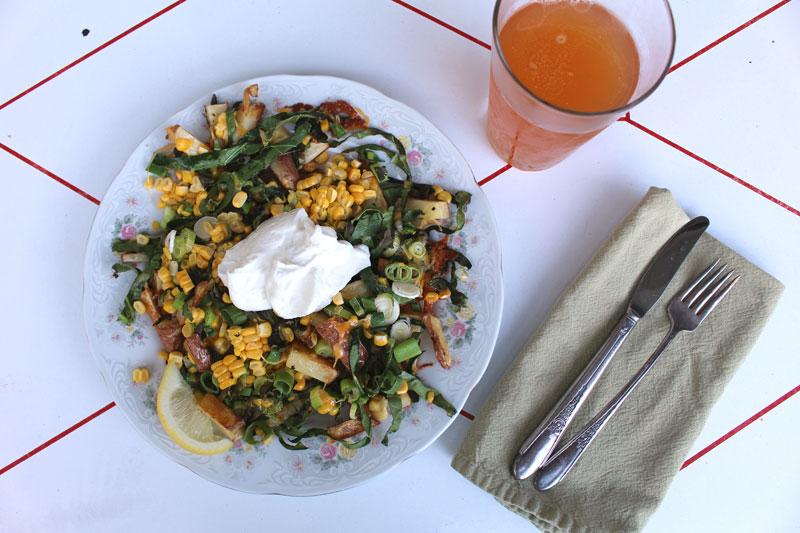
Apples go so nicely with grapes and cheese, so serve some (on their own, or in a salad) with this easy, comforting dish that welcomes fall (cough cough, seriously, fall, let’s do this now, enough with the hundred degree weather).

Happy Eating!

Cheesy Chicken and Grapes with Rice
Recipe Type: Dinner, Main Dish, Meat, Chicken, Fruit, Grapes
Author: Rachel Oberg – De Ma Cuisine
Prep time: 10 mins
Cook time: 96 mins
Total time: 1 hour 46 mins
Serves: 2-3
Ingredients
  • 2 T olive oil
  • 2-3 chicken thighs
  • to taste salt
  • dash cayenne
  • 2-3 C hot chicken or vegetable stock (or water)
  • 1 C brown rice
  • 1 C grapes, halved, seeds removed
  • 1 C cheddar cheese, grated
  • 1 apple, sliced, for serving
Instructions
  1. Heat an ovenproof skillet over medium heat. When it’s hot, add olive oil. When oil is hot, add chicken. Sprinkle with salt and cayenne. Sear on each side for 3 minutes.
  2. Add 2 C stock, rice, and salt. Stir gently around chicken (make sure all rice is in stock, not on top of chicken). Bring to a boil, then reduce to a simmer for 10 minutes.
  3. Add grapes, and simmer, adding more liquid if needed, cooking until chicken reaches 180F and rice is to desired tenderness, about 45-50 minutes (cooking uncovered, until the last 20-30 minutes), stirring occasionally.
  4. Taste and adjust seasoning if needed. Top with cheese and broil for 3 minutes.
  5. Serve with a side of apples.
3.2.1311

Monday

1

September 2014

2

COMMENTS

Irish Nachos

Written by , Posted in Appetizers, Cheese, Dinner, Gluten Free, Herbs, Kid-Friendly, Lunch, Main Dishes, Potatoes, Quick and Easy, Roasting, Sides, Snacks, Vegetables, Vegetarian

IrishNachos-9

Confession: I’ve never actually had Irish Nachos. I’ve seen some pictures though, so maybe that counts for something. Tim had them once when he was out with friends. He came home and talked about how good they were.

They seemed like something that I could make.

IrishNachos-1

It all starts with potatoes. You could slice them thin and round if you’d like. I cut them in to chunks because it’s quick and easy.

I need more quick and easy when it comes to meal preparations.

IrishNachos-2

Since we get a weekly box of produce from Abundant Harvest Organics, I try to add as many veggies as possible to our meals. The longer I do it the easier it is and now it’s become second nature. All the times that I’ve made my Irish Nachos, I’ve added some sort of greens. I just love their flavor when they’re roasted.

This particular version of Irish Nachos has more veggies than Tim would prefer (just a little too piled on for him). I’ve made them two or three other times with less. He liked those better. So use my recipe as a suggestion box and tweak it and adapt it to suit your family.

IrishNachos-3

I feel like Irish Nachos ought to have some sort of green onion sprinkled over top. That might just be me. In any case, I really like what they add to the dish.

IrishNachos-4

Crisped up potatoes are gathered into piles.

Mmmmm piles of potatoes.

IrishNachos-5

Then all of the toppings are piled on. You can do them in whatever order you’d like.

IrishNachos-6

Don’t forget the cheese. They are nachos after all.

IrishNachos-7

Since I recently cut a bunch of corn off the cob, I’m using it in everything. Summer Pizza, Squash and Egg Wraps, and Quinoa Salads… It’s good to have corn on hand.

IrishNachos-8

My favorite part, whenever there’s hot cheese involved, are the crispy bits of cheeeeeese. Every last bit needs to be scraped off the pan.

Every last bit.

Happy Eating!

Irish Nachos
Recipe Type: Main, Dinner, Side, Snack, Potatoes, Vegetarian
Author: Rachel Oberg – De Ma Cuisine
Prep time:
Cook time:
Total time:
Serves: 2-4
Ingredients
  • 4 potatoes, cut into long chunks
  • 1 T olive oil
  • 1/2 t (or more) salt
  • to taste pepper
  • 1/2 to 1 C greens (collards, kale, spinach, chard) cut in a chiffonade (thin ribbons)
  • 1/2 to 1 C green onions (or chives), chopped
  • 1/2 to 1 C cheese, grated
  • 2 cobs corn, cut off the cob
  • yogurt, for topping
  • lemon wedges, for serving
Instructions
  1. Pre-heat the oven to 350F.
  2. Toss potatoes with olive oil, salt, and pepper. Place on 1-2 baking sheets (don’t overcrowd them – use two sheets if needed), and bake for 15 minutes, flip them (and rotate the position in the oven if using two sheets), and bake about 15 minutes more (or until potatoes are crispy outside, tender inside).
  3. Gather potatoes into piles (as many piles as there are people eating), and top with greens, onions, cheese, and corn. Bake for 10 minutes more.
  4. Serve topped with yogurt and a squeeze of lemon.


Thursday

28

August 2014

3

COMMENTS

Squash and Scrambled Egg Wraps

Written by , Posted in Breakfast, Brunch, Cheese, Dinner, Eggs, Fruit, Kid-Friendly, Low Carb, Lunch, Main Dishes, Quick and Easy, Thoughts, Vegetables, Vegetarian

SquashEggWraps-12

My family lives entirely too far away from me. Or I live too far away from them. Today has been one of those days where I’m missing them especially a lot.

Sniff. I’ll be ok. It’s always too long in between in person visits, but I’m always thankful for the technology like Skype, so we can talk and see each others faces every week. Usually at some point someone sounds like a robot, there’s a delay and we all talk over each other, or it sounds like there’s a train rushing by at someone’s house. But, we’re hearing each other’s voices, seeing each other’s faces, from so far away.

If Anja (who is almost 2 years old) is on, we’re just dying at the cuteness, as she says our names and chats about the puzzle she just got.

Oh I love technology…

FamilySkype

These wraps seem like the kind of thing that we would enjoy together when we’re all gathered around the table for a meal. In person. All of us at the same table.

SquashEggWraps-1

We all enjoy food. In fact, all three of us kids are involved in the food industry in some way. My mom and dad have a banquet hall and have passed on their love for eating, cooking, and gardening to us. I have fond memories of plucking still warm raspberries and cherry tomatoes from the garden that we had in our backyard growing up. There are so many things about those years that I find myself trying to duplicate now as an adult with my own home.

SquashEggWraps-3

I don’t know if I was crazy about squash as a kid. Mom would hide it in “Zoo Bread” (made with zucchini), which we loved. But, I love squash now and can’t get enough of it this summer especially.

One of my favorite easy lunches is Squash’n Eggs. This is almost the same thing, just topped with cheese and salsa, and all wrapped up.

SquashEggWraps-2

If possible, I always have eggs on hand. They’re the perfect meal saver. From pasta topped with a fried egg, to Pasta Carbonara, to Roasted Broccoli and Fried Egg Sandwiches, it’s eggs to the rescue.

SquashEggWraps-4

I whisked the eggs with a little bit of milk, some salt, and pepper. Keeping it simple.

SquashEggWraps-5

Once the eggs start to set, they get scraped off the bottom of the pan a bit. Low heat is key with scrambled eggs. Cook them gently.

SquashEggWraps-7

Once they’re just set, they’re ready.

SquashEggWraps-8

Half of the mixture is scooped out on to each tortilla. Whole wheat for me, white for Tim. It’s what we both prefer.

SquashEggWraps-6

SquashEggWraps-9

I like to add a little bit of monterey jack or cheddar cheese to them. Tastes so good.

SquashEggWraps-10

A plomp of salsa, then they get rolled up. My whole wheat tortillas aren’t as flexible as Tim’s white ones. But, even cracked, they taste good.

SquashEggWraps-11

We have tons of fresh tomatoes right now and they’ve got the most incredible flavor, so we’re eating them on everything! I hope you are too. And, I especially hope that you’re enjoying these wraps with your family. Even if it’s just via Skype.

Happy Eating!

Squash and Scrambled Egg Wraps
Recipe Type: Main, Dinner, Lunch, Breakfast, Brunch, Quick and Easy, Eggs, Vegetarian
Author: Rachel Oberg – De Ma Cuisine
Prep time:
Cook time:
Total time:
Serves: 2
One of the quickest, easiest lunches for those super busy days. Squash and scrambled eggs are topped with cheese and salsa, and all wrapped up.
Ingredients
  • 1 T olive oil
  • 1 medium summer squash, chopped
  • to taste salt
  • to taste pepper
  • 1/2 C corn
  • 4 eggs
  • 2 T milk or water
  • to taste salt
  • to taste pepper
  • 2 tortillas
  • 1/4 to 1/2 C monterey jack (or cheddar) cheese, grated
  • salsa
  • 1 tomato, chopped, for topping
Instructions
  1. Heat skillet, add oil, when oil is hot add squash, salt, and pepper. Cook for about 5 minutes over medium-low heat. Add corn and cook for about 2 minutes more.
  2. Turn heat to low. Whisk together eggs, milk or water, salt, and pepper. Add to squash skillet. Gently scrape the bottom of the pan with a wooden spoon or heat-safe spatula to scrape up the eggs as some bits begin to set. Cook for about 4-5 minutes, or until eggs are just set, scraping occasionally. Taste and adjust seasoning if needed.
  3. Scoop egg mixture into the tortillas. Top with cheese and salsa. Fold ends in and then sides.
  4. Serve topped with tomato.


Monday

25

August 2014

2

COMMENTS

Meatball Subs

Written by , Posted in Beef, Bread, Cheese, Dinner, Fruit, Herbs, Kid-Friendly, Lunch, Main Dishes, Meat, Quick and Easy, Sandwiches, Sauces

MeatballSubs-6

I want you to know that I almost had to stop working on this post to go back to the grocery store to buy some ground beef so I can make these sandwiches. They are not on the menu for dinner tonight, but working on these pictures is tormenting me.

Tormenting I say.

The day that I photographed this dish, as soon as I was done, I stood next to the island and inhaled it so fast that I think I gave myself heartburn.

Oops.

Worth it.

MeatballSubs-2

It all starts with meatballs. They’re made with organic beef, an egg, and some honey. Plus herbs. Gotta have herbs.

They start in the pan that an onion has just cooked in.

Some homemade tomato sauce is added, and they cook a bit longer.

I’m drooling here.

MeatballSubs-1

And then there’s a homemade baguette.

Can this meal get any better?!

If you don’t have the time to make homemade baguettes, I understand. They are a lot of work. Buuuut so worth it.

The bread is toasted in a buttered skillet.

Yep. It got better.

MeatballSubs-3

If you can manage to stop yourself from just standing at the stove and scooping the meatballs out of the pan with the bread, you can top it with cheese.

If you can’t, I understand.

Buuuuuuut I think that might actually be a good idea. You know how the best part of eating a plate of tomato sauced spaghetti is wiping down the plate with your buttered bread? This is kinda like that but better, because there’s so much more goodness to scoop up.

Next time I’m trying this.

MeatballSubs-4

If you’ve held yourself together and convinced yourself to not eat like a maniac at the stove, top the sandwich with lots of basil.

MeatballSubs-5

Now you’ve earned a bite.

So have I.

I’m hungry.

Happy Eating!

Meatball Subs
Recipe Type: Main, Sandwich, Lunch, Dinner, Beef
Author: Rachel Oberg – De Ma Cuisine
Prep time:
Cook time:
Total time:
Serves: 3
One of our favorite sandwiches is also one of the messiest. Filled with delicious beef, basil, and cheese, we love a good meatball sub.
Ingredients
  • 1 onion, diced
  • 2 T olive oil, divided
  • 1 egg
  • to taste salt
  • to taste pepper
  • 1 t honey
  • 1 t balsamic vinegar
  • 2 C tomato sauce
  • 1/2 t mustard
  • 1 T fresh (or 1/2 t dried) parsley, divided
  • 1 T fresh (or 1/2 t dried) thyme, divided
  • 1 lb. ground beef
  • 2 C tomato sauce
  • to taste salt
  • to taste pepper
  • 1 t lemon juice
  • 1 T butter
  • pinch salt
  • 3 longish portions of baguette or crusty bread, sliced in half lengthwise
  • cheese, grated
  • fresh basil, for topping
Instructions
  1. Heat a large skillet. Add 1 T olive oil. When it’s hot, add the onion and cook over medium heat for about 5 minutes (or until onion is translucent and softened), stirring occasionally.
  2. Whisk together egg through thyme. Combine beef with egg mixture, mixing together with your hands (do not over mix). Roll into about 12 meatballs.
  3. In the onion skillet, add remaining 1 T olive oil, turn heat to medium-high, and add meatballs. Cook, turning often, until browned all over (about 8-10 minutes total).
  4. Whisk together tomato sauce, salt, pepper, remaining parsley, and thyme. Pour into meatball pan. Bring to a boil, then reduce to a simmer. Cook meatballs until they reach 160F (about 10-15 minutes). Stir in a squeeze of lemon.
  5. Heat another skillet and add the butter and a pinch of salt. Once the butter is hot, add the bread (cut side down) and cook over medium heat it until it’s browned.
  6. Top the bottom piece of bread with some cheese, four meatballs, a couple scoops of sauce, a bit more cheese, and the basil. Scoop a bit more sauce on the top piece of bread and close the sandwich.


Monday

18

August 2014

0

COMMENTS

Beef and Bean Enchiladas

Written by , Posted in Baking, Beans, Beef, Cheese, Dinner, Fruit, Gluten Free, Kid-Friendly, Legumes, Lunch, Main Dishes, Meat, Potlucks, Vegetables

BeefBeanEnchiladas-11

Enchiladas are one of my go-to meals when I want to bring dinner to friends. It’s pretty quick and easy to make, it’s hearty, and it can be pretty healthy.

They’re also one of Tim’s favorites.

I try to have some in the freezer at all times.

BeefBeanEnchiladas-2

I mean, take a look at all of the veggies I’ve piled in here. I had celery on hand, but normally I’d use bell peppers (note: if you’re using celery, make sure it’s really cooked down and soft). I also have been putting summer squash in everything, so why not these too?!

BeefBeanEnchiladas-1

Also corn. In everything. I am addicted.

This winter when we had a million spaghetti squash I cooked a bunch of ’em and froze the flesh. I’ve been slowly using it. If you don’t have any cooked spaghetti squash you could just add more beans and summer squash.

Tim doesn’t mind when I sneak spaghetti squash into things like this. But, he did note that he got a pretty squashy bite, so stir it in pretty well if that might bother someone in your family. 😉

BeefBeanEnchiladas-4

I like to cook up the filling first. That way they take less time in the oven. Plus then I can make sure that all the veggies are soft. No one wants a crunchy this or that, unless it’s supposed to be there.

BeefBeanEnchiladas-5

Tim built me a beautiful, huge kitchen island when we moved. So I have tons of space to lay out all the tortillas I could ever need.

I’m thankful for this workspace.

The sauce gets divided evenly between the tortillas.

BeefBeanEnchiladas-6

The ends get folded in and then it’s rolled up. My whole wheat tortillas cracked a bit. No big deal.

BeefBeanEnchiladas-3

I like a bit of sauce in the bottom of the pan. If you like it extra saucy, add more! I used what I had in the freezer, so normally I’d make it a bit juicier than this looks (the recipe is adapted to be saucier).

BeefBeanEnchiladas-7

Rolled up and ready for cheeeeeeeeese.

BeefBeanEnchiladas-8

You could add way more cheese if you’d like, but I didn’t want to go overboard. Moderation, right?!

BeefBeanEnchiladas-10

After these came out of the oven, I put half of them into freezer safe containers so they will be ready for lunches. The rest we devoured.

BeefBeanEnchiladas-9

If you’re gonna bring these to some friends, send along a container of Greek yogurt (or sour cream), salsa, corn chips, and guacamole (if you’re feeling extra generous). Make them a simple green salad with some chopped fresh tomatoes and a container of homemade Ranch dressing (whisk together a bit of yogurt, mayo, fresh herbs, garlic, salt, and pepper). And for dessert, how about some Fruit Crisp that can be added to the leftover Greek yogurt for breakfast the next morning?

If you’re serving it tonight for your family, serve it exactly the same way.

Happy Eating!

Beef and Bean Enchiladas
Recipe Type: Main, Easy, Beans, Beef, Vegetables, Dinner, Main Dishes
Author: Rachel Oberg – De Ma Cuisine
Prep time:
Cook time:
Total time:
Serves: 4-6
Perfect for a hearty dinner tonight, or to make to take to a friend in need.
Ingredients
  • 1 t olive oil
  • 1/4 to 1/2 C bell peppers (or celery), chopped
  • 1/2 to 1 C summer squash, chopped
  • pinch salt
  • 1-2 C Chili (I used Beef Chili), or 1 lb. ground beef
  • 8-15 oz. kidney beans
  • 1 1/2 C cooked spaghetti squash (or add more beans and summer squash)
  • 1/4 C salsa
  • 1 C corn
  • 1/2 t chili powder (or more if using ground beef)
  • pinch ginger
  • to taste salt
  • to taste pepper
  • 1/2 to 1 C tomato sauce (add an extra 1/4 C if using ground beef)
  • to taste salt
  • to taste pepper
  • 8-10 tortillas
  • 1 C cheese, grated (Monterey/Pepper Jack or Cheddar)
  • Greek yogurt, for topping
  • 1-2 fresh tomatoes, chopped, for topping
  • jalapeño, chopped, for topping (optional – if you like it extra spicy)
Instructions
  1. Pre-heat oven to 350F.
  2. Heat a skillet, add olive oil. When oil is hot, add bell peppers/celery, summer squash, and a pinch of salt. Cook for about 5 minutes, or until veggies are tender, over medium heat, stirring occasionally. (Note: if using raw ground beef, cook first, then add veggies when beef is almost done. Add the extra 1/4 C tomato sauce with the beans in the next step.)
  3. Mix together chili, beans, spaghetti squash, salsa, corn, chili powder, ginger, salt, and pepper. Add to skillet. Bring to a boil, reduce to a simmer, and cook for about 5 minutes. Taste and adjust seasoning if needed.
  4. Mix tomato sauce with salt and pepper. Pour into the bottom of a greased 9×13 baking dish.
  5. Divide the beef and bean filling between the tortillas. Fold ends in and roll up. Place seam side down in tomato sauced pan. Top with salsa and cheese. Bake for 20 minutes, uncovered, or until cheese is melted.
  6. Serve topped with yogurt and fresh tomatoes (and jalapeño if desired).
Notes
Gluten-free if you use corn tortillas.