De Ma Cuisine

Dairy-Free Archive

Thursday

18

September 2014

0

COMMENTS

How to Make Tomato Sauce

Written by , Posted in Dairy-Free, Dinner, Fruit, Gluten Free, Herbs, How To, Kid-Friendly, Sauces, Storage/Prep, Vegan, Vegetables, Vegetarian

Tomato-Sauce-7

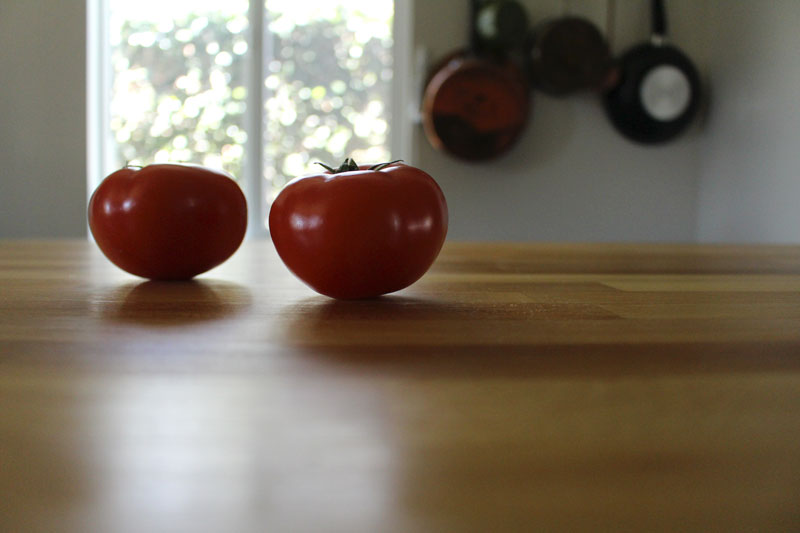
Tomatoes are one of the best things about summer.

Actually, all the fruits and veggies that we’ve been getting are the best.

They’re all favorites.

I want them to last all year long. I know that in a month or two, when it finally starts to cool down, I will be thankful for the heartier root veggies, apples, and pears that will be coming. But, for now, let’s keep talking about summer. ‘Cause I’m not quite ready to be done with it yet.

Tomato-Sauce-1

One of the ways to prolong summer is by preserving its fruits and veggies. So, like I’ve done a few times before, let’s talk about saving summer. In the form of a special tomato sauce.

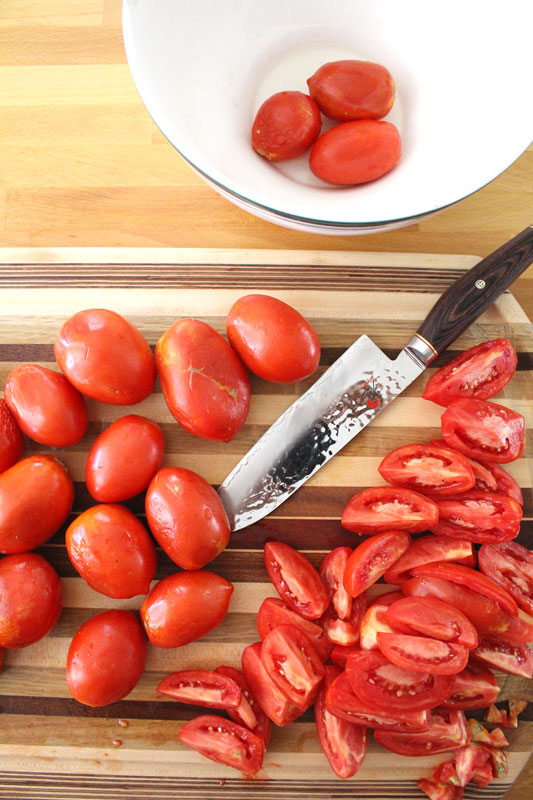
It starts with a bunch of Roma tomatoes. They’re my favorite for sauce. They have less seeds and goopy bits, and I find them a little less watery… Hooooowever, use what you have! Use what you have! Use what you have!!!

I quartered mine, sliced off the hard bit at the end, and then roughly chopped them. They’re going to be blended later, so precision isn’t necessary. You may have noticed that I didn’t peel them. Later you will notice that I don’t strain them. You can if you want, but a little tomato peel and seeds don’t bother me.

Tomato-Sauce-2

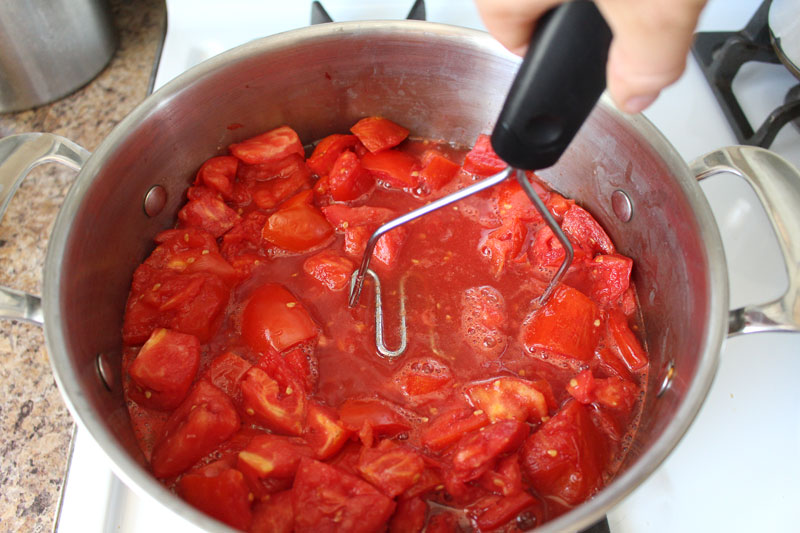
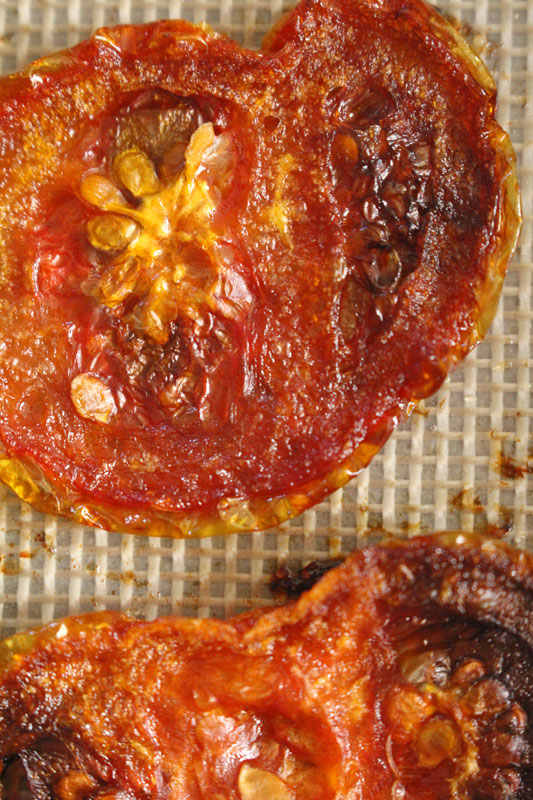
They cook up for a few minutes, then are mashed up with a potato masher. This just speeds things along a bit, breaking down-wise.

Tomato-Sauce-3

If you want to have just a plan tomato sauce, blend it up here and cook for an hour and a half or two.

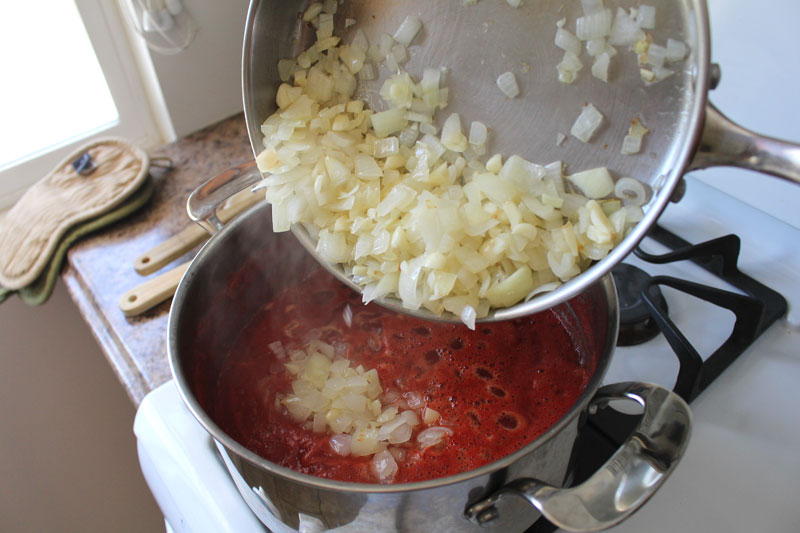
I know how I like my tomato sauce, so I thought I’d get ahead of the game a little, and add some onions, garlic, herbs, and a few other things to the mix before blending.

It’s up to you.

Choose your own adventure.

My adventure has a whole head of garlic in it. Just the way I like it.

Oh mah goodness the smell in our kitchen was just fantastic. A whole head of garlic is just like heaven to me.

Tomato-Sauce-4

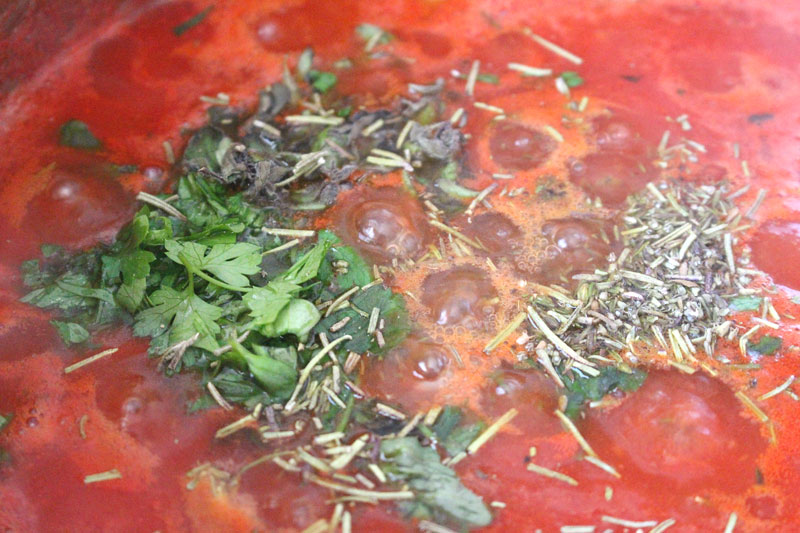
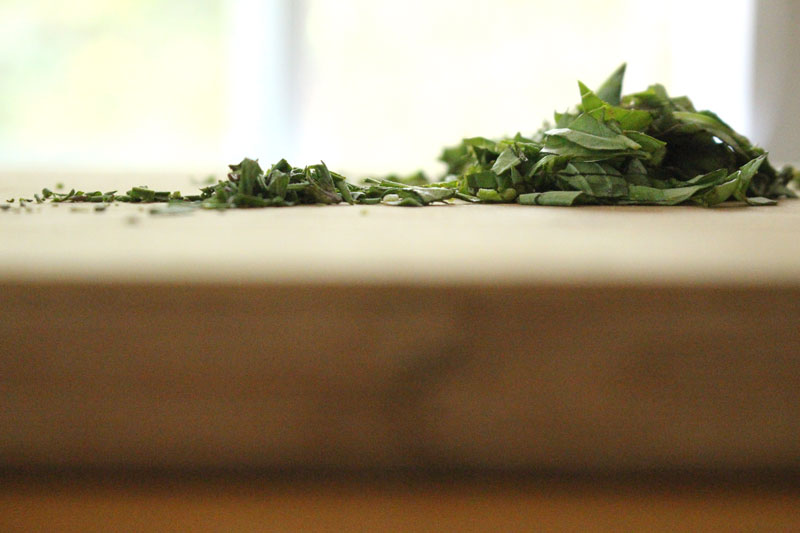
I have basil, parsley, and oregano growing in my garden right now. I added those summer favorites, along with some dried thyme and rosemary. Plus a glug of balsamic vinegar and a drizzle of honey.

Tomato-Sauce-5

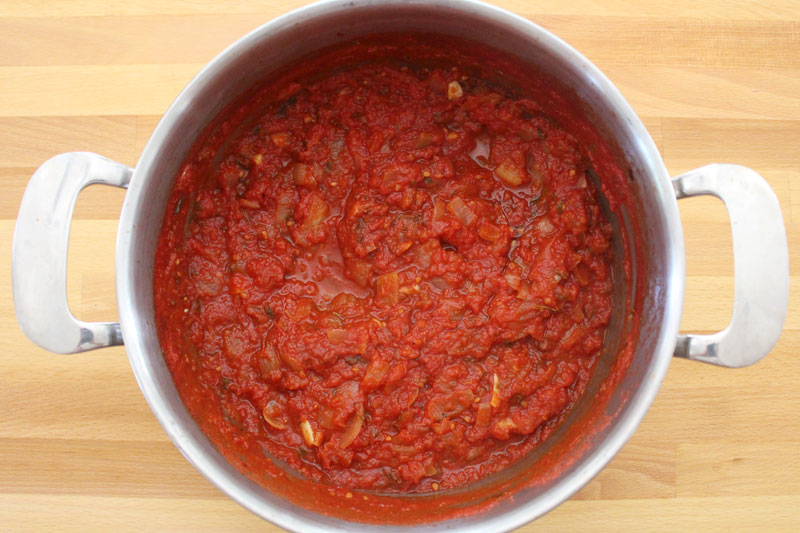
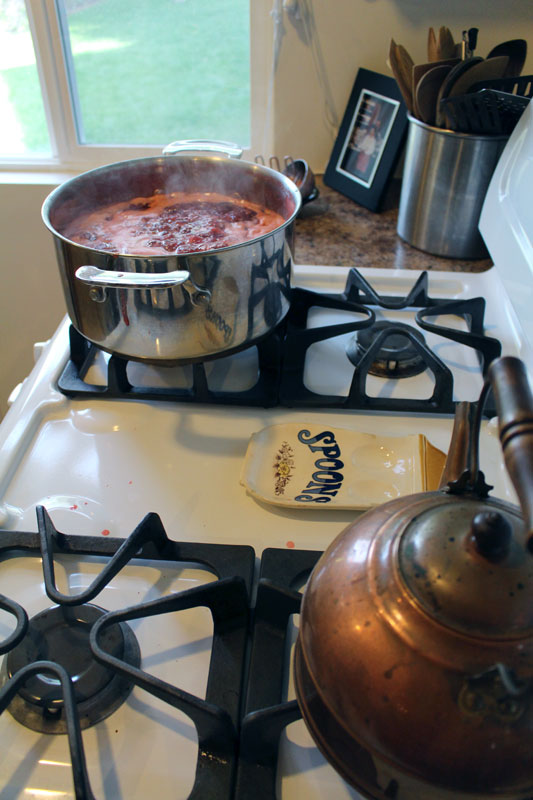
Then I cooked it all up until the water had mostly evaporated and the sauce was thick.

Tomato-Sauce-6

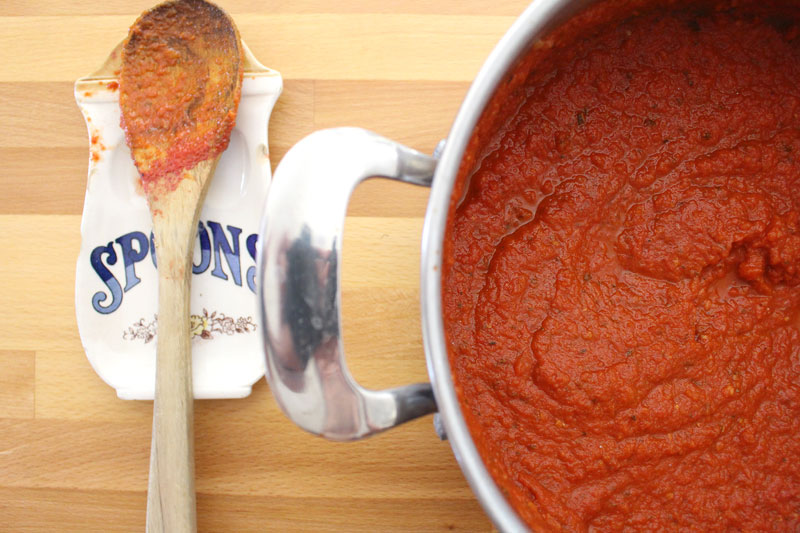
Quick blend with the hand blender (or the regular blender).

Taste. Add more salt if you want, but remember that you will probably be using this along with other things, so under-salting is ok here.

And only here.

Tomato-Sauce-8

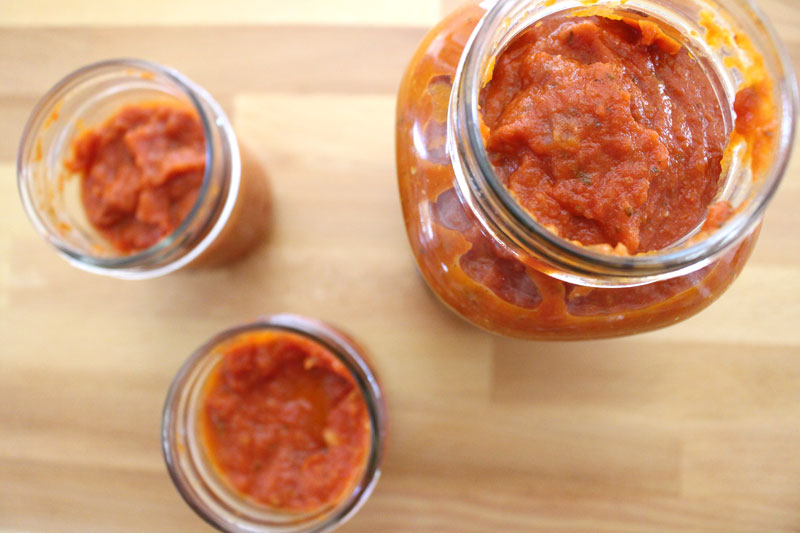
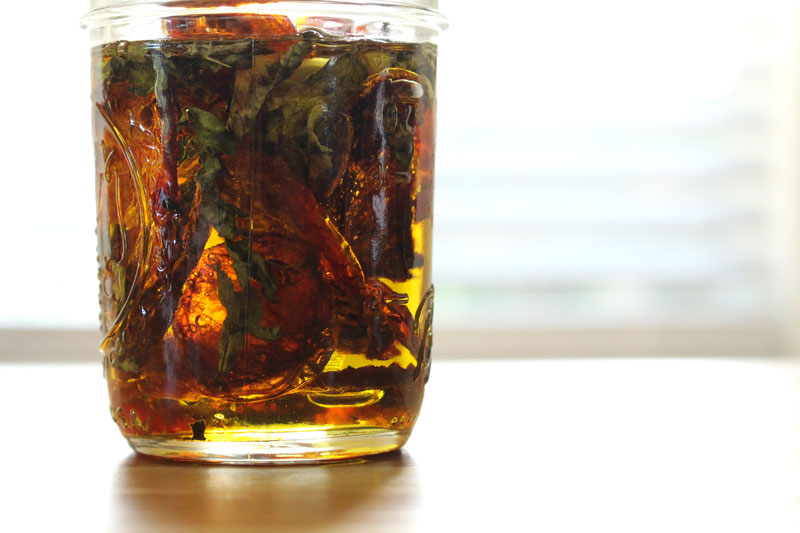
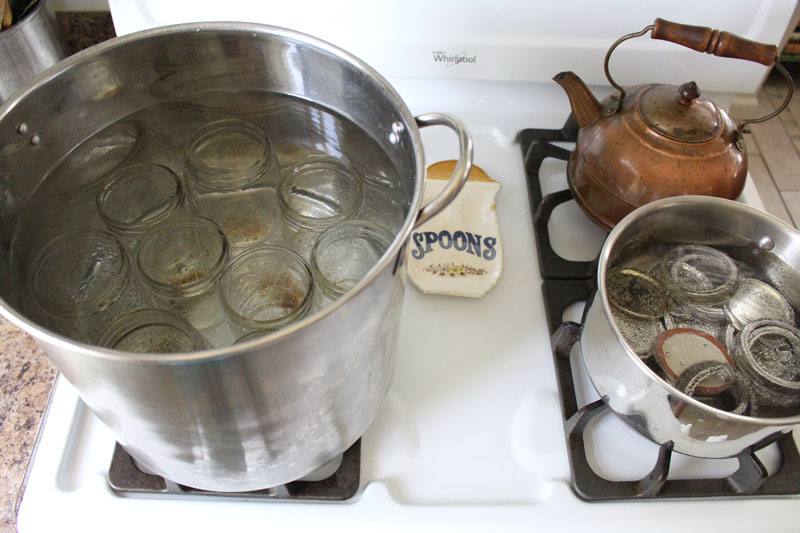
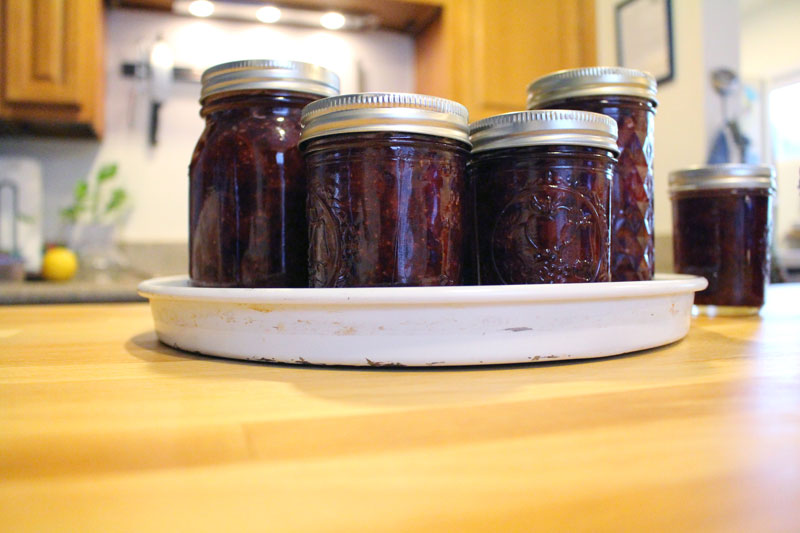
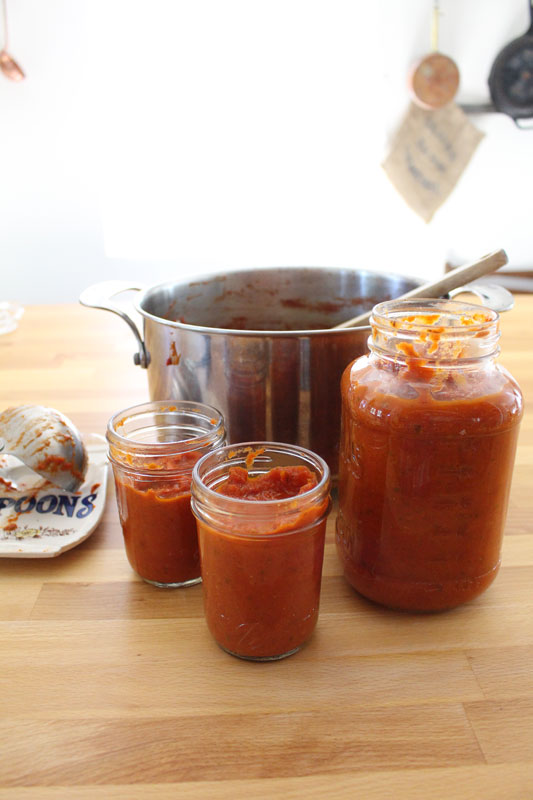
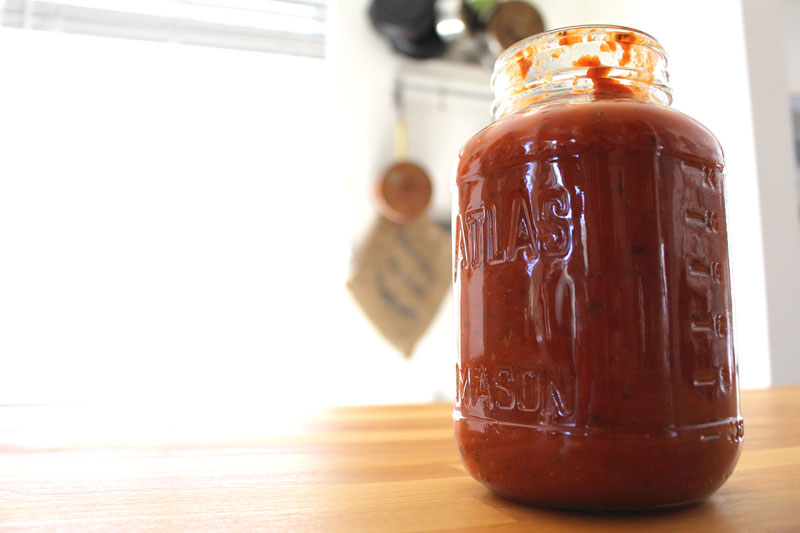
I had some jars sterilized and ready. I will store these in the freezer, since I don’t want to process them in a water bath for 35 minutes. Is it just me, or does anyone else get nervous about the jars breaking and losing their precious sauce? I don’t have a canning set, and I’m definitely not risking jars in a large pot of boiling water bumping in to each other.

Tomato-Sauce-9

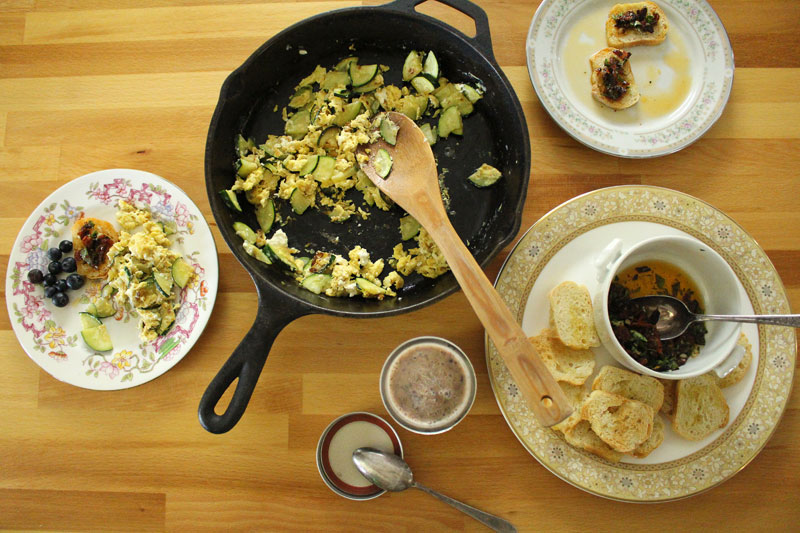
The next thing to do is to figure out how to use this amazing sauce. 

Easy.

You can pair it with things like pasta, meats, and breads. It will go great with veggies too.

Specifically, you could make Eggplant or Squash Parmesan, Spaghetti and Meatballs, Deconstructed Lasagne, Meat and Cheese Lasagna, and Summer Pizza.

And oh my gosh you totally should use it to make Meatball Subs. Like right now. I’m serious.

Or, if you just can’t wait, grab some crusty bread and dip it in to the sauce. Good idea right?!

Happy Eating!

Tomato Sauce
Recipe Type: Condiment, Fruit, Vegetable, Vegan, Vegetarian, Gluten-Free, Dairy-Free
Cuisine: Italian
Author: Rachel Oberg – De Ma Cuisine
Prep time: 20 mins
Cook time: 140 mins
Total time: 2 hours 40 mins
Ingredients
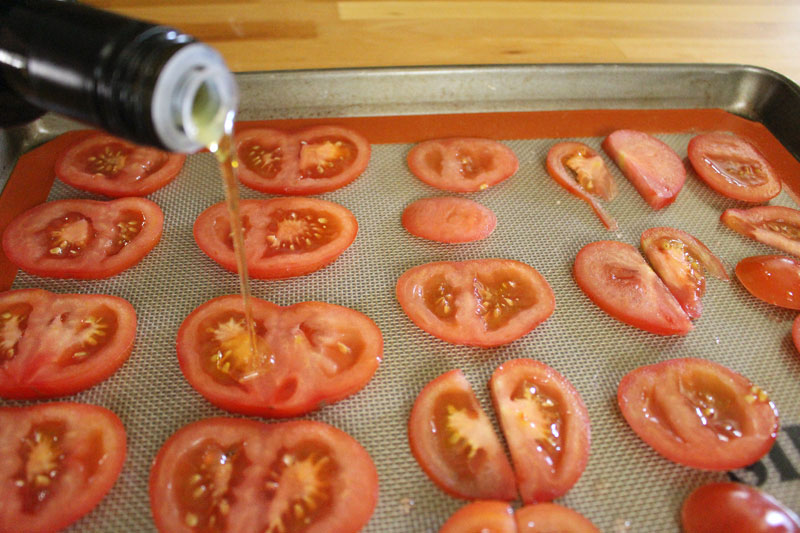
  • 5 pounds Roma tomatoes, roughly chopped
  • 1 t salt
  • Extras: 2 T olive oil
  • 2 onions, roughly chopped
  • 1 head (about 12 cloves) garlic, roughly chopped
  • pinch pepper
  • 1/4 fresh basil, roughly chopped
  • 2 T fresh parsley, roughly chopped
  • 2 T fresh oregano, roughly chopped
  • 1 t dried rosemary, crushed
  • 1 t dried thyme
  • 2 T balsamic vinegar
  • 1 T honey
Instructions
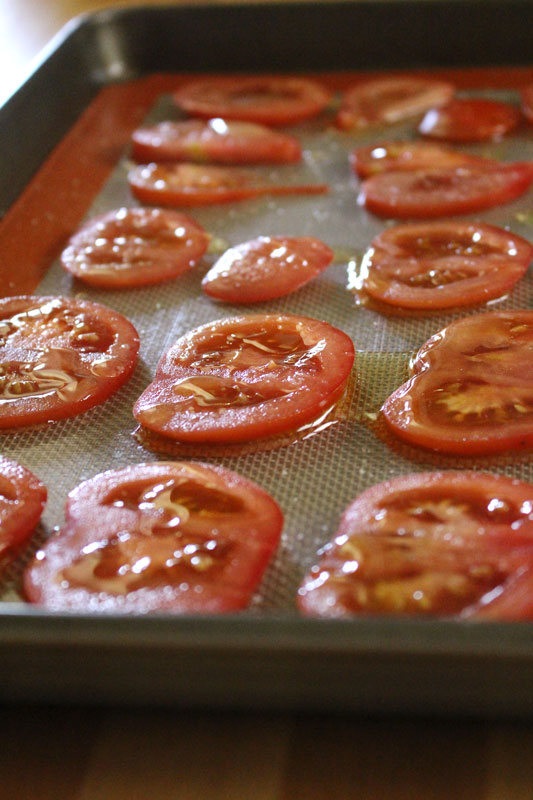
  1. Combine tomatoes and salt in a large pot. Cook over medium heat, stirring occasionally, for about 10 minutes. Mash with a potato masher and cook for 10 minutes more.
  2. (If you don’t want to add anything else, skip to step 5.)
  3. Add olive oil to a hot pan. Add onions (bell pepper, zucchini) and cook over medium heat with a pinch of salt for about 10 minutes, stirring occasionally. Add garlic and cook, stirring constantly, for 3 minutes more.
  4. Add onion mixture, herbs, vinegar, and honey to the tomatoes. Use a spatula to get all the garlic infused oil from the pan. Stir once to combine.
  5. Blend with a hand blender, or in batches in a regular blender – removing the plug from the lid and covering with a clean towel.
  6. Bring back to a boil, then reduce to a simmer and cook for 1.5 – 2 hours, or until sauce has thickened, stirring occasionally.
  7. Sterilize your canning jars, bands, and lids in a pot of boiling water for at least 10 minutes at a rolling boil (or in the dishwasher).
  8. Pour sauce in to jars, leaving an inch or so (or a bit less) at the top for expansion.
  9. Store in the freezer once they have cooled completely.*
3.2.1311

(Yields about 2.5 pints or 5 C sauce.)

*To process jars in a water bath Ball suggests that you add 1 T lemon juice to each jar before filling and process in a water bath for 35 minutes. Do this if you want to store at room temperature – only store at room temperature if they have sealed properly).

Monday

8

September 2014

0

COMMENTS

Massaged Kale and Tuna Salad

Written by , Posted in Dairy-Free, Dinner, Fish, Fruit, Gluten Free, Lunch, Main Dishes, Meat, Quick and Easy, Salads, Sides, Vegetables


MassagedKaleTunaSalad-6Sometimes I just need a good salad. Salads are versatile and delicious, but sometimes aren’t hearty enough to be considered a main course. So I like to add a bit of protein so there’s a bit more to it.

For this salad, I chose tuna. Because it’s what I had. Because I like it. I used canned for this one. But, then a few weeks later I discovered fresh tuna at the grocery store, and the leftovers from that dinner would work just as well (maybe better, hello, fresh!).

You could also use chicken, turkey, ham, quinoa, garbonzo beans, or lentils.

‘Cause why not?!

MassagedKaleTunaSalad-1

Then there’s the kale. It’s one of my favorite green veggies. But, I also love chard and spinach too. If you don’t have any of these dark green goodies, regular lettuce will work fine too (just don’t do the massaging step). A hearty butter lettuce works great, but use what you have in your fridge.

MassagedKaleTunaSalad-2

Kale is tossed with a bit of olive oil and some salt, then massaged for a few minutes. Your hands will turn green. That’s normal.

MassagedKaleTunaSalad-3

It will get darker and feel a bit limp, like it does when it’s cooked. I love kale this way. Easier to digest and super yummy.

MassagedKaleTunaSalad-4You can really use whatever dressing you’d like. Although I’d suggest some sort of vinaigrette or something lemony. I just squeezed some lemon and drizzled a bit of balsamic over top. Perfect with the olive oil that was already all over the kale.

MassagedKaleTunaSalad-5

I like a lotta crunch in my salads. Usually nuts and carrots do the trick. Sometimes croutons are added. Here I’ve also got apples, because I happened to have some on hand. But, again, use what you have (and what goes well with tuna, or whatever protein you’ve chosen).

ButterLettuceFruitTunaSalad_1

At other times, I’ve also used grapes (in season now, so yummy with tuna!), cucumber, apples, cheddar, and almonds. This is one of my favorite combinations. It would go well with a nice butter lettuce, or the massaged kale.

Tuna-Salad

Tomato is also a good addition.

Use what’s in season and what will compliment the other ingredients, and you’re sure to find a winning combination.

MassagedKaleTunaSalad-7

However you toss it together, this hearty salad will hold up well prepared the night before for a work or school lunch. But, like most foods, it’s best eaten fresh, right after you’ve made it, standing at the kitchen island, out of the serving bowl… or maybe that’s just me.

Happy Eating!

Massaged Kale and Tuna Salad
Recipe Type: Main, Lunch, Side, Salad, Fish
Author: Rachel Oberg – De Ma Cuisine
Prep time:
Total time:
Serves: 2
Ingredients
  • Tuna: 1 can tuna, drained (or about 5-6 oz. leftover cooked tuna)
  • 1/2 lemon, juiced
  • 1 t olive oil
  • pinch cayenne
  • to taste salt
  • to taste pepper
  • 2 T green onions, chopped
  • Salad: 3 C kale, torn into small pieces
  • 1-2 T olive oil
  • 1-2 T lemon juice
  • 1/2 to 1 T balsamic vinegar
  • to taste salt
  • to taste pepper
  • 1/4 C carrot, thinly sliced into rounds (or instead of carrots and green onions, try: grapes, cheddar cheese, cucumber, and apple)
  • 1 apple, roughly chopped
  • 1/4 C roasted and salted almonds, roughly chopped
  • (could also add chopped tomato)
Instructions
  1. Combine all tuna ingredients together. Taste and adjust seasoning if needed.
  2. Pour 1 T oil and a bit of salt onto kale. Massage with hands for 2-3 minutes (or until kale looks darker, wiltier, and a bit like it is cooked).
  3. Top kale with tuna and remaining ingredients.


Monday

21

July 2014

0

COMMENTS

Fresh Herb and Dried Tomato Bruschetta

Written by , Posted in Appetizers, Bread, Brunch, Dairy-Free, Fruit, Herbs, Lunch, Quick and Easy, Sandwiches, Snacks, Vegan, Vegetables, Vegetarian

FreshHerbDriedTomatoBruschetta-4

I dried some tomatoes.

There was a moment when I wasn’t sure if they would turn out.

Somewhere in-between peeking into the oven to see some still watery tomatoes, and picking a couple burned ones off the baking sheet there was success.

Success made of sweet, intense flavor.

Dried-Tomatoes-8

They have a texture like a dried cranberry. A hint of sweetness like them too. But, that’s where the similarities end.

Because you wouldn’t make a dried cranberry into a bruschetta… would you?

Don’t answer that.

We will just move on. Let us go to a place of amazing.

FreshHerbDriedTomatoBruschetta-5

One of my favorite appetizers (or meals, depending on the day) is bruschetta. It’s crazy simple to prepare. And insanely good to eat. Like coo coo crazy good.

It’s bread, garlic, oil, tomatoes, and herbs. You can’t go wrong.

FreshHerbDriedTomatoBruschetta-1

A baguette is sliced, drizzled with olive oil, and toasted.

I learned how to make baguettes that time I went to Paris.

I think of that trip most days. Making baguettes brings a little bit of Paris to my kitchen.

Bruschetta brings a little bit of Italy.

I like that.

FreshHerbDriedTomatoBruschetta-2

Fresh herbs like basil and savory are perfect. Oregano would also be nice, but I didn’t have any at the time. I do now. Guess I’ll have to make these again.

Twist my arm.

FreshHerbDriedTomatoBruschetta-3

Those obnoxiously good tomatoes are chopped up. (If they even made it off the baking sheet. I’m not sure how many I ate before they went into the jar on drying day.) They’re combined with the fresh herbs and a ton of garlic.

Oh sweet garlic. How I love thee…

FreshHerbDriedTomatoBruschetta-6

I ate them all. All. All by myself.

There are really enough for 3-4 people.

I was gonna share with Tim, but he ended up having a lunch meeting. Oh darn. I ate them with Squash’n Eggs, and a Smoothie. And then I ate the leftovers for a snack later in the evening.

Happy Eating!

Fresh Herb and Dried Tomato Bruschetta
Recipe Type: Appetizer, Side, Vegetarian, Fruit, Herbs, Vegan
Author: Rachel Oberg – De Ma Cuisine
Prep time:
Cook time:
Total time:
Serves: 4
Ingredients
  • 16-24 slices baguette
  • 1 t olive oil
  • pinch salt
  • 1 pint sized jar dried tomatoes, chopped
  • 2 T fresh basil, chopped
  • 1 t fresh savory, chopped
  • (oregano could also be added)
  • 1/4 C olive oil (use the oil from the tomatoes)
  • 1 clove garlic (from tomatoes), minced
  • 3-4 cloves garlic, minced
  • to taste, salt
  • to taste, pepper
Instructions
  1. Pre-heat oven to 350F (I used the toaster/convection oven).
  2. Drizzle baguette with a bit of olive oil, sprinkle with salt. Toast for about 10-15 minutes, or until crispy and slightly browned.
  3. Combine tomato through pepper. Taste and adjust seasoning if needed.
  4. Top toasted baguette slices with tomato mixture.


Thursday

17

July 2014

0

COMMENTS

How To Dry Tomatoes

Written by , Posted in Canning, Condiments, Dairy-Free, Fruit, Gluten Free, Herbs, Roasting, Vegan, Vegetables, Vegetarian

Dried-Tomatoes-6

Tomatoes are such a great fruit. It’s weird that we use them like a vegetable when they’re not one.

I’m ok with that.

They go with so much, they can be used in so many different ways.

The possibilities are pretty endless.

Dried-Tomatoes-1

Around here, the growing season for local tomatoes is pretty long. We’ve been getting them in our Abundant Harvest Organics box for about two months now.

We’re very fortunate.

But, that doesn’t mean we don’t need to preserve them and make them last as long as possible.

Dried-Tomatoes-2

I opted to dry the tomatoes by slow roasting them in the oven at a low temperature.

I love the intense flavor that roasting brings.

I’ve always called this type of tomato a “sun-dried tomato”. But, since I did not dry them in the sun, I didn’t want to lie.

Also, if I’d tried to dry them in the sun I have a feeling that a curious dog might have enjoyed a snack. They are safer in the oven.

Dried-Tomatoes-3

It’s simple: tomatoes, olive oil, and salt.

Dried-Tomatoes-5

Tomatoes are sliced thin, but not too thin. No thinner than a quarter of an inch please.

Trust me.

They will burn.

But, the dog will be happy because he will get a treat.

Dried-Tomatoes-4

Dried tomatoes are just perfection. A fabulous way to make summer tomatoes last a little longer.

Or, in our case, a fun new way to enjoy them. As they will soon be eaten.

Dried-Tomatoes-7

Since the base recipe is simple, it leaves so many options for flavoring the oil they are stored in.

I opted to make a jar of simple Italian-style, with basil, oregano, and garlic.

Other yummy options would be:

Red pepper flakes, garlic, and rosemary.

Cilantro, oregano, and jalapeño (dry the jalapeños the same way as the tomatoes).

Rosemary and garlic.

Bay leaf, garlic, and rosemary.

Dill, lemon thyme, and garlic.

Fennel seeds, garlic, and basil.

Thyme, rosemary, and oregano.

Lemon zest, basil, and garlic.

I want to make them all!

Dried-Tomatoes-8

I’ve stored them in the fridge and plan to use them quickly, on bruschetta, in pasta, and on pizza.

The olive oil, which will become a delicious flavored oil, will be used as well.

We don’t waste food around here if we can help it. 😉

Happy Eating!

Kitchen Basics: Drying Tomatoes
Recipe Type: Condiment, Preserving, Roasting, Drying, Vegetarian, Fruit
Author: Rachel Oberg – De Ma Cuisine
Preserve summer’s beautiful tomatoes by drying them and storing them in olive oil.
Ingredients
  • 2 tomatoes, sliced 1/4″ thick (no thinner, or they will burn)
  • 1-2 T olive oil
  • to taste salt
  • 1 T dried basil
  • 1 T dried oregano
  • 1 clove garlic, thinly sliced
  • 1/2 to 3/4 C olive oil
Instructions
  1. Pre-heat the oven to 250F.
  2. Line a baking sheet with a silpat or parchment paper. Place tomatoes in a single layer on the silpat or parchment paper. Drizzle generously with olive oil, and sprinkle with salt.
  3. Bake for 3 hours, turning occasionally, until tomatoes are nicely dried.
  4. Cool completely and combine in a half pint jar with herbs, garlic, and olive oil. Store in the refrigerator.
Notes
Yields: one half pint, including the oil.
3.2.1303

Thursday

3

July 2014

0

COMMENTS

Honey and Maple Syrup Sweetened Berry Jam

Written by , Posted in Breakfast, Brunch, Canning, Condiments, Dairy-Free, Dessert, Fruit, Gluten Free, Kid-Friendly, Vegetarian

StrawberryJamSecondTime-5One of my favorite things about summer is the fruit. The nectarines are amazing, the plums are incredible, and the berries… they are the best!

We had raspberries in the garden growing up, so they are my emotional favorite. Tim’s family has blackberries, so they’re a favorite too. But there’s just something about blueberries and strawberries… I love ’em.

I’m always so sad when their season ends (as it is ending now). I’m thankful for the others, don’t get me wrong. But, I want berry season to last as long as possible.

BlueberryJam-2

There are plenty of ways to preserve these summer treasures. You can freeze washed berries, pitted cherries, and halved stone fruit on a baking sheet, and then pop them into a bag. You can make tons of crisps and cobblers and wrap them up really well and freeze them for November. You can make sauces and smoothies to be pulled out when the weather has turned cold.

And, you can make jam.

Last summer I decided that I would try. Surprisingly, it turned out. The catch was that I wanted to make it sans pectin and sugar. I didn’t know if you could, but I wanted to.

And I did.

I made three kinds: cherry, strawberry, and blueberry.

We ran out a few months ago. This year, I don’t intend to run out. So I made a ton. First strawberry (which follows the same recipe), then blueberry.

StrawberryJamSecondTime-4

Before you start, make sure you have clean jars and lids (the lid is the flat piece, and is not re-useable if you want them to seal, the band is the part that wraps around the jar and screws into place).

I don’t have a dishwasher, so I used a pot of boiling water and boiled for about ten minutes.

StrawberryJamSecondTime-3

I love lemon zest, so I opted to add a bunch for a hint of brightness, instead of only using lemon juice.

In general, if possible, any time I use a lemon, I zest it first. Why waste such goodness?! If there’s any extra, it goes into the freezer.

StrawberryJamSecondTime-2

Strawberry jam is a bit more of a process than blueberry. There’s hulling and chopping involved. 

It’s gonna be messy.

But it’s worth it.

StrawberryJamSecondTime-6

When I was making the strawberry, I forgot how much the stuff bubbles up. I had to move it to two pots, since the one was a bit too small.

I was wiser with the blueberries.

BlueberryJam-3

BlueberryJam-4

It’s not going to be thick thick, like jam made with pectin. But, it will thicken up a bit. Cook it until it’s as thick as you want it (you can test it by putting a plate in the freezer and putting a dollop of jam on it so it will cool quickly, then test to see how runny it is), even if that’s longer than the time listed in the recipe.

StrawberryJamSecondTime-1

BlueberryJam-5

Jars are filled and left to cool on the counter for a bit. You should hear the lids popping as they seal. Sealed or not, I like to store them in the freezer (after fully cooling in the fridge), even after they’re opened. (There are different opinions on how long properly canned homemade jam will last unrefrigerated. (1) Since I didn’t pressure cook or process the jam in boiling water after adding it to the jars, I opted to be extra safe and keep them in the freezer, even if they did seal. In my experience, they have lasted as long as it took to consume them – less than a year, in the freezer. I hope that this summer’s batch will last more than a year, stored in the freezer. Once opened, stored in the fridge, they usually are fine for a month or two, maybe more. Just keep an eye out for mold. Jams with less sugar and that aren’t commercially prepared tend to have a shorter shelf life. (1) So be mindful of that, and whether or not you have pressure cooked them, when deciding where to store them.)

This jam is perfect for the usual toast or English muffin, to top ice cream, or to be eaten by the spoonful by a hungry food blogger.

Happy Eating! 

Blueberry or Strawberry Jam
Recipe Type: Condiment, Fruit, Preserving, Canning
Author: Rachel Oberg – De Ma Cuisine
Ingredients
  • 12 C blueberries or strawberries (strawberries: hulled and chopped)
  • 4 C honey
  • 1 C maple syrup
  • 3 T lemon zest
  • 3/4 C lemon juice
Instructions
  1. Bring berries through lemon zest to a boil. Mash with a potato masher. Once it comes to a rapid boil, cook for 3-5 minutes.
  2. Reduce heat to a simmer and cook for about 20 minutes.
  3. Remove from heat, stir in lemon juice, and let stand for 5 minutes.
  4. Ladle into jars, leaving about 1/2″ of space at the top. Cover with the lid and let stand for 15-30 minutes.
  5. Store at room temperature if they’ve sealed, or in the freezer if they haven’t (or if you just want to).
  6. Makes about 6 pints (or 12 half pints).
Notes
To sanitize jars, place in a large pot and cover with water (about 1 inch over the top of jars). Bring to a boil and boil for about 10 minutes.
3.2.1303

(1) I have referenced this site for information on the shelf life of jam.