De Ma Cuisine

appetizers Archive

Thursday

25

September 2014

0

COMMENTS

How to Make Pesto – Part 1 – Basil Pesto

Written by , Posted in Appetizers, Cheese, Condiments, Gluten Free, Herbs, How To, Nuts, Quick and Easy, Snacks, Storage/Prep, Vegetables, Vegetarian

BasilPesto-7

This is gonna be one of the simplest things you’ve never made. At least that’s what I thought when I made it for the first time about a month ago.

I don’t know why I’d waited this long.

I was missing out.

BasilPesto-6

It literally takes about 10 minutes.

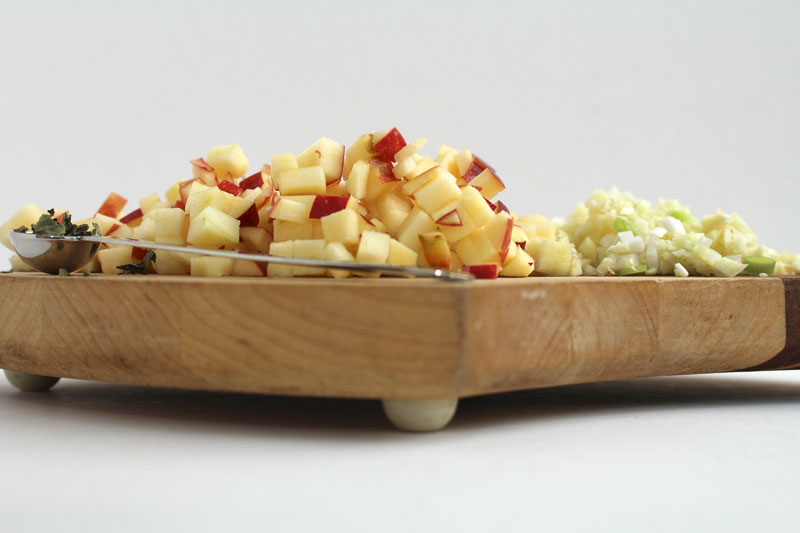
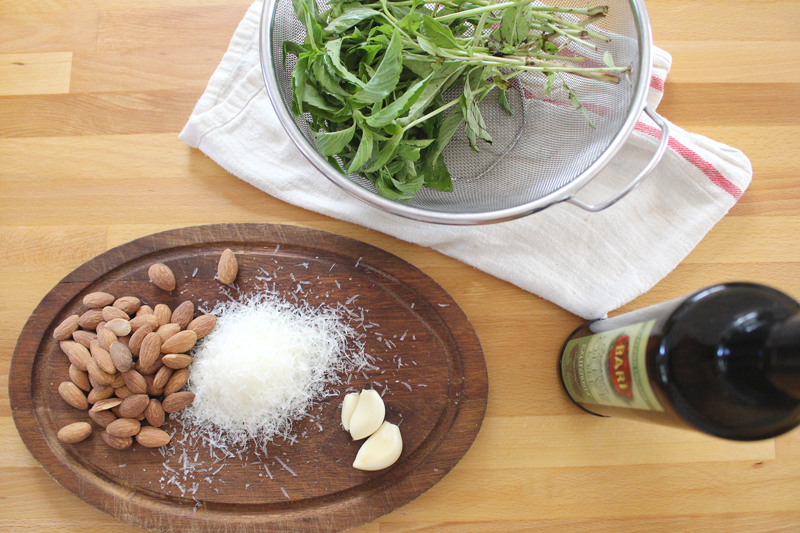
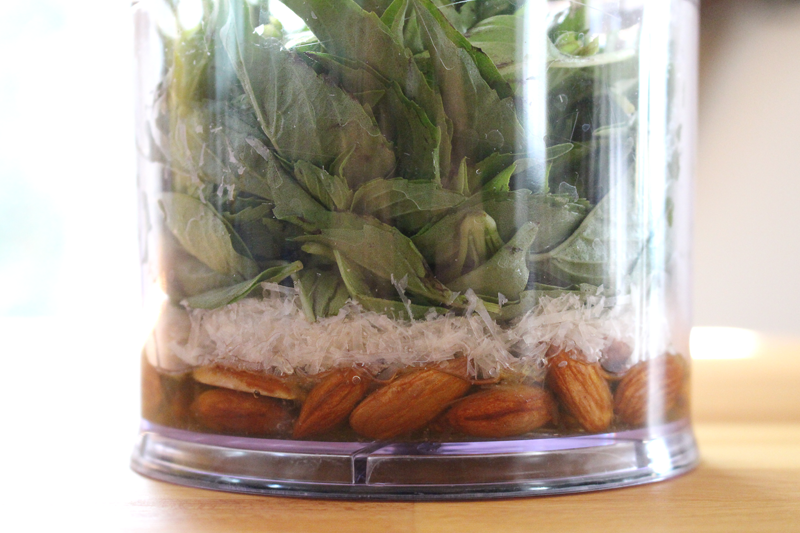
It takes nuts (I had almonds).

It’s great with cheese (I used parmesan).

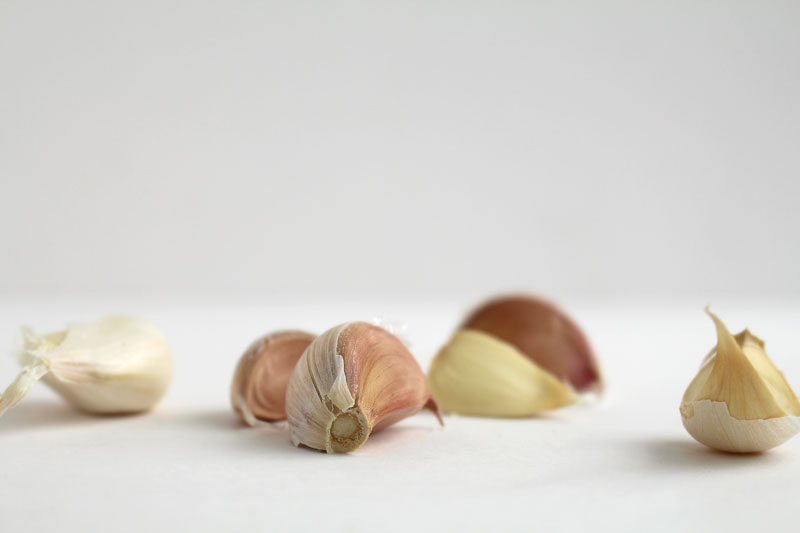
Garlic is essential (as it is to most things).

Olive oil holds it together.

And something green rounds it all out.

BasilPesto-5

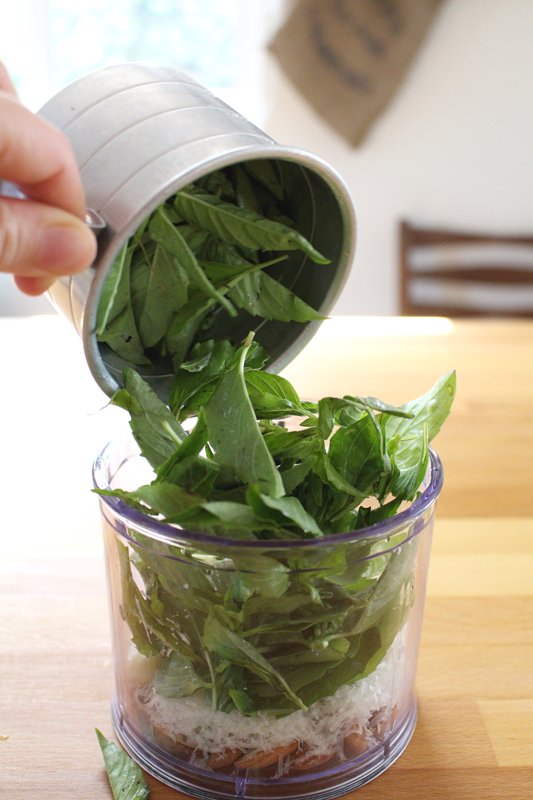
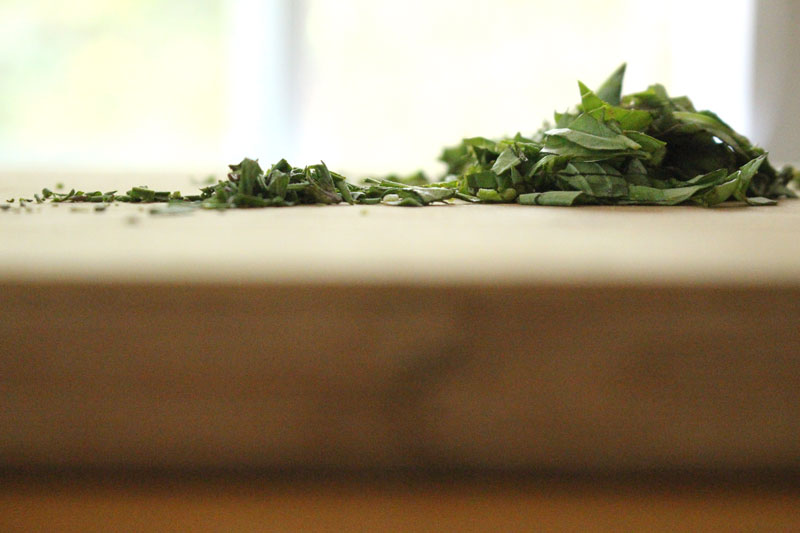
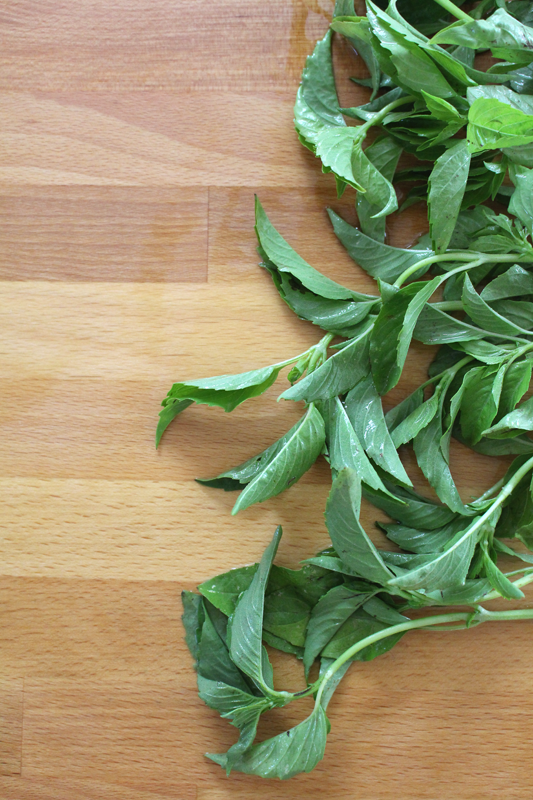
In this case, the green is basil.

We will get into other types of pesto on another day.

For today, let’s stick to the basics.

BasilPesto-4

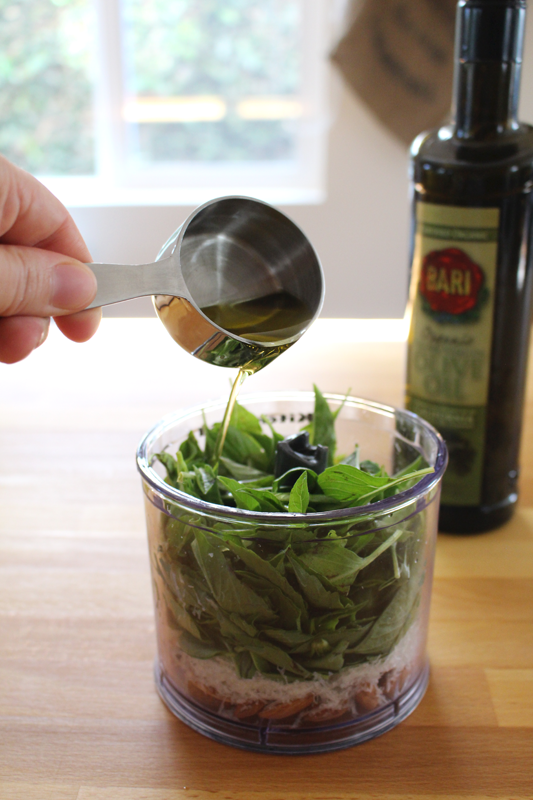
It’s important to use good olive oil… always, not just for pesto. I know the people at Bari. They’re awesome. I’ve gone in to their mill and seen them in action. I’ve tasted oil that was olives that same morning. This is seriously spectacular stuff.

BasilPesto-3

You can use whatever blending device you prefer. I have a great KitchenAid hand blender that is perfect for pesto. It came with this cute little food processor attachment, which works well for this task.

BasilPesto-2

Now, here’s a little trick I’ve tried.

Two tricks actually.

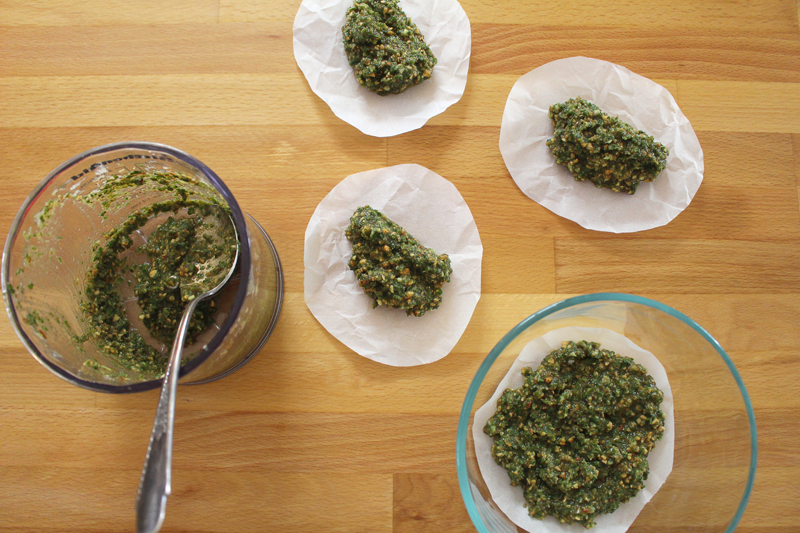
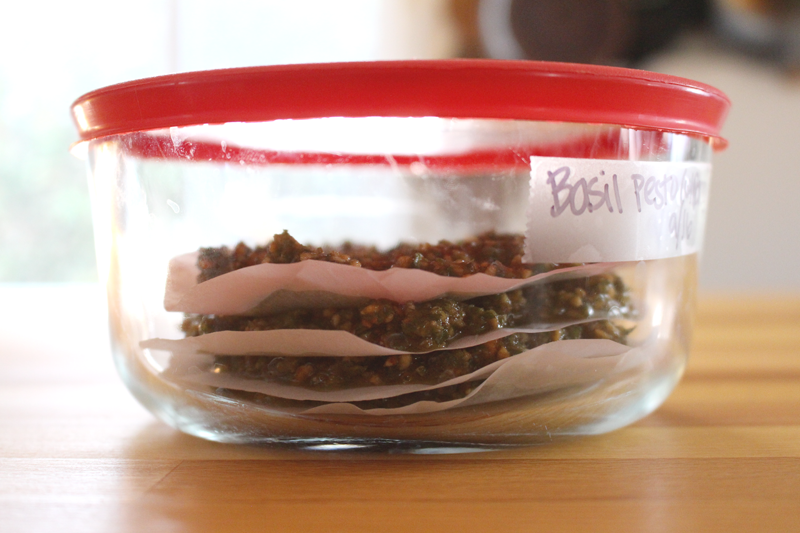
The first one is: To get the parchment paper to lay flat, scrunch it into a ball, wrinkle it all up, then smooth it out. No more curling up and rolling away.

Second: By portioning out the pesto in advance, there’s no need to wait for the whole container to thaw to use it. Just pop off a layer and leave it in the fridge overnight (in a sealed container), or on the counter for a little while, to bring it to room temperature.

BasilPesto-1

You could stand there eating it out of the bowl (your significant other may ask you if you’ve been eating salami, because of the garlic breath… no big deal… yes, this has happened at our house before). Raw garlic is good for your immune system, so go ahead! Or, ahem, get some good bread and slather it with pesto. I mean, c’mon. That’s dinner right there.

If you want a little more than just pesto and bread for dinner, how about a twist on a Caprese Salad to start with? Layer some sliced tomatoes with fresh mozzarella and top with pesto. Or, on the salad note, you could add it to a Panzanella if you’d like – mix it in with the dressing. You could follow that with some Chicken Parmesan topped with Pesto alongside some Roasted Bell Peppers and Squash.

If you want a vegetarian dinner, Eggplant Parmesan would be great topped with pesto. Serve it with some Roasted Zucchini and Crusty Bread for mopping up.

I could eat pizza most days. You could go simple and do mozzarella and pesto. You could add some chicken to the mozz and pesto. You could keep it vegetarian and add tomatoes or zucchini.

Basil always works in soups. You could top a Roasted Eggplant Soup with pesto. Add it to a Minestrone Soup. Serve it on toast alongside (and be sure to save a few bites to mop up any last drops of soup).

You could mix it in to some wild rice. Serve that alongside the Chicken or Eggplant Parmesan for a nice meal.

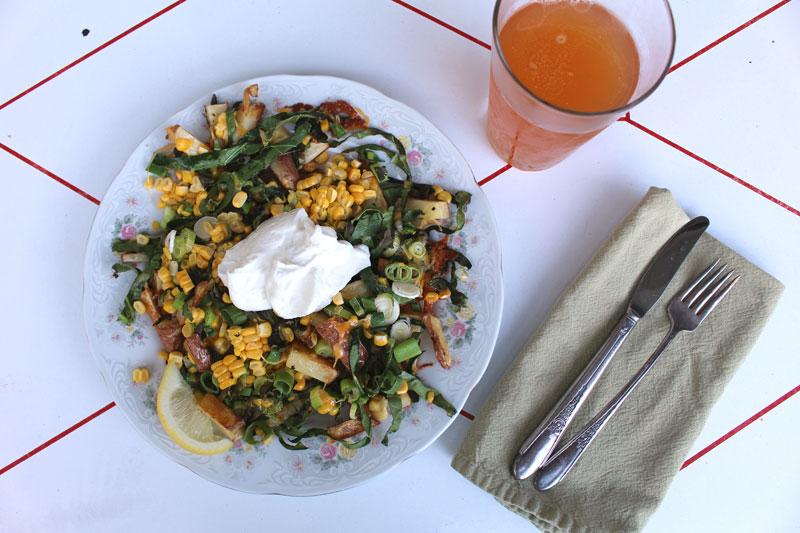
And finally, for breakfast, you could poach some eggs and drizzle them with pesto. Serve with your favorite toast.

Happy Eating! 

Basil Pesto
Recipe Type: Condiment, Sauce, Topping, Basil, Gluten-Free
Author: Rachel Oberg – De Ma Cuisine
Prep time:
Total time:
Ingredients
  • 1/2 C almonds or pine nuts
  • 2 C packed down (about 1 bunch) fresh basil
  • 2-3 cloves garlic
  • 1/4 to 1/2 C olive oil
  • to taste salt
  • 2 T to 1/4 C parmesan cheese
Instructions
  1. Place all ingredients in a blending apparatus (food processor, hand blender, blender) and blend, adding more olive oil and scraping down the sides as needed.
  2. Taste and adjust seasoning if needed.
  3. Divide into 4 and spread on four pieces of parchment paper, which can be stacked in a freezer safe container.


Monday

1

September 2014

2

COMMENTS

Irish Nachos

Written by , Posted in Appetizers, Cheese, Dinner, Gluten Free, Herbs, Kid-Friendly, Lunch, Main Dishes, Potatoes, Quick and Easy, Roasting, Sides, Snacks, Vegetables, Vegetarian

IrishNachos-9

Confession: I’ve never actually had Irish Nachos. I’ve seen some pictures though, so maybe that counts for something. Tim had them once when he was out with friends. He came home and talked about how good they were.

They seemed like something that I could make.

IrishNachos-1

It all starts with potatoes. You could slice them thin and round if you’d like. I cut them in to chunks because it’s quick and easy.

I need more quick and easy when it comes to meal preparations.

IrishNachos-2

Since we get a weekly box of produce from Abundant Harvest Organics, I try to add as many veggies as possible to our meals. The longer I do it the easier it is and now it’s become second nature. All the times that I’ve made my Irish Nachos, I’ve added some sort of greens. I just love their flavor when they’re roasted.

This particular version of Irish Nachos has more veggies than Tim would prefer (just a little too piled on for him). I’ve made them two or three other times with less. He liked those better. So use my recipe as a suggestion box and tweak it and adapt it to suit your family.

IrishNachos-3

I feel like Irish Nachos ought to have some sort of green onion sprinkled over top. That might just be me. In any case, I really like what they add to the dish.

IrishNachos-4

Crisped up potatoes are gathered into piles.

Mmmmm piles of potatoes.

IrishNachos-5

Then all of the toppings are piled on. You can do them in whatever order you’d like.

IrishNachos-6

Don’t forget the cheese. They are nachos after all.

IrishNachos-7

Since I recently cut a bunch of corn off the cob, I’m using it in everything. Summer Pizza, Squash and Egg Wraps, and Quinoa Salads… It’s good to have corn on hand.

IrishNachos-8

My favorite part, whenever there’s hot cheese involved, are the crispy bits of cheeeeeese. Every last bit needs to be scraped off the pan.

Every last bit.

Happy Eating!

Irish Nachos
Recipe Type: Main, Dinner, Side, Snack, Potatoes, Vegetarian
Author: Rachel Oberg – De Ma Cuisine
Prep time:
Cook time:
Total time:
Serves: 2-4
Ingredients
  • 4 potatoes, cut into long chunks
  • 1 T olive oil
  • 1/2 t (or more) salt
  • to taste pepper
  • 1/2 to 1 C greens (collards, kale, spinach, chard) cut in a chiffonade (thin ribbons)
  • 1/2 to 1 C green onions (or chives), chopped
  • 1/2 to 1 C cheese, grated
  • 2 cobs corn, cut off the cob
  • yogurt, for topping
  • lemon wedges, for serving
Instructions
  1. Pre-heat the oven to 350F.
  2. Toss potatoes with olive oil, salt, and pepper. Place on 1-2 baking sheets (don’t overcrowd them – use two sheets if needed), and bake for 15 minutes, flip them (and rotate the position in the oven if using two sheets), and bake about 15 minutes more (or until potatoes are crispy outside, tender inside).
  3. Gather potatoes into piles (as many piles as there are people eating), and top with greens, onions, cheese, and corn. Bake for 10 minutes more.
  4. Serve topped with yogurt and a squeeze of lemon.


Monday

21

July 2014

0

COMMENTS

Fresh Herb and Dried Tomato Bruschetta

Written by , Posted in Appetizers, Bread, Brunch, Dairy-Free, Fruit, Herbs, Lunch, Quick and Easy, Sandwiches, Snacks, Vegan, Vegetables, Vegetarian

FreshHerbDriedTomatoBruschetta-4

I dried some tomatoes.

There was a moment when I wasn’t sure if they would turn out.

Somewhere in-between peeking into the oven to see some still watery tomatoes, and picking a couple burned ones off the baking sheet there was success.

Success made of sweet, intense flavor.

Dried-Tomatoes-8

They have a texture like a dried cranberry. A hint of sweetness like them too. But, that’s where the similarities end.

Because you wouldn’t make a dried cranberry into a bruschetta… would you?

Don’t answer that.

We will just move on. Let us go to a place of amazing.

FreshHerbDriedTomatoBruschetta-5

One of my favorite appetizers (or meals, depending on the day) is bruschetta. It’s crazy simple to prepare. And insanely good to eat. Like coo coo crazy good.

It’s bread, garlic, oil, tomatoes, and herbs. You can’t go wrong.

FreshHerbDriedTomatoBruschetta-1

A baguette is sliced, drizzled with olive oil, and toasted.

I learned how to make baguettes that time I went to Paris.

I think of that trip most days. Making baguettes brings a little bit of Paris to my kitchen.

Bruschetta brings a little bit of Italy.

I like that.

FreshHerbDriedTomatoBruschetta-2

Fresh herbs like basil and savory are perfect. Oregano would also be nice, but I didn’t have any at the time. I do now. Guess I’ll have to make these again.

Twist my arm.

FreshHerbDriedTomatoBruschetta-3

Those obnoxiously good tomatoes are chopped up. (If they even made it off the baking sheet. I’m not sure how many I ate before they went into the jar on drying day.) They’re combined with the fresh herbs and a ton of garlic.

Oh sweet garlic. How I love thee…

FreshHerbDriedTomatoBruschetta-6

I ate them all. All. All by myself.

There are really enough for 3-4 people.

I was gonna share with Tim, but he ended up having a lunch meeting. Oh darn. I ate them with Squash’n Eggs, and a Smoothie. And then I ate the leftovers for a snack later in the evening.

Happy Eating!

Fresh Herb and Dried Tomato Bruschetta
Recipe Type: Appetizer, Side, Vegetarian, Fruit, Herbs, Vegan
Author: Rachel Oberg – De Ma Cuisine
Prep time:
Cook time:
Total time:
Serves: 4
Ingredients
  • 16-24 slices baguette
  • 1 t olive oil
  • pinch salt
  • 1 pint sized jar dried tomatoes, chopped
  • 2 T fresh basil, chopped
  • 1 t fresh savory, chopped
  • (oregano could also be added)
  • 1/4 C olive oil (use the oil from the tomatoes)
  • 1 clove garlic (from tomatoes), minced
  • 3-4 cloves garlic, minced
  • to taste, salt
  • to taste, pepper
Instructions
  1. Pre-heat oven to 350F (I used the toaster/convection oven).
  2. Drizzle baguette with a bit of olive oil, sprinkle with salt. Toast for about 10-15 minutes, or until crispy and slightly browned.
  3. Combine tomato through pepper. Taste and adjust seasoning if needed.
  4. Top toasted baguette slices with tomato mixture.


Monday

21

April 2014

2

COMMENTS

Caesar Soup

Written by , Posted in Appetizers, Bread, Cheese, Fruit, Herbs, Lunch, Meat, Pork, Sides, Soups, Toasting, Vegetables

CaesarSoup1

I have to confess something to you. A bowl of caesar salad in my vicinity will not last long. I have a hard time sharing it… I will, but I might rather eat the whole bowl by myself.

Enough about my caesar sharing issues.

Are you like me, and kinda stuck with the idea that lettuce can only be used in a salad or on a sandwich? Let’s break that mold.

How about a nice bowl of lettuce soup… Um, it’s way better than it sounds… and than the color might make you think (sorry, now we know, lettuce makes for a brown soup).

CaesarSoup2

We all know that a good caesar salad dressing has tons of garlic. (Ahem, this is true of most of my favorite foods.) I mean, it’s good for you, and it tastes so gooooooood. Why not?!

CaesarSoup3

Apple and basil are not part of a traditional caesar. Oh well. They go well in this recipe, so let’s ignore tradition for a moment.

CaesarSoup7

CaesarSoup4

Then the lettuce is wilted in. Just like that. Kinda fun. We usually want lettuce to be crisp, cold, and fresh. Most people turn their noses up at wilty lettuce. Snobs. (Hey, me too. Who wants a bowl of wilty salad… unless it’s meant to be wilted! Then we’re singing a different tune.)

CaesarSoup5

You know that loaf of bread that is now stale and is not acceptable for peanut butter and jam? Good. Let’s rip it apart and toast it up. It’s seasoned with a little bit of olive oil, some salt, and pepper. Crunchy is good here, so don’t under toast.

No one wants soggy croutons.

Because they’re totally going into the soup. Yep. We’re doing this. The soup was blended and strained so it’s creamy and smooth. Then it is topped with that bacon you’ve been snacking on, those croutons you can’t stop eating, and the parmesan cheese you keep sneaking tastes of. (Oh, just me? Cool.) Plus, don’t forget about adding a drizzle of your favorite olive oil.

CaesarSoup6

And just like that, it’s ready.

Creamy and dreamy, with a bit of zip.

Boom, bang, done did. (What?!) Let’s eat!

CaesarSoup8

Happy Eating!

Caesar Soup
Recipe Type: Soup, Lunch, Side, Main, Quick and Easy, Foodie
Author: Rachel Oberg – De Ma Cuisine
Prep time: 15 mins
Cook time: 37 mins
Total time: 52 mins
Serves: 2
Ingredients
  • 2 slices bacon
  • 1 T olive oil
  • 1 apple, diced
  • 1/2 t dried basil
  • 1 stalk green garlic, diced
  • 6 cloves garlic, diced
  • to taste salt
  • to taste pepper
  • 1 t dijon mustard
  • 1 T balsamic vinegar
  • 6 C lettuce, washed and torn
  • 4 C vegetable stock
  • 2 C bread, torn
  • 1 T lemon juice
  • 2 T mayonnaise
  • olive oil, for topping
  • parmesan cheese, grated, for topping
Instructions
  1. Pre-heat oven to 350F.
  2. Cook bacon and drain on a paper towel lined plate.
  3. Heat a soup pot. Add oil. When oil is hot, add apple, basil, green garlic, garlic, salt, and pepper. Cook for 2-3 minutes over medium-low heat, stirring occasionally.
  4. Add dijon and balsamic vinegar, and cook 1 minute.
  5. Add lettuce and wilt down for 2-3 minutes, stirring constantly.
  6. Add stock and bring to a boil. Reduce to a simmer and cook for 15-20 minutes.
  7. Toss bread with some olive oil, salt, and pepper. Place on a baking sheet and toast for about 10 minutes, turning once.
  8. Remove soup from heat. Add lemon juice and mayo. Blend with a hand blender or regular blender (regular: remove the plug from the lid and cover hole with a clean towel). Strain, taste and adjust seasoning if needed.
  9. Serve topped with croutons, a drizzle of olive oil, bacon, and a sprinkle of parmesan cheese (add the croutons immediately before serving).
3.2.1269


Wednesday

19

March 2014

0

COMMENTS

Radish and Feta Toasts

Written by , Posted in Appetizers, Brunch, Cheese, Gluten Free, Herbs, Lunch, Quick and Easy, Sandwiches, Sides, Vegetables, Vegetarian

RadishFetaToasts4

It sure feels like spring here in LA. And our boxes of Abundant Harvest Organics goodness are telling the same story. We’re into the season of radishes, snap peas, and asparagus.

I love it!

Different varieties of radishes are sent to us year round it seems. I love using them in things like soups, frittatas, and Shepherd’s Pie.

Something these dishes all have in common: they hide the radishes well.

That’s ok. I mean, I figure that it’s great to get as many veggies into a dish as you can. But, how about if we highlight the radish a wee bit here, and enjoy a little bit of the bite.

You ready?

So that it’s not too strong, the radish is chopped small (diced or minced). Whatever kind of radish you have will do just fine.

RadishFetaToasts1

Mix away. This is going on some toast!

RadishFetaToasts2

Things get all fresh and bright and springlike when flavors like lemon, dill, and feta are combined together.

Can you taste it? Are you eating it for snack out on the porch, enjoying the spring weather?

Maybe you’re having it for dinner, along with some white fish that you’ve roasted in the oven. Mmm… I think that sounds lovely.

RadishFetaToasts3

If there are any leftovers, wrap it up in your favorite kind of tortilla with some snap peas and kale. You’ll be glad you saved some for lunch.

RadishFetaToasts5

Happy Eating!

Radish and Feta Toasts
Recipe Type: Side, Snack, Sandwich, Herbs, Cheese, Vegetables, Vegetarian, Dill
Author: Rachel Oberg – De Ma Cuisine
Prep time: 10 mins
Total time: 10 mins
Serves: 2-4
Ingredients
  • 1/4 C radish, minced
  • 1/2 T salted butter, at room temperature/softened
  • 1/2 T olive oil
  • 4 oz. feta cheese, crumbled
  • 1 oz. cream cheese
  • 1 T lemon juice
  • 1/4 C spring onion, minced
  • 1/2 T fresh basil, minced
  • 1/2 to 1 T fresh dill, minced
  • 1/2 T fresh parsley, minced
  • to taste salt
  • 2-4 slices bread (sourdough, rye, French), toasted
Instructions
  1. Combined radish through salt. Taste and adjust seasoning if needed.
  2. Spread on toasted bread.
  3. Enjoy.
3.2.1269