I took the dog for a walk this morning. It smells like potato salad outside. Not in a good way.
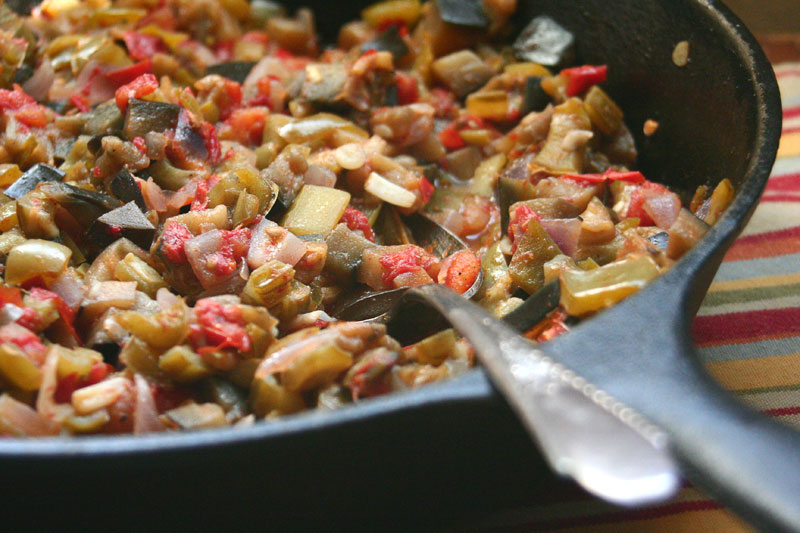
In happier news, I used the sinqua that has been in the Abundant Harvest Organics boxes lately for something so yummy. I’ll admit that I was a little hesitant to try this foreign to me veggie at first. But, when I read that you could use it kinda like you would zucchini, I wasn’t as scared. I have been wanting to make Ratatouille for ages, and was so excited when a few weeks ago almost all of the ingredients were in our weekly box of produce. All but the summer squash. I decided to give the sinqua a chance. Success! We loved it!
So I thought I’d make it for you on the show. You could, of course, use summer squash if you’d prefer. But, if you’re looking for an interesting way to use the sinqua, give it a try as a replacement.
When we were eating dinner last night, I said something about how there was a whole eggplant in the dish. Husband looked up quickly and said, “There’s eggplant in here?!” I guess he didn’t know he liked it. 😉
Happy Eating!
Ratatouille
Author: Rachel Oberg – De Ma Cuisine
Prep time:
Cook time:
Total time:
Serves: 3-4
Ingredients
1 eggplant (about 3 C), diced (peel left on)
2 sinqua (Chinese okra) or summer squash (about 2 C), peeled and diced
3 bell peppers (about 2-3 C), diced
2 tomatoes (about 2 C), diced
1 medium onion, diced (I used red, use whatever kind you have on hand)
1 t fresh thyme (or 1/2 t dried)
3-4 T olive oil
1 t garlic powder (or 4 cloves, diced)
1/2 to 1 t salt (or to taste)
pepper
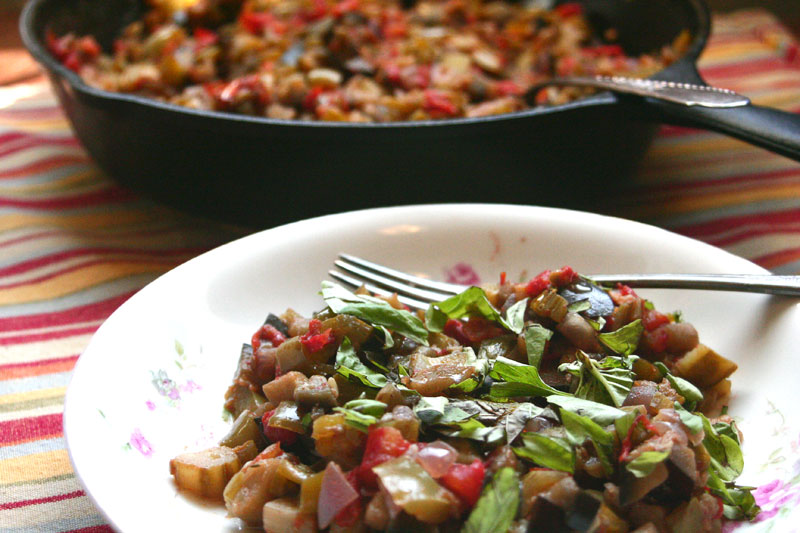
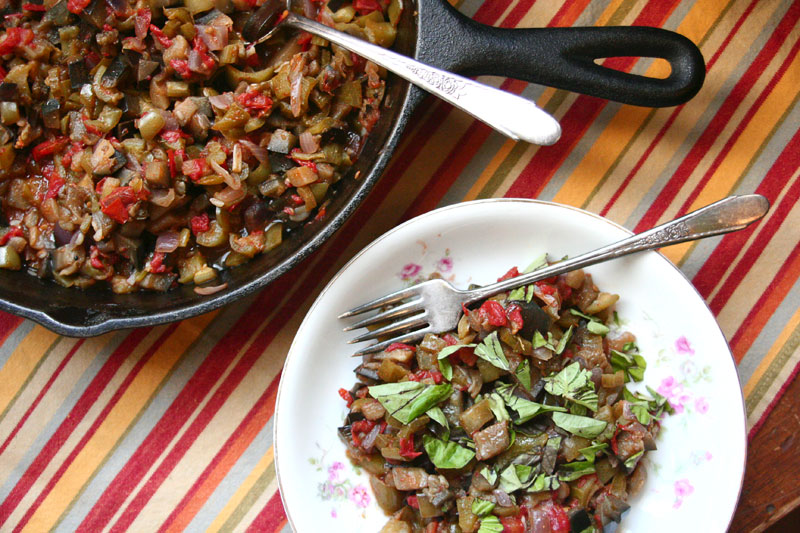
1/4 C fresh basil, chopped (for topping)
Instructions
Heat skillet. Add 3 T oil. Add onions, peppers, salt, and pepper. Cook about 8 minutes over medium or medium-low heat.
Add eggplant, sinqua/squash, thyme, and garlic powder. Cook covered, for 5 minutes.
Add tomato, cook covered for 5 minutes over medium heat. Cook uncovered for 15 minutes (or until the juice from the tomatoes has mostly boiled away), stirring often, over medium-high heat.
Taste and adjust seasoning if needed.
Top with a drizzle of good olive oil and basil.
Notes
We ate this dish with some leftover (reheated) Chicken and Crostini (topped with olive oil, tomato, and parmesan cheese).
Every Tuesday after I pick up my Abundant Harvest Organics box I’m always so inspired by its contents. My brain floods with ideas. But, my menu and show are already planned.
This is my 40th episode. So, I thought I’d do something a little different. This is often what dinner preparation looks like at our house, or how menu planning happens. I stand at the cupboard or the fridge and see ingredients and all-of-a-sudden have a vision for dinner.
I’m not planning to make this a permanent change (unless I love it and it works really well, I suppose), but it’s something that’s fun for me. It’s how I cook best – not following a recipe. We’ll see how it goes…
Oh and there are bloopers too, because I wanted there to be.
The above was written before filming, now it’s after I’ve filmed, and I want to write a few things down before I clean up. This was a really yummy dish. Normally, I’m an add or subtract to a dish kinda person. You may do this here too. BUT, know that if you do, you won’t get the full effect of the deliciousness. You see, every ingredient was carefully chosen to go along with the broccoli (the star). I had a bite with just pasta and while it was good, it was nothing compared to a bite with broccoli, carrot, cheese, almond, bacon, egg, and sauce. I don’t normally eat the whole bowl of food after I film. But, I’ll admit that there was almost nothing left today. And for once it wasn’t just because I’d forgotten to eat lunch and was starving.
OK, enough about the dish. Here’s the recipe. Enjoy!
Last modified on 2012-09-19 19:26:03 GMT. 2 comments. Top.
Broccoli Penne
#ratingval# from #reviews# reviews
Print
Recipe Type: Main, Pasta
Author: Rachel Oberg – De Ma Cuisine
Prep time: 15 mins
Cook time: 30 mins
Total time: 45 mins
Serves: 3-4
Roasted broccoli and carrots are paired with a fried egg, bacon, almonds, and a delicious sauce… oh and don’t forget the pasta!
Ingredients
2 heads broccoli, cut into large pieces (use the stem too – cut/peel the tough outside and use the tender inside)
1 carrot, grated
pinch cayenne
1/2 t garlic powder
salt
pepper
1 t or half a sprig fresh tarragon
1/2 t fresh oregano
1/2 sprig fresh thyme
1 T dijon mustard
1/2 C balsamic vinegar (reduced to about 2-3 T)
2-4 T olive oil
3/4 – 1 C pasta water
1 slice bacon/serving (for topping)
1/4 C parmesan cheese (for topping)
1/4 C almonds (for topping)
1 egg/serving (for topping)
penne pasta
Instructions
Toss broccoli with a bit of olive oil, salt, and pepper. Roast broccoli at 400F for 20 minutes. Halfway through add grated carrots (also tossed with a bit of oil, salt, and pepper).
Meanwhile, cook and drain pasta, reduce balsamic vinegar (watch carefully so it doesn’t burn), and cook bacon.
Whisk together the mustard, reduced balsamic vinegar, herbs, cayenne, garlic powder, salt, pepper. Stream in 2-3 T olive oil as you whisk. Add the pasta water.
Right before serving, fry the egg(s) (I cooked mine covered so the top would set quicker).
Combine pasta, sauce, and veggies. Top with an egg, 1 halved piece of bacon, almonds, and parmesan cheese.
A few weeks ago we went to the mountains. We wanted to get out of town, relax, and exchange the freeway dust for Evergreens. But, we also got to participate in a fundraiser weekend. Part of the fundraiser was a silent auction. Husband had his heart set on “winning” some BBQ sauce that the Balakian family had made. He did. He has reluctantly agreed to let me us “only a little bit” of it this week on my show. He wants to savor it, so it can last a long time. Hey, it’s really good. He can’t help it!
I got to meet Jackie, of the Balakian family, that weekend. She was so sweet and was excited to hear that I was planning to use the sauce on my show. It’s a perfect addition to chicken. And cooking it in the Crock Pot makes for a really easy meal.
When I made this chicken dish the first time, a few years ago (with the same sauce), we devoured it. But, there were some leftovers and I made BBQ Chicken Stuffed Avocados with them. Oooh, those were good. Since I cooked 4 pieces of chicken for the show, we have two leftover. I’m not sure what I’ll do with them this time. I’m thinking of serving them as a Pulled Chicken Sandwich on Cornbread. It would be nice with coleslaw, or some Roasted Veggies… That sounds really goooood!
I served the chicken with wonderfully simple Mashed Potatoes. You could also serve them with Polenta (that’s what I did the first time I made this dish). You could substitute the veggies I’ve used for whatever you have on hand. I used some of what came in this week’s Abundant Harvest Organics box.
Next week is my 40th episode. Be prepared for some bloopers and a slightly different format.
Last modified on 2012-12-01 02:15:49 GMT. 0 comments. Top.
BBQ Sauced Crock Pot Chicken
#ratingval# from #reviews# reviews
Print
Recipe Type: Main, Meat
Author: Rachel Oberg – De Ma Cuisine
Serves: 4
Chicken cooks low and slow in sweet and tangy BBQ sauce for a delicious and easy dinner.
Ingredients
1 pack chicken breasts (mine had 2)
1 pack bone-in chicken thighs (mine had 2)
1 C BBQ sauce
1/4 C water
1/2 C apple cider
1 t apple cider vinegar
olive oil
1 red onion, roughly chopped in large pieces
1 sweet pepper (or bell pepper), roughly chopped in large pieces
1 tomato, roughly chopped in large pieces
Instructions
Drizzle olive oil in a Crock Pot.
Mix sauce, water, vinegar, and cider. Pour 1/4 of the mixture into the bottom of the Crock Pot. Place chicken on the sauce and pour remaining sauce over top. Arrange veggies over top of chicken.
Cook on high heat for 3-4 hours (mine took about 4), or low heat for 5-6 hours, or until the chicken breast’s internal temperature comes to 170F, and the thighs come to 180F.
Notes
Cooking time depends on how cold chicken is when it goes into the Crock Pot. Mine was still slightly frozen, so it took a little bit longer. The most important thing is that it comes to a safe internal temperature.
Last modified on 2012-09-12 23:24:07 GMT. 0 comments. Top.
Simple Mashed Potatoes
#ratingval# from #reviews# reviews
Print
Recipe Type: Side, Potatoes
Author: Rachel Oberg – De Ma Cuisine
Serves: 4
Ingredients
4 medium-large potatoes, scrubbed and cubed
water (enough to fill to just below or at steamer basket bottom)
1 t salt, to taste
2 T olive oil
1/2 to 1 C milk (or more, if you want them creamier – 1 C was perfect for me)
Instructions
Pour cold water into a medium or large pot. Fill to just below or at steamer basket bottom.
Place steamer basket in pot and fill with quartered potatoes.
Steam, covered, until soft, about 25-30 minutes (potatoes should pierce easily with a fork).
Remove potatoes from pot and place in a bowl (or back into dried out pot, or stand mixer). Add milk, salt, and olive oil. Mash to desired consistency (using a potato masher, hand blender, stand mixer…).
Taste and adjust seasonings if needed.
Notes
These are simple, basic mashed potatoes. You could add: pepper, chives, parsley, roasted garlic, cheese, bacon, butter, or anything else that sounds yummy. You could, of course, also top them with gravy (but, alongside the chicken, I didn’t think they needed any).
Crostini are one of my favorite appetizers, or a great side to a soup, salad, roast… they go with a lot. They’re a fun way to use veggies too, and fruit. During the wintery months, I like to put broccoli and Cheddar or Gruyère on them, or apples, jam, and Parmesan. They’re pretty versatile. Veggies or fruit, olive oil, salt and pepper, cheese, and you’re ready… oh, and don’t forget the bread.
I like to use a French or Italian loaf – baguette is my preference, but this week I had a regular loaf of French bread, so rather than buy something else, I used what I had. You could also use crackers, like Triscuits, if you don’t have any non-sandwich type bread.
I usually slice the bread, top it, then bake. You can also slice, bake, top, bake, which will make for a crispier crostini. Either way is good to me. Depends on your toppings. Some of the ones I made could have been good toasted a bit first, as they can get soggy if they sit around for a while… buuuuut, are they really going to sit around? In my experience, these things go pretty quickly. 😉 I intended to only have a bite of each… I had at least two three.
I’ve been calling these delicious treats “crostinis” for so long… I didn’t realize until I asked our Italian friend, Andrea, about the proper pronunciation, that it was “crostini”, since it’s already plural. I learned something new! (Thanks, Andrea!)
I hope you enjoy these as much as (or even more than) I did!
Tomato Soup is one of my favorite comfort foods. Combined with Grilled Cheese, of course. I’m happy to buy the soup that’s in a box. It tastes good. I like it. But, you know that if I can, I like to make things myself. So, since tomatoes are in season and I have so many of them, why the heck not!?
If you’re wondering why I’m making soup when it’s 100 degrees out, it’s because I might possibly be insane. Or, because I can’t wait for fall to actually arrive. Or, because I just like soup. You choose. In any case, I’m making soup. You can watch me make it, and tuck this recipe away for a rainy day (ahh, wouldn’t a rainy day be just perfect with this meal?? Reminds me of when I was at camp when I was little, one of the two times I went… I didn’t love camp… and it was raining and we had grilled cheese and tomato soup…), or brave the heat and make it too. Or, maybe you live somewhere where the end of August really does bring cooler weather. In any case, I hope you make it and I really hope you enjoy it.
I’ve roasted carrots, tomatoes (duh), onion, and garlic. You could add other favorite veggies too! Summer squash, bell peppers, beets…
I blended it up with the Hand Blender that KitchenAid gave me (Woo hoo! Yay! Thanks!!). I’m crazy about this gadget, guys! It’s awesome, and it even comes in a case, so all the pieces can be stored together… more about it in another post, coming up soon. If you prefer to use a traditional blender, be my guest. But, please remove the middle plug part on the lid and cover it with a clean towel. This will allow steam to escape and the lid to not get all rubbery and fall into the blender, and hot soup to not fly all over you and your kitchen. No, I’m not joking. This happened to me. Now I know, and now I have a Hand Blender (that experience was precisely the reason why I got one).
This soup is delicious, friends! After I filmed and photographed, I wasn’t planning to eat more than a bite or two. Then before I knew it, the sandwich had been mostly devoured and there was just a drop of soup left. This happens often on filming days. Sometimes it’s because I’m so darn hungry. Most of the time, it’s because it’s so good that I just stand there at my little island and have “just one more bite”. I ate it twice yesterday, once already today, and I’m considering another bowl for second lunch. Husband liked it so much that he asked for another grilled cheese to go with his next helping. Always makes me feel great when he wants seconds.
Oh, and this is a fun way to sneak veggies in for those with picky eaters… they’ll never know it’s healthy because it tastes so good! Or maybe they will and they just won’t care.
Last modified on 2013-10-15 17:20:56 GMT. 2 comments. Top.
Roasted Tomato Soup
Recipe Type: Soup, Main
Author: Rachel Oberg – De Ma Cuisine
Prep time: 15 mins
Cook time: 60 mins
Total time: 1 hour 15 mins
Serves: 4-6
Comforting, homemade tomato soup. Perfect for a chilly fall day.
Ingredients
10 tomatoes, each one cut in 6 or 8 pieces
2 carrots, roughly chopped
1 onion, roughly chopped
6 cloves of garlic, tip chopped off
4 C veggie stock
1 1/2 C water (or stock)
1-2 t salt
3/4-1 t pepper
1 t sweet paprika
1 t fresh thyme
1/2 t dried oregano (or 1 t fresh)
1/3 C garlic chives
1/2 C basil
3 T balsamic vinegar
2-3 T olive oil
1 T heavy whipping cream (or half and half, or milk… whatever you use in your morning coffee) per bowl
Instructions
Pre-heat oven to 350F. Place tomatoes on a baking sheet, drizzle with olive oil, sprinkle with salt and pepper. Place onions and carrots on a baking sheet. Drizzle with olive oil, and sprinkle with salt and pepper. Roast veggies for about 30 minutes (carrots might not be tender, that’s OK, we’re par-baking them, as they will cook more later).
Add stock, thyme, oregano, garlic chives, paprika, salt, and pepper to soup pot. Bring to a boil, then reduce to a simmer. Cook until veggies are done roasting.
Add roasted veggies to the soup pot. Bring to a boil and cook 15-30 minutes, or until carrots are tender.
Add basil and balsamic vinegar and cook 5 minutes more.
Using a hand blender (or a regular blender – if you do this method, please remove the plug in the lid and cover it with a towel instead, this allows steam to escape, and results in a non-disastrous soup making experience… trust me, I’ve learned this the hard way), submerge into soup, then begin to blend. Be careful, it may splash, and it’s very hot (I know you know this). Blend until smooth.
Taste and adjust seasoning. Add a drizzle of good olive oil.
Serve it topped with a drizzle of cream, alongside a grilled cheese sandwich.
Notes
This soup will freeze and reheat well. To store, cool on counter for a while, then place in the refrigerator. Once it’s completely cooled, freeze in an airtight container. It can be reheated to use in pasta sauces, to add to Minestrone Soup, you could add pasta to it, other veggies, or just reheat it and have it with another grilled cheeeeeeese! You could also eat it chilled, as a Gazpacho.
Last modified on 2012-08-29 20:51:27 GMT. 0 comments. Top.
Grilled Cheese
#ratingval# from #reviews# reviews
Print
Recipe Type: Sandwich, Main or Side
Author: Rachel Oberg – De Ma Cuisine
Prep time: 5 mins
Cook time: 8 mins
Total time: 13 mins
Serves: 1
A perfect compliment to tomato soup.
Ingredients
2 pieces of bread (frozen, opt.)
1 T olive oil (or unsalted butter)
salt
4-5 slices Gruyère cheese (or your favorite kind of cheese)
1 clove garlic (opt.) (or garlic salt, if you don’t want to use frozen bread)
Instructions
If you’re using garlic: Rub the garlic onto one side of each slice of the frozen bread. It should use almost a whole clove. (Or for non-frozen: sprinkle with garlic powder.)
Drizzle with olive oil, sprinkle with salt, and spread the oil out evenly across the bread. Repeat on second slice of bread.
Top un-oiled side of one slice of bread with cheese. Close the sandwich and place in a pre-heated pan (over medium or medium-low heat). Cook until bread is slightly browned, flip, cook until cheese is melted and bread is browned, about 3-4 minutes on each side.