De Ma Cuisine

Tomatoes Archive

Monday

18

August 2014

0

COMMENTS

Beef and Bean Enchiladas

Written by , Posted in Baking, Beans, Beef, Cheese, Dinner, Fruit, Gluten Free, Kid-Friendly, Legumes, Lunch, Main Dishes, Meat, Potlucks, Vegetables

BeefBeanEnchiladas-11

Enchiladas are one of my go-to meals when I want to bring dinner to friends. It’s pretty quick and easy to make, it’s hearty, and it can be pretty healthy.

They’re also one of Tim’s favorites.

I try to have some in the freezer at all times.

BeefBeanEnchiladas-2

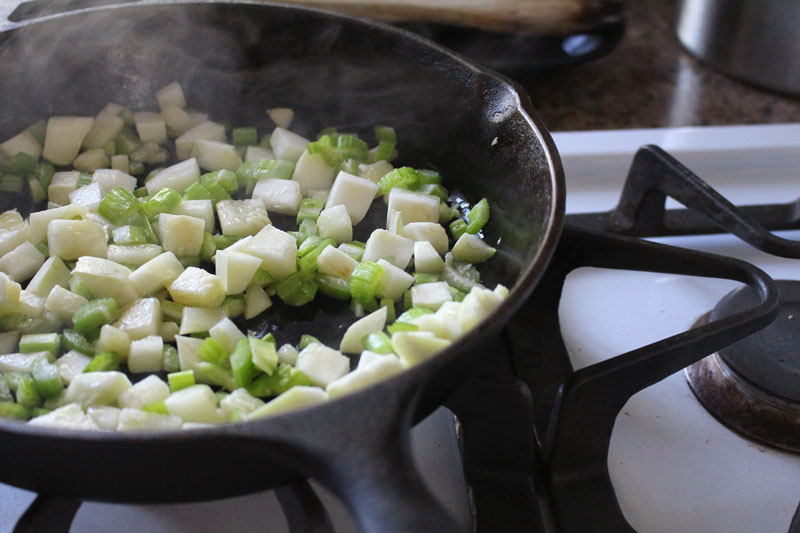
I mean, take a look at all of the veggies I’ve piled in here. I had celery on hand, but normally I’d use bell peppers (note: if you’re using celery, make sure it’s really cooked down and soft). I also have been putting summer squash in everything, so why not these too?!

BeefBeanEnchiladas-1

Also corn. In everything. I am addicted.

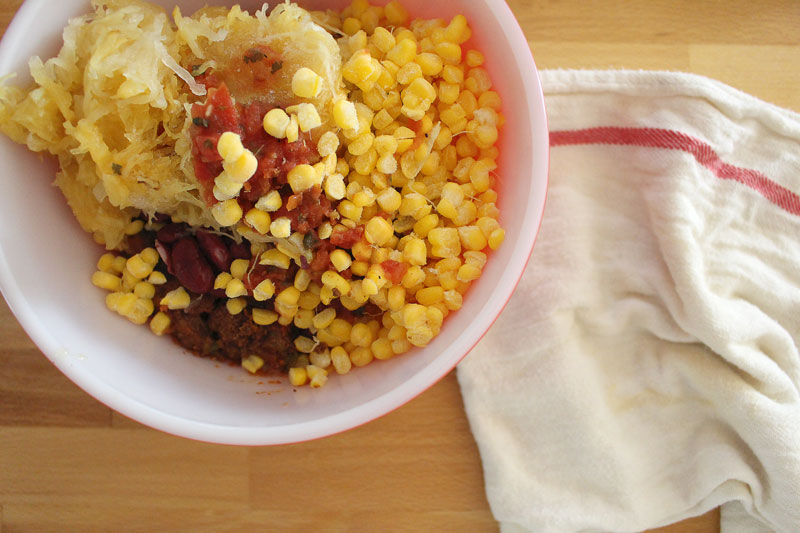
This winter when we had a million spaghetti squash I cooked a bunch of ’em and froze the flesh. I’ve been slowly using it. If you don’t have any cooked spaghetti squash you could just add more beans and summer squash.

Tim doesn’t mind when I sneak spaghetti squash into things like this. But, he did note that he got a pretty squashy bite, so stir it in pretty well if that might bother someone in your family. 😉

BeefBeanEnchiladas-4

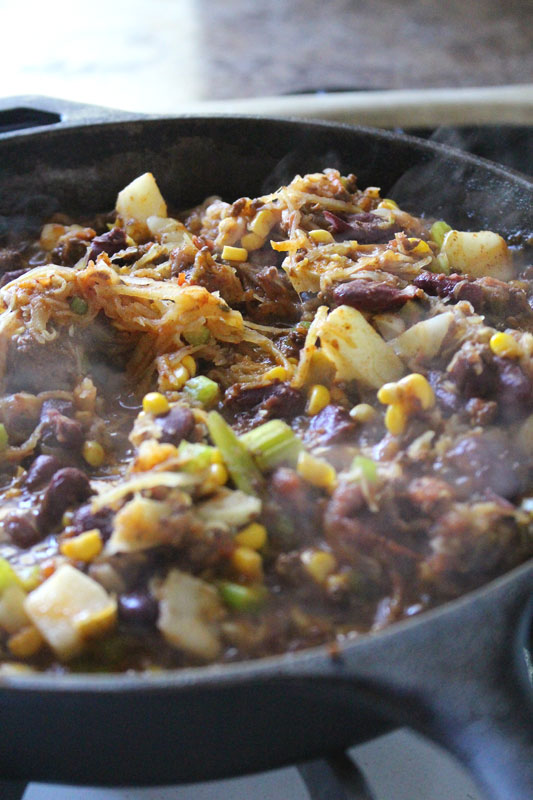
I like to cook up the filling first. That way they take less time in the oven. Plus then I can make sure that all the veggies are soft. No one wants a crunchy this or that, unless it’s supposed to be there.

BeefBeanEnchiladas-5

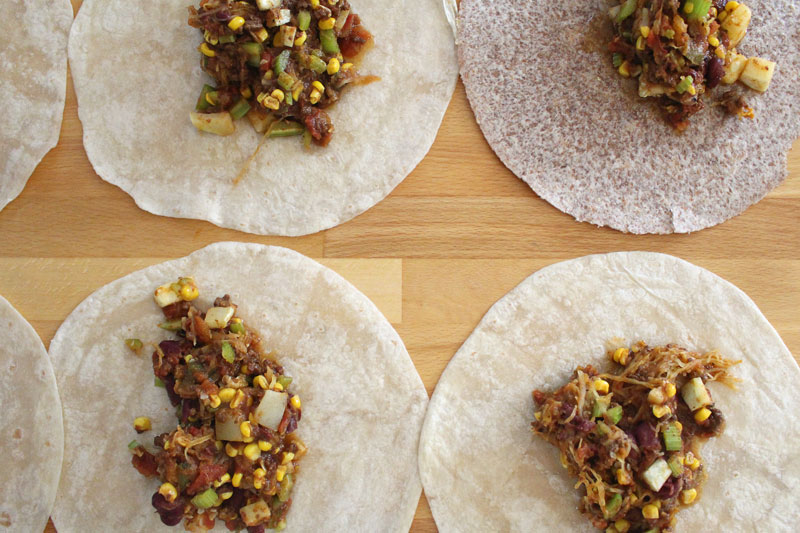
Tim built me a beautiful, huge kitchen island when we moved. So I have tons of space to lay out all the tortillas I could ever need.

I’m thankful for this workspace.

The sauce gets divided evenly between the tortillas.

BeefBeanEnchiladas-6

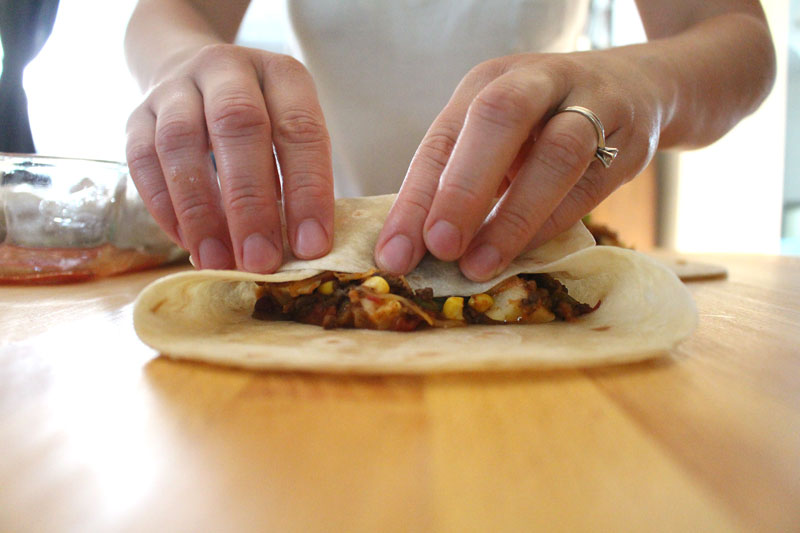
The ends get folded in and then it’s rolled up. My whole wheat tortillas cracked a bit. No big deal.

BeefBeanEnchiladas-3

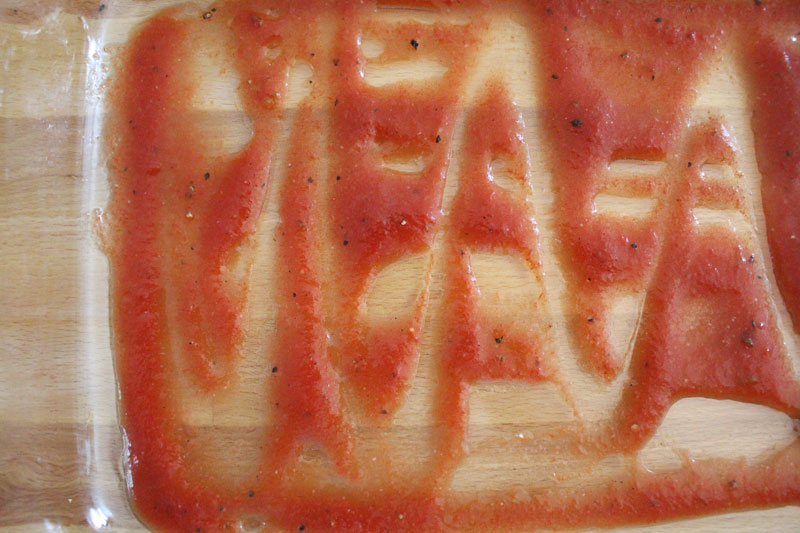
I like a bit of sauce in the bottom of the pan. If you like it extra saucy, add more! I used what I had in the freezer, so normally I’d make it a bit juicier than this looks (the recipe is adapted to be saucier).

BeefBeanEnchiladas-7

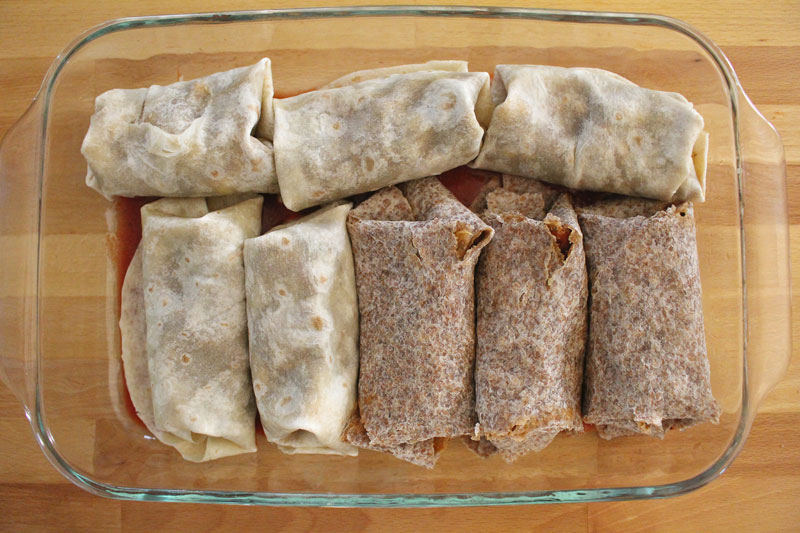
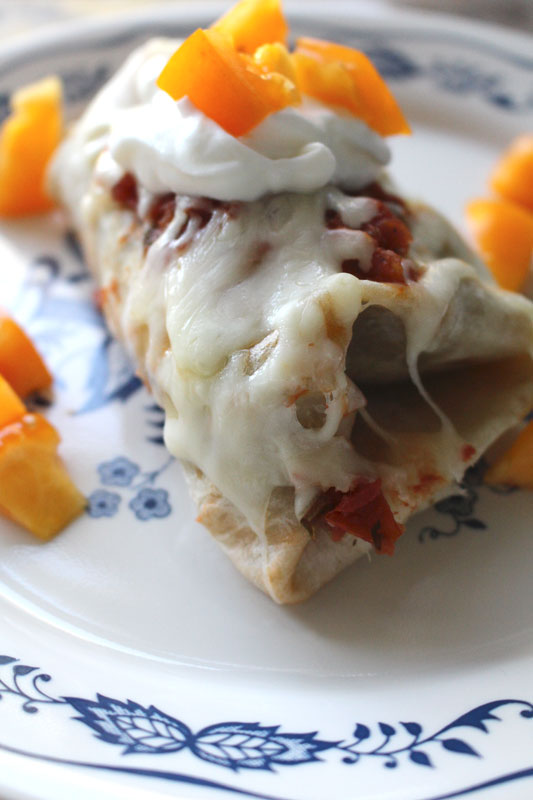
Rolled up and ready for cheeeeeeeeese.

BeefBeanEnchiladas-8

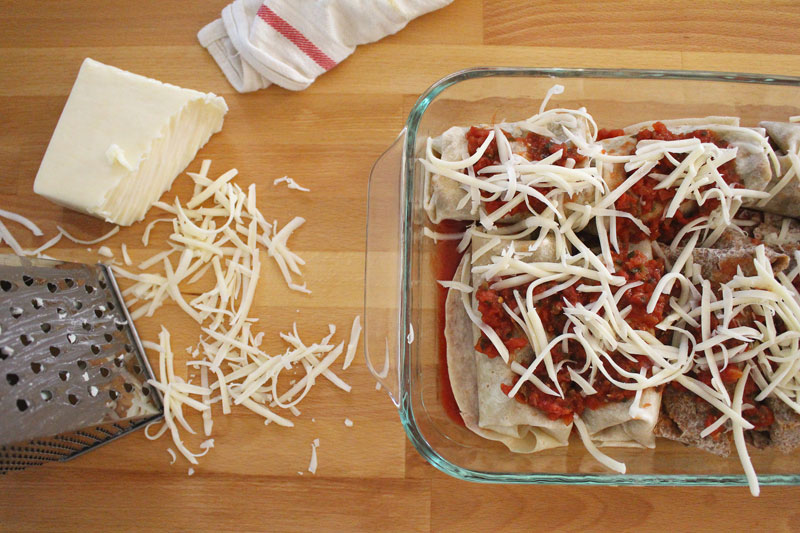
You could add way more cheese if you’d like, but I didn’t want to go overboard. Moderation, right?!

BeefBeanEnchiladas-10

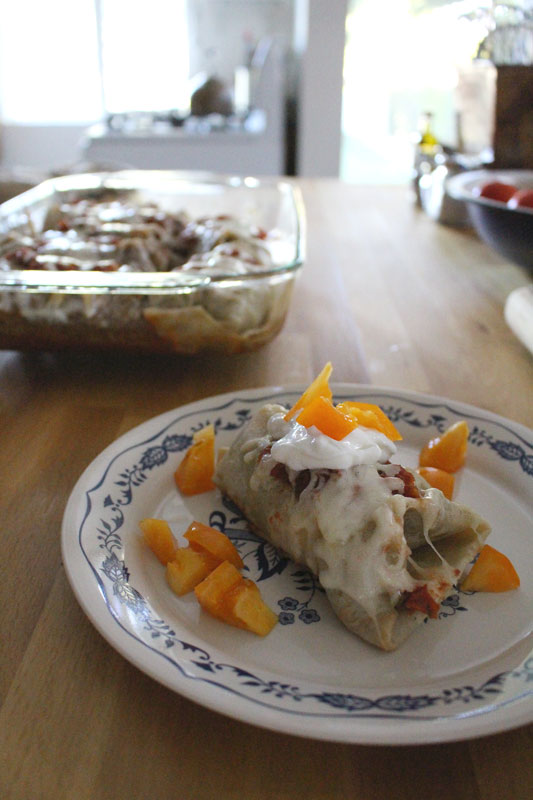
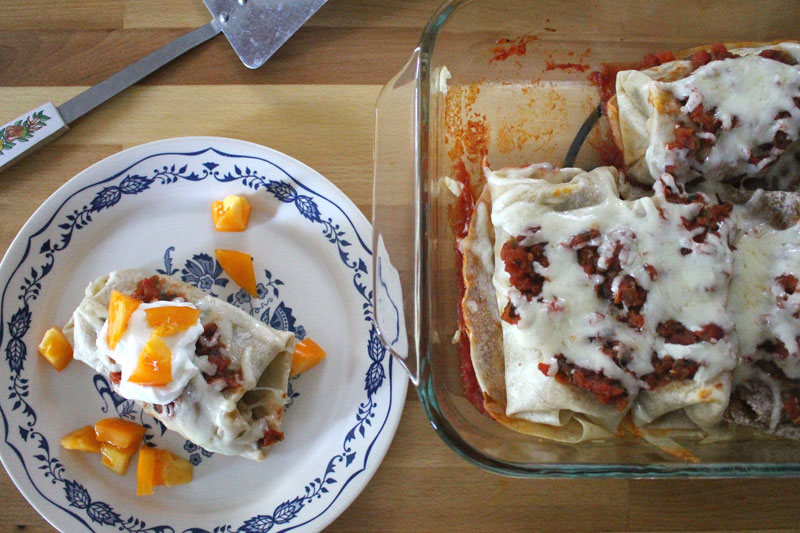
After these came out of the oven, I put half of them into freezer safe containers so they will be ready for lunches. The rest we devoured.

BeefBeanEnchiladas-9

If you’re gonna bring these to some friends, send along a container of Greek yogurt (or sour cream), salsa, corn chips, and guacamole (if you’re feeling extra generous). Make them a simple green salad with some chopped fresh tomatoes and a container of homemade Ranch dressing (whisk together a bit of yogurt, mayo, fresh herbs, garlic, salt, and pepper). And for dessert, how about some Fruit Crisp that can be added to the leftover Greek yogurt for breakfast the next morning?

If you’re serving it tonight for your family, serve it exactly the same way.

Happy Eating!

Beef and Bean Enchiladas
Recipe Type: Main, Easy, Beans, Beef, Vegetables, Dinner, Main Dishes
Author: Rachel Oberg – De Ma Cuisine
Prep time:
Cook time:
Total time:
Serves: 4-6
Perfect for a hearty dinner tonight, or to make to take to a friend in need.
Ingredients
  • 1 t olive oil
  • 1/4 to 1/2 C bell peppers (or celery), chopped
  • 1/2 to 1 C summer squash, chopped
  • pinch salt
  • 1-2 C Chili (I used Beef Chili), or 1 lb. ground beef
  • 8-15 oz. kidney beans
  • 1 1/2 C cooked spaghetti squash (or add more beans and summer squash)
  • 1/4 C salsa
  • 1 C corn
  • 1/2 t chili powder (or more if using ground beef)
  • pinch ginger
  • to taste salt
  • to taste pepper
  • 1/2 to 1 C tomato sauce (add an extra 1/4 C if using ground beef)
  • to taste salt
  • to taste pepper
  • 8-10 tortillas
  • 1 C cheese, grated (Monterey/Pepper Jack or Cheddar)
  • Greek yogurt, for topping
  • 1-2 fresh tomatoes, chopped, for topping
  • jalapeño, chopped, for topping (optional – if you like it extra spicy)
Instructions
  1. Pre-heat oven to 350F.
  2. Heat a skillet, add olive oil. When oil is hot, add bell peppers/celery, summer squash, and a pinch of salt. Cook for about 5 minutes, or until veggies are tender, over medium heat, stirring occasionally. (Note: if using raw ground beef, cook first, then add veggies when beef is almost done. Add the extra 1/4 C tomato sauce with the beans in the next step.)
  3. Mix together chili, beans, spaghetti squash, salsa, corn, chili powder, ginger, salt, and pepper. Add to skillet. Bring to a boil, reduce to a simmer, and cook for about 5 minutes. Taste and adjust seasoning if needed.
  4. Mix tomato sauce with salt and pepper. Pour into the bottom of a greased 9×13 baking dish.
  5. Divide the beef and bean filling between the tortillas. Fold ends in and roll up. Place seam side down in tomato sauced pan. Top with salsa and cheese. Bake for 20 minutes, uncovered, or until cheese is melted.
  6. Serve topped with yogurt and fresh tomatoes (and jalapeño if desired).
Notes
Gluten-free if you use corn tortillas.

Monday

4

August 2014

1

COMMENTS

Summer Pizza

Written by , Posted in Baking, Cheese, Dinner, Fruit, Herbs, Lunch, Main Dishes, Pizza, Quick and Easy, Vegetables, Vegetarian

SummerPizza-8Eeets thyme fur peeeetsa.

Sorry. Kinda. It’s been one of those days. Sometimes stress is released in the form of weirdness.

And managed by eating pizza.

SummerPizza-2

Cutting veggies is therapeutic too. I have lots of cutting boards, and two are designated for onions and garlic. My beautiful new cutting board is not one of them. I never want anything sweet to accidentally taste like raw onions. Nope. Yuck. So I have two cutting boards with an X on the back that are special and a little bit stinky. 

SummerPizza-1

We had a similar pizza to this the other week. Ahem, I did. Tim doesn’t agree that squash belongs on a pizza. He will eat it in pretty much anything else though, so it’s cool. He made his own personal pizza and I made mine. Mine had lots of veggies. His didn’t. They both tasted good.

SummerPizza-3

I used Alana’s recipe for the pizza crust (from her cookbook). You can use hers, or whatever you would normally use. I like my crust thin and crispy. If you like it thicker and chewier, adjust the recipe accordingly.

Because of my taste for crispness, I like to par-bake the crust a bit before topping it.

Par-bake means to partially bake it (as par-cook means to partially cook).

I topped it with a bit of olive oil and some herbs, because I wanted two layers of herby flavor. (Helpful tip: If you need some bread to go accompany a dish and you don’t have a baguette on hand, you could just all the way bake the crust and eat it like a sort of focaccia bread.)

SummerPizza-4

Then it’s topped with some tomato sauce (it’s also great with olive oil if you don’t like sauce), and more herbs.

SummerPizza-5

Lots of different veggies, like kale, zucchini, corn, and tomato (tomato is a fruit, but in this case let’s pretend it’s a veggie since it’s acting like one), but not so many that it weighs down the pizza. It’s still a light summer meal.

SummerPizza-6

I opted for some parmesan and an aged cheddar. Because it’s what I have in the fridge.

I’d planned to use feta, but it’s smelled baaaaad. There’s stinky cheese and then there’s steeeeenky cheese.

SummerPizza-7

It’s topped with a bit of basil (from my garden – all the basil that I got as an add-on from AHO last week is gone gone gone). And as soon as the last photo was taken I ate as much as I could, as quickly as possible because I was starving! And then I ate it again today before I typed up this post.

Happy Eating!

Summer Pizza
Recipe Type: Main, Dinner, Pizza
Author: Rachel Oberg – De Ma Cuisine
Prep time:
Cook time:
Total time:
Serves: 4
Summer squash, corn, and tomatoes all top this light summer pizza.
Ingredients
  • 2 t olive oil, divided
  • 1 pizza crust
  • 2 t dried Italian herbs (mixture of basil, rosemary, oregano, thyme, and parsley), divided
  • to taste salt
  • to taste pepper
  • 1/4 C tomato sauce (optional – could also just use olive oil)
  • 12-15 slices zucchini/summer squash
  • 8-10 tomato slices
  • 2 T raw corn (frozen is fine)
  • 1/4 C kale (spinach, chard, collard greens), cut in a chiffonade (small ribbons)
  • 2 T green onions, chopped
  • 1/2 C cheese (parmesan and cheddar), grated
  • to taste salt
  • to taste pepper
  • fresh basil, for topping
Instructions
  1. Pre-heat oven to 450F.
  2. Grease pizza pan with 1 t olive oil. Press out crust onto pan so it’s fairly thin. Top crust with remaining olive oil, and sprinkle with 1 t Italian herbs, salt, and pepper. Bake for about 5 minutes (optional – you can bake it all at once too).
  3. Top par-baked crust with sauce, remaining Italian herbs, veggies, cheese, salt, and pepper. Bake an additional 7 minutes (or until crust is to desired crispness and cheese is melted – it will be longer for thicker crusts).
  4. Serve topped with fresh basil.

Monday

21

July 2014

0

COMMENTS

Fresh Herb and Dried Tomato Bruschetta

Written by , Posted in Appetizers, Bread, Brunch, Dairy-Free, Fruit, Herbs, Lunch, Quick and Easy, Sandwiches, Snacks, Vegan, Vegetables, Vegetarian

FreshHerbDriedTomatoBruschetta-4

I dried some tomatoes.

There was a moment when I wasn’t sure if they would turn out.

Somewhere in-between peeking into the oven to see some still watery tomatoes, and picking a couple burned ones off the baking sheet there was success.

Success made of sweet, intense flavor.

Dried-Tomatoes-8

They have a texture like a dried cranberry. A hint of sweetness like them too. But, that’s where the similarities end.

Because you wouldn’t make a dried cranberry into a bruschetta… would you?

Don’t answer that.

We will just move on. Let us go to a place of amazing.

FreshHerbDriedTomatoBruschetta-5

One of my favorite appetizers (or meals, depending on the day) is bruschetta. It’s crazy simple to prepare. And insanely good to eat. Like coo coo crazy good.

It’s bread, garlic, oil, tomatoes, and herbs. You can’t go wrong.

FreshHerbDriedTomatoBruschetta-1

A baguette is sliced, drizzled with olive oil, and toasted.

I learned how to make baguettes that time I went to Paris.

I think of that trip most days. Making baguettes brings a little bit of Paris to my kitchen.

Bruschetta brings a little bit of Italy.

I like that.

FreshHerbDriedTomatoBruschetta-2

Fresh herbs like basil and savory are perfect. Oregano would also be nice, but I didn’t have any at the time. I do now. Guess I’ll have to make these again.

Twist my arm.

FreshHerbDriedTomatoBruschetta-3

Those obnoxiously good tomatoes are chopped up. (If they even made it off the baking sheet. I’m not sure how many I ate before they went into the jar on drying day.) They’re combined with the fresh herbs and a ton of garlic.

Oh sweet garlic. How I love thee…

FreshHerbDriedTomatoBruschetta-6

I ate them all. All. All by myself.

There are really enough for 3-4 people.

I was gonna share with Tim, but he ended up having a lunch meeting. Oh darn. I ate them with Squash’n Eggs, and a Smoothie. And then I ate the leftovers for a snack later in the evening.

Happy Eating!

Fresh Herb and Dried Tomato Bruschetta
Recipe Type: Appetizer, Side, Vegetarian, Fruit, Herbs, Vegan
Author: Rachel Oberg – De Ma Cuisine
Prep time:
Cook time:
Total time:
Serves: 4
Ingredients
  • 16-24 slices baguette
  • 1 t olive oil
  • pinch salt
  • 1 pint sized jar dried tomatoes, chopped
  • 2 T fresh basil, chopped
  • 1 t fresh savory, chopped
  • (oregano could also be added)
  • 1/4 C olive oil (use the oil from the tomatoes)
  • 1 clove garlic (from tomatoes), minced
  • 3-4 cloves garlic, minced
  • to taste, salt
  • to taste, pepper
Instructions
  1. Pre-heat oven to 350F (I used the toaster/convection oven).
  2. Drizzle baguette with a bit of olive oil, sprinkle with salt. Toast for about 10-15 minutes, or until crispy and slightly browned.
  3. Combine tomato through pepper. Taste and adjust seasoning if needed.
  4. Top toasted baguette slices with tomato mixture.


Thursday

17

July 2014

0

COMMENTS

How To Dry Tomatoes

Written by , Posted in Canning, Condiments, Dairy-Free, Fruit, Gluten Free, Herbs, Roasting, Vegan, Vegetables, Vegetarian

Dried-Tomatoes-6

Tomatoes are such a great fruit. It’s weird that we use them like a vegetable when they’re not one.

I’m ok with that.

They go with so much, they can be used in so many different ways.

The possibilities are pretty endless.

Dried-Tomatoes-1

Around here, the growing season for local tomatoes is pretty long. We’ve been getting them in our Abundant Harvest Organics box for about two months now.

We’re very fortunate.

But, that doesn’t mean we don’t need to preserve them and make them last as long as possible.

Dried-Tomatoes-2

I opted to dry the tomatoes by slow roasting them in the oven at a low temperature.

I love the intense flavor that roasting brings.

I’ve always called this type of tomato a “sun-dried tomato”. But, since I did not dry them in the sun, I didn’t want to lie.

Also, if I’d tried to dry them in the sun I have a feeling that a curious dog might have enjoyed a snack. They are safer in the oven.

Dried-Tomatoes-3

It’s simple: tomatoes, olive oil, and salt.

Dried-Tomatoes-5

Tomatoes are sliced thin, but not too thin. No thinner than a quarter of an inch please.

Trust me.

They will burn.

But, the dog will be happy because he will get a treat.

Dried-Tomatoes-4

Dried tomatoes are just perfection. A fabulous way to make summer tomatoes last a little longer.

Or, in our case, a fun new way to enjoy them. As they will soon be eaten.

Dried-Tomatoes-7

Since the base recipe is simple, it leaves so many options for flavoring the oil they are stored in.

I opted to make a jar of simple Italian-style, with basil, oregano, and garlic.

Other yummy options would be:

Red pepper flakes, garlic, and rosemary.

Cilantro, oregano, and jalapeño (dry the jalapeños the same way as the tomatoes).

Rosemary and garlic.

Bay leaf, garlic, and rosemary.

Dill, lemon thyme, and garlic.

Fennel seeds, garlic, and basil.

Thyme, rosemary, and oregano.

Lemon zest, basil, and garlic.

I want to make them all!

Dried-Tomatoes-8

I’ve stored them in the fridge and plan to use them quickly, on bruschetta, in pasta, and on pizza.

The olive oil, which will become a delicious flavored oil, will be used as well.

We don’t waste food around here if we can help it. 😉

Happy Eating!

Kitchen Basics: Drying Tomatoes
Recipe Type: Condiment, Preserving, Roasting, Drying, Vegetarian, Fruit
Author: Rachel Oberg – De Ma Cuisine
Preserve summer’s beautiful tomatoes by drying them and storing them in olive oil.
Ingredients
  • 2 tomatoes, sliced 1/4″ thick (no thinner, or they will burn)
  • 1-2 T olive oil
  • to taste salt
  • 1 T dried basil
  • 1 T dried oregano
  • 1 clove garlic, thinly sliced
  • 1/2 to 3/4 C olive oil
Instructions
  1. Pre-heat the oven to 250F.
  2. Line a baking sheet with a silpat or parchment paper. Place tomatoes in a single layer on the silpat or parchment paper. Drizzle generously with olive oil, and sprinkle with salt.
  3. Bake for 3 hours, turning occasionally, until tomatoes are nicely dried.
  4. Cool completely and combine in a half pint jar with herbs, garlic, and olive oil. Store in the refrigerator.
Notes
Yields: one half pint, including the oil.
3.2.1303