De Ma Cuisine

De Ma Cuisine Archive

Thursday

16

October 2014

0

COMMENTS

End of the Week Pasta

Written by , Posted in Dairy-Free, Dinner, Eggs, Fruit, Herbs, Lunch, Main Dishes, Pasta, Quick and Easy, Vegetables, Vegetarian

EndOfTheWeekPasta-7

It’s nearing the end of the week. And the cupboards are a little bare, the pantry is kinda empty, the produce drawers are filled with distant memories (and a few stray veggies).

Sound familiar?

Maybe this only happens at our house.

In any case, I’ve learned to be clever with those final few ingredients before the crisper drawers are re-stocked. Usually, this involves some sort of pasta. Fresh pasta, dried pasta, leftover pasta… just pasta. (Of course you could also use wild rice, quinoa, lentils, or potatoes. They’d all be fabulous!)

The additions change every time though.

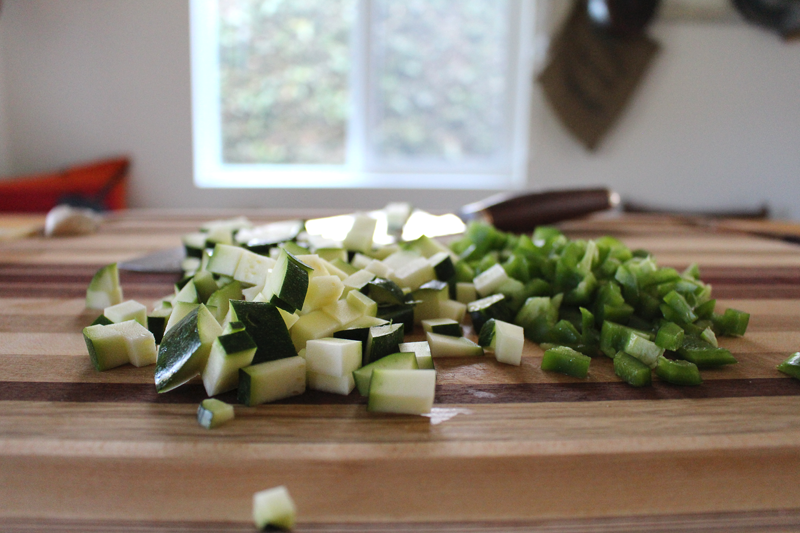
Sometimes it’s tuna and peas. It could be artichokes, bell peppers, and tomatoes. Today, it was zucchini, bell pepper, and tomatoes.

EndOfTheWeekPasta-1

It starts with some oil. For this particular recipe it was olive oil. Butter is also great with pasta. Coconut oil could also work, but make sure you’re ok with a hint of coconut if you go that route.

EndOfTheWeekPasta-2

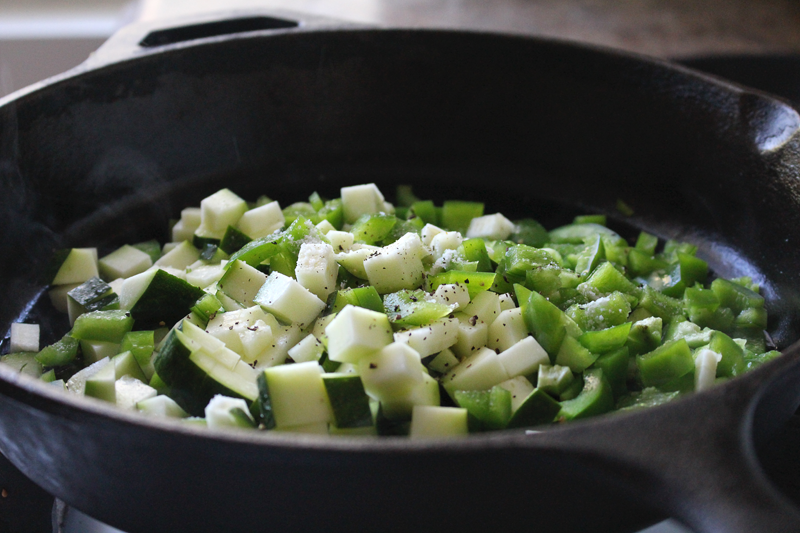
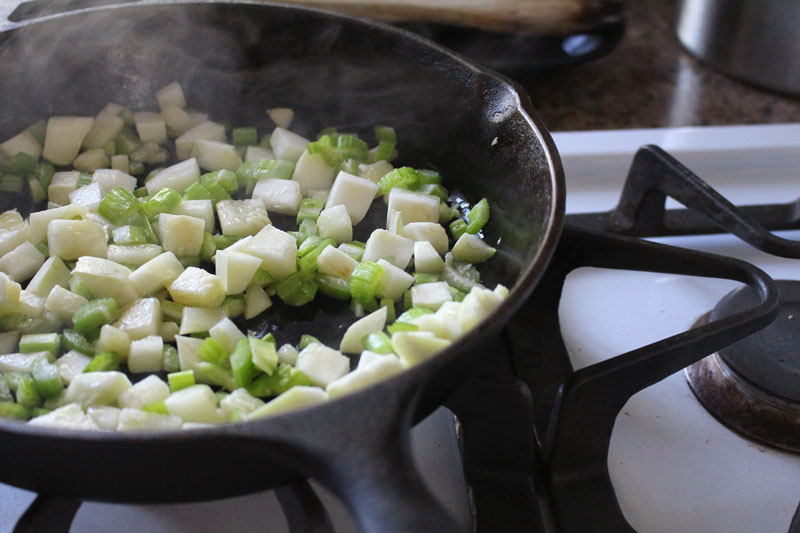
Then, you know the drill… some of the veggies are added to the hot oil. They cook for a few minutes with some salt and pepper.

Easy.

EndOfTheWeekPasta-3

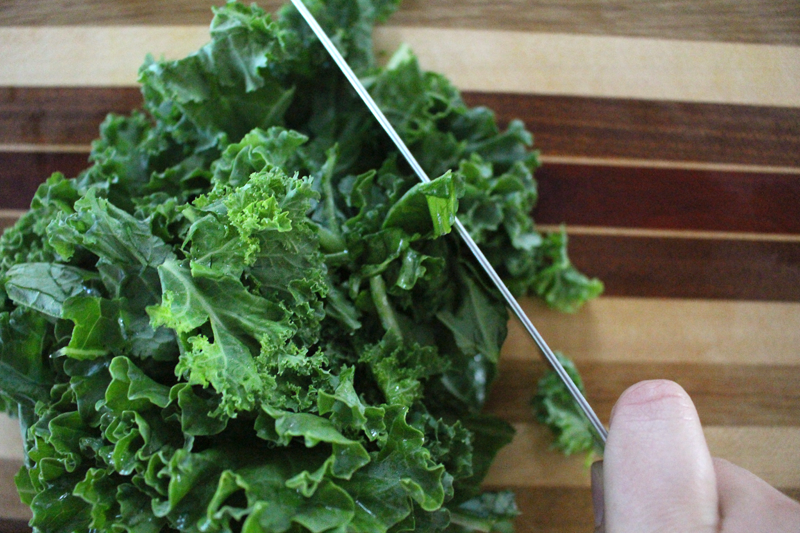
Then things like kale and garlic are added. Kale wilts, garlic smells amazing.

You could use other greens, like chard, mizuna, mustard greens, spinach, or collard greens.

You could add tons more garlic, or use none at all.

I prefer the tons route.

EndOfTheWeekPasta-4

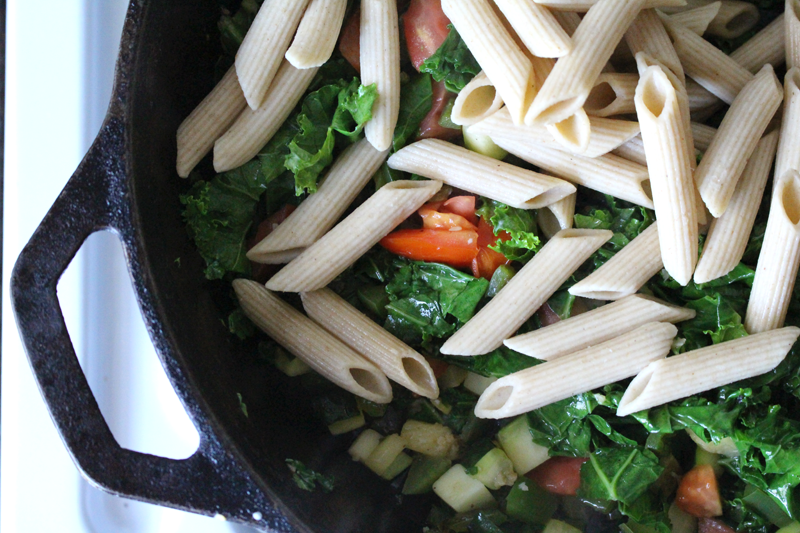
Pasta is cooked and added. I had some leftovers that I’d frozen, then defrosted in the fridge overnight. Worked just fine. If you’re cooking fresh, reserve a bit of the starchy cooking water to add to the veggies. Helps the sauce to stick to the pasta, but isn’t essential.

EndOfTheWeekPasta-5

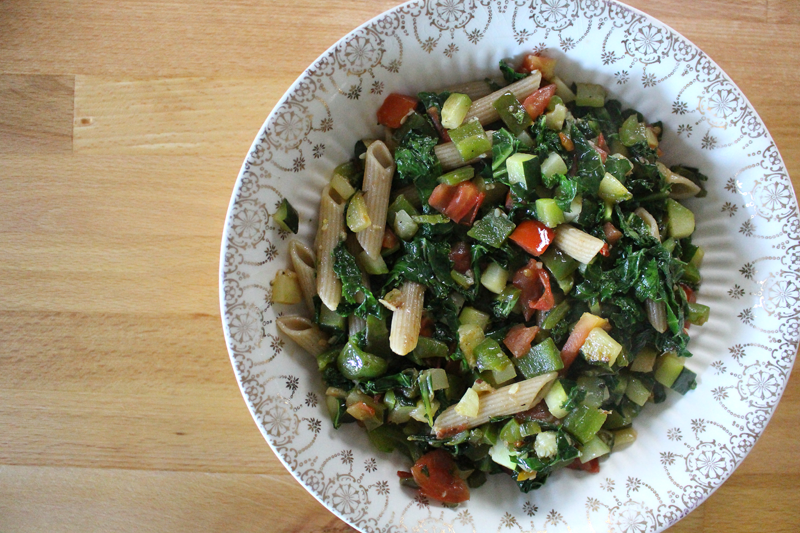
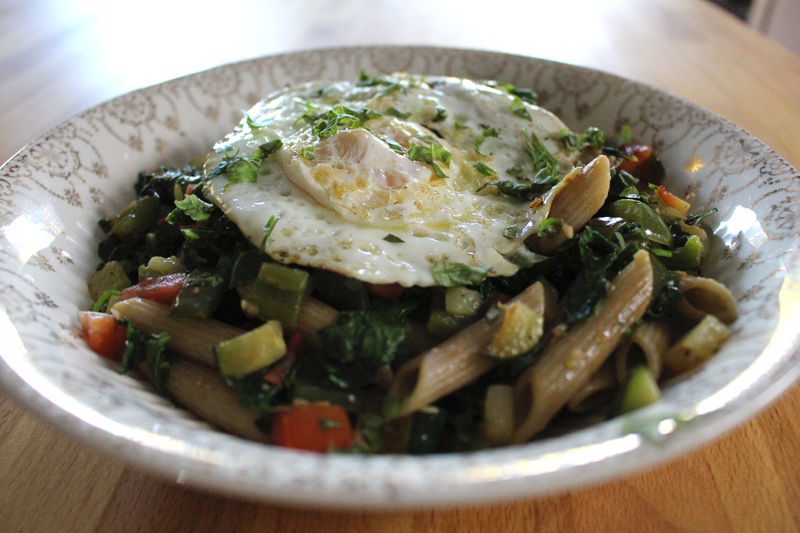
Serve yourself a huge bowlful. Green goodness all around!

EndOfTheWeekPasta-6

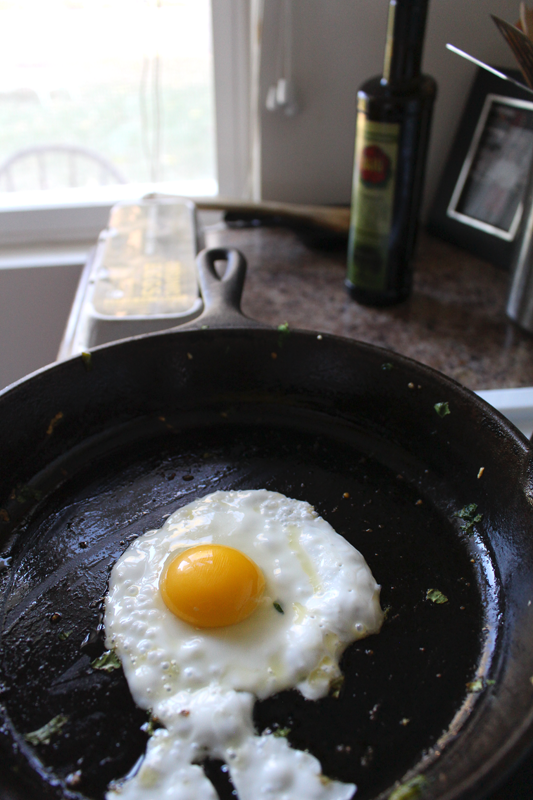
While the pasta hangs out for a minute, fry an egg in the veggie pan. One egg per person. Unless you want two.

Salt the eggs when they’re hot.

EndOfTheWeekPasta-8

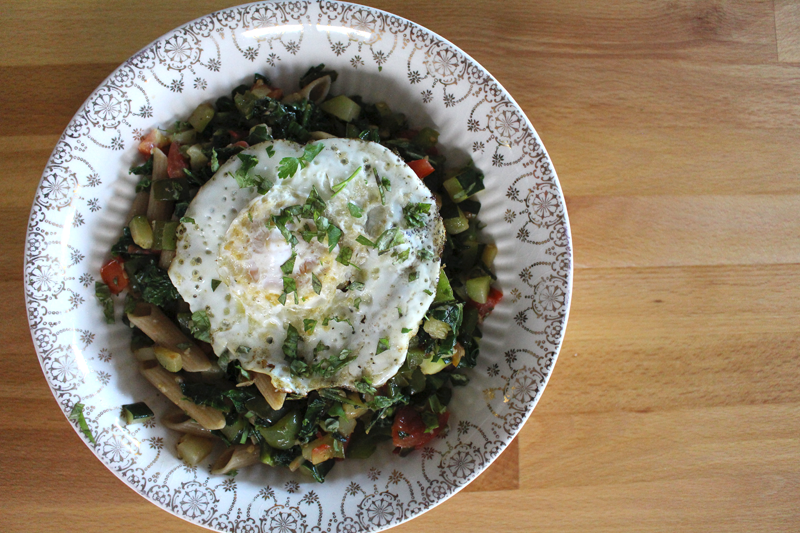
Then slide them onto the pasta. The yolk, if it’s still a bit runny, will add to the sauce.

End of the week fridge situation isn’t so bad after all.

Happy Eating!

End of the Week Pasta
Recipe Type: Main, Pasta, Vegetarian, Vegetables, Quick and Easy
Author: Rachel Oberg – De Ma Cuisine
Prep time:
Cook time:
Total time:
Serves: 2
Ingredients
  • pasta, cooked
  • 2 T olive oil
  • 1 C zucchini/summer squash, chopped (or carrots or radishes, grated)
  • 1 bell pepper, any color, chopped (or broccoli, cauliflower, eggplant, green beans, celery, or peas)
  • to taste salt
  • to taste pepper
  • 1-2 cloves garlic, minced
  • 1 C kale (chard, spinach, or mizuna would also be great), chopped
  • 1 tomato, chopped
  • 1/2 to 1 C pasta water (optional)
  • 1 T olive oil
  • 1 egg/person
  • to taste salt
  • handful fresh herbs (basil, parsley), chopped, for topping
Instructions
  1. Cook pasta, reserving 1/2 to 1 C pasta water.
  2. Heat skillet. Add olive oil. Add zucchini, bell pepper, and salt. Cook over medium-low heat for 5 minutes, stirring occasionally.
  3. Add garlic, kale, and tomatoes. Cook for about 3 minutes more, stirring often.
  4. Add pasta water, if using. Remove from heat, stir in pasta. Pour pasta in a bowl and keep warm.
  5. Add remaining olive oil to skillet. Add egg and cook to desired doneness. Sprinkle with salt.
  6. Divide pasta between bowls. Top each bowl with an egg. Top egg and pasta with fresh herbs.


Monday

15

September 2014

0

COMMENTS

Cheesy Chicken and Grapes with Rice

Written by , Posted in Braising, Cheese, Dinner, Fruit, Gluten Free, Grains, Kid-Friendly, Lunch, Main Dishes, Meat, Poultry, Rice

CheesyChickenAndGrapesWithRice-7

We don’t usually have a problem finishing off the grapes (or most any fruit that comes our way from Abundant Harvest Organics). We usually eat it raw. But, sometimes it’s super fun to try something new.

Like grapes with chicken and rice.

Oh yes I did.

CheesyChickenAndGrapesWithRice-1

It all starts with some thighs. I had a package of two, so that’s what I used. Add more (using a larger skillet) if your family needs more.

It’s seasoned simply, with cayenne and salt. This is gonna be a simple, humble dish, where the flavors really shine.

Shine chicken shine.

Go grape! Go grape! It’s grrrrrrrrrrrrape!

(I don’t know… Sorrynotsorry. I blame it on the Christmas music I’m listening to, in the 100 degree weather, to prepare for a concert in December… Not really. But, the heat makes my brain a little kooky.)

CheesyChickenAndGrapesWithRice-2

I made chicken stock the other day and then froze it. So, to quickly defrost the stock, I brought it to a boil. I don’t normally use hot stock when cooking rice (except when making risotto). So, you could use cold stock, if you’ve planned ahead and put it in the fridge overnight. I didn’t. Just adjust the cooking time as needed.

CheesyChickenAndGrapesWithRice-3

Once the stock + rice + chicken comes to a boil, reduce to a simmer and cook for a few minutes.

CheesyChickenAndGrapesWithRice-4

While these few minutes pass, halve and de-seed some grapes.

Eat them all.

Halve and de-seed some more.

CheesyChickenAndGrapesWithRice-5

Add the grapes to the skillet. Pick them off the top of the chicken, and stir slightly into the rice. Then cook for a good long while (you know, until the rice is done and the chicken is hot). You may need to add more liquid partway through, and stir every once in a while.

CheesyChickenAndGrapesWithRice-6

Is one of your favorite snacks crackers and cheese with grapes? Do you wait expectantly for fall to arrive, so you can eat this snack as often as possible?

I do.

So, why not add some cheddar to the mix? Right?!

CheesyChickenAndGrapesWithRice-8

It’s sprinkled on and popped in to the broiler for just about 3 minutes. It’s like a bazillion degrees in there, so it’s not gonna take long. Don’t leave the kitchen to go wash your hair while it broils. You may have a smoky situation on your hands if you do.

Also, you remembered to use an ovenproof skillet, right? I know you did. But, just making sure. ‘Cause if you decided to not use one AND wash your hair while it broils, well, that’d be just disastrous. Let’s avoid kitchen catastrophes when possible.

CheesyChickenAndGrapesWithRice-9

Once the rice is cooked, the chicken and rice all kinda brown a bit, creating this amazing sauce that I just want to soak up with a piece of crusty bread.

CheesyChickenAndGrapesWithRice-10

Apples go so nicely with grapes and cheese, so serve some (on their own, or in a salad) with this easy, comforting dish that welcomes fall (cough cough, seriously, fall, let’s do this now, enough with the hundred degree weather).

Happy Eating!

Cheesy Chicken and Grapes with Rice
Recipe Type: Dinner, Main Dish, Meat, Chicken, Fruit, Grapes
Author: Rachel Oberg – De Ma Cuisine
Prep time: 10 mins
Cook time: 96 mins
Total time: 1 hour 46 mins
Serves: 2-3
Ingredients
  • 2 T olive oil
  • 2-3 chicken thighs
  • to taste salt
  • dash cayenne
  • 2-3 C hot chicken or vegetable stock (or water)
  • 1 C brown rice
  • 1 C grapes, halved, seeds removed
  • 1 C cheddar cheese, grated
  • 1 apple, sliced, for serving
Instructions
  1. Heat an ovenproof skillet over medium heat. When it’s hot, add olive oil. When oil is hot, add chicken. Sprinkle with salt and cayenne. Sear on each side for 3 minutes.
  2. Add 2 C stock, rice, and salt. Stir gently around chicken (make sure all rice is in stock, not on top of chicken). Bring to a boil, then reduce to a simmer for 10 minutes.
  3. Add grapes, and simmer, adding more liquid if needed, cooking until chicken reaches 180F and rice is to desired tenderness, about 45-50 minutes (cooking uncovered, until the last 20-30 minutes), stirring occasionally.
  4. Taste and adjust seasoning if needed. Top with cheese and broil for 3 minutes.
  5. Serve with a side of apples.
3.2.1311

Monday

18

August 2014

0

COMMENTS

Beef and Bean Enchiladas

Written by , Posted in Baking, Beans, Beef, Cheese, Dinner, Fruit, Gluten Free, Kid-Friendly, Legumes, Lunch, Main Dishes, Meat, Potlucks, Vegetables

BeefBeanEnchiladas-11

Enchiladas are one of my go-to meals when I want to bring dinner to friends. It’s pretty quick and easy to make, it’s hearty, and it can be pretty healthy.

They’re also one of Tim’s favorites.

I try to have some in the freezer at all times.

BeefBeanEnchiladas-2

I mean, take a look at all of the veggies I’ve piled in here. I had celery on hand, but normally I’d use bell peppers (note: if you’re using celery, make sure it’s really cooked down and soft). I also have been putting summer squash in everything, so why not these too?!

BeefBeanEnchiladas-1

Also corn. In everything. I am addicted.

This winter when we had a million spaghetti squash I cooked a bunch of ’em and froze the flesh. I’ve been slowly using it. If you don’t have any cooked spaghetti squash you could just add more beans and summer squash.

Tim doesn’t mind when I sneak spaghetti squash into things like this. But, he did note that he got a pretty squashy bite, so stir it in pretty well if that might bother someone in your family. 😉

BeefBeanEnchiladas-4

I like to cook up the filling first. That way they take less time in the oven. Plus then I can make sure that all the veggies are soft. No one wants a crunchy this or that, unless it’s supposed to be there.

BeefBeanEnchiladas-5

Tim built me a beautiful, huge kitchen island when we moved. So I have tons of space to lay out all the tortillas I could ever need.

I’m thankful for this workspace.

The sauce gets divided evenly between the tortillas.

BeefBeanEnchiladas-6

The ends get folded in and then it’s rolled up. My whole wheat tortillas cracked a bit. No big deal.

BeefBeanEnchiladas-3

I like a bit of sauce in the bottom of the pan. If you like it extra saucy, add more! I used what I had in the freezer, so normally I’d make it a bit juicier than this looks (the recipe is adapted to be saucier).

BeefBeanEnchiladas-7

Rolled up and ready for cheeeeeeeeese.

BeefBeanEnchiladas-8

You could add way more cheese if you’d like, but I didn’t want to go overboard. Moderation, right?!

BeefBeanEnchiladas-10

After these came out of the oven, I put half of them into freezer safe containers so they will be ready for lunches. The rest we devoured.

BeefBeanEnchiladas-9

If you’re gonna bring these to some friends, send along a container of Greek yogurt (or sour cream), salsa, corn chips, and guacamole (if you’re feeling extra generous). Make them a simple green salad with some chopped fresh tomatoes and a container of homemade Ranch dressing (whisk together a bit of yogurt, mayo, fresh herbs, garlic, salt, and pepper). And for dessert, how about some Fruit Crisp that can be added to the leftover Greek yogurt for breakfast the next morning?

If you’re serving it tonight for your family, serve it exactly the same way.

Happy Eating!

Beef and Bean Enchiladas
Recipe Type: Main, Easy, Beans, Beef, Vegetables, Dinner, Main Dishes
Author: Rachel Oberg – De Ma Cuisine
Prep time:
Cook time:
Total time:
Serves: 4-6
Perfect for a hearty dinner tonight, or to make to take to a friend in need.
Ingredients
  • 1 t olive oil
  • 1/4 to 1/2 C bell peppers (or celery), chopped
  • 1/2 to 1 C summer squash, chopped
  • pinch salt
  • 1-2 C Chili (I used Beef Chili), or 1 lb. ground beef
  • 8-15 oz. kidney beans
  • 1 1/2 C cooked spaghetti squash (or add more beans and summer squash)
  • 1/4 C salsa
  • 1 C corn
  • 1/2 t chili powder (or more if using ground beef)
  • pinch ginger
  • to taste salt
  • to taste pepper
  • 1/2 to 1 C tomato sauce (add an extra 1/4 C if using ground beef)
  • to taste salt
  • to taste pepper
  • 8-10 tortillas
  • 1 C cheese, grated (Monterey/Pepper Jack or Cheddar)
  • Greek yogurt, for topping
  • 1-2 fresh tomatoes, chopped, for topping
  • jalapeño, chopped, for topping (optional – if you like it extra spicy)
Instructions
  1. Pre-heat oven to 350F.
  2. Heat a skillet, add olive oil. When oil is hot, add bell peppers/celery, summer squash, and a pinch of salt. Cook for about 5 minutes, or until veggies are tender, over medium heat, stirring occasionally. (Note: if using raw ground beef, cook first, then add veggies when beef is almost done. Add the extra 1/4 C tomato sauce with the beans in the next step.)
  3. Mix together chili, beans, spaghetti squash, salsa, corn, chili powder, ginger, salt, and pepper. Add to skillet. Bring to a boil, reduce to a simmer, and cook for about 5 minutes. Taste and adjust seasoning if needed.
  4. Mix tomato sauce with salt and pepper. Pour into the bottom of a greased 9×13 baking dish.
  5. Divide the beef and bean filling between the tortillas. Fold ends in and roll up. Place seam side down in tomato sauced pan. Top with salsa and cheese. Bake for 20 minutes, uncovered, or until cheese is melted.
  6. Serve topped with yogurt and fresh tomatoes (and jalapeño if desired).
Notes
Gluten-free if you use corn tortillas.

Monday

4

August 2014

1

COMMENTS

Summer Pizza

Written by , Posted in Baking, Cheese, Dinner, Fruit, Herbs, Lunch, Main Dishes, Pizza, Quick and Easy, Vegetables, Vegetarian

SummerPizza-8Eeets thyme fur peeeetsa.

Sorry. Kinda. It’s been one of those days. Sometimes stress is released in the form of weirdness.

And managed by eating pizza.

SummerPizza-2

Cutting veggies is therapeutic too. I have lots of cutting boards, and two are designated for onions and garlic. My beautiful new cutting board is not one of them. I never want anything sweet to accidentally taste like raw onions. Nope. Yuck. So I have two cutting boards with an X on the back that are special and a little bit stinky. 

SummerPizza-1

We had a similar pizza to this the other week. Ahem, I did. Tim doesn’t agree that squash belongs on a pizza. He will eat it in pretty much anything else though, so it’s cool. He made his own personal pizza and I made mine. Mine had lots of veggies. His didn’t. They both tasted good.

SummerPizza-3

I used Alana’s recipe for the pizza crust (from her cookbook). You can use hers, or whatever you would normally use. I like my crust thin and crispy. If you like it thicker and chewier, adjust the recipe accordingly.

Because of my taste for crispness, I like to par-bake the crust a bit before topping it.

Par-bake means to partially bake it (as par-cook means to partially cook).

I topped it with a bit of olive oil and some herbs, because I wanted two layers of herby flavor. (Helpful tip: If you need some bread to go accompany a dish and you don’t have a baguette on hand, you could just all the way bake the crust and eat it like a sort of focaccia bread.)

SummerPizza-4

Then it’s topped with some tomato sauce (it’s also great with olive oil if you don’t like sauce), and more herbs.

SummerPizza-5

Lots of different veggies, like kale, zucchini, corn, and tomato (tomato is a fruit, but in this case let’s pretend it’s a veggie since it’s acting like one), but not so many that it weighs down the pizza. It’s still a light summer meal.

SummerPizza-6

I opted for some parmesan and an aged cheddar. Because it’s what I have in the fridge.

I’d planned to use feta, but it’s smelled baaaaad. There’s stinky cheese and then there’s steeeeenky cheese.

SummerPizza-7

It’s topped with a bit of basil (from my garden – all the basil that I got as an add-on from AHO last week is gone gone gone). And as soon as the last photo was taken I ate as much as I could, as quickly as possible because I was starving! And then I ate it again today before I typed up this post.

Happy Eating!

Summer Pizza
Recipe Type: Main, Dinner, Pizza
Author: Rachel Oberg – De Ma Cuisine
Prep time:
Cook time:
Total time:
Serves: 4
Summer squash, corn, and tomatoes all top this light summer pizza.
Ingredients
  • 2 t olive oil, divided
  • 1 pizza crust
  • 2 t dried Italian herbs (mixture of basil, rosemary, oregano, thyme, and parsley), divided
  • to taste salt
  • to taste pepper
  • 1/4 C tomato sauce (optional – could also just use olive oil)
  • 12-15 slices zucchini/summer squash
  • 8-10 tomato slices
  • 2 T raw corn (frozen is fine)
  • 1/4 C kale (spinach, chard, collard greens), cut in a chiffonade (small ribbons)
  • 2 T green onions, chopped
  • 1/2 C cheese (parmesan and cheddar), grated
  • to taste salt
  • to taste pepper
  • fresh basil, for topping
Instructions
  1. Pre-heat oven to 450F.
  2. Grease pizza pan with 1 t olive oil. Press out crust onto pan so it’s fairly thin. Top crust with remaining olive oil, and sprinkle with 1 t Italian herbs, salt, and pepper. Bake for about 5 minutes (optional – you can bake it all at once too).
  3. Top par-baked crust with sauce, remaining Italian herbs, veggies, cheese, salt, and pepper. Bake an additional 7 minutes (or until crust is to desired crispness and cheese is melted – it will be longer for thicker crusts).
  4. Serve topped with fresh basil.

Monday

28

July 2014

0

COMMENTS

Parsnip Fries with Dip

Written by , Posted in Appetizers, Cheese, Condiments, Dinner, Gluten Free, Herbs, Kid-Friendly, Leftovers, Lunch, Quick and Easy, Roasting, Sides, Snacks, Vegetables, Vegetarian

ParsnipFriesWithDip-8

I have something to confess. Other than roasting parsnips, or using them in soups, I don’t have many other ways that I use them.

Maybe because I know how good they are roasted. Think fried plantains meets roasted carrots.

I figured that it was time to try something a little bit different. I mean, I’m still roasting them, but this time there’s dip.

ParsnipFriesWithDip-1

As with most of the veggies that I roast, they are tossed with Bari’s Organic Olive Oil, salt, and pepper. Simple.

ParsnipFriesWithDip-2

Then they go onto a baking sheet with a bit of room around each one. They’ll roast a bit better that way. I used two baking sheets for the seven parsnips, flipping the parsnips and rotating the sheets in the oven partway through.

ParsnipFriesWithDip-3

And then there is dip.

ParsnipFriesWithDip-4

A creamy, herby, garlicky dip.

You could dip so many things in this. Roasted veggies, obviously. Fresh veggies, yum. Or you could thin it out a little with some buttermilk and make it into a salad dressing.

The taste is a bit like caesar dressing meets ranch dressing.

Or, goodness in a bowl.

Confession number two: I couldn’t stop dipping.

ParsnipFriesWithDip-5

I can’t get enough of roasted veggies. They get all crispy on the outside, and tender on the inside.

ParsnipFriesWithDip-7

I made these to eat while we watched the All-Star Game the other week.

They’re best hot out of the oven, but room temperature is perfectly acceptable too.

If you don’t eat them all in one sitting (it was difficult for me to not eat them all before Tim even got home from work) and there are leftovers here are some yummy ways you could use them:

  1. Re-heated in some tinfoil (closed to start with, then once they’re warm, open to let them crisp up).
  2. Chopped up and sautéed with some greens.
  3. Re-heated and pulsed a couple times in the food processor (regular blender/hand blender) with some of the dip to serve alongside a roasted chicken.
  4. Chopped and added to soup (near the end of the cooking time).

ParsnipFriesWithDip-6

If you do eat them all in one sitting, I understand.

Happy Eating!

Parsnip Fries with Dip
Recipe Type: Side, Snack, Appetizer
Author: Rachel Oberg – De Ma Cuisine
Prep time:
Cook time:
Total time:
Serves: 4
Sweet and crispy roasted parsnips are dipped in a creamy garlicky herb dip, making a delicious appetizer or snack.
Ingredients
  • 7-8 parsnips, cut into 3/8″ x 3/8″ x 3″ sticks (or French fry shape)
  • 1-2 T olive oil
  • to taste salt
  • to taste pepper
  • dip: 3/4 C yogurt
  • 1/4 C parmesan cheese, grated
  • 1-2 cloves garlic
  • pinch ginger
  • 1/2 T honey
  • 1 T balsamic vinegar
  • 1/4 to 1/2 t dried thyme
  • 1/4 to 1/2 t dried parsley
  • 1/4 C fresh basil
  • to taste salt
  • to taste pepper
  • 1/4 C olive oil
Instructions
  1. Pre-heat the oven to 400F.
  2. Toss parsnips with olive oil, salt, and pepper. Place on two baking sheets, without overcrowding. Bake for 10-15 minutes, flip, rotate position in the oven, and bake for about 10 minutes more (or until parsnips are crispy outside, tender inside).
  3. Blend dressing ingredients together (in food processor or blender). Adjust seasoning if needed.
  4. Serve immediately.
Notes
This makes a lot of dip, so you could probably halve the recipe and be just fine… probably. 😉