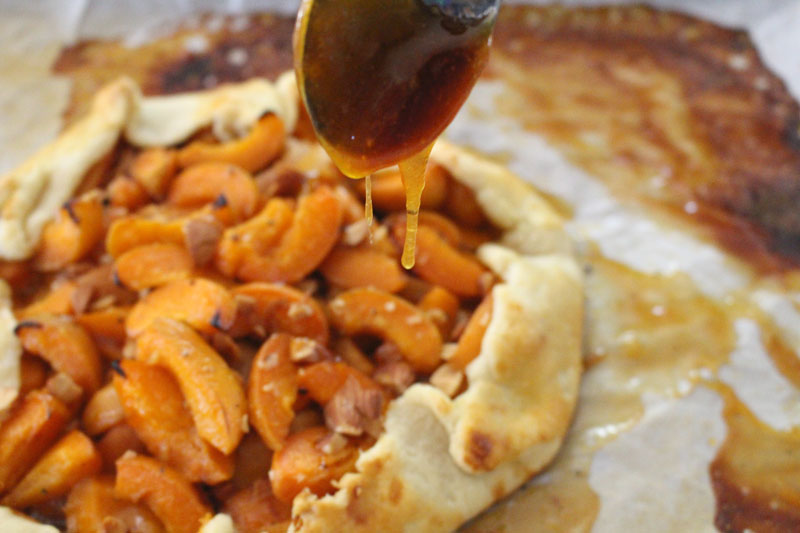
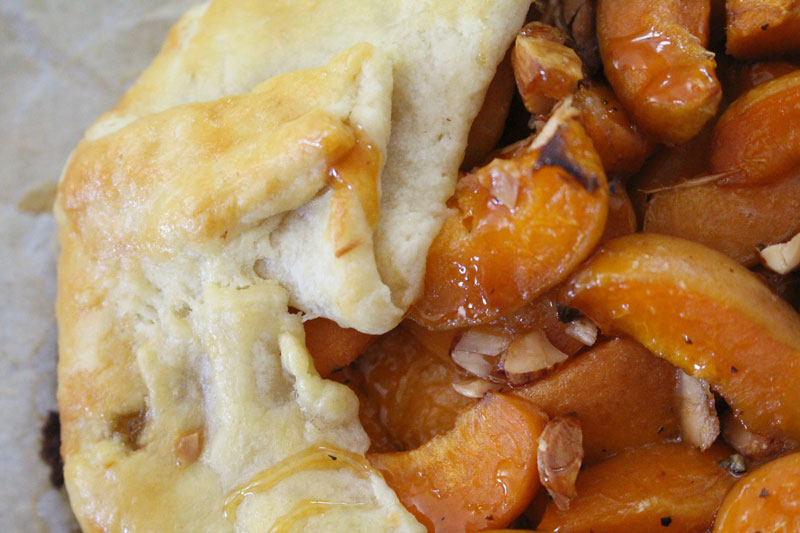
De Ma Cuisine

Dessert Archive

Thursday

7

August 2014

6

COMMENTS

Peach Sauce

Written by , Posted in Breakfast, Brunch, Canning, Condiments, Dessert, Fruit, Gluten Free, Kid-Friendly, Sauces, Vegetarian

PeachSauce-13

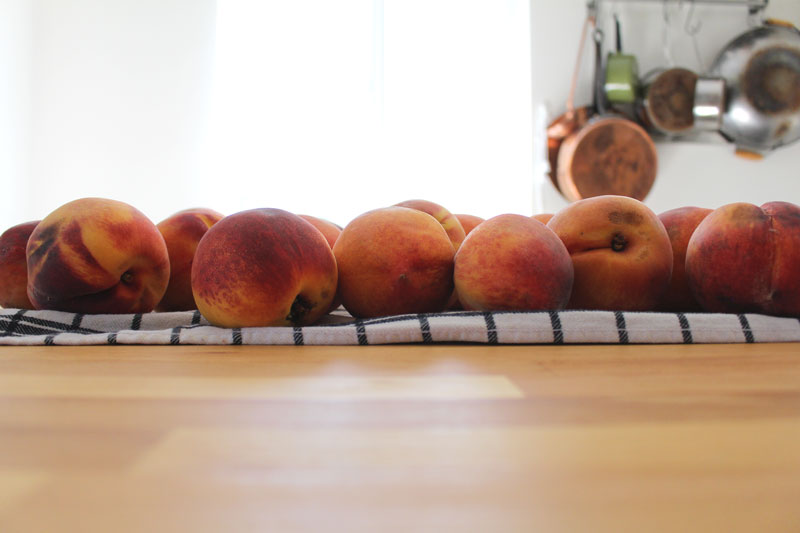
Last week I ordered twenty pounds of peaches as an add on from Abundant Harvest Organics. I thought I’d bitten off more than I could chew (haha, no pun intended) and worried that they may spoil before I got to them.

None did.

And now I have a yummy peach sauce to share with you!

PeachSauce-1

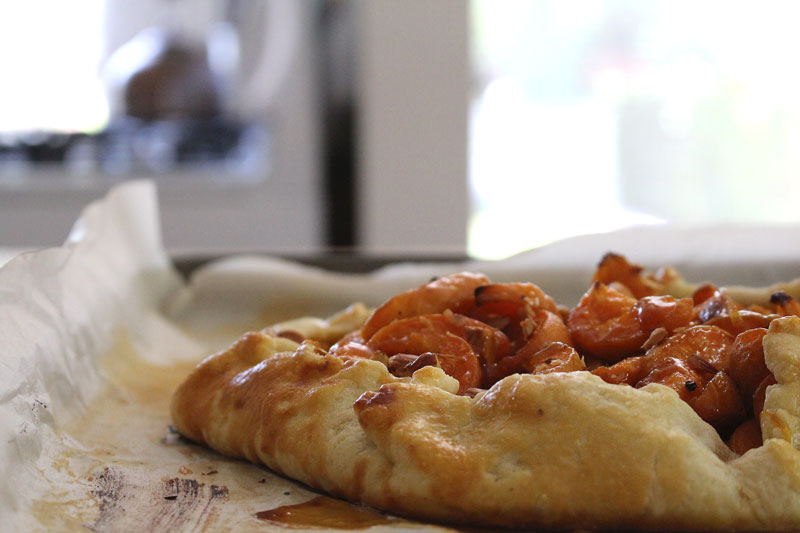
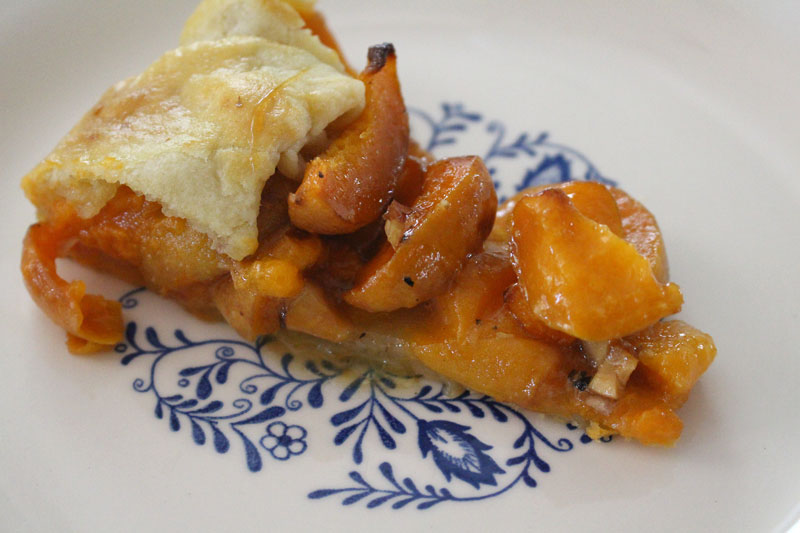
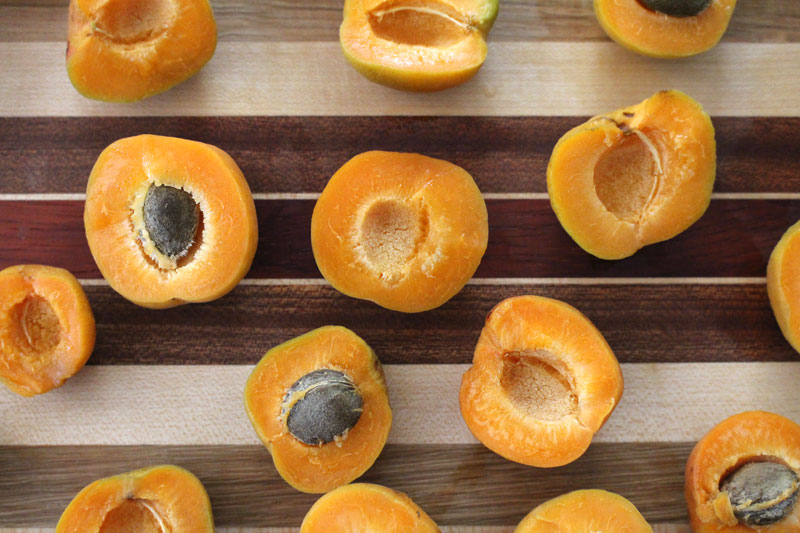
Feel free to substitute your favorite stone fruit if you’d like. Plums, nectarines, apriums, pluots, apricots… they’d all be amazing.

PeachSauce-2

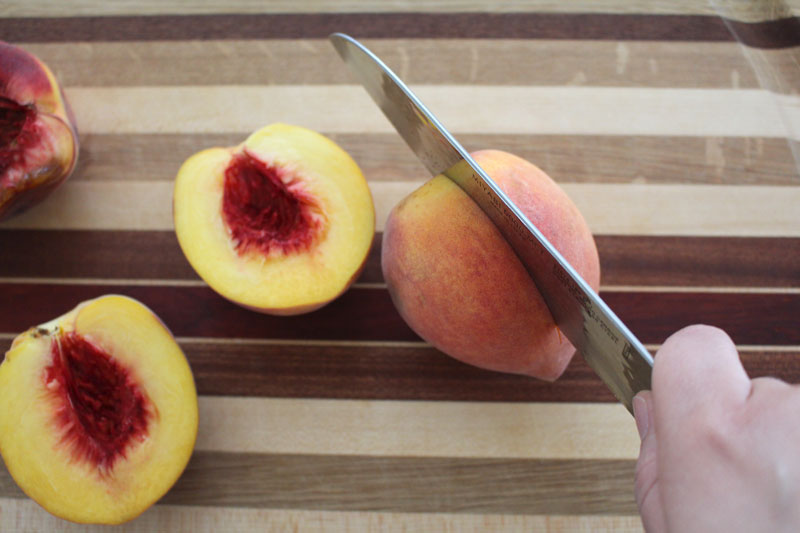
Start by halving the peaches. Remove the pit, and slice or roughly chop. It’s going to be blended in a bit, so don’t worry about the shape.

PeachSauce-5

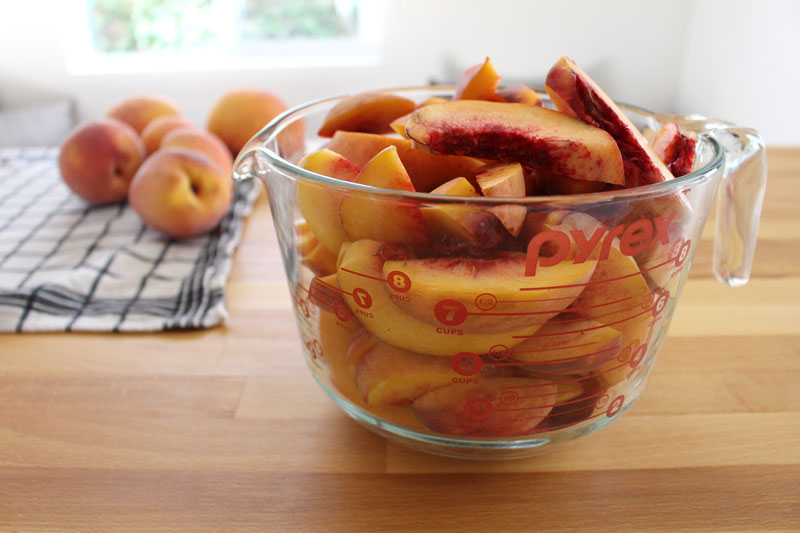
About eight to ten cups will do just fine. Out of my twenty pounds of peaches, I ended up with roughly 45 cups of sliced peaches in total. This sauce was just a small portion (I froze the rest – more about that another week).

PeachSauce-6

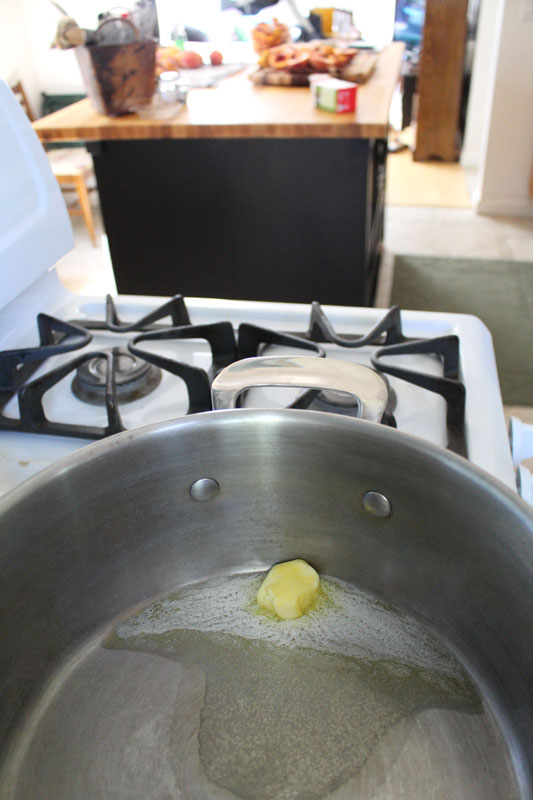
I added two tablespoons of butter to a large hot pot. If you don’t want to use butter, coconut oil would be just fine. The fat adds a rich quality to the sauce that I love. If you don’t want to add either, that’s cool too.

PeachSauce-7

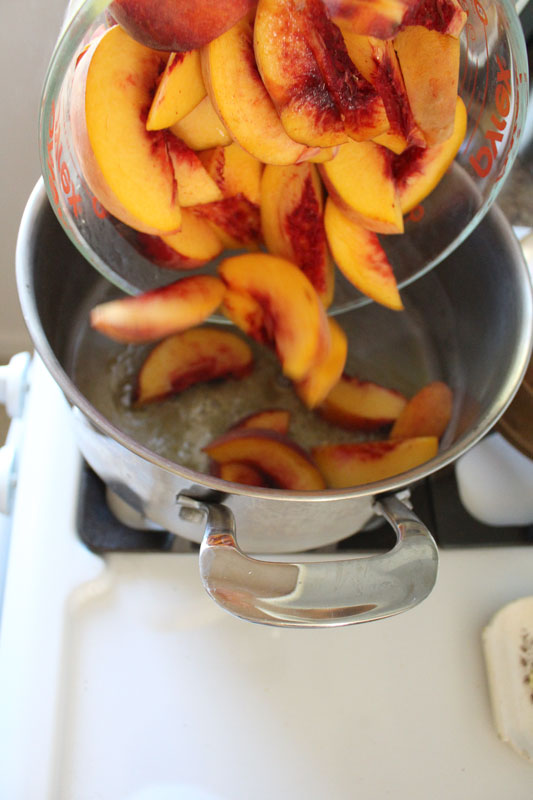
Peaches are dumped into the hot browning butter.

Get ready for the smell. It’s amazing!

PeachSauce-10

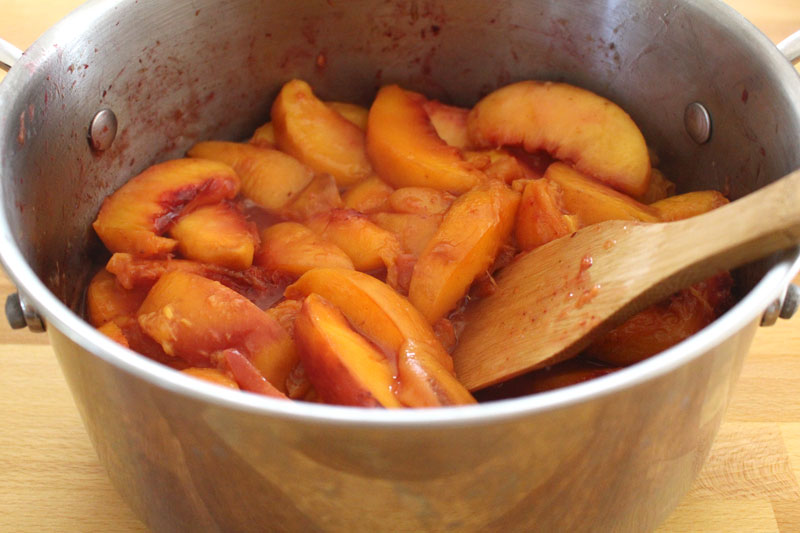
After the peaches have cooked for about twenty minutes (and then rested for ten – not a must, I just needed more time to work on a different recipe, so they had to wait), they should look something like this.

PeachSauce-8

PeachSauce-9

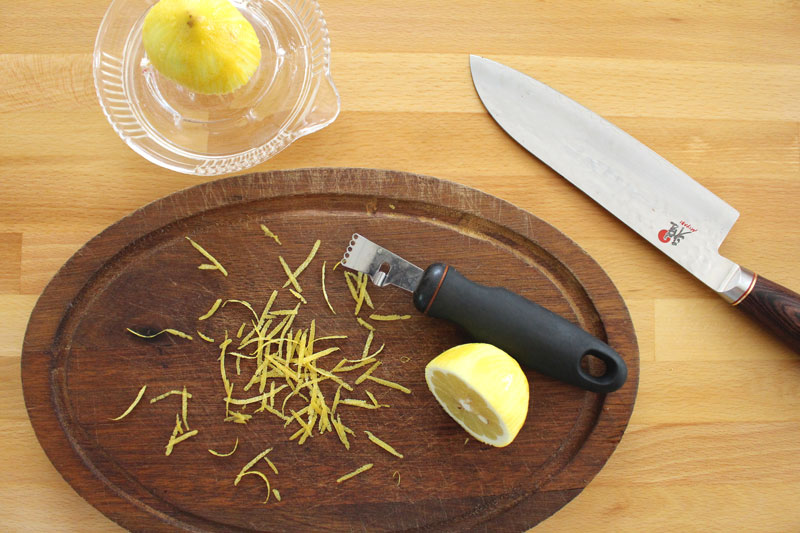
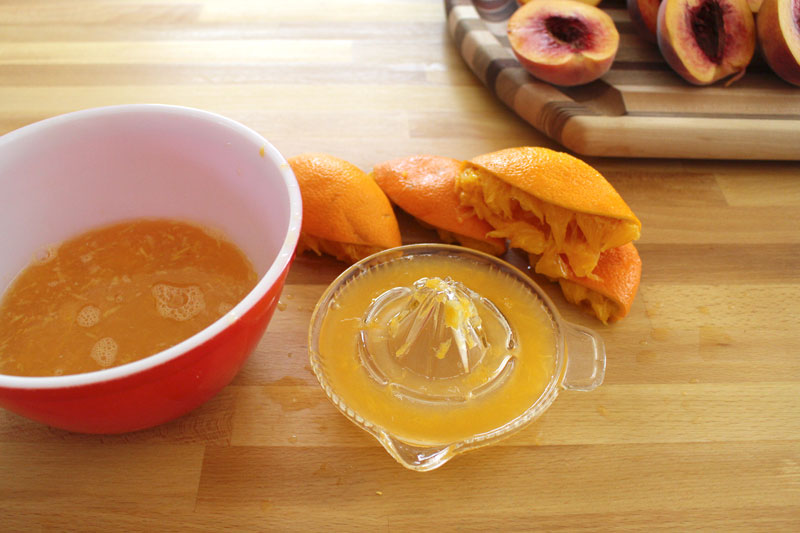
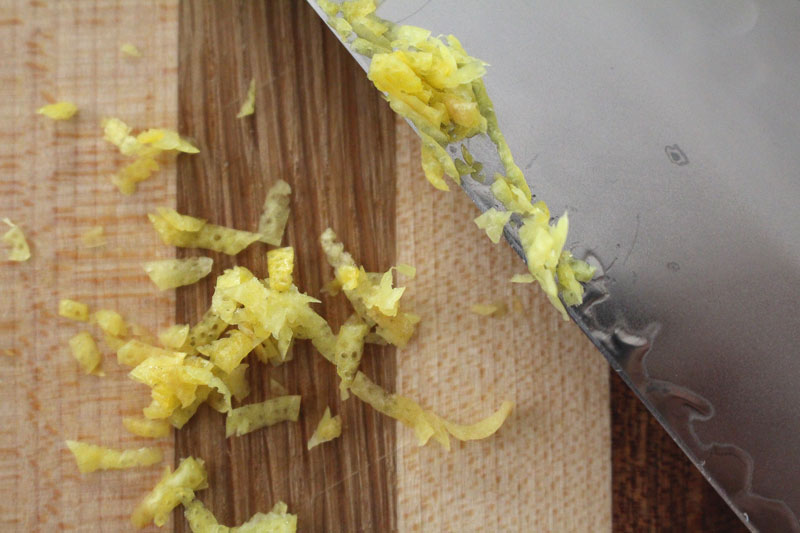
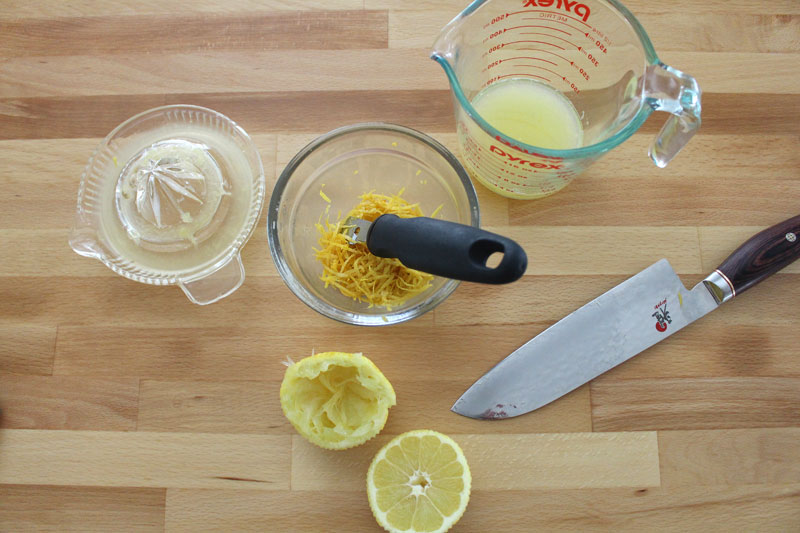
I had a few oranges still hanging around from spring boxes (wow they lasted a long time!!), so I whisked them up with the zest and juice from one lemon, a bit of coconut palm sugar, and a pinch of salt.

PeachSauce-11

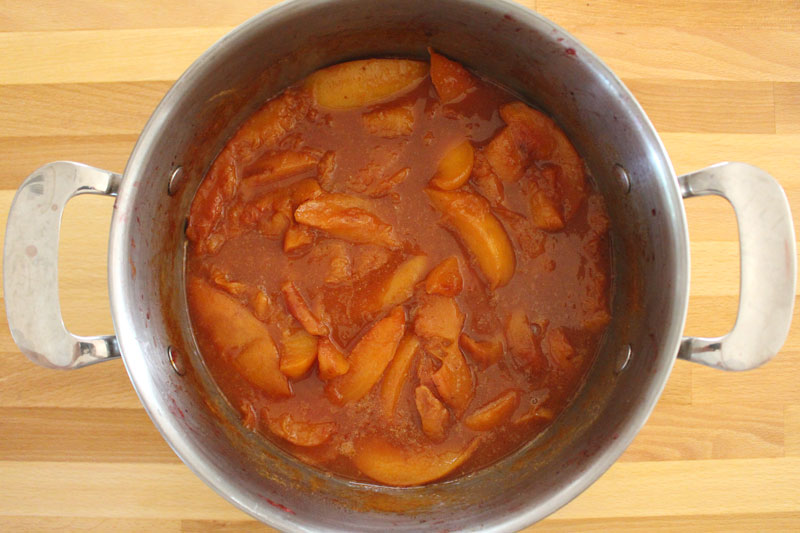
And then, orangy-lemon juice meet smooshy peaches.

Orangeyou glad I didn’t say… I don’t know… banana?!

Sorry. Kinda.

PeachSauce-12

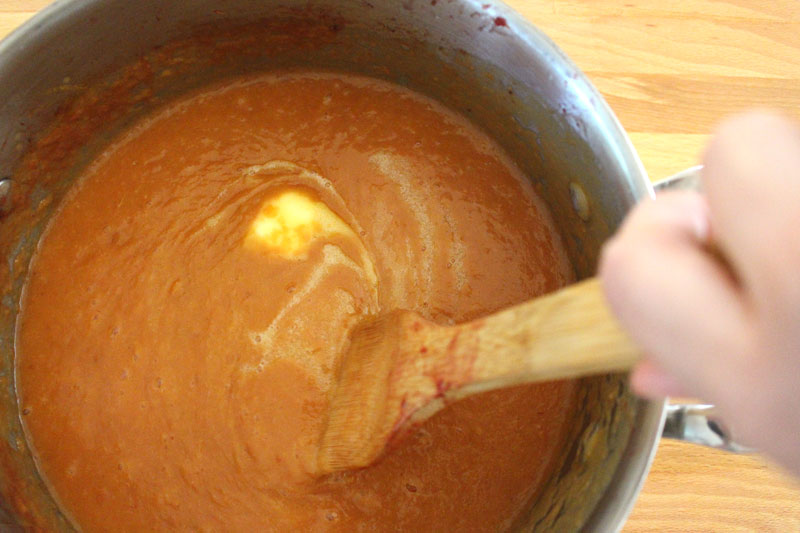
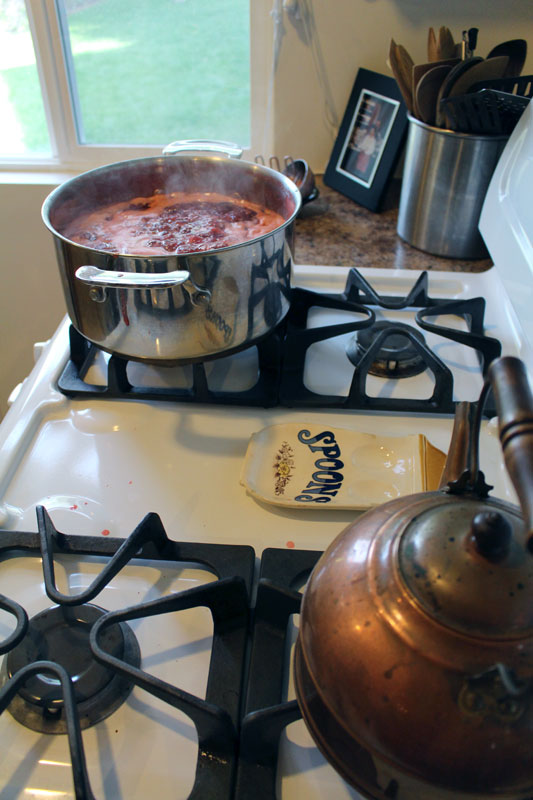
After the sauce cooked up for a while longer, I blended it up with my hand blender. A regular blender will work just fine too (just be sure to remove the middle part of the lid and cover the hole with a clean kitchen towel).

One more tablespoon of butter is stirred in after the sauce is blended.

Extra richy richness.

PeachSauce-14

This is gonna be good… I’m hoping that Tim will make some more Vanilla Bean Ice Cream so I can top it with some of this sauce. You could make this even more awesome by roasting some fruit to plomp on top. It would be great over French Toast or Cornmeal Pancakes, or used in place of jam.

Or, just eat it by the spoonful…

Happy Eating!

Peach Sauce
 
Recipe Type: Dessert, Sauces, Stone Fruit, Gluten-Free, Breakfast
Author: Rachel Oberg – De Ma Cuisine
Prep time:
Cook time:
Total time:
Sweet summer peaches are cooked up in butter and blended to make a delicious sauce.
Ingredients
  • 3 T unsalted butter (divided 2 T, 1 T)
  • 8-10 C ripe peaches, sliced or roughly chopped
  • 1 t vanilla extract
  • pinch salt
  • juice from 1 lemon
  • zest from 1 lemon
  • juice from 2-3 oranges
  • 3 T coconut palm sugar (brown sugar, maple syrup, or honey will work too)
Instructions
  1. Heat a large pot and add 2 T of butter. When butter is hot, add peaches. Cook over medium-low heat, stirring occasionally, for 20 minutes, or until peaches are very soft. Let stand 10 minutes (optional).
  2. Whisk together vanilla through sugar. Add to peaches. Bring to a boil. Reduce to a simmer and cook for 20 minutes.
  3. Blend with a hand blender (it helps to tip the pot to the side a bit to prevent splattering) or a blender (in batches, with the middle part of the lid removed and a clean towel covering the hole). Stir in remaining 1 T of butter.
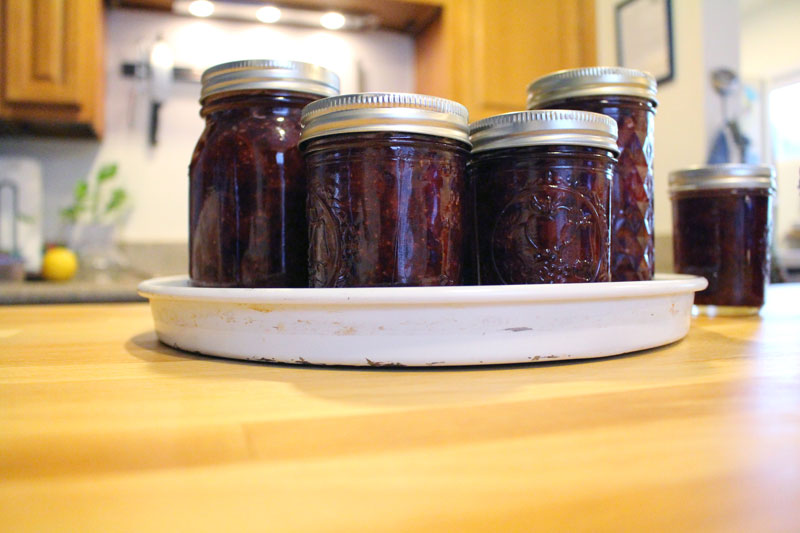
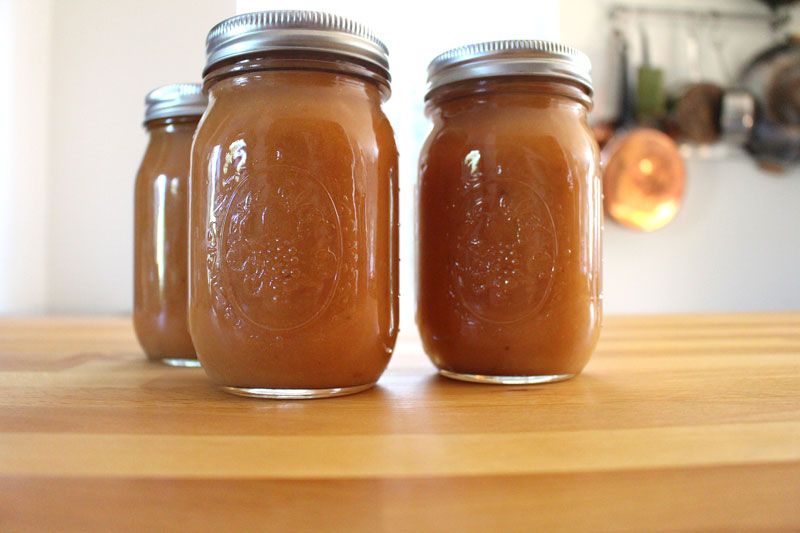
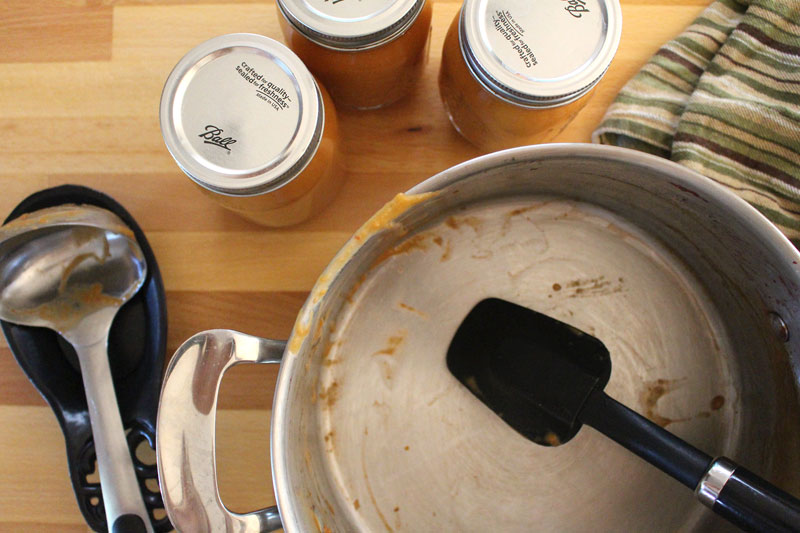
  4. To store, ladle into clean pint jars, leaving at least 1/2″ of room at the top. I prefer to store the sauce in the freezer, freezing uncovered, then adding the lids once the sauce is frozen.
 
Notes
Yields 3 pint jars.


Monday

14

July 2014

1

COMMENTS

Apricot and Black Pepper Galette

Written by , Posted in Baking, Breakfast, Brunch, Dessert, Eggs, Fruit, Lunch, Vegetarian

ApricotBlackPepperGalette-11

Remember that time when my blog was broken… for like two months… and then Tim and some friends fixed it?

Yeah, they fixed it just because they’re nice people.

So I made them a galette.

Sometimes thank you needs to be said in the form of food.

David, Andy, Vic, and of course Tim, thank you. I can cook the food, take the pictures, and type some letters in here. But, when something breaks, it takes brains like yours to know how to make things better. I am grateful.

ApricotBlackPepperGalette-14

So grateful that I’m sharing our stone fruit. Sharing it and converting it into a thank you treat.

ApricotBlackPepperGalette-2

We had some over-ripe apricots in the fridge. You know, the ones that are kinda wrinkly and you think they might be good for nothing? Instead, you find that they’re super soft and sweet. Just perfect for a galette.

Nectarines, peaches, plums, apriums, and pluots could all be substituted. You know, use what you have on hand.

ApricotBlackPepperGalette-1

Lemon zest. It needed to be a part of this dish. I just can’t get enough. It’s an essential part of my pantry, so I try to have lemons on hand no matter what the season. They brighten almost any dish.

ApricotBlackPepperGalette-3

Apricots are combined with a bit of butter, some honey, and maple syrup.

Aaaand black pepper.

Don’t skip this. Black pepper goes really well with stone fruit.

Seriously!

ApricotBlackPepperGalette-4

I made a pie crust. I used Alana’s recipe from her cookbook, which is one of my favorites, called The Homemade Pantry (it’s on page 150). It was super easy and I really liked how it turned out. Sooo yeah, I’ll be making that again (along with her Maple Popcorn which I’ve made twice and can’t stop stuffing into my face).

ApricotBlackPepperGalette-5

Alana suggests folding the crust in half and then in half again to move it from the counter to the pan. I did this. It worked well.

Winner.

ApricotBlackPepperGalette-6

All that sweet filling is plomped in the center of the crust.

I think this is gonna be good.

ApricotBlackPepperGalette-7

The filling is sprinkled with chopped almonds. For crunch. Walnuts would be great too. Or if you’re not nuts about nuts (sorry, I couldn’t resist), leave ’em out.

ApricotBlackPepperGalette-8

ApricotBlackPepperGalette-9

To make the crust all shiny and pretty I whisked an egg and brushed it onto the crust. You don’t have to do this, but it’s an easy way to make your galette go from pretty to spectacular.

ApricotBlackPepperGalette-13

I was all proud of myself for making a crust that held together and didn’t have any holes for the filling to leak out of.

Wrong.

It leaked all over the place. (This happened the first time I made a galette too.)

The good thing is that it turns into candy.

Accidental candy.

I ate most of it.

ApricotBlackPepperGalette-10

The rest I scraped off the pan and drizzled over the galette.

Yep, now the galette has caramel sauce on it.

Super fancy.

(If your galette doesn’t leak, pat yourself on the back and then email me to tell me how you did it. Ok? Ok.)

ApricotBlackPepperGalette-12

The whole process took me a while, from pie crust start to drizzling finish. But, it’s not all that complicated or difficult. And it’s so worth it.

ApricotBlackPepperGalette-15

Make this ahead of time and then invite your favorite people to join you for dinner. I would like to eat this outside, under a nice shade tree, after some barbecue and potato salad. And the leftovers, if there are any, might get a dollop of Greek yogurt and turn into breakfast.

That’s how we roll at our house.

Happy Eating!

Apricot and Black Pepper Galette
Recipe Type: Dessert, Fruit, Summer
Author: Rachel Oberg – De Ma Cuisine
Prep time: 75 mins
Cook time: 30 mins
Total time: 1 hour 45 mins
Serves: 6
Ingredients
  • 1 pie crust
  • 1/8 to 1/4 C honey
  • 1/8 to 1/4 C maple syrup
  • 1 t lemon zest
  • 1 T lemon juice
  • pinch salt
  • 1/4 t freshly ground black pepper
  • 3 C super ripe apricots (plums, peaches, nectarines, pluots, apriums could be substituted or added)
  • 1 T butter, cut into small pieces
  • butter, for baking
  • flour, for baking
  • 2 T almonds, chopped
  • 1 egg, whisked
Instructions
  1. Prepare pie crust and chill for an hour. Remove from fridge 15 minutes before rolling out.
  2. Pre-heat the oven to 375F.
  3. Whisk together honey through pepper. Add apricots and butter, tossing gently to combine.
  4. Butter and lightly flour a piece of parchment paper, that’s on a baking sheet.
  5. Roll out pie crust to be about 12-14″ in diameter. Gently fold in half and in half again, and pick it up to place on the parchment paper. Unfold.
  6. Scoop the apricot mixture into the center of the crust. Sprinkle with almonds. Gently fold the crust up and around the filling, leaving the center open. Make sure there are no cracks, or the liquid will run. Brush crust with egg and bake for 25-30 minutes, or until the crust is golden and flaky.
  7. If any sauce leaks out, scrape off the pan with a spoon and drizzle over the galette (it will be like a caramel).
  8. Let cool completely before serving.
Notes
Prep time includes pie crust preparation.
3.2.1303


Thursday

3

July 2014

0

COMMENTS

Honey and Maple Syrup Sweetened Berry Jam

Written by , Posted in Breakfast, Brunch, Canning, Condiments, Dairy-Free, Dessert, Fruit, Gluten Free, Kid-Friendly, Vegetarian

StrawberryJamSecondTime-5One of my favorite things about summer is the fruit. The nectarines are amazing, the plums are incredible, and the berries… they are the best!

We had raspberries in the garden growing up, so they are my emotional favorite. Tim’s family has blackberries, so they’re a favorite too. But there’s just something about blueberries and strawberries… I love ’em.

I’m always so sad when their season ends (as it is ending now). I’m thankful for the others, don’t get me wrong. But, I want berry season to last as long as possible.

BlueberryJam-2

There are plenty of ways to preserve these summer treasures. You can freeze washed berries, pitted cherries, and halved stone fruit on a baking sheet, and then pop them into a bag. You can make tons of crisps and cobblers and wrap them up really well and freeze them for November. You can make sauces and smoothies to be pulled out when the weather has turned cold.

And, you can make jam.

Last summer I decided that I would try. Surprisingly, it turned out. The catch was that I wanted to make it sans pectin and sugar. I didn’t know if you could, but I wanted to.

And I did.

I made three kinds: cherry, strawberry, and blueberry.

We ran out a few months ago. This year, I don’t intend to run out. So I made a ton. First strawberry (which follows the same recipe), then blueberry.

StrawberryJamSecondTime-4

Before you start, make sure you have clean jars and lids (the lid is the flat piece, and is not re-useable if you want them to seal, the band is the part that wraps around the jar and screws into place).

I don’t have a dishwasher, so I used a pot of boiling water and boiled for about ten minutes.

StrawberryJamSecondTime-3

I love lemon zest, so I opted to add a bunch for a hint of brightness, instead of only using lemon juice.

In general, if possible, any time I use a lemon, I zest it first. Why waste such goodness?! If there’s any extra, it goes into the freezer.

StrawberryJamSecondTime-2

Strawberry jam is a bit more of a process than blueberry. There’s hulling and chopping involved. 

It’s gonna be messy.

But it’s worth it.

StrawberryJamSecondTime-6

When I was making the strawberry, I forgot how much the stuff bubbles up. I had to move it to two pots, since the one was a bit too small.

I was wiser with the blueberries.

BlueberryJam-3

BlueberryJam-4

It’s not going to be thick thick, like jam made with pectin. But, it will thicken up a bit. Cook it until it’s as thick as you want it (you can test it by putting a plate in the freezer and putting a dollop of jam on it so it will cool quickly, then test to see how runny it is), even if that’s longer than the time listed in the recipe.

StrawberryJamSecondTime-1

BlueberryJam-5

Jars are filled and left to cool on the counter for a bit. You should hear the lids popping as they seal. Sealed or not, I like to store them in the freezer (after fully cooling in the fridge), even after they’re opened. (There are different opinions on how long properly canned homemade jam will last unrefrigerated. (1) Since I didn’t pressure cook or process the jam in boiling water after adding it to the jars, I opted to be extra safe and keep them in the freezer, even if they did seal. In my experience, they have lasted as long as it took to consume them – less than a year, in the freezer. I hope that this summer’s batch will last more than a year, stored in the freezer. Once opened, stored in the fridge, they usually are fine for a month or two, maybe more. Just keep an eye out for mold. Jams with less sugar and that aren’t commercially prepared tend to have a shorter shelf life. (1) So be mindful of that, and whether or not you have pressure cooked them, when deciding where to store them.)

This jam is perfect for the usual toast or English muffin, to top ice cream, or to be eaten by the spoonful by a hungry food blogger.

Happy Eating! 

Blueberry or Strawberry Jam
Recipe Type: Condiment, Fruit, Preserving, Canning
Author: Rachel Oberg – De Ma Cuisine
Ingredients
  • 12 C blueberries or strawberries (strawberries: hulled and chopped)
  • 4 C honey
  • 1 C maple syrup
  • 3 T lemon zest
  • 3/4 C lemon juice
Instructions
  1. Bring berries through lemon zest to a boil. Mash with a potato masher. Once it comes to a rapid boil, cook for 3-5 minutes.
  2. Reduce heat to a simmer and cook for about 20 minutes.
  3. Remove from heat, stir in lemon juice, and let stand for 5 minutes.
  4. Ladle into jars, leaving about 1/2″ of space at the top. Cover with the lid and let stand for 15-30 minutes.
  5. Store at room temperature if they’ve sealed, or in the freezer if they haven’t (or if you just want to).
  6. Makes about 6 pints (or 12 half pints).
Notes
To sanitize jars, place in a large pot and cover with water (about 1 inch over the top of jars). Bring to a boil and boil for about 10 minutes.
3.2.1303

(1) I have referenced this site for information on the shelf life of jam.

Friday

27

June 2014

2

COMMENTS

Vegan Fruit Crisp

Written by , Posted in Baking, Breakfast, Brunch, Dairy-Free, Dessert, Fruit, Gluten Free, Kid-Friendly, Quick and Easy, Vegan, Vegetarian


VeganFruitCrisp-8

A few weeks ago we were invited to a barbecue at the house of some friends. I brought the dessert. The only dessert.

One of my favorite go-to desserts is fruit crisp. I like to make it because it’s easy and because my mom used to make it all the time when I was growing up, so I have a sentimental attachment to it.

For this particular evening, I chose to make it because the friends who hosted are vegans. I wasn’t sure about trying to make a vegan cake. So I went with simple, and adapted my crisp to suit them.

Their son, Theo, was not impressed. He was expecting dessert. To a three year old, dessert means cake.

Oops.

The still warm crisp was dished out. Generous helpings. I was anxious to know if they liked it. As Theo was handed his plate his little face just crumpled and the cutest three year old voice says, “That’s not desse-wrt! Where’s the cake?”

Thankfully his parents liked it. 😉

VeganFruitCrisp-1

It’s the perfect dessert for whatever fruit is in season. Spring and summer: berries and stone fruit. Fall and winter: apples, pears, persimmons, and grapes. And it makes a fabulous breakfast the next day. Cold with some Greek yogurt, that’s how I like it. Or just standing in front of the fridge with the door open, shoveling spoonfuls into my mouth as I try to decide what to make for dinner. (I know, I know, I’m not supposed to decide with the fridge door open… My mom has told me a thousand times…)

VeganFruitCrisp-2

Sugars and juice are whisked together. Sweet sweet. But, it’s honey, maple syrup, and coconut palm sugar. No refined white sugar here. You can use white or brown sugar if you prefer. This is how I like it though.

VeganFruitCrisp-3

Super sweet and juicy, the fruit is tossed with the liquid and poured into a greased baking dish.

VeganFruitCrisp-4

I opted for summer fruits, because that’s what’s in season. Aren’t the colors pretty?

VeganFruitCrisp-5

A slightly less sweet, oaty, crumbly mixture will top the fruit.

VeganFruitCrisp-6

Oats for hearty goodness. And to make this a perfectly acceptable next day breakfast.

VeganFruitCrisp-7

Invite your favorite people over, or bring this to a barbecue.

Just be sure to remind them that it’s not cake.

(Sorry Theo.)

Happy Eating!

Vegan Fruit Crisp
 
Recipe Type: Dessert, Vegan, Fruit
Author: Rachel Oberg – De Ma Cuisine
Prep time:
Cook time:
Total time:
Serves: 8-10
Perfect for any time of year, for vegans and non-vegans alike.
Ingredients
  • 2 C blueberries
  • 1 C strawberries (could sub blackberries), chopped
  • 2 C (heaping) nectarines (could sub apples, pears, plums, persimmons), chopped
  • 1/2 C apriums/apricots (could sub peaches), chopped
  • 1 T cornstarch
  • 1 t vanilla extract
  • 3 T orange juice
  • pinch salt
  • 1/3 C honey
  • 1/3 C coconut palm sugar (honey, maple syrup, or brown sugar will work too)
  • 1/3 C maple syrup (or honey)
  • 4 C oats
  • 1/3 C coconut palm sugar
  • 2 T whole wheat or Gluten-free flour
  • 1 t cinnamon
  • dash nutmeg
  • pinch allspice
  • 1/3 C maple syrup
  • 3 T coconut oil, melted
  • 2 T honey
  • 1 T coconut oil, plus more for greasing the pan
Instructions
  1. Pre-heat the oven to 350F.
  2. Combine fruit in a bowl.
  3. Whisk together cornstarch, vanilla, orange juice, salt, honey, coconut palm sugar, and maple syrup. Toss with fruit.
  4. Combine oats, flour, coconut palm sugar, cinnamon, nutmeg, and allspice. Add maple syrup, oil, and honey.
  5. Pour fruit into a greased 9×13 baking dish. Top with oat mixture. Press down slightly with a spatula. Bake for about 45 minutes, or until bubbly and hot.
  6. Let stand for at least 10 minutes before serving – it’s best just a little warmer than room temperature.
 
Notes
If you’d prefer a non-vegan crisp, use butter instead of coconut oil. If you have vegan friends who don’t eat honey, just use maple syrup. For gluten-free, use your favorite GF flour and oats.

Monday

25

November 2013

3

COMMENTS

Apple Bourbon Galette and Non-Traditional Thanksgiving Ideas

Written by , Posted in Baking, Dessert, Fruit, Holiday, Menu Planning, Vegetarian

AppleBourbonGalette_4If you’re like me, Thanksgiving might just be one of your favorite meals of the year. My perfect bite is one that includes EVERYTHING: mashed potatoes, turkey, stuffing, gravy, sweet potatoes, green beans, and cranberry sauce. And, yes, I am a traditionalist when it comes to the Thanksgiving meal food. I don’t want roast beef, I’d rather not have creamed corn, and I definitely don’t need a salad. I love all these things, buuuut, not at Thanksgiving. To be honest, I can even do without the rolls (but that’s only because they kinda just take up extra stomach space that could be used for more of everything else). However… I know that not everyone feels the same way. And that’s great. We don’t all need to think like I do.

Some may think it would be fun to eat something other than turkey for Thanksgiving. Awesome. Some may not love mashed potatoes and gravy. Cool. Some may detest sweet potatoes and green beans. I think you’re missing out, but then there’s more for me. Whatever your reason, I do love to plan a fun themed menu, so I have some ideas for you.

To start, you could enjoy a delicious Roasted Butternut Squash Soup. I made this soup a few weeks ago and I just loved it (um, I will note that Tim, who is not a super fan of squash, said it was good, for a squash dish ;)).

For the main dish, Herbed Roasted Chicken Thighs with Cherry Tomatoes would be awesome. I made this for an episode of the show. I looks great, and tastes even better! Along with the chicken some Crispy Potatoes would be amazing and I always love roasted broccoli… can’t go wrong with roasted veggies.

If you need some sort of bread to go with a special meal, Garlic Bread would be fun. (When we eat garlic bread, sometimes I don’t want to eat whatever else we’re having because I love bread so much.)

Pomegranates are in season. How about making some homemade Pomegranate Juice to drink? Confession: I’ve never done this. I need to.

AppleBourbonGalette_6

Ok, now we need something to replace the traditional Pumpkin Pie. I made these Apple Bourbon Galettes a few weeks ago and they were phenomenal. They’re great for a special occasion, but also perfect for a weeknight dinner… yes!

AppleBourbonGalette_5

AppleBourbonGalette_3

AppleBourbonGalette_1

On Wednesday I will have some ideas for what to do with your Thanksgiving leftovers. I wonder if anyone in the history of Thanksgiving has ever not had leftovers. I doubt it. Actually, I don’t think I like that idea. Thanksgiving leftovers are so yummy!!

AppleBourbonGalette_2

Happy Eating!

Apple Bourbon Galette
Recipe Type: Dessert, Baking, Apples, Fruit, Sweet
Author: Rachel Oberg – De Ma Cuisine
Prep time:
Cook time:
Total time:
Serves: 4
Ingredients
  • 2 T honey
  • 2 T butter, cut into small chunks
  • 1/4 C coconut palm sugar (or brown sugar or raw sugar)
  • 1/4 C maple syrup
  • 2 t bourbon (optional)
  • 2 t vanilla extract
  • 1 T apple cider vinegar
  • pinch salt
  • 1/2 t cinnamon
  • 1/4 t nutmeg
  • 1-2 pinches ginger
  • 1-2 pinches allspice
  • 4-5 (about 4-5 C) apples, thinly sliced
  • 1 pie crust, divided in 4
  • 1 egg, whisked
  • butter, for greasing
Instructions
  1. Pre-heat the oven to 375F. Place a piece of parchment paper on a baking sheet. Butter the parchment paper.
  2. Whisk together honey through allspice (it’s ok if there are still small chunks of butter).
  3. Toss sweet mixture with apples, making sure all apples are coated.
  4. Roll out individual pieces of crust in a circle. Place on parchment paper. Place a few scoops of filling on one crust. Fold crust up and around filling, leaving the center open. Make sure there are no cracks in the crust or the liquid will run. Repeat with remaining pieces of crust.
  5. Brush each crust with egg.
  6. Bake for 25-30 minutes, or until crust is golden and flaky.