
#TimAndRachGoToParis2013 – What I Cooked
Written by Rachel, Posted in Baking, Bread, Thoughts, Travel
While we were in Paris we ate out a lot. We had Boeuf Bourguignon, Roast Beef and Potatoes, and Chicken and Rice. We ate baguettes, croissants, and pain au chocolate. It was pretty much the best ever. Ever ever ever.
Tim really wanted me to take some cooking classes while we were there. We found a little school about a 15 minute walk from our Montmartre flat called Cook’n With Class. Know what makes the best vacation even better? When you can (somewhat) duplicate the foods when you return home.
The first class that I took was a baking class with Chef Emmanuelle. She’s a great teacher. She made the class fun and comfortable, and made the recipes seem possible (I had had the impression that French baking was impossible – I now know that I was wrong).
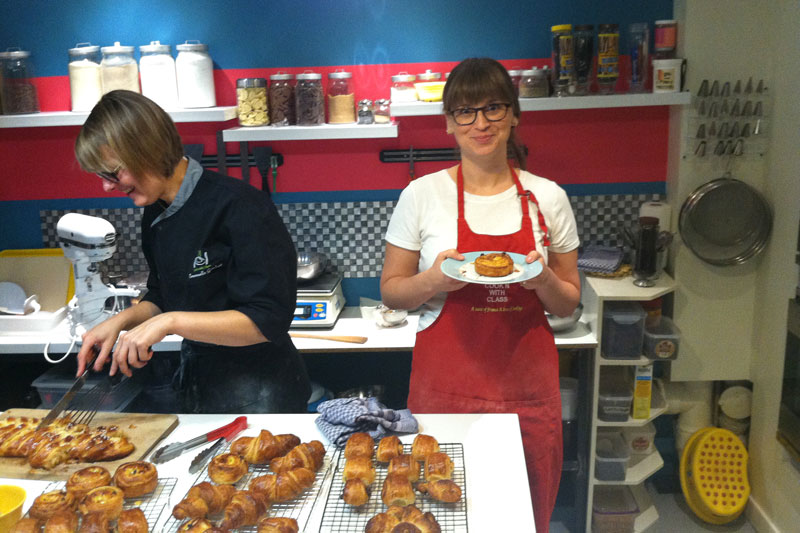
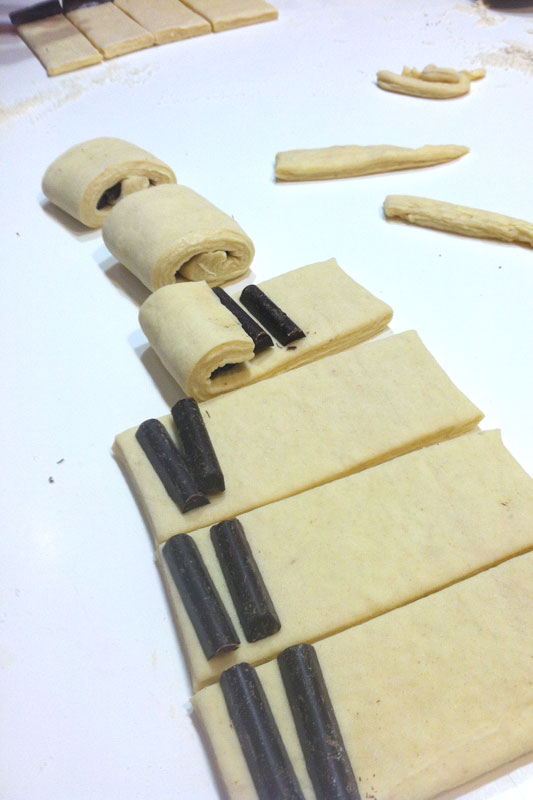
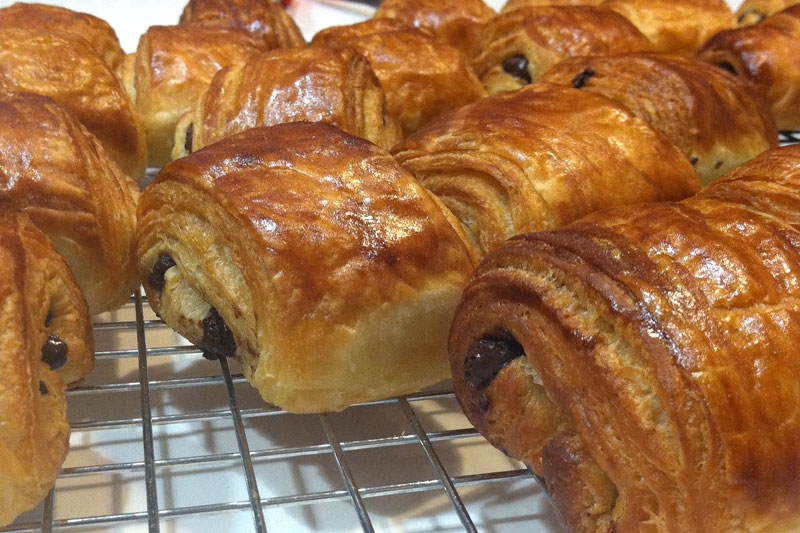
She taught us how to make pain au chocolate (which I’ve decided was better than any that we bought at the patisseries or boulangeries in Paris). They were incredible and surprisingly easy to make (easy being relative though – we’re still baking).
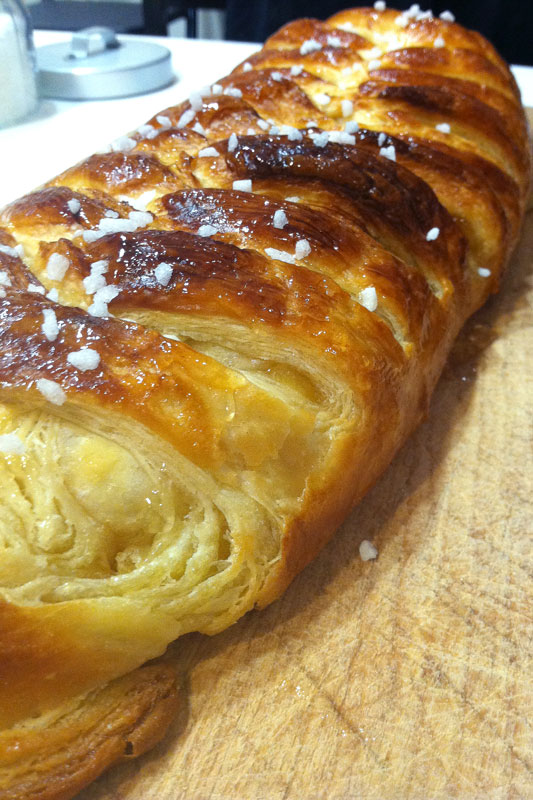
We made a strudel avec des pommes (apple strudel). Oh so divine. I got to braid it. Yeah, I know. I felt pretty cool doing it.
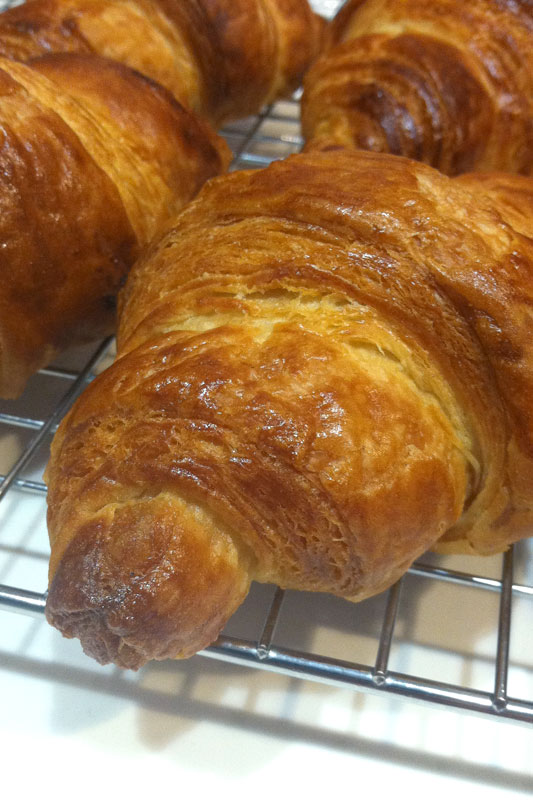
And then… the croissants. Once again, not as difficult as I’d imagined they’d be. They’re next on my list of Paris foods to make. I have pounds and pounds of butter in the fridge just waiting. I’m not sure how many croissants I ate in Paris. Too many to count. I’ve had one since we returned. It was meh. I’m sure that even the ones I make won’t be quite the same.
We also made pain aux raisins, which is like a raisin bread with a custardy filling and an apricot glaze.
I’ll take two, please.

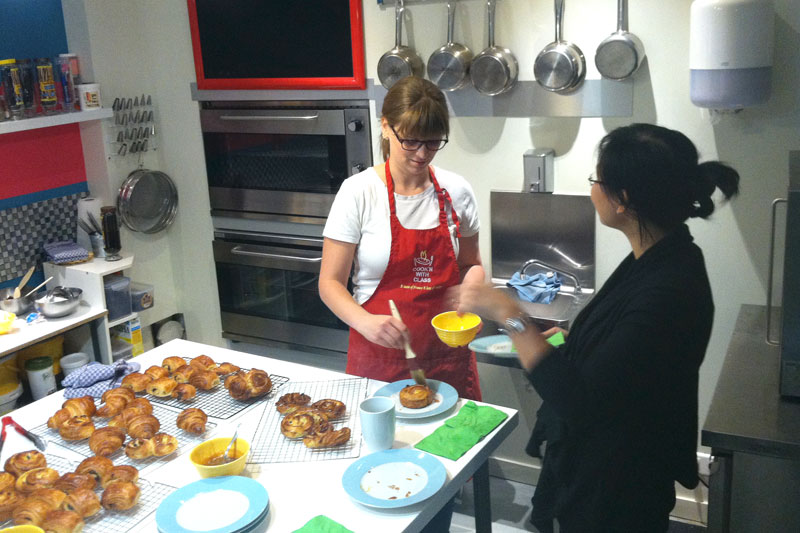
At Cook’n With Class they were happy to have Tim come by to taste the food we’d made. And they even let our German friends (who came to visit us) try some. Since Tim didn’t take the classes with me, it was special to be able to share what I’d made with him.
We got to take home the leftovers too.
I really want one many pain au chocolate right now.
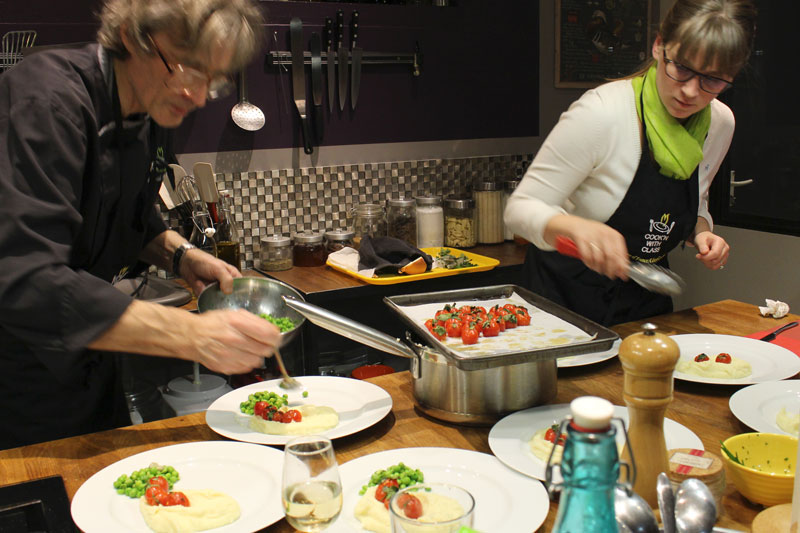
The second class that I took was the Evening Market Class with Chef Patrick. He is a world class chef. Wow. So talented. We put vanilla beans in mashed potatoes (mind blown), we crushed coriander by hand, and we stuffed cherry tomatoes with spices and torn basil leaves.
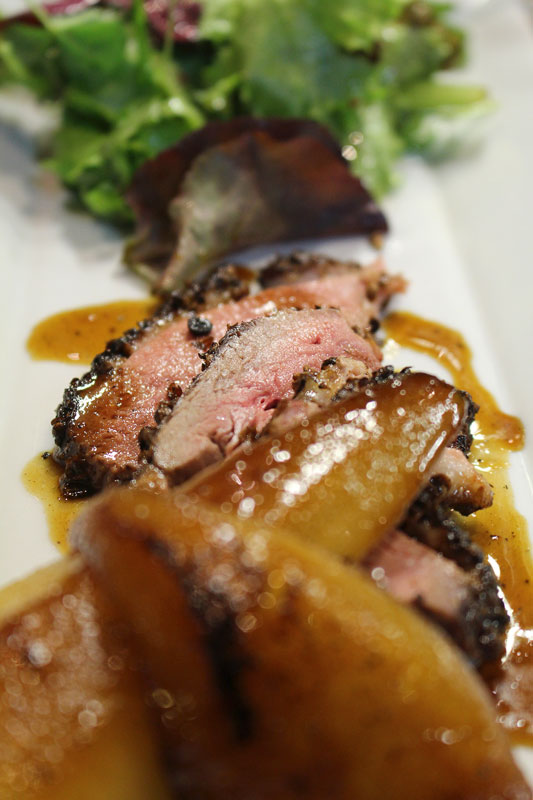
This class was really cool. We met at a nearby metro stop and then walked over to some of the market streets. We bought most of the ingredients for our four course dinner. The first course was (I’m totally sighing as I write this because I can’t stand that I’m not eating this right NOW!) Duck Magret with Sweet Wine “Jus” with Sautéed and Caramelized Pears with a salad that had a delicious vinaigrette.
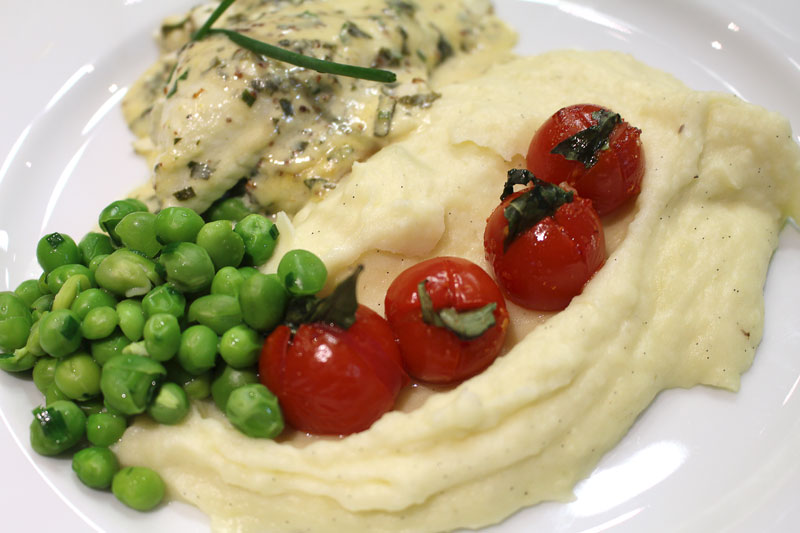
The second course was Fish Fillets with Dijon Mustard Sauce with Herbs, Sweet Red Chili and Basil Slow-Baked Tomatoes, Vanilla Mashed Potatoes, and Peas.
Chef Patrick asked if anyone wanted to learn how to skin the fish. Fish that he’d just chosen from the fishmonger an hour earlier. I tried. You guys, it’s way harder than it looked!
Since people in the class knew that I had some experience with cooking, I got volunteered to help a few times. I didn’t mind. I pretended that I knew what I was doing. My jobs were to plate the tomatoes (that we all seasoned and stuffed), to watch the potatoes, and when they were done, to add the cream and butter. (Um, I added a lot – I was kinda expecting him to tell me when to stop. He didn’t. Cool. I like butter and cream. I think I added just the right amount.)
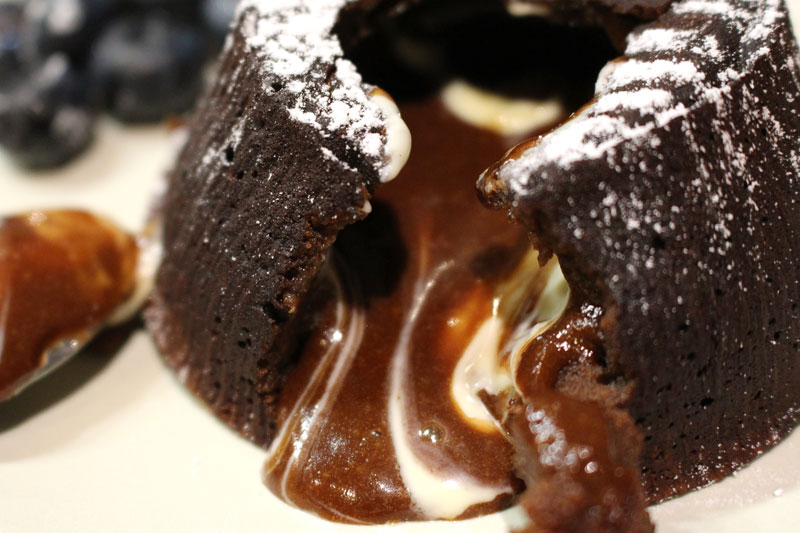
And then there was dessert. I’m so not a sweets person. This Lava Cake was insane. There’s some serious gooey goodness going on there. Another on my ever lengthening list of things I must make from Paris.
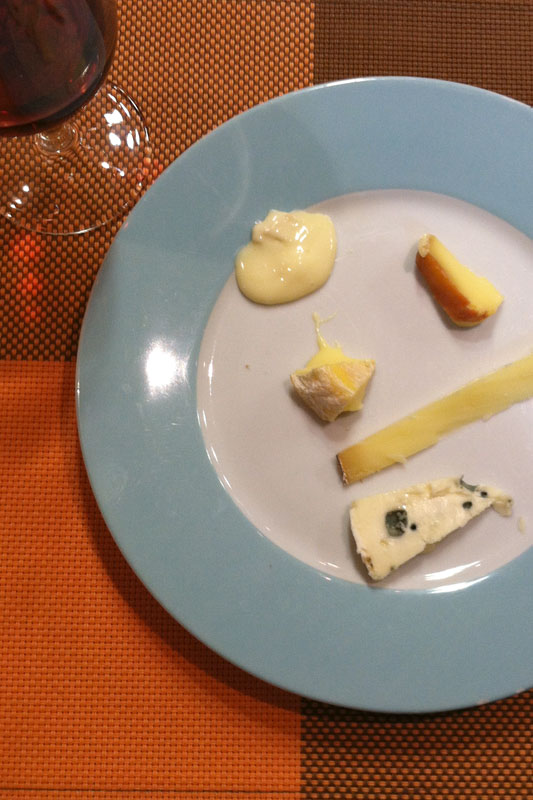
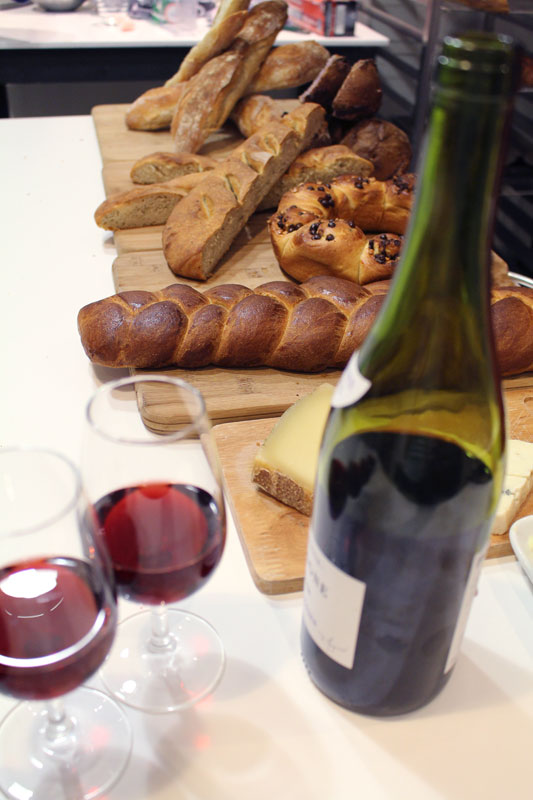
In Paris you get to eat cheese after dessert. No matter that we were incredibly full after the first three courses (I didn’t just try things, I ate everything). It was time for cheese and more wine. (We drank a lot of wine in Paris. It was often the cheapest beverage on the menu.)
I can’t remember the names of the cheeses. I do know that one was a brie, there was a goat cheese, a super aged something or other, a roquefort (I think), and a something else. They were arranged in order of stinkiness.
The class lasted for about 6 hours. Tim had bought a dinner ticket, so he joined us right before we started eating. We walked home late that night, hoping that we’d be hungry in the morning, since I had my French Bread Making Class coming up.
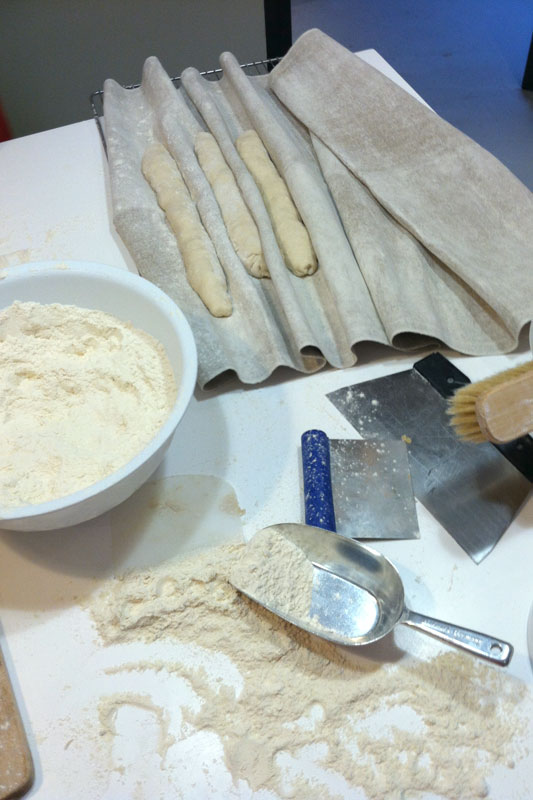
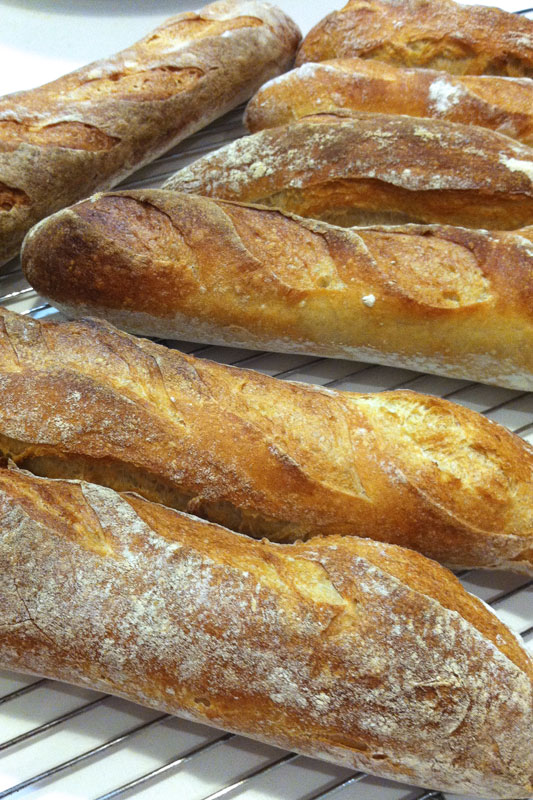
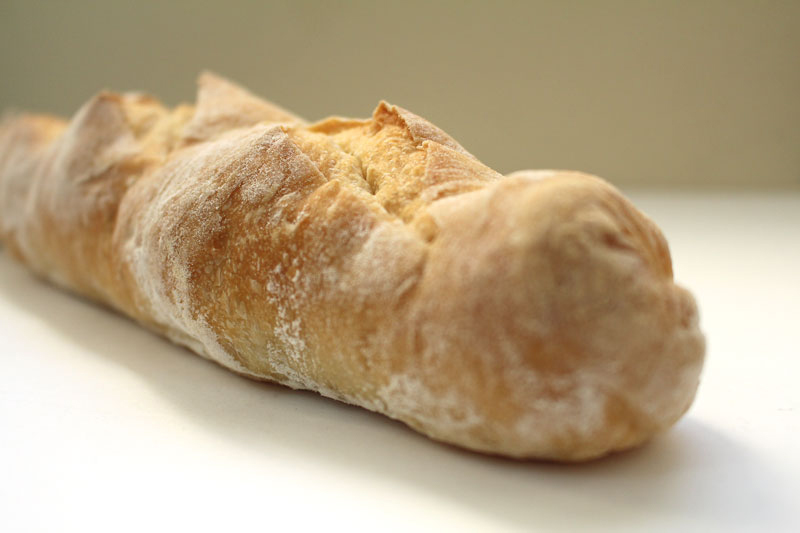
Chef Alex taught this, my last class. It was just a few days before we were to leave. I’d had probably a baguette a day, maybe more. I was ready to make my own.
They were much more difficult than I’d imagined they’d be. I figured that I’d made bread before and I’d be pretty good at it.
Nope.
No expert here.
I mean, they turned out great. But, that was because Alex would come over and ask what I was doing and then tell me what I was actually supposed to be doing. I got it, eventually, and we successfully made real French baguettes. Best food ever.
Tim was once again invited to taste the treats we’d prepared. In addition to the baguettes, we made two kinds of brioche (rolls and a braided loaf)‚ fougasse (focaccia), and these rolls that were made with a Beaujolais wine (the worst wine to drink, but it made for a yummy bread), sausage, and nuts. And of course there was wine and cheese to go with it. Even though we’d eaten a huge meal the night before we had room for plenty of bread.
One of the things that I miss the most about Paris: the baguettes. Big surprise. For Christmas Tim gave me a kitchen scale (it was suggested that I have one before trying to bake on my own). A few weeks ago I was finally able to make real French baguettes at home. Ok, kinda real. They weren’t the same, but they were pretty good.
So, friends, if you’re ever in Paris (and I really hope you are), I’d definitely recommend taking a cooking class from my friends at Cook’n With Class. What a fun and delicious experience it was.
They were kind enough to allow me to share their baguette recipe with you. Some of the instructions make more sense after you’ve taken a class. If that’s the case, um, they’re located at 6 rue Baudelique 75018 Paris, France. 😉
The final installment of our Paris adventures will continue next week.
Au revoir!
- 2 1/4 pounds / 1 kg all purpose flour or bread flour
- 1 1/2 pounds /650 to 700 g of water, cold from tap (distilled is better)
- 1/2 oz /16 g of dry yeast OR 1oz/ 32 grams of fresh yeast
- 2/3 oz or 22 g fine sea salt
- In a stand-up mixer fitted with the paddle attachment add flour, then water. Mix 30 seconds just to combine the ingredients. (You can also by hand use the dough hook to stir the flour and water together until all of the flour is wet). Cover and let rest for 30 minutes (autolysis). In these 30 minutes the flour will slowly absorb the water.
- Now using the dough hook. Start on medium speed and add slowly the yeast, then the salt. Keep mixing for about 5 minutes on medium low speed, let rest 10 minutes and then mix again on high for 5 minutes to develop the gluten. The dough is done when a small piece can be stretched so thin you can see your fingers through it. (This is called the windowpane test). The dough should be very smooth and should not be any warmer than 27C /80F.
- Let the dough rest, covered, for about 1 hour at room temperature. If the room is too hot place the dough in the fridge, always covered.
- Optional but well worth the effort: Turn the dough over onto itself every 15 minutes during the hour that it rests or just until it becomes to elastic to stretch, this technique will help develop fantastic air pockets in the dough. Slap the dough onto the table a few times, then place in large plastic container 30cm x 40cm lightly greased with vegetable oil. Cover with lightly oiled film, place in the fridge for 14 to 16 hours.
- Take the dough out of the fridge and gently place it on a floured table. Divide into 6 rectangular pieces. Keep the sticky side facing up and gently fold the dough a third of the way down your rectangle, do this by pulling the dough over your thumb as to not push all the air out of the dough. Then by using the piano fingers technique spread the dough laterally while also pushing forward you are trying to form a tighter skin around the dough to trap the air. Repeat this a couple of times, then using your thumbs, seal the dough to itself, forming a seam. Place these pre-formed baguettes on a tray covered by a tea towel until they are about 50% larger, This will take roughly 1/2 hour for this rising.) During this next phase you will try to save as much air pockets as possible. If you’re too rough the dough will deflate and the crumb will be more dense and even. Shape each piece into a baguette by placing each pre-formed baguette onto a lightly floured surface the sticky side up and repeating the folding steps noted above create the seal by pinching the seal onto the bench with your thumbs. Gently roll the baguette with your hands to achieve the final baguette shape. Place each baguette on a baking sheet lined with parchment and then lightly floured. Gently roll the formed baguettes onto the baguette baking trays seam side down, then cover again until about 50% larger than they were… maybe doubled.
- Place a shallow pan in the bottom of the oven and preheat to 475F (250C) degrees.
- Using a razor or sharp knife make 1/4 inch deep, diagonal slashes, 3 to 4 times down the length of the loaf. (for a half baguette) 6 to 7 for a full baguette) do this by holding the end of the baguette with one hand, and with the other hand, make quick slashes along the length of the baguette. Pour about 1/4 of a cup of water in the pan in the bottom of the oven, and place baguettes in the oven, working quickly vaporize the oven and generously vaporize the baguettes with a spray bottle. Quickly close the as not to lose too much heat. Keep making steam for the first 10 minutes to help developing a nice thick crust. Bake the bread for about 20 minutes until browned.
- You can use an instant read thermometer to test for doneness. The bread should have an internal temperature of 200F/93C degrees when done. When the bread is cooked it sounds hollow when you tap it.

