De Ma Cuisine

vegetarian Archive

Thursday

25

June 2015

0

COMMENTS

Green Bean Fries

Written by , Posted in Appetizers, Dairy-Free, Dinner, Fruit, Gluten Free, Herbs, Inspired By, Kid-Friendly, Lunch, Quick and Easy, Roasting, Sauces, Sides, Snacks, Vegan, Vegetables, Vegetarian

GreenBeanFries-5

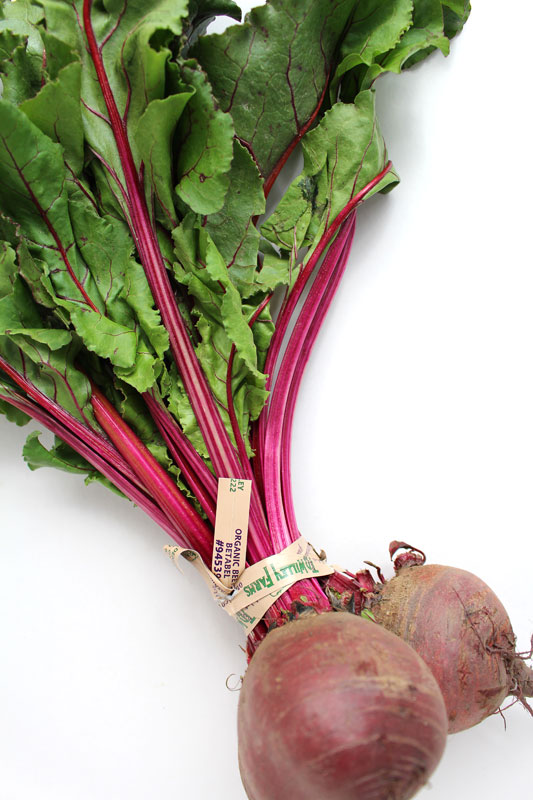
I’m crazy about French fries. With a burger they’re fabulous, topped with gravy and cheese curds they’re comforting, with a hearty dip they’re a meal. Of course they don’t have to be made with potatoes. Parsnips, carrots, and summer squash all work perfectly. And while we’re at it, why not try sweet potatoes, beets, or rutabagas?

GreenBeanFries-1

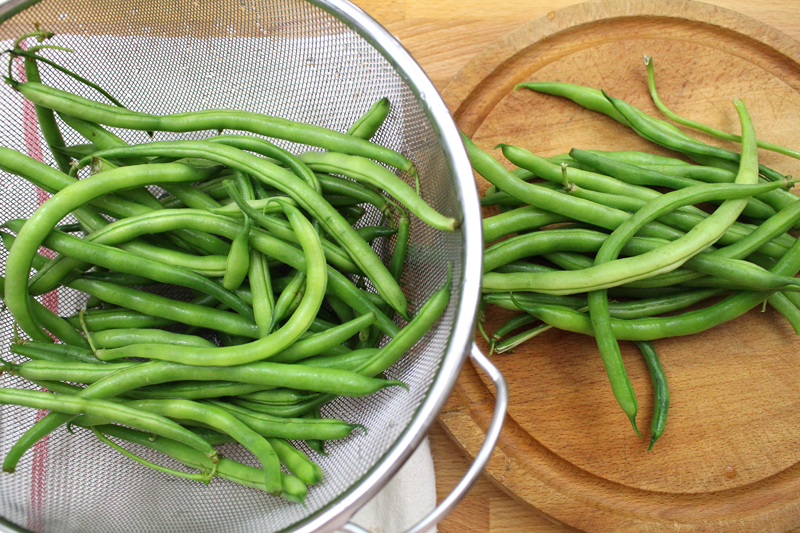
And when I’m feeling lazy and don’t want to take the time to cut up some veggies for roasting, or when I’ve got so many green beans just waiting to be used, I figure I might as well turn them into fries.

Never mind the fact that roasting green beans is one of my favorite ways to eat them. Ever.

GreenBeanFries-3

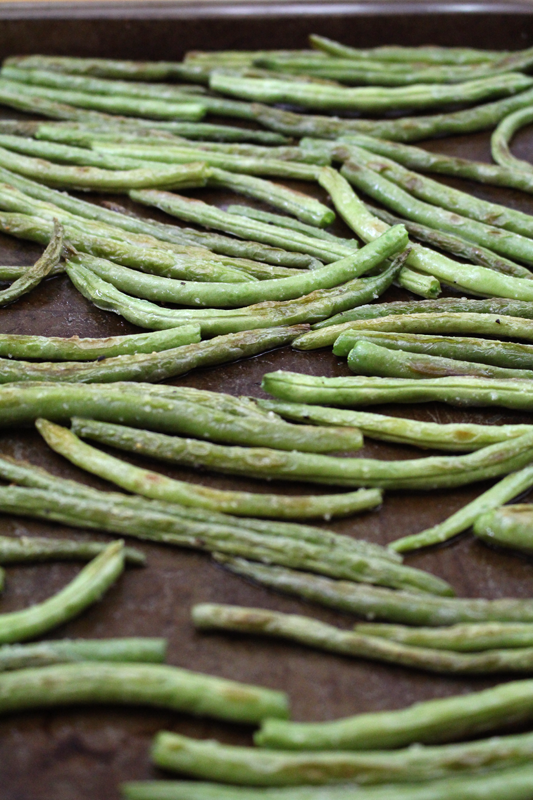
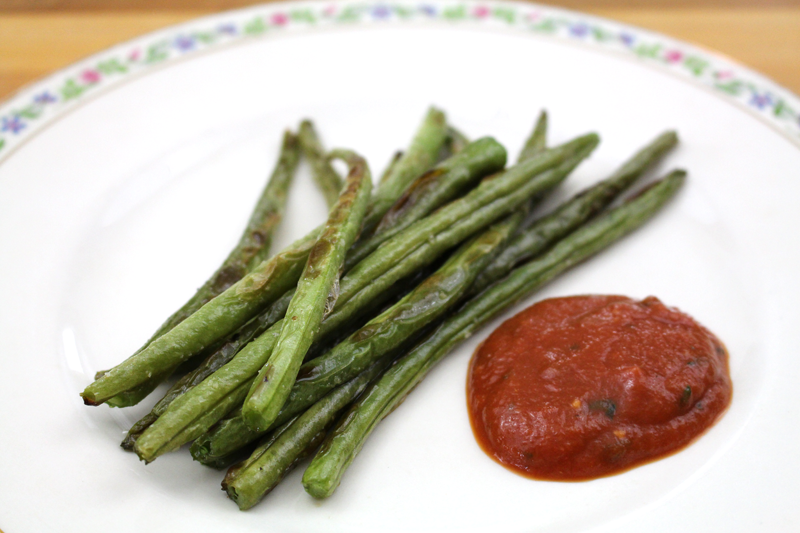
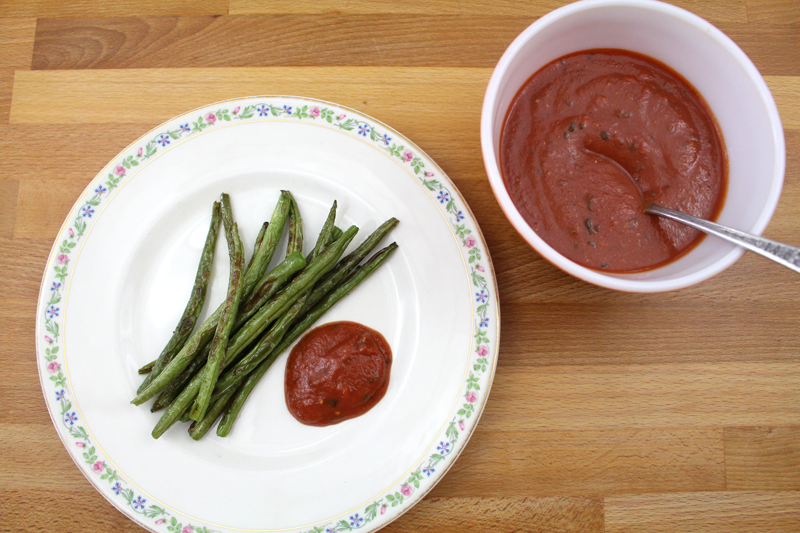
So it’s pretty simple. The beans are tossed with olive oil, salt, and pepper and head into a hot oven. High heat and not a lot of time will work well here.

GreenBeanFries-2

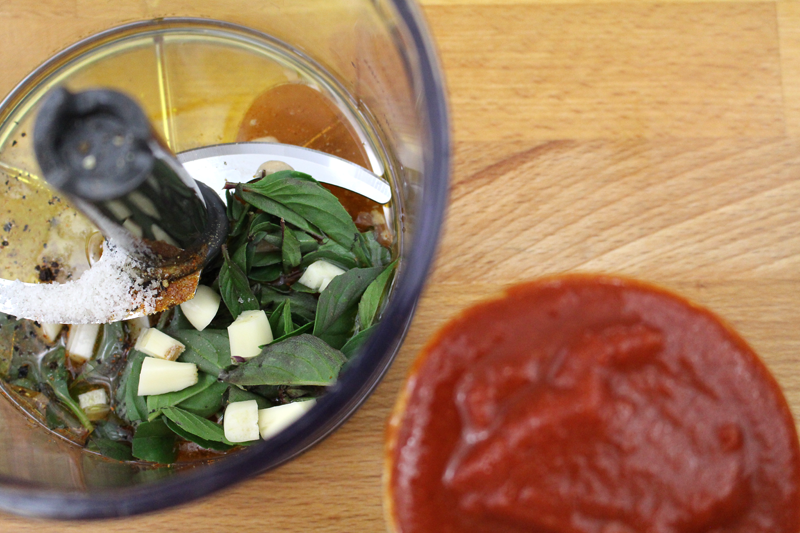
While the beans roast, a quick “ketchup” is blended together. Garlic, basil, a few spices, a little this (maple syrup), a little that (dijon mustard)… a minute or two in the mini food processor and we have some sort of tomatoey, herby, ketchup-like dipping sauce.

GreenBeanFries-4

This could be used for any of the above French fry options. If there are leftovers, it’d be great heated up and served over pasta, or used as a pizza sauce. Oh and it’d be fabulous atop a burger.

I have some suggestions in the recipe for three different herb combinations. I was also thinking that if you wanted to go a completely different direction and opt for a creamy dip, crème fraîche would be an awesome option. I might try that next time. (P.S. Crème fraîche is actually pretty easy to make from scratch! Who knew?!)

GreenBeanFries-6

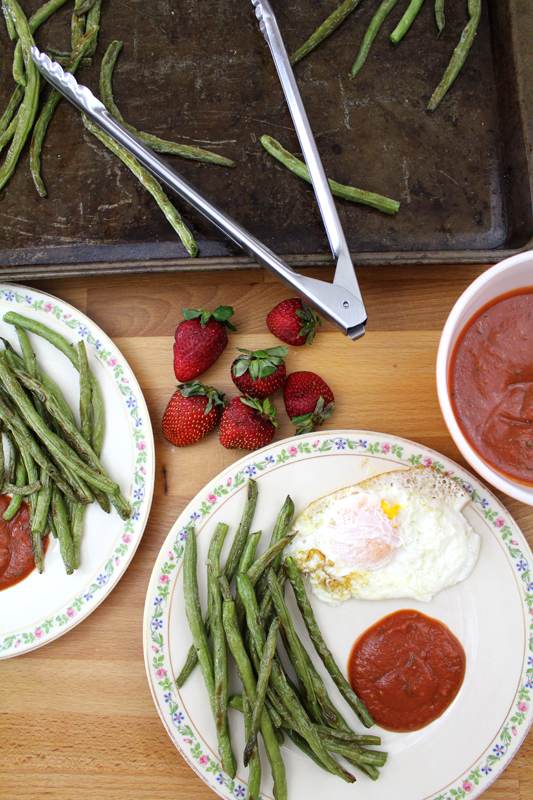
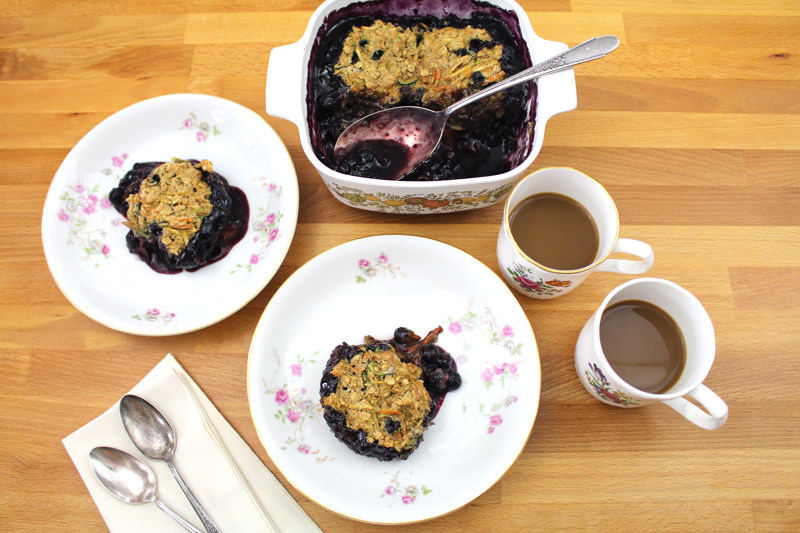
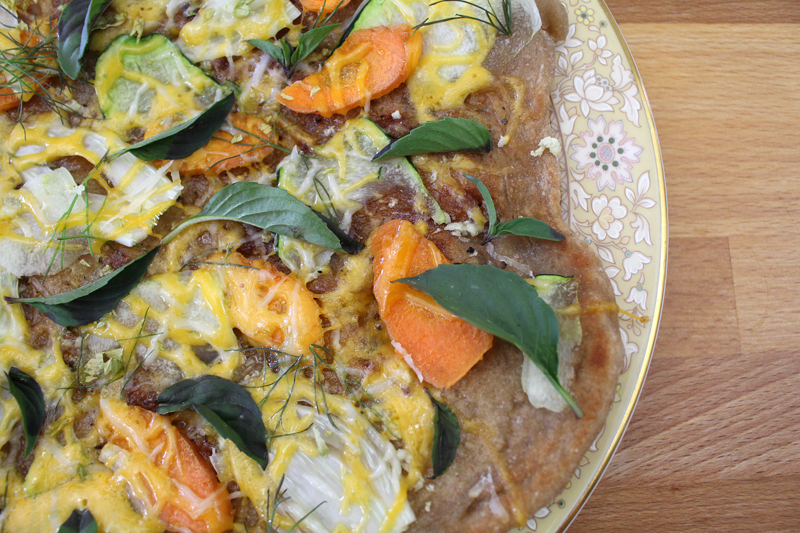
The meals that I make and photograph for these posts usually end up being lunch. So, I fried up some eggs, washed some strawberries, and we were set. Of course Green Bean Fries would be a great compliment to a meal; a wonderful side, But, more often than not of late, I’ve been enjoying veggies as the star.

Happy Eating!

Green Bean Fries

Prep Time: 10 minutes

Cook Time: 17 minutes

Total Time: 27 minutes

Yield: 2-4

Green Bean Fries

Ingredients

  • 1-2 pounds green beans, stems removed
  • 1 t olive oil
  • to taste salt
  • to taste pepper
  • 2 T total (fresh if possible, if dried, crumble and reduce amounts): dill + parsley + basil OR basil + parsley + savory + thyme OR tarragon + parsley + dill + fennel pollen
  • 1 clove garlic, roughly chopped
  • pinch cayenne
  • pinch ginger
  • 1 t maple syrup
  • 1 t dijon
  • 2 T olive oil
  • 1 T chives or shallots (optional)
  • 1 C tomato puree
  • 1 T vinegar
  • to taste salt
  • to taste pepper

Instructions

  1. Pre-heat the oven to 425F.
  2. Toss beans with 1 t olive oil, salt, and pepper. Pour beans onto two baking sheets (so they're not over-crowded). Roast for 10 minutes, flip and rotate their position in the oven, and roast for 6-7 minutes more.
  3. While beans roast, blend herbs through pepper. Taste and adjust seasoning if needed.
  4. Serve green beans dipped in "ketchup".
http://www.de-ma-cuisine.com/green-bean-fries/

Thursday

18

June 2015

1

COMMENTS

Blueberry Cobbler

Written by , Posted in Baking, Breakfast, Brunch, Dessert, Eggs, Fruit, Gluten Free, Holiday, Kid-Friendly, Vegetables, Vegetarian

BlueberryCobbler-4

My husband, Tim, is the sweets person in our home. I can devour an entire tray of roasted summer squash, a bag of salt and vinegar potato chips, or a plate of bruschetta. But, when it comes to desserts I just don’t really need them all that often (except the lemon curd with strawberries and meringue that we had for dessert on my birthday… or the homemade vanilla mascarpone and chocolate swirl ice cream bon bons that Tim made for my birthday… I need those right now). So when Tim hollers from the other room that a sweet treat that I’ve made is really good, that’s when I know it’s something worth sharing.

BlueberryCobbler-1

Since it’s tougher to experiment with baking than with regular cooking, I don’t do it all that often. There’s just too much room for error. But, I had success a few weeks ago when I made some whole wheat parsnip cookies, so I adapted those as a starting point for a blueberry cobbler.

BlueberryCobbler-2

Any fruit could be used, depending on what’s in season. But, it’s berry season right now, and we’ve got about 6 pounds of blueberries in the fridge. Some might end up as jam, a few in desserts, but most will just be eaten raw. That’s usually my preferred method for consuming berries.

But, while raw is often best, this cobbler got super thick and syrupy. I might just eat the berry portion on their own if it weren’t for the yummy topping that I can’t get enough of. But, if there’s extra, may I suggest those berries over ice cream? And the cobbler topping, well if there’s extra (I had extra because I used a smaller pan), they make great cookies.

BlueberryCobbler-3

That topping has veggies. Sorrynotsorry. Tim yelled that there were squash and carrots in his cobbler. They won’t make your cobbler taste like vegetables, don’t worry. But, my suggestion is that if you have picky family members who don’t like to see anything green at dessert, just stick to parsnips. They’re not as noticeable.

BlueberryCobbler-5

Other items of note: I used a gluten-free flour blend (from Gluten-Free-Girl and The Chef). You can substitute whole wheat or all purpose if you prefer. I used maple syrup as the only sweetener. No refined white sugar here. I’ve been on a maple syrup kick as of late, using it to sweeten everything from yogurt to coffee. But, honey would be great too. Just remember that honey has a distinct taste and may be a bit sweeter than maple syrup, so adjust accordingly. I might go for half honey, half maple syrup to start.

BlueberryCobbler-6

This is a perfect summer dessert for your next barbecue or picnic, but it can also be enjoyed for breakfast. Just add a dollop of Greek yogurt.

Happy Eating!

Blueberry Cobbler

Prep Time: 20 minutes

Cook Time: 1 hour

Total Time: 1 hour, 20 minutes

Yield: 4-6

Blueberry Cobbler

Ingredients

  • 1/2 C gluten-free flour
  • 1/8 t salt
  • 1/4 t baking powder, sifted
  • 1/4 t baking soda, sifted
  • 1/8 t cinnamon
  • pinch ginger
  • 1/4 C butter, cold, cut into small cubes
  • 1/2 C oats
  • 1 C combination of parsnips, carrots, and summer squash (for picky eaters: parsnips are the least visible), grated
  • 1 t lemon zest, chopped
  • 1/4 C maple syrup
  • 1 egg
  • 1 t vanilla extract
  • 1 T cornstarch
  • 1 t vanilla extract
  • 3 T orange juice
  • pinch salt
  • 1/2 C maple syrup
  • 1/4 t cinnamon
  • 2 1/2 C blueberries (strawberries, peaches, nectarines, plums, blackberries, apricots, apples, pears, or persimmons may also be used - chopped if larger fruit)

Instructions

  1. Pre-heat the oven to 350F. Place a rack in the lower third of the oven.
  2. Whisk flour through ginger. Mix in butter with a pastry blender or fingers until chunks of butter are pea sized or smaller. Add oats through parsnips (if veggies weren't grated already, place butter mixture in the freezer while you grate).
  3. In a separate bowl whisk together maple syrup, egg, and 1 t vanilla extract. Make a well in the dry ingredients and add the wet. Stir to combine. Set dough in the fridge while you do the next step.
  4. Whisk cornstarch through 1/4 t cinnamon. Toss with the fruit. Pour fruit in a greased 6x6 or 8x8 baking dish. Top with a large spoonfuls of dough*. Bake for 50-60 minutes, or until topping is no longer gooey and fruit is bubbly and hot (baking time may vary depending on the size of the dish - I used a 6x6 dish). Let stand for 10-20 minutes before serving.

Notes

* Extra dough may be dropped onto an ungreased baking sheet and baked for 12 minutes, cooled for 5 min on the baking sheet, and then cooled on a cooling rack.

http://www.de-ma-cuisine.com/blueberry-cobbler/

Monday

15

June 2015

1

COMMENTS

Bean and Veggie Mélange

Written by , Posted in Appetizers, Beans, Breakfast, Brunch, Dairy-Free, Dinner, Fruit, Gluten Free, Herbs, Legumes, Lunch, Potlucks, Quick and Easy, Salads, Sides, Snacks, Vegan, Vegetables, Vegetarian

BeanVeggieSaladDip-7

I called this a “mélange”, which is French for “mixture”. It seems so versatile that I don’t want to limit it by calling it a dip or a salad. A dip implies the need for some sort of scooper. Corn chips would work well. I’m planning to try this tonight. A salad or a side implies that it’s a dish meant to compliment something else. Served alongside some grilled chicken or pan seared tofu would be fabulous. It could be a topping for brown rice/quinoa/bulgur wheat, breakfast burritos, fried eggs, or crispy potatoes. It could be a part of a taco salad. It could become an appetizer and top a garlic rubbed crostini.

This makes enough for about 4-5 servings, so I’m looking forward to trying as many of these as possible.

BeanVeggieSaladDip-1

The magic all starts with the fruits and veggies. I chose summer squash, carrot, garlic, jalapeño, and these fabulous Kingsburg Gold cherry tomatoes that I’ve been waiting a year for.

Seriously.

Cherry tomatoes are one of my favorite things about summer. They bring back memories of eating tomatoes, still warm from the sun, from our garden when I was growing up. No matter how large or small my garden is, I always try to grow tomatoes. I plan to save some seeds from these Kingsburg Golds to plant next year.

If you want to swap out any of the veggies, I have a few suggestions: eggplant (finely chopped), corn (fresh off the cob), bell pepper (in place of or in addition to the jalapeño), red onion (I don’t have any on hand, or I would have added it), radish (finely grated – don’t use too much so it doesn’t overpower), and avocado (ripe, but not too).

BeanVeggieSaladDip-2

I like to grate carrots when they’re in a salad or a dip. I thought they’d be easier to scoop up than chunks. Plus they’re a little less in your face with the crunch. Grating tames them a bit. If you like chunks, chop away.

BeanVeggieSaladDip-3

It’s all so super simple. A quick oil and vinegar dressing with some paprika for fun flavor. It’s one of my favorite spices. If you don’t love it, chili powder would be great, cumin could be good, or you could just stick to salt and pepper and add a few fresh herbs (like basil and parsley, and maybe even cilantro).

BeanVeggieSaladDip-4

Everyone gets tossed around, then they get to stand for a few minutes to marinate a bit.

BeanVeggieSaladDip-5

We ate this for lunch with plain old cheese quesadillas. The fridge is a little bare right now, so we’re all out of the usual quesadilla toppings (salsa and Greek yogurt). But, let me tell you, I may just skip them from now on. I liked this better.

BeanVeggieSaladDip-6

I think dinner tonight will be corn chips with this little mélange. That counts as dinner, right? And then breakfast burritos tomorrow… I wonder if I’ll ever get sick of it. 😉

Happy Eating

Bean and Veggie Mélange

Prep Time: 10 minutes

Total Time: 10 minutes

Yield: 4

Bean and Veggie Mélange

Ingredients

  • 2-3 T balsamic vinegar
  • 1 clove garlic, minced
  • 2 T chives, minced
  • 1 t paprika
  • to taste salt
  • to taste pepper
  • 2-3 T olive oil
  • 1 1/2 - 2 C beans (black, kidney, white, garbonzo), drained and rinsed if canned, cooked and cooled if dried
  • 2 C zucchini, grated
  • 1 C carrot, grated
  • 1/2 to 1 C tomatoes, chopped
  • 1/2 jalapeño (about 1-2 T - use more for more heat), ribs and seeds removed if desired, minced
  • could also add: bell pepper, red onion, radish, corn, avocado, or eggplant

Instructions

  1. Whisk together balsamic through pepper. Stream in olive oil as you whisk some more.
  2. Toss beans and veggies with dressing. Taste and adjust seasoning if needed.
  3. Let stand about 10 minutes before serving.

Notes

Wash hands after cutting jalapeño and be careful not to touch eyes while cutting. Serve this dish on its own, as a side, or with corn chips for dipping. Use it to top rice/quinoa/bulgur wheat, breakfast burritos, fried eggs, crispy potatoes, taco salad, or crostini.

http://www.de-ma-cuisine.com/bean-and-veggie-melange/

Monday

8

June 2015

0

COMMENTS

Fennel Pizza

Written by , Posted in Baking, Cheese, Dinner, Fruit, Gluten Free, Grilling, Herbs, Kid-Friendly, Lunch, Main Dishes, Pizza, Quick and Easy, Vegetables, Vegetarian

FennelPizza-5

It can be tough to transition from one season to the next. I never quite know what I’m in the mood for… Do I still want a hearty winter veggie soup, or am I ready for snap peas and asparagus? I have a few go to dishes that make the transition a bit easier and blur the lines, if you will. Things like pasta, soup, stir fry, shepherd’s piechicken pot pie, and enchiladas all work well no matter what the season.

So does pizzaaaa!

Ridiculously well.

One of the great things about pizza is how adaptable it is. For example, you could exchange the regular crust for gluten-free, make a cauliflower crust, use corn tortillas, or even grill some eggplants and top them with sauce and veggies. You can omit the cheese, change the veggies, and add more herbs. You can grill it, bake it, or cook it in a skillet.

Hello versatility!

Today I went with the spring variation. It was perfect for what we got in the Abundant Harvest Organics box this week: fennel, carrots, and basil.

FennelPizza-1

I adapted this crust and cooking method recipe. It’s become a staple in our home. The crust freezes well and is a synch to make.

FennelPizza-2

The recipe calls for stove top cooking, then finishing in the oven. But, it’s too hot for the oven today, so I just covered it and left it on the stove for a couple of minutes.

FennelPizza-3

This allowed the veggies to soften just a bit, but they still had some crunch. If you don’t like crunchy veggies on your pizza, no problem. Just do a quick sauté before you top the pizza. You can even use the same skillet. Just wipe out any bits that are stuck to the bottom of the skillet before adding more oil and your crust.

FennelPizza-4

Here are my variations by season:

Spring

Fennel

Everything feels fresh and new, bursting with color and flavor. Depending on how early it is in spring, I may want to use thinly shaved asparagus instead of summer squash, bright green peas instead of fennel. But, because we’re actually right smack in the middle of one of these transition periods, I’m using what’s in season, and thankful for every bite.

Toppings: Summer squash, carrot, fennel.

Herbs: Basil and parsley (after cooking) and fennel fronds (before cooking).

Sauce: Olive oil and garlic.

Cheese: Cheddar and parmesan, or ricotta and parmesan.

Method: Skillet, grill, or oven.

Summer

EggplantPrep-1

During the lazy, hazy, crazy days of summer, I love to have a simple pizza. I would probably choose 2-3 of the toppings, so the pizza isn’t overwhelmed. I want light and easy. Serve it with a quick salad of lettuce, cherry tomatoes, and chopped almonds, with a balsamic-olive oil vinaigrette for a perfect summer treat.

Toppings: Summer squash, tomatoes, corn, bell peppers, or eggplant.

Herbs: Basil (after cooking) and thyme (before or after cooking… any time… get it?!).

Sauce: Tomato.

Cheese: Mozzarella, cheddar, or feta.

Method: Skillet or grill.

Fall

Beets1

It’s finally cooled down (ahem, maybe, depending on where you live – around here fall is the hottest time of year). The first root veggies are starting to appear. Things like beets, cozy sweaters, and hot chocolate are exciting again. For this pizza, I would go for everything listed.

Toppings: Arugula (or kale or mâche), suuuuuper thinly sliced beets, halved cherry tomatoes, and a smidge of horseradish.

Herbs: Cilantro and chives (after cooking).

Sauce: Tomato.

Cheese: Blue, mozzarella, parmesan, or feta.

Method: Oven, skillet, or grill.

Winter

ChardWraps-7

It’s cold! I want something hearty and filling.

Toppings: Really thinly sliced sweet potatoes and cauliflower, swiss chard (or spinach, mustard greens, collards, or kale)

Herbs: Rosemary (before cooking).

Sauce: Olive oil and garlic.

Cheese: Blue, parmesan, or feta.

Method: Oven or skillet.

Happy Eating!

Fennel Pizza

Yield: 2

Fennel Pizza

Ingredients

  • 2 personal sized pizza crusts
  • olive oil
  • salt
  • pepper
  • cayenne (optional)
  • garlic, minced
  • summer squash, very thinly sliced
  • carrot, very thinly sliced
  • fennel, very thinly sliced
  • fennel fronds, torn
  • 1 C cheese, grated (cheddar and parmesan mixture)
  • fresh herbs (basil, parsley, and thyme), chopped or whole

Instructions

  1. Top crust with olive oil through cheese.
  2. Cook using your favorite method. If grilling or cooking in a skillet, cook one side for 2-3 minutes first, flip, then add toppings. Cook for 2-3 minutes more, and either cover with a lid or cover the grill and turn the heat to low or off and cook for about 1-2 minutes more.
  3. Remove from pan and top with fresh herbs.
http://www.de-ma-cuisine.com/fennel-pizza/

Monday

1

June 2015

0

COMMENTS

Stone Fruit Chips

Written by , Posted in Dairy-Free, Fruit, Gluten Free, Kid-Friendly, Roasting, Snacks, Vegan

StoneFruit-Chips-5

I’ve been saying for years how much I love to roast almost every kind of veggie. Last summer I took on tomatoes, drying them, not just roasting (and then promptly making them in to Bruschetta). So I knew that fruit was possible. But until today, I didn’t know the delicious satisfaction of drying stone fruit.

StoneFruit-Chips-1

It started simply enough: thinly sliced fruit on a lined baking sheet. I used a silpat (silicone mat), but parchment paper would work too. I sliced the fruit a quarter of an inch thick. Thicker would make the drying process take longer, thinner would be shorter.

StoneFruit-Chips-2

This is a great prep it and forget it recipe. Except don’t forget it – set the timer.

While I waited, I cleaned up, unpacked this week’s Abundant Harvest Organics box, and made a glaze of sorts for the fruit. You don’t have to brush them with anything. But, I wanted to add some seasonings, so I figured it wouldn’t hurt. I chose coconut oil, a few spices, and some maple syrup.

StoneFruit-Chips-3

A few of the chips were thinner side pieces, so they dried out faster. I had a cooling rack out and as I flipped them every 30 minutes, I took off any that were done, so no one burned.

StoneFruit-Chips-4

I let them cool for a little bit, then got to dipping them in some maple syrup sweetened yogurt. Sweetened silken tofu would also be great, if you’re looking to keep things in the vegan camp.

These make a great snack (I ate them all myself!), but they could also be chopped and added to Chamomile and Honey Pancakes (top or batter) or French Toast, or added to the batter of Whole Wheat Parsnip Cookies. In the cooler seasons, the stone fruit can be substituted with apples, persimmons, and pears.

Happy Eating!

Stone Fruit Chips

Prep Time: 10 minutes

Cook Time: 6 hours

Total Time: 6 hours, 10 minutes

Yield: 2

Stone Fruit Chips

Ingredients

  • 2 C stone fruit, sliced about 1/4" thick
  • 1-2 t coconut, canola, or vegetable oil (melted - coconut)
  • 2-3 t maple syrup
  • pinch of any or all: cinnamon, nutmeg, all spice, ginger
  • tiny pinch salt
  • Greek yogurt or silken tofu
  • maple syrup

Instructions

  1. Pre-heat the oven to 200F.
  2. Lay fruit on a parchment paper or silpat lined baking sheet. Bake for 30 minutes.
  3. Whisk together oil through salt.
  4. Flip fruit then brush with seasoned oil. Return to oven for 30 minutes.
  5. Flip fruit and brush the other side with seasoned oil. Return to oven for 3-5 hours, or until fruit is dried (place some on a cooling rack if it dries out faster than others), flipping every 30 minutes.
  6. Serve on their own or dipped in yogurt/tofu sweetened with maple syrup.

Notes

Most of the cooking time is hands off. Just set the timer and plan to be around for a little more than 6 hours to flip the fruit once in a while.

http://www.de-ma-cuisine.com/stone-fruit-chips/