De Ma Cuisine

stove top Archive

Thursday

26

March 2015

0

COMMENTS

Chicken Noodle Soup

Written by , Posted in Dinner, Fruit, Gluten Free, Herbs, Kid-Friendly, Lunch, Main Dishes, Meat, Pasta, Poultry, Soups, Vegetables

ChickenNoodleSoup-6

I know that Chicken Noodle Soup is one of those meals that’s made when someone feels under the weather. But, I want to enjoy it any day. It’s just so good.

ChickenNoodleSoup-2

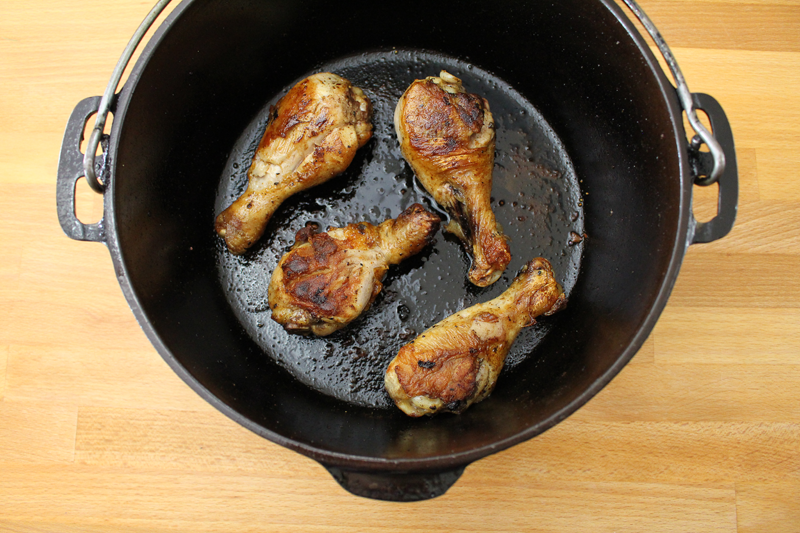
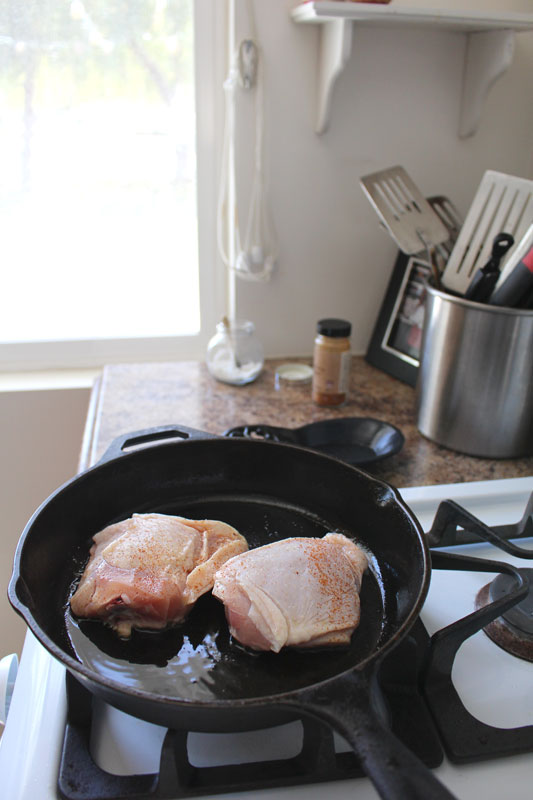
It starts with some chicken that’s cooked in a bit of olive oil. The skin gets all crispy and the inside tender and juicy. It takes a while, just be patient. Once the chicken is cooked, it rests for a bit, and gets cool enough to handle. And those crispy bits on the bottom of the pan, they’re on their way to make this soup simply divine.

ChickenNoodleSoup-1

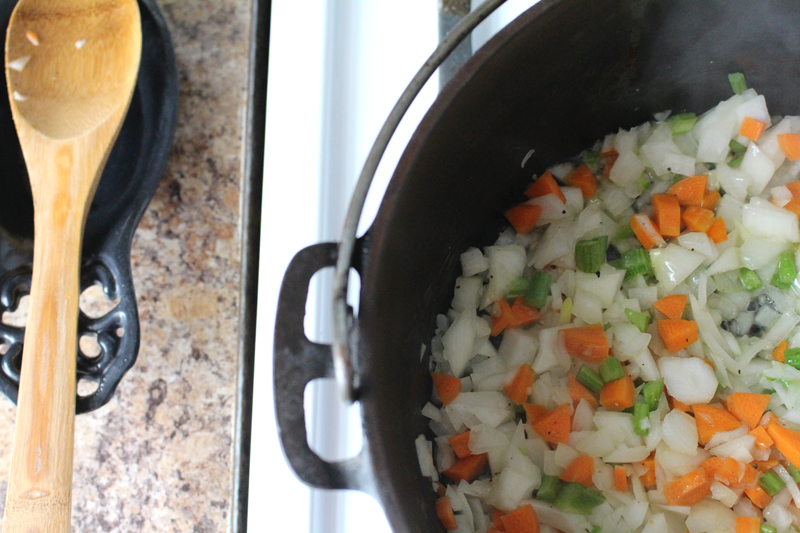
A little butter and oil is added to that same pan. No washing out required. The bits at the bottom will loosen as you stir the veggies and help make the broth a deep, rich brown.

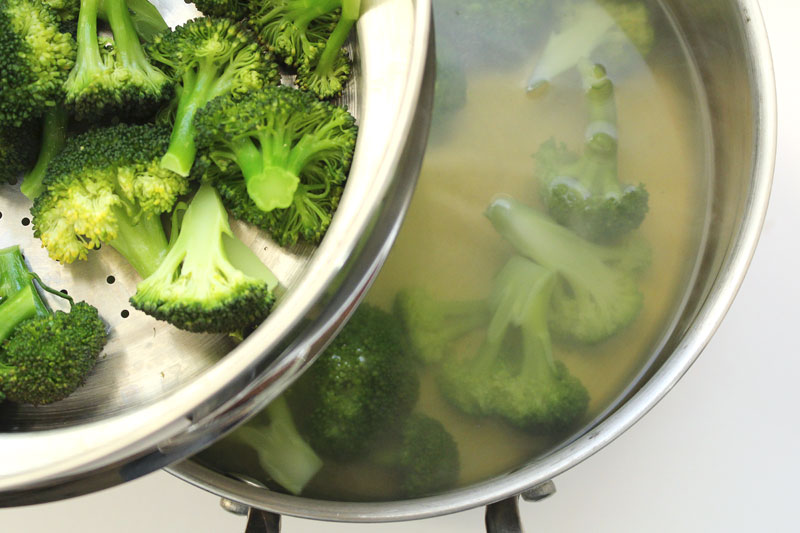
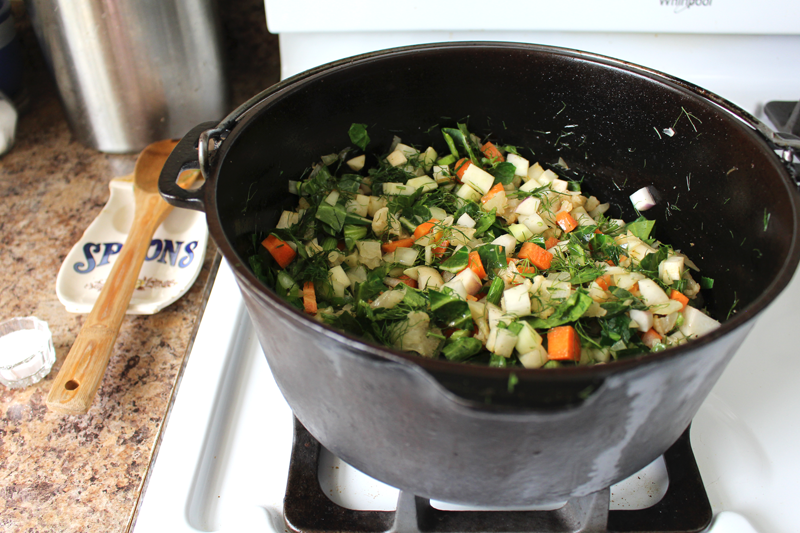
Back to the veggies for a sec – there are tons of ’em. Fennel, carrots, kohlrabi, greens, cauliflower… and even more that you could add, depending on what you have on hand (check out the recipe for more). If you’re using this as an under the weather helper, it’s perfect because it’s packed with nutrients. If you’re not, well, it’s great for the same reason. 😉

ChickenNoodleSoup-3

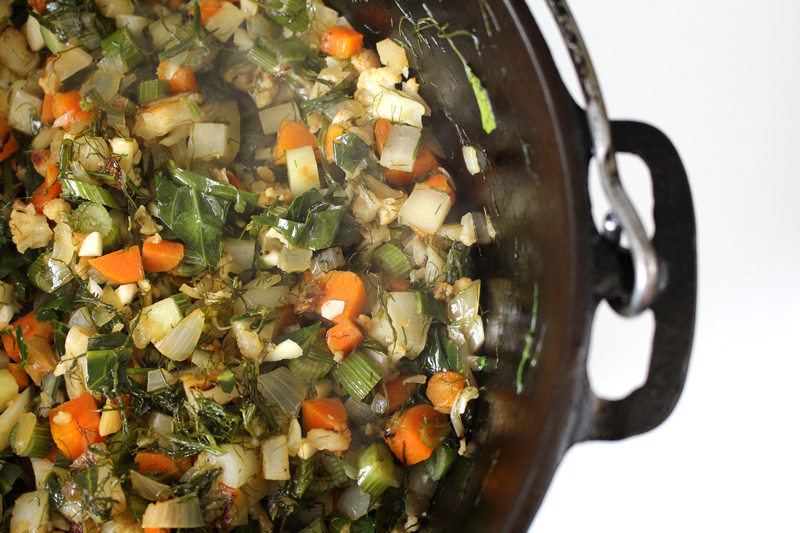
The veggies are cooked covered, for about 10 minutes. They just need to sweat it all out. No big deal.

ChickenNoodleSoup-4

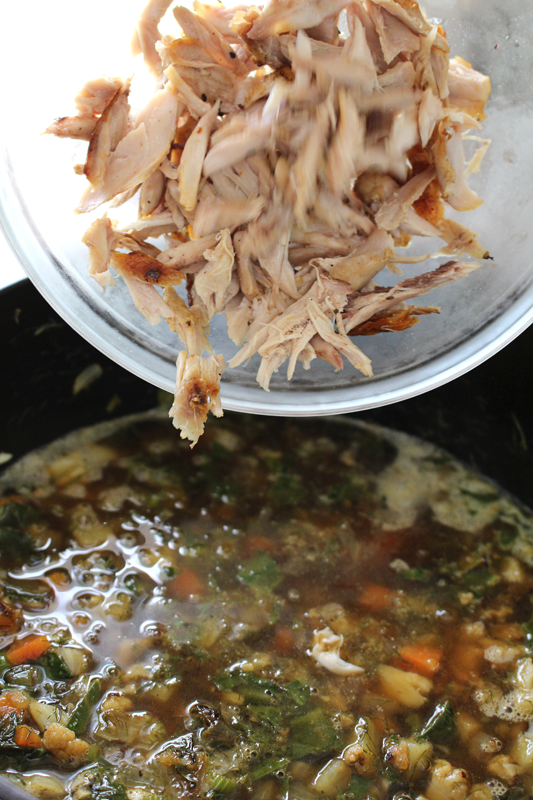
Once they’re ready, the chicken, which has been shredded, is added, along with the stock.

ChickenNoodleSoup-5

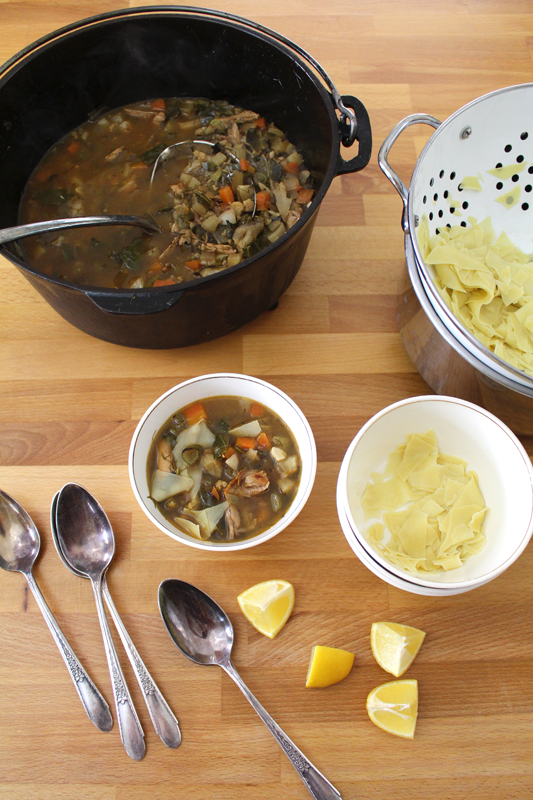
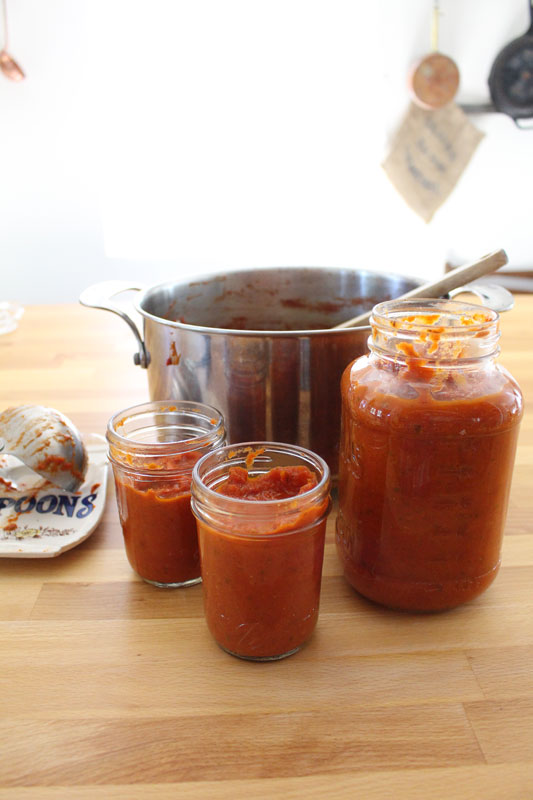
I like to cook the pasta separately. I have a hard time making the right amount of food for just two of us, so this way I can save the leftovers for another day without worrying that the pasta will absorb all the liquid and become a soggy, mushy mess. If you’re going to eat it all in one sitting, feel free to cook the pasta in the soup (you may want to add a bit more stock).

ChickenNoodleSoup-7

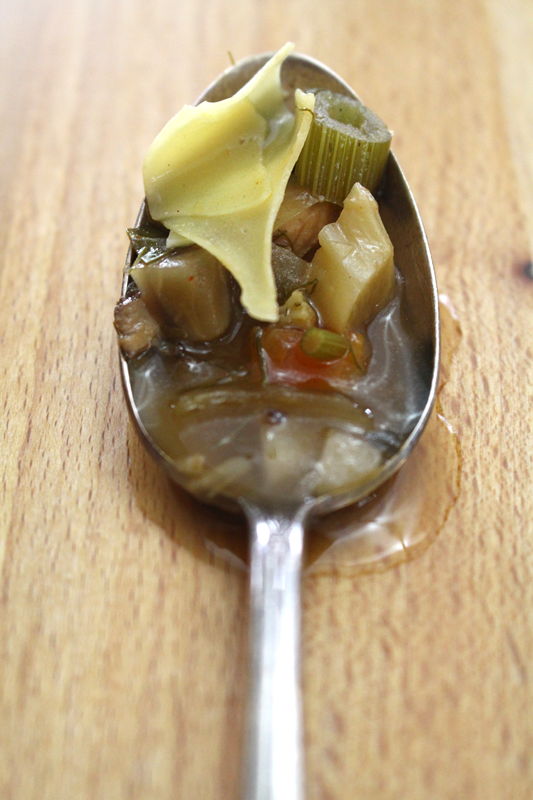
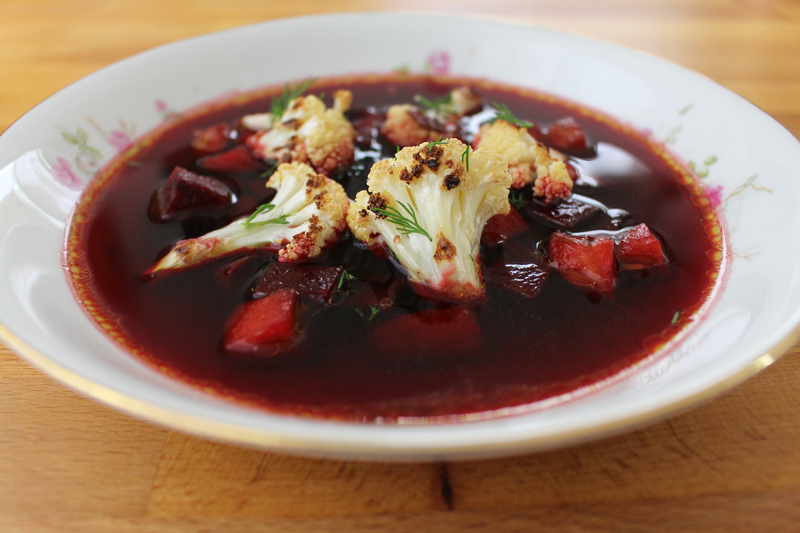
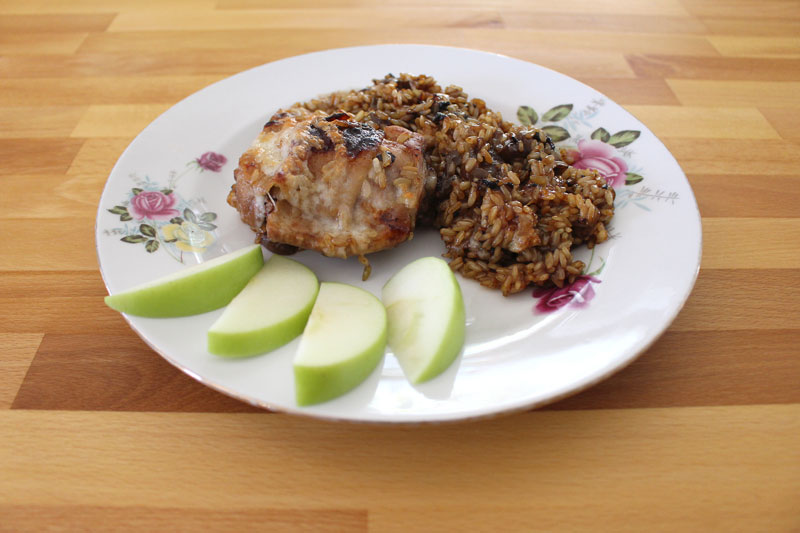
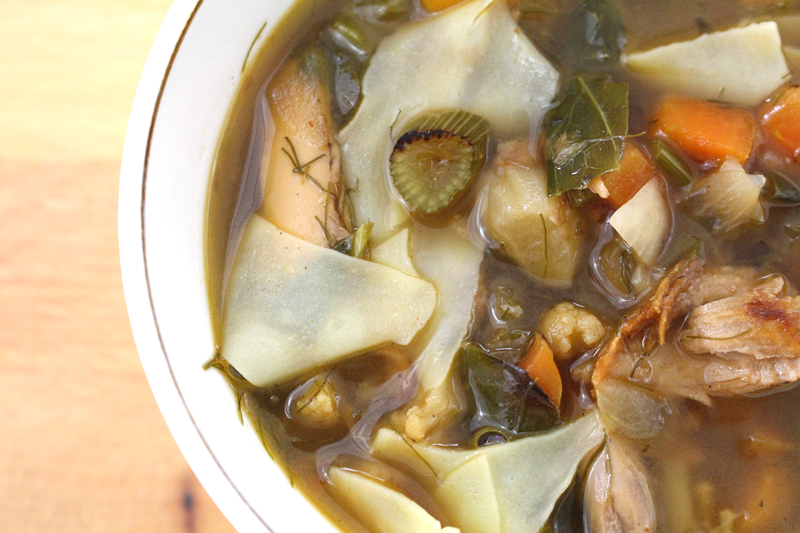
The pasta is divided into the bowls and topped with some soup for a hearty and delicious meal.

Happy Eating!

Chicken Noodle Soup

Prep Time: 10 minutes

Cook Time: 1 hour, 7 minutes

Total Time: 1 hour, 17 minutes

Yield: 4

Chicken Noodle Soup

Ingredients

  • 2 T olive oil
  • 3-4 chicken drumsticks (or 2-3 thighs, or 1 breast) (ending up with about 1-2 C cooked and shredded meat)
  • to taste salt
  • to taste pepper
  • 1 T butter
  • 1 t olive oil
  • 1 C fennel (any part), chopped
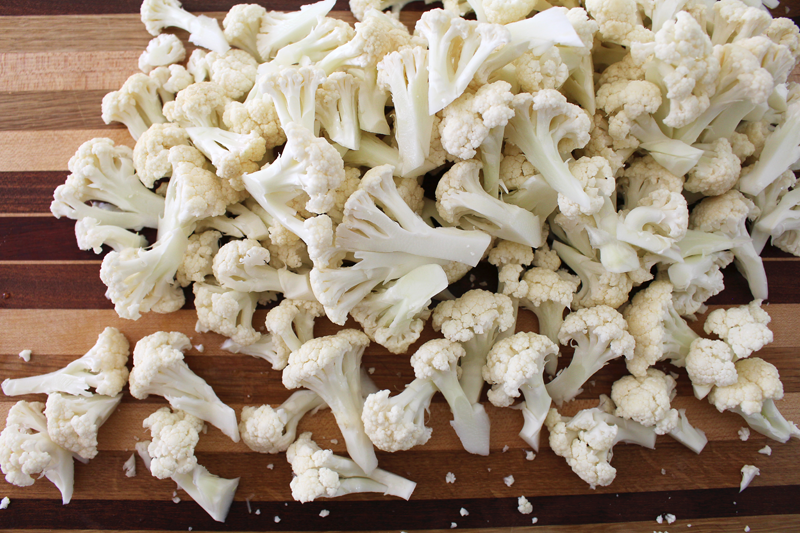
  • 1 C cauliflower, chopped
  • 1 C carrot, chopped
  • 1 C onion (or shallot or leek), chopped
  • 1-2 C greens (kale, collard greens, chard etc), chopped
  • 1/2 C turnip (or rutabaga), chopped
  • 1/2 C radish, chopped
  • 1/2 C kohlrabi, chopped
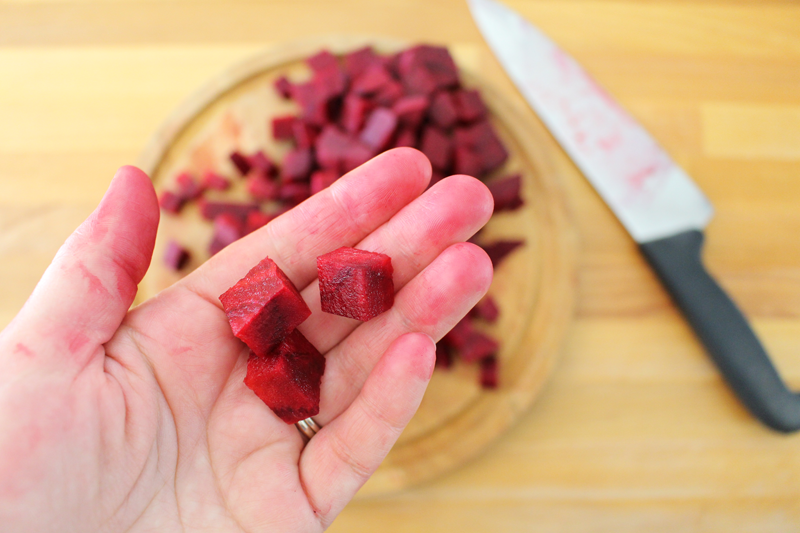
  • (could also add celery, broccoli, parsnip, summer squash, bell pepper, peas, green beans, beets, asparagus, or mushrooms)
  • 3 cloves garlic, diced
  • 1 T balsamic vinegar
  • 1/2 t each dried (or 1/2 T fresh) rosemary, thyme, basil, and parsley (or replace all four with tarragon, dill, and parsley)
  • pinch each cayenne, ginger, and paprika
  • 6-8 C stock (vegetable or chicken)
  • 1 C pasta (any kind)
  • 1 T butter
  • 1 T lemon juice
  • lemon slices, for serving

Instructions

  1. Heat a soup pot over medium heat. Add 2 T olive oil. When oil is hot, add chicken and sprinkle with salt and pepper. Cook for about 30-35 minutes (for drumsticks), or until internal temperature reaches 180F, turning every 5 minutes or so.
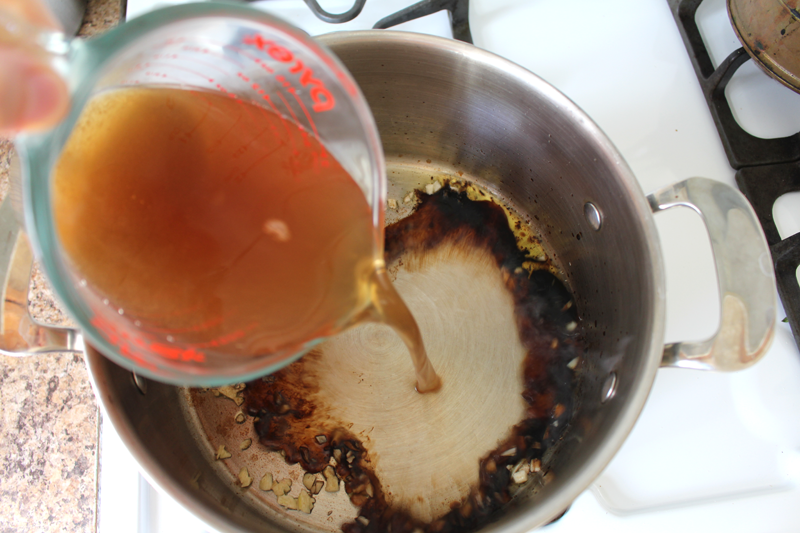
  2. Remove chicken from soup pot and let cool slightly on a paper towel lined plate. Return soup pot to the heat, add 1 T butter and 1 t olive oil. Add fennel through kohlrabi, stir to scrape browned bits off the bottom of the pan, and cook covered for about 10 minutes, stirring occasionally. Add garlic and cook for 1 minute. Add balsamic vinegar and deglaze the pan, scraping the bottom, about 1 minute.
  3. Add seasonings and stock. Bring to a boil, then reduce to a simmer for 15-20 minutes.
  4. Cook pasta in boiling salted water. Drain.
  5. Remove soup from heat, stir in 1 T butter and lemon juice. Taste and adjust seasoning if needed.
  6. Divide pasta between 4 bowls and top with soup. Serve with a lemon wedge for squeezing.
http://www.de-ma-cuisine.com/chicken-noodle-soup/

Monday

23

February 2015

0

COMMENTS

Sweet and Spicy Roasted Beet and Carrot Soup

Written by , Posted in Dairy-Free, Dinner, Fruit, Gluten Free, Herbs, Lunch, Main Dishes, Roasting, Soups, Vegan, Vegetables, Vegetarian

RoastedBeetCarrotSoup-7

If you are into time travel and happen to meet up with my younger self, please don’t tell her that she will grow to love beets. She will surely not believe you and may even laugh in your face.

I am not a believer in time travel, if you were wondering. But, we just watched the Back to the Future trilogy, and being married to Tim, we discuss time travel way more than I ever thought I would. So it’s on my mind more often than I would have ever thought it would be… But then again, I never thought I’d like beets, sooooooo…

If I could time travel, I think I’d go to a point in history when Julia Child was alive, so I could meet her, preferably in Paris, at a dinner party at her house, after we’d become best friends during one of her L’école des trois gourmandes classes. Maybe we’d even enjoy beets together, since I would be taking my love of beets with me wherever I time traveled to.

Yes, beets. I love them. I am sad when they’re gone. It’s a pretty good life lesson, if I stop and think about it. There are so many things that I think I don’t like. Maybe I really and truly don’t like them. But, with the right additions, with the right complimentary flavors, after trying and failing a few times, maybe they will become not just not as bad as I’d thought, but a favorite.

RoastedBeetCarrotSoup-1

For this soup, beets are most certainly the star. They bring a sweet, earthy depth to it that’s like nothing else. Combined with (also sweet) carrots, it’s just a fabulous combination. They stained my hands red when I was peeling them (making me wonder how they’d do as an Easter egg dye) (if that would bother you, you could wear gloves), but it washed off with a good scrubbing.

RoastedBeetCarrotSoup-2

The cauliflower in this dish adds a bit of crunch and, well technically a lack of color, that looks kinda awesome with the red soup. I cooked it separately and added it at the end so that it wouldn’t turn pink. If you don’t care as much, you can add it to the soup with the beets and carrots.

RoastedBeetCarrotSoup-3

The base of the soup is basically (ha, no pun intended) olive oil, garlic, balsamic vinegar, and vegetable stock. There’s a bit of salt and pepper, and some heat from cayenne. That’s it. It’s a simple one.

RoastedBeetCarrotSoup-4

The carrots and beets take a while longer to roast than the cauliflower, so they get a head start.

RoastedBeetCarrotSoup-5

Don’t worry, the cauliflower will catch up.

Roasted cauliflower and broccoli are one of my favorite sides. Probably ever. I can’t get enough of how crispy and nutty they get in the oven.

RoastedBeetCarrotSoup-8

The beets and carrots are added to the boiling stock. They’ll all simmer away for a few minutes. Then it’s ladled into a bowl, topped with some cauliflower, lemon juice, and dill. I haven’t decided if I like it better with or without the dill. I mean, I like it both ways, so I’d say add it if you want to.

RoastedBeetCarrotSoup-6

I made a very different beet soup a few weeks ago that was not yummy. I added a few too many bitter root veggies that threw off the taste. So, my expectations for this soup were admittedly not very high. This soup pleasantly surprised me with how flavorful it was. I liked it so much that I put my spoon down and slurped the last of the broth out of the bowl.

The real test will be if Tim likes it. He doesn’t yet know that he loves beets like I do. 😉

Happy Eating!

Sweet and Spicy Roasted Beet and Carrot Soup

Sweet and Spicy Roasted Beet and Carrot Soup

Ingredients

  • 1 large beet (about 2 C), peeled and cut into 1/2" cubes
  • 3 t olive oil, divided
  • to taste salt
  • to taste pepper
  • 3 carrots (about 1 1/2 C), cut into 1/2" chunks
  • 1/4 head of cauliflower (about 2 C), cut into bite sized pieces
  • 1 T olive oil
  • 2 cloves garlic, diced
  • 2 T balsamic vinegar
  • 4 C vegetable stock
  • 2 C water
  • to taste salt
  • to taste pepper
  • good sprinkle cayenne
  • lemon slices, for serving
  • 1/2 t dill (optional), finely chopped, for topping

Instructions

  1. Pre-heat the oven to 400F.
  2. Toss beets with 1 t olive oil and a bit of salt and pepper. Place on a baking sheet and bake on the top rack for 15 minutes.
  3. Toss carrots with 1 t olive oil, some salt and pepper. Stir beets and add carrots, cook for 15 minutes more.
  4. Toss cauliflower with 1 t olive oil, place on a baking sheet. Stir beets and carrots and move to a rack in the lower portion of the oven. Place cauliflower on the upper rack. Roast for 10-15 minutes.
  5. Remove beets and carrots from the oven. Flip cauliflower, and roast 10 minutes more.
  6. Heat soup pot over medium-low. Add 1 T olive oil. Add garlic and cook for 1 minute. Add balsamic vinegar and cook for 30 seconds more. Add stock through cayenne. Bring to a boil, add beets and carrots* and reduce to a simmer. Cook for 5-10 minutes. Taste and adjust seasoning if needed.
  7. Spoon into bowls, topping the soup with cauliflower, lemon, and a tiny bit of dill.
http://www.de-ma-cuisine.com/sweet-and-spicy-roasted-beet-and-carrot-soup/

Thursday

22

January 2015

0

COMMENTS

How to Use it Best – Winter Edition

Written by , Posted in How To, Storage/Prep

HoneyRoastedCarrotsParsnips2

It’s no secret that I love to roast veggies. I’ve been known to roast anything from beets, to peas, to cabbage. But, not all veggies are alike. And not all veggies act the same when they’re thrown into a pot of boiling water, sautéed in a skillet, or roasted in the oven.

Here’s some of what I’ve found to work (and sometimes not work), in my experience as a home cook.

In Soups

CannelliniBeetGreenSoup-2

I use potatoes, sweet potatoes, butternut squash, acorn squash, and rutabagas interchangeably in soups. They respond similarly, and, unless I know that one or the other might not pair well with another of the soup’s components, if I have one, but not the other, I’m going to use what I have. Same thing with broccoli and cauliflower – I find them similar enough. And when it comes to soups, I’ll usually add as many veggies as I can. Starting with the harder veggies (think roots like carrots and beets), then adding slightly softer guys (hello broccoli and cauliflower, maybe even cabbage, and herbs like rosemary and thyme), and adding more delicate greens and herbs at the end (kale, chard, dill, parsley).

Cooking 101 – One of the keys to adding things at the same time is to make sure they’re chopped/diced/cubed the same size as all the other components. This will ensure that someone doesn’t burn, while someone else is still raw. This goes for any method of cooking.

In Salads

RoastedRadishes1

I love lots of different textures in a salad. I will often combine a nice butter lettuce with tuna, a hard boiled egg, some chopped nuts, croutons, dried fruit, and grated or chopped veggies.

I prefer to grate hard root veggies like carrots and radishes. If you’re ok with raw beets, grate them too. But, you can also roast for salads. Roasted beet chips and crispy potatoes are some of my favorite salad toppers.

Cooking 101 – If you want to tame a spicy radish a bit, grate it. You won’t bite into a big chunk of burning, if that’s not what you were hoping to get from your salad.

In the Oven

RoastedButternutSquashSoupVegan-5

As Fries

I love to cut potatoes, sweet potatoes, parsnips, and winter squash into sticks to make fries. Mostly, because I want to dip them in yummy sauce.

In Smaller Pieces

A head of broccoli or cauliflower cut into bite sized chunks, some cubes of potato, winter squash, or sweet potato; wheels of carrot, one inch pieces of beet all make a great side when roasted. Just toss them with some olive oil, salt, and pepper before they head into the oven, and you’re good to go.

Cooking 101 – The stem of the broccoli doesn’t need to be discarded. Simply peel the tough outer layer, then slice the inner portion and use as you would the florets.

Roasting Whole

Beets are my favorite to roast whole. Recently, I’ve discovered that it’s best to put them in a pan, with about a cup of water, then tightly cover with foil. They will take about an hour (for small-ish beets) at around 425F, and maybe 10 to 20 minutes more if they’re larger.

Obviously, potatoes are kinda famous for being roasted whole. Sweet potatoes are the same story. You can leave them as they are, or wrap them in foil if you want. If you’re gonna do the foil method, before you wrap them up, drizzle them with some olive oil, and sprinkle with salt, so the skin is extra tasty. I like things extra tasty, so I’m all over the oliveoilsaltextrayummyskin.

And there’s the winter squash, which technically I don’t roast whole, I cut them in half, but they’re so huge that I think they count. Sometimes, when I have a whole bunch on the counter I will roast them all, then scrape the roasted flesh out of the skin and freeze it. It makes soup prep incredibly easy. (And, save this tip for summer: I do the same thing when I have loads and loads of eggplant.)

Cooking 101 – You don’t have to peel beets before you roast them. Once they’re soft, leave them to cool slightly (covered or uncovered, I haven’t noticed much of a difference either way), then using gloves, a paper towel, a paring knife, or your fingers, peel the skin off – it should be pretty easy (and oddly satisfying).

On the Stove Top

BoiledSteamedBroccoli-5

Steaming

I find that most veggies respond pretty well to steam. By this, of course, I mean veggies that are meant to be eaten cooked. I probably wouldn’t steam lettuce… although at the moment, that’s the only one coming to mind that I wouldn’t… But, you know, use your judgement on this one.

Some of my favorites to steam are: carrots, potatoes, broccoli, cauliflower, and green beans.

I prefer steaming over boiling, because I think the veggies retain more of their nutrients.

Cooking 101 – Save leftover steaming or boiling water to cook pasta, or to make veggie stock with the scraps that would have gone in the compost.

Boiling

My Oma always boiled the potatoes for special dinners. They tasted great. I know that boiling is the way people often cook potatoes when they’re going to be mashed. When I took that cooking class in Paris, that’s how we boiled the potatoes. It’s a tried and true method. And you can really pop quite a few veggies in a bunch of really hot water and get good results. Just beware that if you leave them too long, they can become water-logged and mushy, and may just fall apart in the pot (and then you adapt and pretend that you’d always planned to make soup).

Cooking 101 – So that you can save the boiling water for pasta cooking or stock, use a slotted spoon to pull out the veggies, rather than just dumping the water out. Or, if you don’t have anything else to cook, let the water cool completely, then take it outside to water your plants.

Sautéeing

Aren’t veggies just so versatile?! I mean, we’ve gone from roasting, to steaming, and now sautéeing, and there are some veggie-friends that are good with any option. So, I’d say, that things like broccoli, brussels sprouts, cauliflower, are an easy yes. If you want to do potatoes, carrots, parsnips… you know, the harder roots, that’s awesome too, just smaller pieces, and plenty of time. And then, if you want to go with the more delicate greens, like kale, chard, mizuna, mustard greens, and spinach, you’ll start with what feels like way too much, and end up with the perfect amount. If you’re starting with some harder veggies, once they’re a few minutes from being done, add the greens. They won’t take long and add a lot to a dish.

Cooking 101 – Don’t throw away those beet greens! They’re delicious sautéed, in salads, and in soups.

However you prepare them, have fun with your veggies!

Thursday

18

September 2014

0

COMMENTS

How to Make Tomato Sauce

Written by , Posted in Dairy-Free, Dinner, Fruit, Gluten Free, Herbs, How To, Kid-Friendly, Sauces, Storage/Prep, Vegan, Vegetables, Vegetarian

Tomato-Sauce-7

Tomatoes are one of the best things about summer.

Actually, all the fruits and veggies that we’ve been getting are the best.

They’re all favorites.

I want them to last all year long. I know that in a month or two, when it finally starts to cool down, I will be thankful for the heartier root veggies, apples, and pears that will be coming. But, for now, let’s keep talking about summer. ‘Cause I’m not quite ready to be done with it yet.

Tomato-Sauce-1

One of the ways to prolong summer is by preserving its fruits and veggies. So, like I’ve done a few times before, let’s talk about saving summer. In the form of a special tomato sauce.

It starts with a bunch of Roma tomatoes. They’re my favorite for sauce. They have less seeds and goopy bits, and I find them a little less watery… Hooooowever, use what you have! Use what you have! Use what you have!!!

I quartered mine, sliced off the hard bit at the end, and then roughly chopped them. They’re going to be blended later, so precision isn’t necessary. You may have noticed that I didn’t peel them. Later you will notice that I don’t strain them. You can if you want, but a little tomato peel and seeds don’t bother me.

Tomato-Sauce-2

They cook up for a few minutes, then are mashed up with a potato masher. This just speeds things along a bit, breaking down-wise.

Tomato-Sauce-3

If you want to have just a plan tomato sauce, blend it up here and cook for an hour and a half or two.

I know how I like my tomato sauce, so I thought I’d get ahead of the game a little, and add some onions, garlic, herbs, and a few other things to the mix before blending.

It’s up to you.

Choose your own adventure.

My adventure has a whole head of garlic in it. Just the way I like it.

Oh mah goodness the smell in our kitchen was just fantastic. A whole head of garlic is just like heaven to me.

Tomato-Sauce-4

I have basil, parsley, and oregano growing in my garden right now. I added those summer favorites, along with some dried thyme and rosemary. Plus a glug of balsamic vinegar and a drizzle of honey.

Tomato-Sauce-5

Then I cooked it all up until the water had mostly evaporated and the sauce was thick.

Tomato-Sauce-6

Quick blend with the hand blender (or the regular blender).

Taste. Add more salt if you want, but remember that you will probably be using this along with other things, so under-salting is ok here.

And only here.

Tomato-Sauce-8

I had some jars sterilized and ready. I will store these in the freezer, since I don’t want to process them in a water bath for 35 minutes. Is it just me, or does anyone else get nervous about the jars breaking and losing their precious sauce? I don’t have a canning set, and I’m definitely not risking jars in a large pot of boiling water bumping in to each other.

Tomato-Sauce-9

The next thing to do is to figure out how to use this amazing sauce. 

Easy.

You can pair it with things like pasta, meats, and breads. It will go great with veggies too.

Specifically, you could make Eggplant or Squash Parmesan, Spaghetti and Meatballs, Deconstructed Lasagne, Meat and Cheese Lasagna, and Summer Pizza.

And oh my gosh you totally should use it to make Meatball Subs. Like right now. I’m serious.

Or, if you just can’t wait, grab some crusty bread and dip it in to the sauce. Good idea right?!

Happy Eating!

Tomato Sauce
Recipe Type: Condiment, Fruit, Vegetable, Vegan, Vegetarian, Gluten-Free, Dairy-Free
Cuisine: Italian
Author: Rachel Oberg – De Ma Cuisine
Prep time: 20 mins
Cook time: 140 mins
Total time: 2 hours 40 mins
Ingredients
  • 5 pounds Roma tomatoes, roughly chopped
  • 1 t salt
  • Extras: 2 T olive oil
  • 2 onions, roughly chopped
  • 1 head (about 12 cloves) garlic, roughly chopped
  • pinch pepper
  • 1/4 fresh basil, roughly chopped
  • 2 T fresh parsley, roughly chopped
  • 2 T fresh oregano, roughly chopped
  • 1 t dried rosemary, crushed
  • 1 t dried thyme
  • 2 T balsamic vinegar
  • 1 T honey
Instructions
  1. Combine tomatoes and salt in a large pot. Cook over medium heat, stirring occasionally, for about 10 minutes. Mash with a potato masher and cook for 10 minutes more.
  2. (If you don’t want to add anything else, skip to step 5.)
  3. Add olive oil to a hot pan. Add onions (bell pepper, zucchini) and cook over medium heat with a pinch of salt for about 10 minutes, stirring occasionally. Add garlic and cook, stirring constantly, for 3 minutes more.
  4. Add onion mixture, herbs, vinegar, and honey to the tomatoes. Use a spatula to get all the garlic infused oil from the pan. Stir once to combine.
  5. Blend with a hand blender, or in batches in a regular blender – removing the plug from the lid and covering with a clean towel.
  6. Bring back to a boil, then reduce to a simmer and cook for 1.5 – 2 hours, or until sauce has thickened, stirring occasionally.
  7. Sterilize your canning jars, bands, and lids in a pot of boiling water for at least 10 minutes at a rolling boil (or in the dishwasher).
  8. Pour sauce in to jars, leaving an inch or so (or a bit less) at the top for expansion.
  9. Store in the freezer once they have cooled completely.*
3.2.1311

(Yields about 2.5 pints or 5 C sauce.)

*To process jars in a water bath Ball suggests that you add 1 T lemon juice to each jar before filling and process in a water bath for 35 minutes. Do this if you want to store at room temperature – only store at room temperature if they have sealed properly).

Monday

15

September 2014

0

COMMENTS

Cheesy Chicken and Grapes with Rice

Written by , Posted in Braising, Cheese, Dinner, Fruit, Gluten Free, Grains, Kid-Friendly, Lunch, Main Dishes, Meat, Poultry, Rice

CheesyChickenAndGrapesWithRice-7

We don’t usually have a problem finishing off the grapes (or most any fruit that comes our way from Abundant Harvest Organics). We usually eat it raw. But, sometimes it’s super fun to try something new.

Like grapes with chicken and rice.

Oh yes I did.

CheesyChickenAndGrapesWithRice-1

It all starts with some thighs. I had a package of two, so that’s what I used. Add more (using a larger skillet) if your family needs more.

It’s seasoned simply, with cayenne and salt. This is gonna be a simple, humble dish, where the flavors really shine.

Shine chicken shine.

Go grape! Go grape! It’s grrrrrrrrrrrrape!

(I don’t know… Sorrynotsorry. I blame it on the Christmas music I’m listening to, in the 100 degree weather, to prepare for a concert in December… Not really. But, the heat makes my brain a little kooky.)

CheesyChickenAndGrapesWithRice-2

I made chicken stock the other day and then froze it. So, to quickly defrost the stock, I brought it to a boil. I don’t normally use hot stock when cooking rice (except when making risotto). So, you could use cold stock, if you’ve planned ahead and put it in the fridge overnight. I didn’t. Just adjust the cooking time as needed.

CheesyChickenAndGrapesWithRice-3

Once the stock + rice + chicken comes to a boil, reduce to a simmer and cook for a few minutes.

CheesyChickenAndGrapesWithRice-4

While these few minutes pass, halve and de-seed some grapes.

Eat them all.

Halve and de-seed some more.

CheesyChickenAndGrapesWithRice-5

Add the grapes to the skillet. Pick them off the top of the chicken, and stir slightly into the rice. Then cook for a good long while (you know, until the rice is done and the chicken is hot). You may need to add more liquid partway through, and stir every once in a while.

CheesyChickenAndGrapesWithRice-6

Is one of your favorite snacks crackers and cheese with grapes? Do you wait expectantly for fall to arrive, so you can eat this snack as often as possible?

I do.

So, why not add some cheddar to the mix? Right?!

CheesyChickenAndGrapesWithRice-8

It’s sprinkled on and popped in to the broiler for just about 3 minutes. It’s like a bazillion degrees in there, so it’s not gonna take long. Don’t leave the kitchen to go wash your hair while it broils. You may have a smoky situation on your hands if you do.

Also, you remembered to use an ovenproof skillet, right? I know you did. But, just making sure. ‘Cause if you decided to not use one AND wash your hair while it broils, well, that’d be just disastrous. Let’s avoid kitchen catastrophes when possible.

CheesyChickenAndGrapesWithRice-9

Once the rice is cooked, the chicken and rice all kinda brown a bit, creating this amazing sauce that I just want to soak up with a piece of crusty bread.

CheesyChickenAndGrapesWithRice-10

Apples go so nicely with grapes and cheese, so serve some (on their own, or in a salad) with this easy, comforting dish that welcomes fall (cough cough, seriously, fall, let’s do this now, enough with the hundred degree weather).

Happy Eating!

Cheesy Chicken and Grapes with Rice
Recipe Type: Dinner, Main Dish, Meat, Chicken, Fruit, Grapes
Author: Rachel Oberg – De Ma Cuisine
Prep time: 10 mins
Cook time: 96 mins
Total time: 1 hour 46 mins
Serves: 2-3
Ingredients
  • 2 T olive oil
  • 2-3 chicken thighs
  • to taste salt
  • dash cayenne
  • 2-3 C hot chicken or vegetable stock (or water)
  • 1 C brown rice
  • 1 C grapes, halved, seeds removed
  • 1 C cheddar cheese, grated
  • 1 apple, sliced, for serving
Instructions
  1. Heat an ovenproof skillet over medium heat. When it’s hot, add olive oil. When oil is hot, add chicken. Sprinkle with salt and cayenne. Sear on each side for 3 minutes.
  2. Add 2 C stock, rice, and salt. Stir gently around chicken (make sure all rice is in stock, not on top of chicken). Bring to a boil, then reduce to a simmer for 10 minutes.
  3. Add grapes, and simmer, adding more liquid if needed, cooking until chicken reaches 180F and rice is to desired tenderness, about 45-50 minutes (cooking uncovered, until the last 20-30 minutes), stirring occasionally.
  4. Taste and adjust seasoning if needed. Top with cheese and broil for 3 minutes.
  5. Serve with a side of apples.
3.2.1311