De Ma Cuisine

Snacks Archive

Monday

3

August 2020

0

COMMENTS

Nachos

Written by , Posted in Beans, Beef, Cheese, Dinner, Fruit, Gluten Free, Herbs, Kid-Friendly, Legumes, Main Dishes, Meat, Pork, Poultry, Quick and Easy, Red Sox, Snacks, Vegetables

Baseball is back. I’ve missed it, mostly. During the off season the Red Sox let Mookie and Brock get away. They’ve been favorites in our house, so it’s a little sad. I’m excited for the other guys to get to shine though. Benny, Bogaerts, Chavis, JD… they have a good offensive team.

I’ve been a baseball fan for as long as I can remember. I was a diehard Jays fan during the “Touch ’em all Joe” World Series. My brothers and I screamed and jumped so hard that the VCR fell off the TV.

Tim and I fell in love with the Red Sox in 2007. After nearly a decade of not paying much attention to baseball, we were on a fall anniversary trip and the Red Sox were in it. I started planning our outings around the playoff schedule. It was Dustin Pedroia’s rookie year. What a time to join Red Sox Nation! Dustin and Papi will forever be my all time favorites. I cried when Papi retired. If Pedroia ever plays again I’ll cry too.

It’s gonna be a weird season (#ThanksCorona). But, whatever it looks like, however short it may be, we will be cheering on the Red Sox. It’s a bit of brightness during a dark time. I like to plan fun foods to eat during the games. Things that we might eat at the ballpark: nachos, pizza, popcorn, hotdogs, fries… So if you need us for the next while, we’ll be eating all the baseball food, yelling at the TV, and texting LeBlanc about how much we love having Jerry Remy back in the booth.

Our Favorite Nachos

Ingredients

  • our favorite hot toppings: sautéed onions and bell peppers, ground meat, pinto beans, black beans
  • taco seasoning
  • salt, to taste
  • tortilla chips, lots of them
  • grated cheese, a lot, like more than you think you’ll need
  • cold toppings: sour cream, salsa, avocado or guacamole, chopped tomatoes, chives/red onions/scallions

Directions

  1. Pre-heat the oven to 350°F (toaster oven please bc summer!).
  2. Cook or re-heat any hot toppings. Stir in some taco seasoning and a pinch of salt.
  3. Arrange the chips in a layer with no gaps for cheese to fall through. This is important. Sprinkle with a ton of evenly distributed cheese. Layer with more chips. Add more cheese. This is like chip lasagna. Do a third layer if you want. We usually stick to two. But, it’s 2020, nothing makes sense. Maybe we’ve been making nachos all wrong by omitting the third layer. Bake for a few minutes, check on the cheese, bake a little longer if it’s not all the way melted. You can always do more melting. You can never un-melt burnt cheese.
  4. When the nachos are perfect, take them out of the oven. Plomp them onto some plates. Top with those cooked hot toppings. Add the sour cream, salsa, avocado, tomatoes, and anything oniony. Did I forget anything? Oh! Tim likes thinly sliced black olives. I think it’s weird, but if he’s in charge I’ll eat it without complaint and will probably like it.

Friday

26

February 2016

0

COMMENTS

Baked Onion Rings with Herb Dip

Written by , Posted in Baking, Condiments, Dairy-Free, Eggs, Gluten Free, Herbs, Quick and Easy, Roasting, Sides, Snacks, Vegan, Vegetables, Vegetarian

OnionRings-3

I’m not a sweets person. I don’t often crave chocolate, I can go without candy, and if given the option, I’d take potato chips over a donut. I do really love ice cream, but I think that’s because Tim is so good at making it. But, even then, I might take onion rings over ice cream. Because I really really love crunchy deep fried foods. French fries, tempura, onion rings… They’re so tasty.

We don’t need to talk about the dangers of fried foods. I’m well aware. You’re well aware. We’ve got that covered. It’s a treat, not an everyday thing.

OnionRings-1

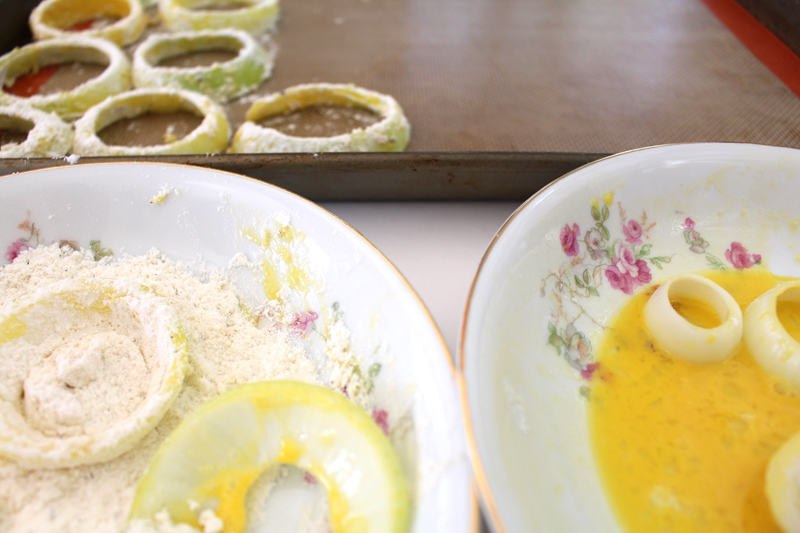
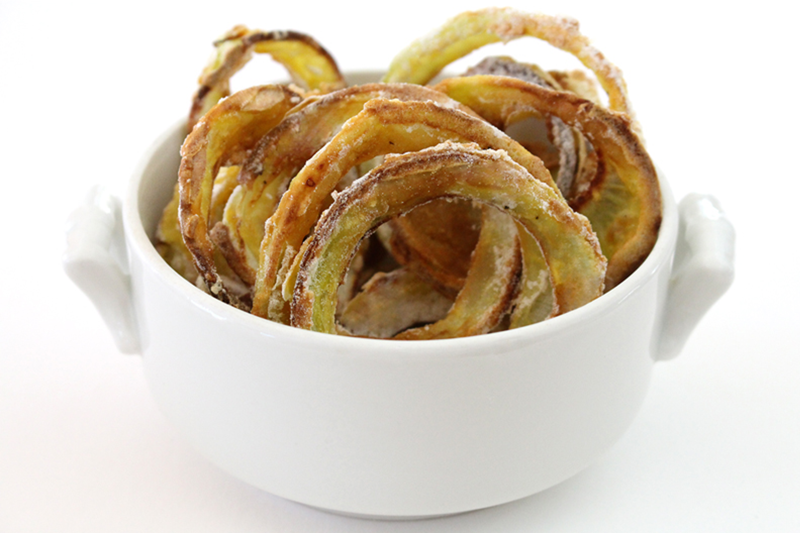
When it comes to guilty pleasures, these onion rings seem like they’d fit in. But, they’re actually pretty innocent. They’re dipped in eggs (you could use coconut or almond milk if you want to keep them vegan), then coated in flour. I double dipped some (you know, egg, flour, egg, flour). I’m not sure which turned out better. They all tasted great.

All.

I ate them all.

OnionRings-2

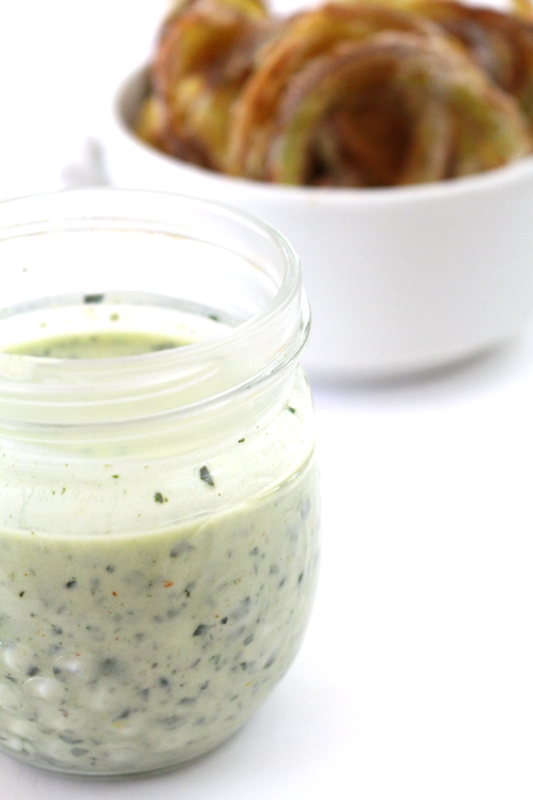
The first secret to this delicious treat is baking them at a high temperature for a short amount of time. We’re talking 425°F for 18-20 minutes total. The second secret is the dip. It’s made up of things like yogurt or silken tofu or mayo or avocado (or ALL!) blended up with some blanched greens, herbs, garlic, and olive oil. I fully submerged each onion ring in the dip before devouring.

If you wanted to make a huge platter and call this dinner, you might also do some green beans, par-cooked potatoes or root veggies (and in a few months summer squash), and add the beans to the dip. Serve it with a big salad and some other fun finger foods (like nachos with refried bean dip) and you’ve got a winner. In fact you’ll most likely find us eating this for dinner sometime this weekend.

Happy Eating!


Baked Onion Rings with Herb Dip

Prep Time: 15 minutes

Cook Time: 25 minutes

Total Time: 40 minutes

Yield: 2-4

Baked Onion Rings with Herb Dip

Ingredients

  • 2 C any of your favorite greens
  • 2.5 C any combo of: yogurt/crème fraîche/mayo/sour cream/avocado
  • 1 T dijon
  • 1 T olive oil
  • 1 t lemon zest, chopped
  • 1 t lemon juice
  • to taste salt
  • to taste pepper
  • 1-2 cloves garlic, minced
  • pinch cayenne (optional)
  • handful chopped herbs like: parsley, basil, thyme, rosemary, oregano
  • 1-2 onions, sliced
  • 2 (or more) eggs, whisked (or coconut, almond, or cow's milk)
  • 2 C flour (AP or GF)
  • to taste salt*
  • to taste pepper

Instructions

  1. Pre-heat the oven to 425°F.
  2. Blanch greens in boiling water for 1 minute. Transfer to an ice bath to cool. (Or, use leftover sautéed greens.)
  3. Whisk yogurt through cayenne. Add herbs and blanched or leftover greens. Blend. Taste for seasoning. Refrigerate until ready to serve.
  4. Mix flour with salt and pepper. Taste (for real). Separate onion into rings. Dip veggies in egg/milk then flour. Repeat if desired. Tap off excess flour. Place on a parchment or Silpat lined baking sheet. Do not let the veggies touch. Bake for about 10 minutes, flip, bake about 8-10 minutes more (or until crispy and browned).
  5. Serve with dip.

http://www.de-ma-cuisine.com/baked-onion-rings-with-herb-dip/

Friday

22

January 2016

0

COMMENTS

Hearty Kale and White Bean Quesadillas

Written by , Posted in Beans, Breakfast, Cheese, Dinner, Gluten Free, Herbs, Legumes, Lunch, Main Dishes, Quick and Easy, Sandwiches, Sides, Snacks, Vegan, Vegetables, Vegetarian

KaleBeanQuesadillas-5

When I plan our menu I try to include a good variety of foods, so we don’t get bored. Sometimes they’re a little more complex, have multiple steps, and more ingredients. Other times they’re simple, basic, super easy. Scrambled eggs and toast makes a great dinner. So do quesadillas.

Quesadillas are probably our go-to, in a pinch, anyone can make it meal. If I’ve planned ahead, I will try to add some beans so it’s not just tortillas and cheese. If I’ve really planned ahead, we may even have homemade tortillas. But, sometimes, just the basics will do. We just need to eat something, and we need to eat that something right now.

KaleBeanQuesadillas-1

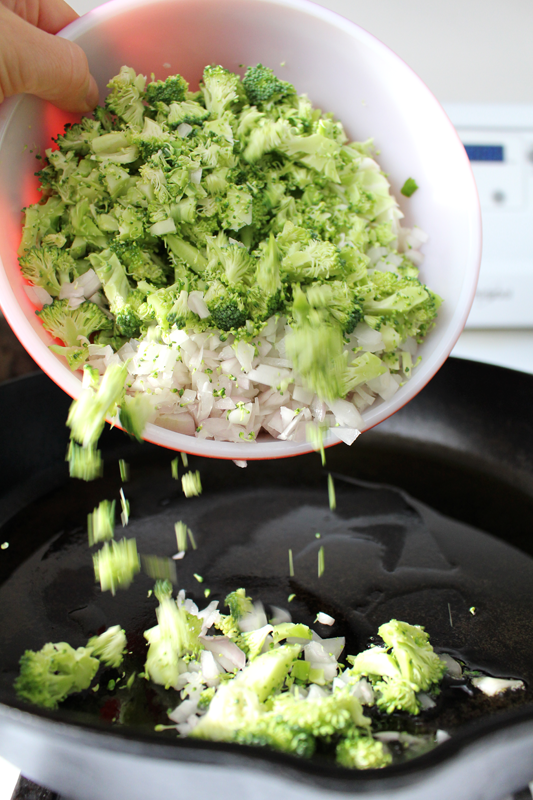
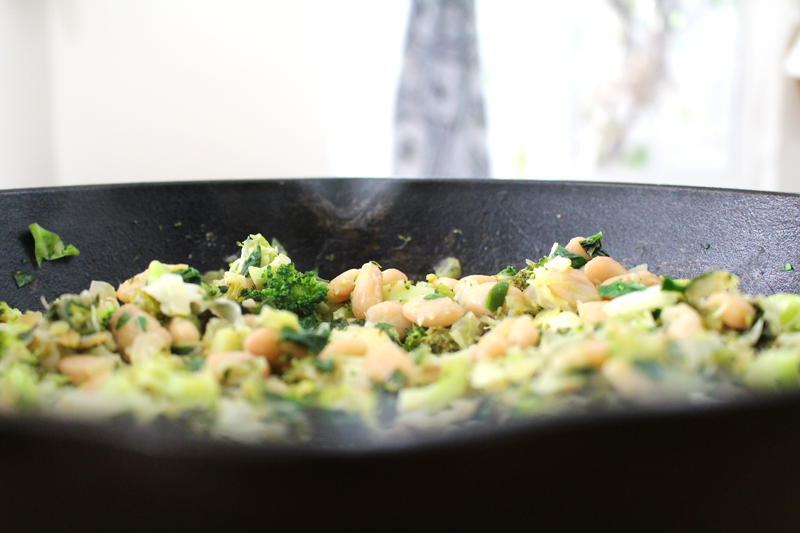
This recipe is a happy medium. I had time to prep and plan, so there are both veggies and beans. I also made a lot and froze the leftovers, so next time we want quesadillas, the filling can be pulled out and reheated. These are pretty versatile. I just took what I had on hand that I thought would go with beans and cheese, finely chopped it, and threw it into a pan.

KaleBeanQuesadillas-2

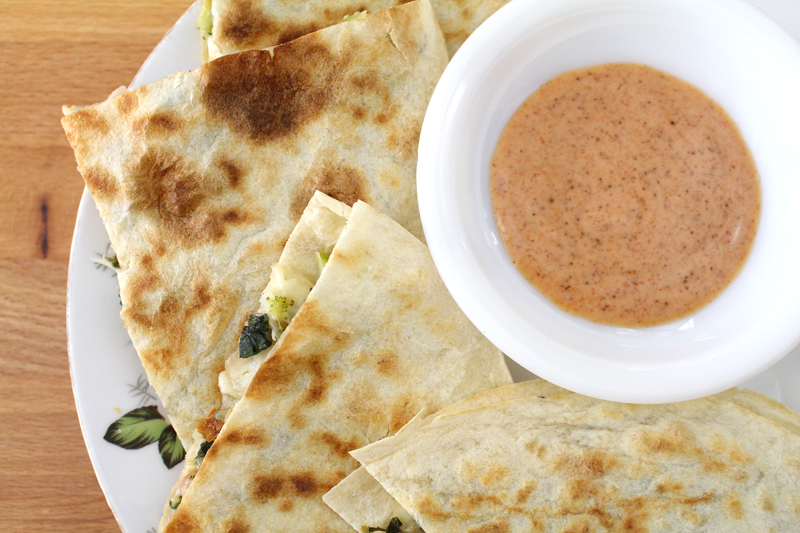
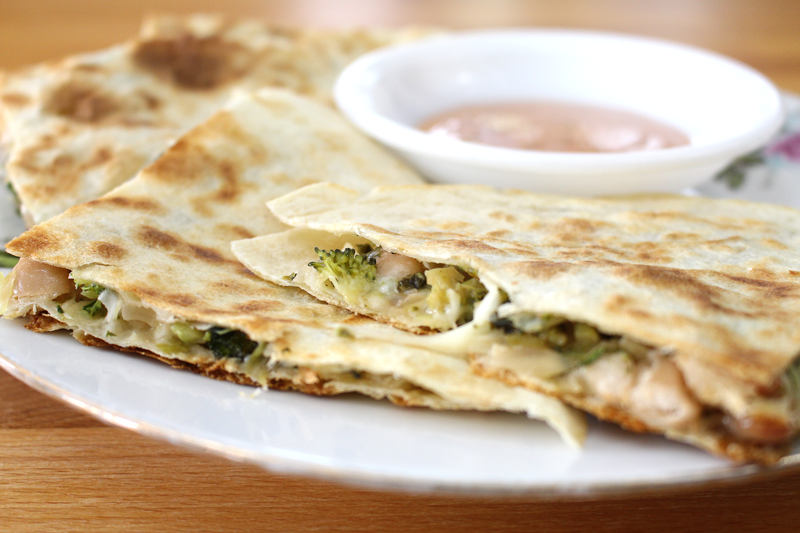
While the veggies and beans cooked, I whisked together a quick dip. But, if there’s no time for dip, or you’re out of yogurt or silken tofu, salsa will be just fine.

KaleBeanQuesadillas-3

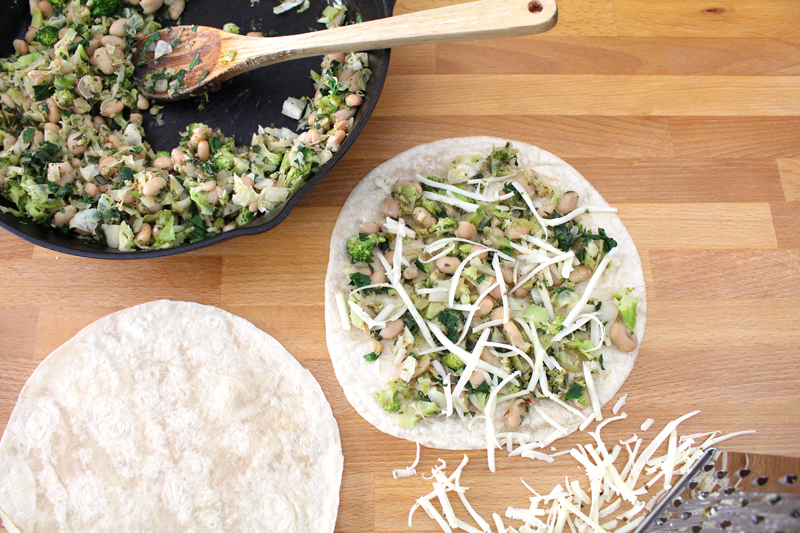
I added pepper jack this time. It’s a great melting cheese and I love the spice that it adds. If you don’t do dairy, I’ve heard that nutritional yeast is great.

KaleBeanQuesadillas-4

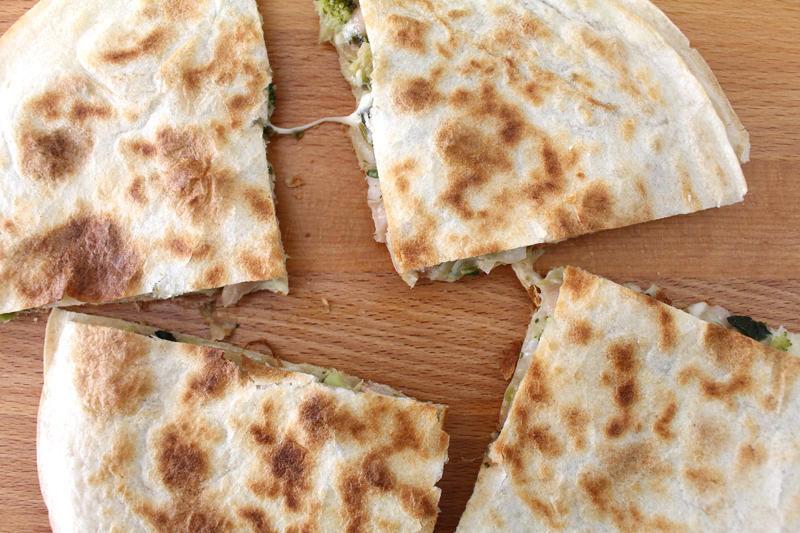
I like my quesadillas super crispy outside and gooey inside. Tim prefers his a little less crispy. I used flour tortillas this time, but corn would be fabulous too. I had been working on another recipe on the same day and I wasn’t hungry when these were done. So I cooled them and saved them for dinner. When I reheated them they had an awesome crisp to them that I totally wasn’t expecting. Almost like the cooling and reheating had done something awesome to the layers in the tortilla. I’m totally down for cold leftovers (mostly because I’m too lazy to heat them up). This time I’m glad I took the time.

KaleBeanQuesadillas-6

I’m sure we will be enjoying these again soon. I’ve almost always got quesadillas on the menu and ingredients for them in the fridge.

Happy Eating!

Hearty Kale and White Bean Quesadillas

Prep Time: 10 minutes

Cook Time: 15 minutes

Total Time: 25 minutes

Yield: 4

Hearty Kale and White Bean Quesadillas

Ingredients

  • 1 T olive oil
  • 2 C (combination of any) broccoli, cabbage, shallots, bell pepper, cauliflower, chile pepper, radish (any type), summer squash, leek, onion; finely chopped
  • to taste salt
  • 1 clove garlic, diced
  • 2 C any type of greens (kale, chard, spinach, mustard greens, mizuna, etc..), ribs removed, chopped
  • 2 C white beans, drained if canned
  • 2 t lime or lemon juice
  • 1 C yogurt or silken tofu
  • sprinkle cayenne
  • 1/2 t chili powder
  • 1/2 t paprika
  • splash maple syrup (optional)
  • 1 T chives (optional), chopped
  • 1-2 t lime or lemon juice
  • to taste salt
  • 8 tortillas (any type)
  • 1 C cheese (pepper jack, cheddar, or feta), grated or crumbled (could also use a sprinkle of nutritional yeast)

Instructions

  1. Heat a skillet. Add oil. Add the 2 C of veggies and salt and cook for 5 minutes, or until tender, over medium-low heat, stirring occasionally. Add garlic, greens, beans, and lime juice. Cook for 5 minutes more. Taste for seasoning.
  2. While the veggies cook, whisk together dip: yogurt/silken tofu through salt. Taste for seasoning and set aside.
  3. Top a tortilla with 1/4 of the bean and veggie mixture. Top with cheese (or nutritional yeast) and then another tortilla. Repeat with remaining tortillas and bean mixture.
  4. Heat a clean skillet. Cook each quesadilla, flipping once, until to desired crispness and cheese is melted (I like about 2-3 minutes/side). Slice into wedges and serve with dip.

http://www.de-ma-cuisine.com/kale-white-bean-quesadillas/

Monday

18

January 2016

0

COMMENTS

Orange You Glad it’s Green Smoothie

Written by , Posted in Breakfast, Brunch, Dairy-Free, Drinks, Fruit, Gluten Free, Kid-Friendly, Quick and Easy, Snacks, Vegan, Vegetables, Vegetarian

OrangeGreenSmoothie-4

When I need a quick meal, smoothies are a great option. Sometimes I make them with peanut butter, chocolate chips, and banana. That’s one of my favorites. But, I also really love a good fruit and veggie smoothie. Sweet, but not too, and packed with nutrients.

OrangeGreenSmoothie-1

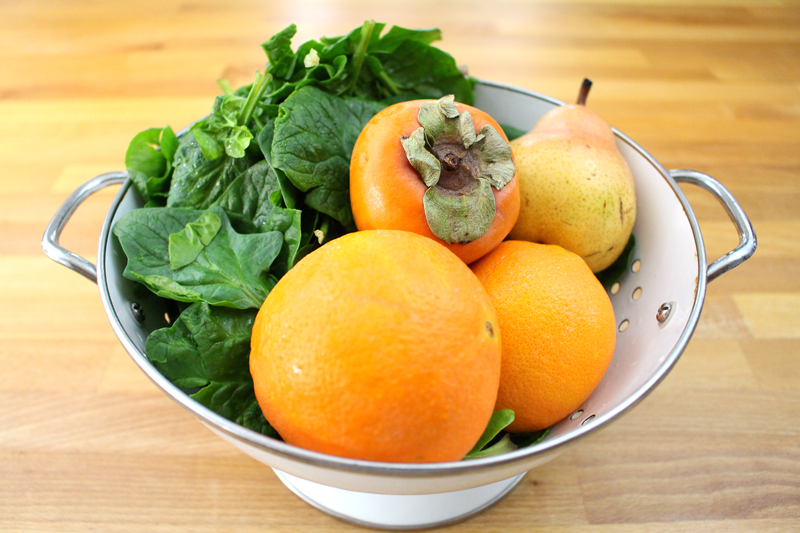
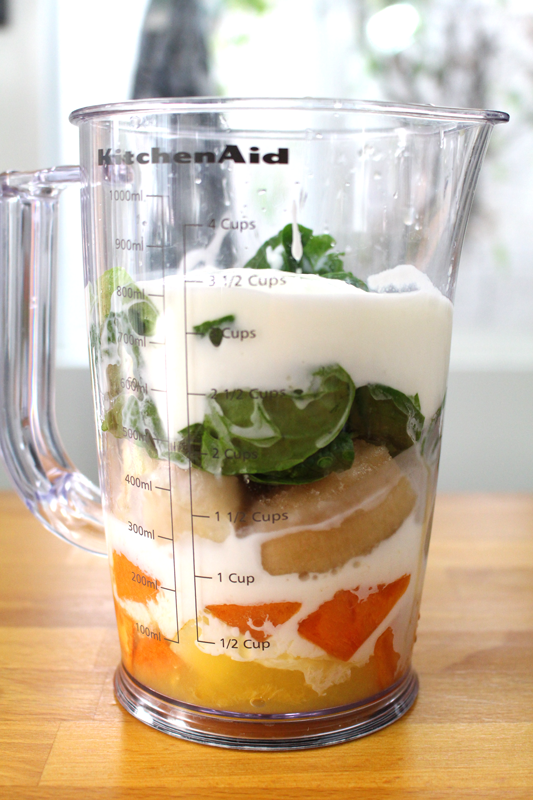
For a wintery smoothie, I opted for orange+pear+persimmon+greens. I just used what I hand on hand. At other times I may use apple instead of the pear, or in the warmer months, stone fruit and berries. The constant is the greens. I like to use mild ones like kale, spinach, or chard, and they just kinda disappear in the fruity goodness.

OrangeGreenSmoothie-2

I wanted to use the orange peel as a cup. We don’t have a dishwasher, so any dishes I generate get washed by hand. The less dishes the better. I used a grapefruit knife to get the segments out, but a sharp paring knife would do just as well. I cut a tiny bit off the bottom of the orange so it would sit flat too. Don’t want any rolling oranges when there’s a smoothie inside!

OrangeGreenSmoothie-3

I like my smoothies to be super thick and pretty cold. So I usually add some frozen banana. Unfrozen would work well too. The riper they are, the sweeter the smoothie.

OrangeGreenSmoothie-5

This can be a great light meal on its own. A working lunch or a good breakfast. If you want to add to the meal, here are a few suggestions for things that I think would compliment it:

Breakfast or Brunch

Savory Baked French Toast

Sweet and Savory Cornmeal Pancakes

Fresh Fruit and Basil Stuffed French Toast

Toast with Peanut Butter and Honey

Winter Frittata

Scrambled Eggs with Bacon and Chives

Turnip Hash with Bacon and Gouda

Paris Potatoes

Lunch

Grilled Egg and Cheese Sandwiches

Bacon Sandwich with Dandelion Greens

Tuna Boats

Dilly Eggs with Lentils

Vegetarian Soft Tacos

Any leftovers can be frozen in an ice cube tray and then re-blended or added to a new smoothie (in place of ice, if you use it).

Happy Eating!

Orange and Green Smoothie

Prep Time: 10 minutes

Total Time: 10 minutes

Yield: 2

Orange and Green Smoothie

Ingredients

  • 1 large orange, top cut off, segments scooped out (if you want to serve smoothie in peel - if not just peel, de-seed, and roughly chop)
  • 1-2 C greens (kale, chard, spinach), roughly chopped
  • 1 frozen banana (or very ripe non-frozen banana)
  • 1 apple or pear, roughly chopped
  • 1 persimmon, peeled and roughly chopped
  • (may substitute fruit with stone fruit or berries depending on the season)
  • 1/2 C yogurt (any kind) (or may use silken tofu or omit altogether)
  • 1-2 T maple syrup or honey
  • 1/2 C milk (any kind) (or use orange juice)

Instructions

  1. Blend until smooth, adding liquid last until you reach desired consistency. Taste for sweetness.
  2. Serve in the orange peel to save on dishes.

http://www.de-ma-cuisine.com/orange-kale-smoothie/

Wednesday

16

December 2015

0

COMMENTS

Garlic and Herb Bread

Written by , Posted in Appetizers, Bread, Cheese, Dairy-Free, Fruit, Gluten Free, Herbs, Nuts, Sandwiches, Snacks, Vegan, Vegetables, Vegetarian

GarlicHerbBread-6

If you need me this winter, I’ll likely be cooking soup, eating soup, chilling soup, reheating soup, and baking all sorts of bread to go with the soup. This is my favorite time of year for that reason. Normally, I’m content with bread still a bit warm from the oven to go with it. You know how they say that there’s nothing like freshly baked bread? They’re right. (By the way, who are “they”?) Sometimes it’s fun to do more than just have bread and butter though. I mean, I learned while in Paris that there is probably nothing I’d rather eat forever and ever than a French baguette with French butter. Literally. I might be willing to give up bacon. But, as we crunched into this herby, garlic studded bread, I couldn’t decide what I liked better, the bread or the Turkey Noodle Soup I’d made to go with it. And I didn’t miss the butter at all.

GarlicHerbBread-1

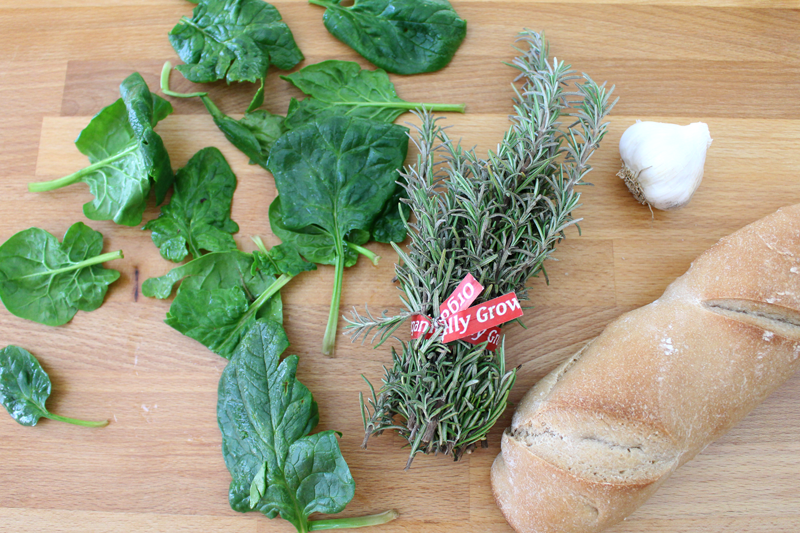
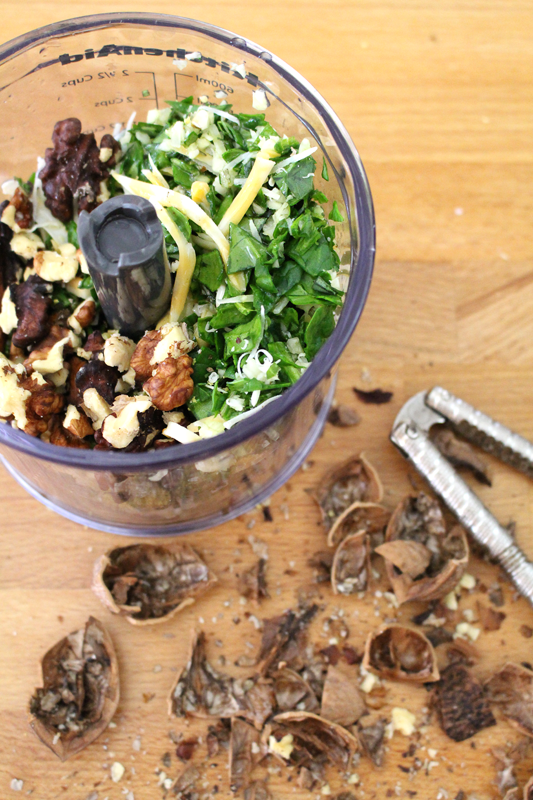
This isn’t an ordinary garlic bread. I threw in some fresh herbs (rosemary from last week’s Abundant Harvest Organics box, and basil from my garden) and a bunch of greens. I used spinach this time, but when I planned the recipe I did so with kale in mind. I’d also use arugula, mizuna, chard, or bok choy. If you don’t have greens, but you want it to be green in color, you could make it with peas… Why not?!

GarlicHerbBread-2

For the cheese I opted for colby jack. But, parmesan, goat, feta, cream cheese, or ricotta would be great too.

GarlicHerbBread-3

I added some nuts, just to make it interesting. To make it even more so, you could add: fennel, asparagus, mushrooms, cabbage, kohlrabi, olives, radicchio, apples (not with garlic or chives), or apricots (not with chives), depending on what’s in season.

GarlicHerbBread-4

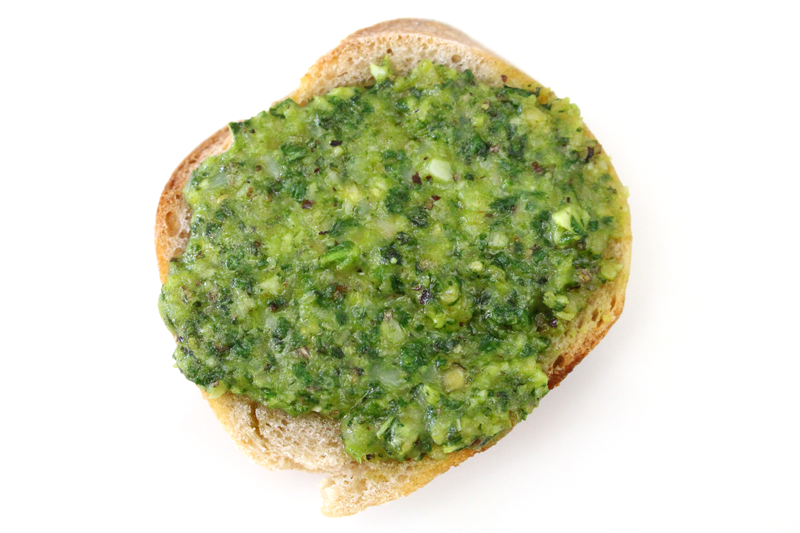
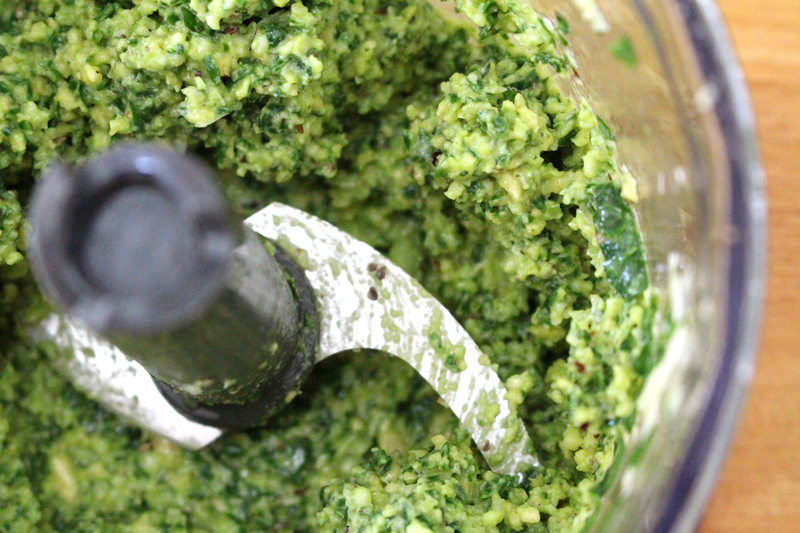
After I blended it up I realized that this is basically a pesto. Pestos often have something green, some nuts, garlic, cheese, and olive oil. This has all of that and more. The great thing about this realization is that if there are leftovers, there’s a lot to do with them.

– mix into pasta

– make into grilled cheese

– add to soup

– stir into risotto

– top a baked potato (or make into twice baked potatoes)

– add it to hasselback potatoes

GarlicHerbBread-5

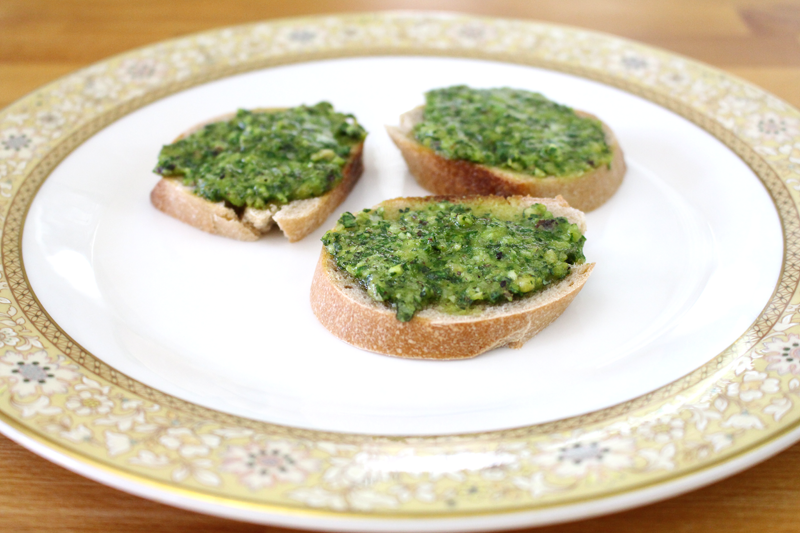
I love this bread served with whatever soup I’ve got on hand. But, on its own it also makes for a fabulous snack.

Happy Eating!

Garlic and Herb Bread

Prep Time: 10 minutes

Cook Time: 10 minutes

Total Time: 20 minutes

Yield: 10

Garlic and Herb Bread

Ingredients

  • 8-10 cloves garlic
  • 2 t fresh rosemary or thyme
  • 2 T fresh basil or chives
  • 2 C greens (kale, spinach, arugula, chard, mizuna, bok choy etc...) or use peas
  • (optional) 1C any: fennel, asparagus, mushrooms, cabbage, kohlrabi, olives, radicchio, apples (not with garlic or chives), or apricots (not with chives)
  • 1/2 to 1 C nuts (walnuts, almonds, hazelnuts)
  • 2 C cheese (parmesan - for vegan could use bread crumbs and capers*, goat, feta, cream cheese, or ricotta), grated or crumbled
  • 1/4 to 1/3 C olive oil
  • 1 t lemon zest
  • 2 t lemon juice
  • to taste salt
  • good pinch cayenne
  • 1 loaf of your favorite bread, sliced

Instructions

  1. Place garlic through cayenne in a food processor. Blend for 20-40 seconds, scrape down the sides and blend for about 10 seconds more. Taste for seasoning.
  2. Spread mixture on bread. Either broil for 2-5 minutes (watch it carefully so it doesn't burn), bake until bubbly and browned, or put between the slices of bread (or slice bread horizontally), wrap in foil, and bake until warmed through.

http://www.de-ma-cuisine.com/garlic-and-herb-bread/