De Ma Cuisine

Butter Archive

Friday

19

February 2016

0

COMMENTS

Savory Crêpes

Written by , Posted in Beans, Breakfast, Brunch, Cheese, Dinner, Eggs, Fruit, Herbs, Leftovers, Legumes, Lunch, Main Dishes, Meat, Nuts, Poultry, Quick and Easy, Vegetables, Vegetarian

SavoryCrepes-3

Right now my thoughts are flipping between crêpes and the onion rings I ate right before I made the crêpes. Of both, I couldn’t wait to eat more. But, let’s talk about the crêpes today (those onion rings can wait until next week). When I was a kid, mom made crêpes every once in a while. If she made them for supper, we usually had to eat a savory crêpe or two before we were allowed to eat one covered with maple syrup, powdered sugar, or honey. I may have turned my nose up at it then, but now I see the merit in the savory crêpe.

Crêpes are what I’d imagine would result if a tortilla and a pancake had a baby. A delicious baby… This is getting weird… They’re light, soft, and a bit crispy around the edges. They’re great with butter and maple syrup, of course, but also the perfect vessel for some savory goodies.

SavoryCrepes-1

I like the idea of a multifaceted filling. It starts with a purée. I had some pumpkin in the freezer that I reheated and seasoned with salt and cayenne. Simple. You could also try cauliflower, sweet potato, or beets.

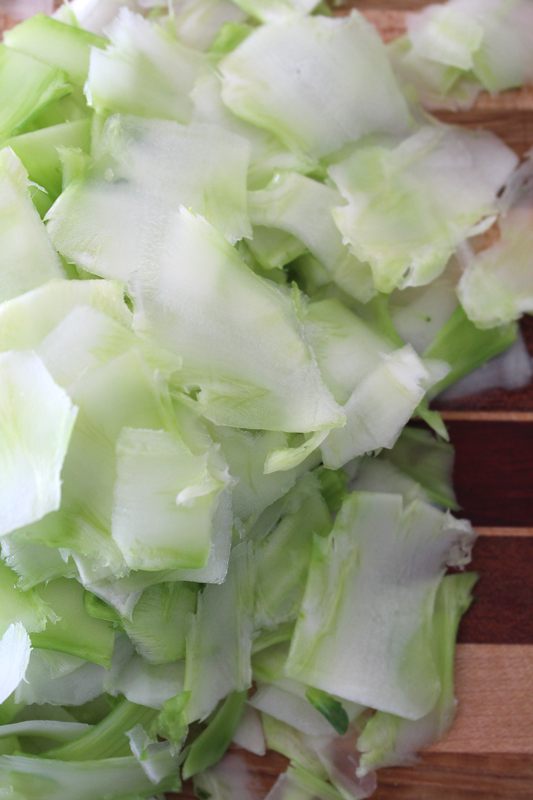
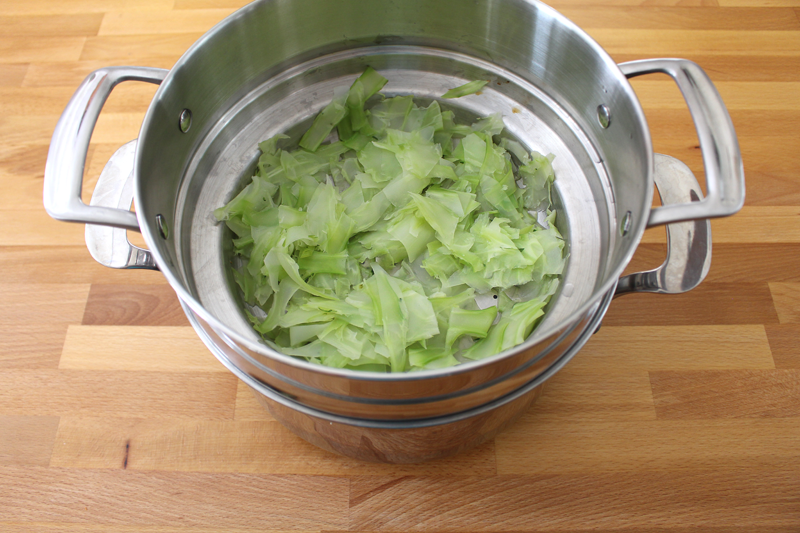
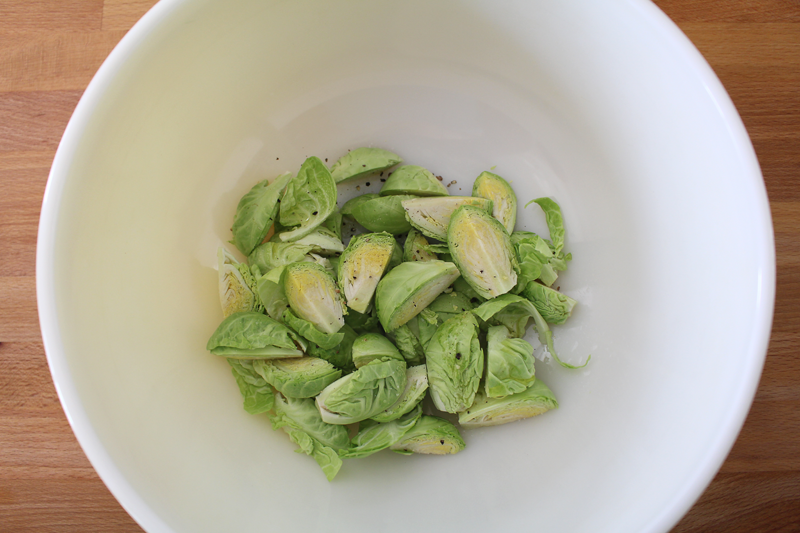
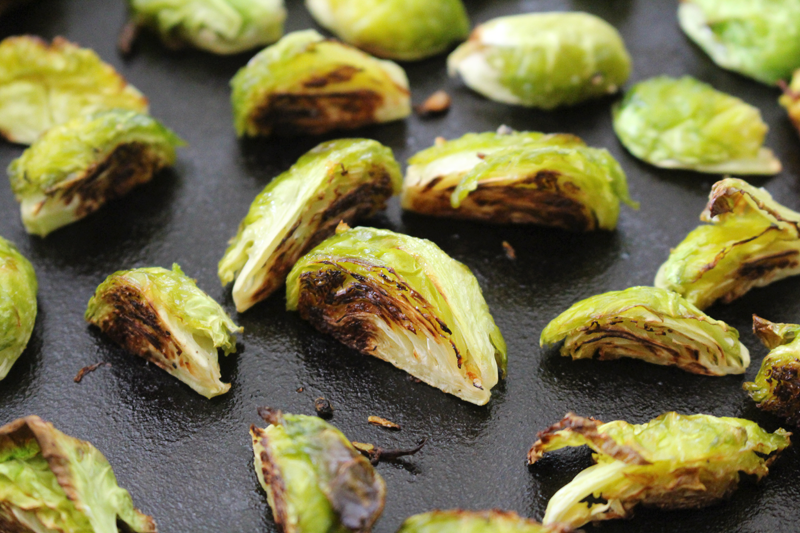
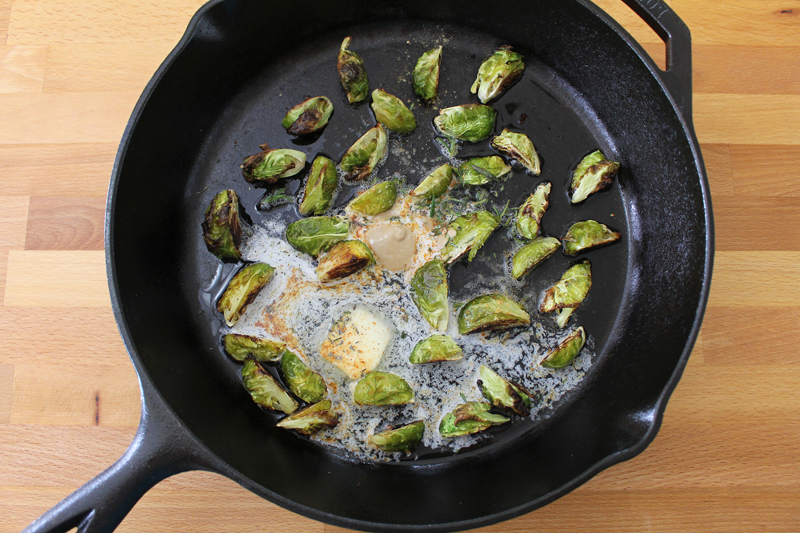
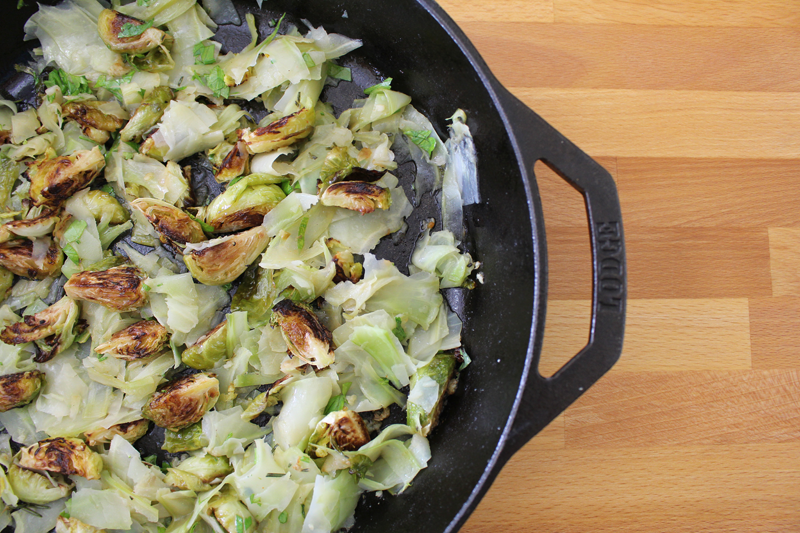
I topped the purée with some sautéed broccoli rabe, peas, and radishes. You might substitute with roasted or raw garlic, broccoli, any greens that you have on hand, apples, cabbage, summer or winter squash, carrots, or even white beans. If you have some fresh herbs on hand, things like basil, thyme, rosemary, or mint would be great. Just use whatever herbs would go well with the veggies that you’re using.

If you wanted to add a little more protein, throw in some leftover shredded chicken or chopped up crispy tofu.

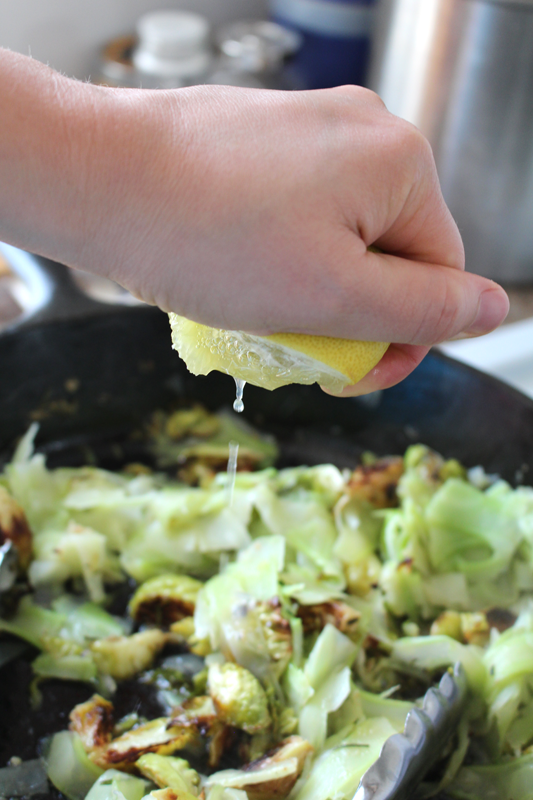
And then, to top it all, I like a spoonful of plain or Greek yogurt, some walnuts, parmesan, and a squeeze of lemon. You might substitute with silken tofu or coconut milk, browned butter or cream, ricotta or cream cheese.

SavoryCrepes-2

If you’ve got any left, they will make the perfect dessert (Nutella crêpes anyone?!), or can be reheated the next day for a quick and easy breakfast. You could do simple, just maple syrup, or maybe top them with some ricotta, cottage cheese, or silken tofu, and some chopped apples sprinkled with cinnamon and a squeeze of lemon. Two meals, one dish.

Happy Eating!

Savory Crêpes

Prep Time: 15 minutes

Cook Time: 20 minutes

Total Time: 35 minutes

Yield: 4

Serving Size: 2 crêpes

Savory Crêpes

Ingredients

  • 1 C purée (any: winter squash, cauliflower, sweet potato, beet)
  • 1 T olive oil
  • 1 C any mix ins: broccoli rabe, peas, roasted or raw garlic, kale, radishes, apples, cabbage, white beans, summer squash, carrots; chopped if warranted
  • 1 C any proteins (optional): cooked chicken, crispy tofu
  • 1 t to 1 T any: thyme, rosemary, basil, mint; chopped
  • to taste salt
  • 8 crêpes
  • 1 C any toppings: ricotta, cream cheese, yogurt, silken tofu, parmesan cheese, browned butter, cream, coconut milk, walnuts, almonds, lemon zest; chopped if warranted
  • lemon wedges, for serving

Instructions

  1. (Prepare crêpe batter if it needs to sit for an hour in the fridge.)
  2. Make your purée (roast or steam veggies, blend, season with salt and, if desired, cayenne).
  3. Heat skillet, add olive oil. Sauté mix ins until tender (about 10 minutes, depending on the veggies) over medium-low heat, stirring occasionally. Add things like greens and garlic near the end. Re-heat protein, if using. Add to mix ins. Add herbs. Taste for seasoning.
  4. While mix ins are cooking, prepare your crêpes (keep them warm in a 200F oven on a baking sheet).
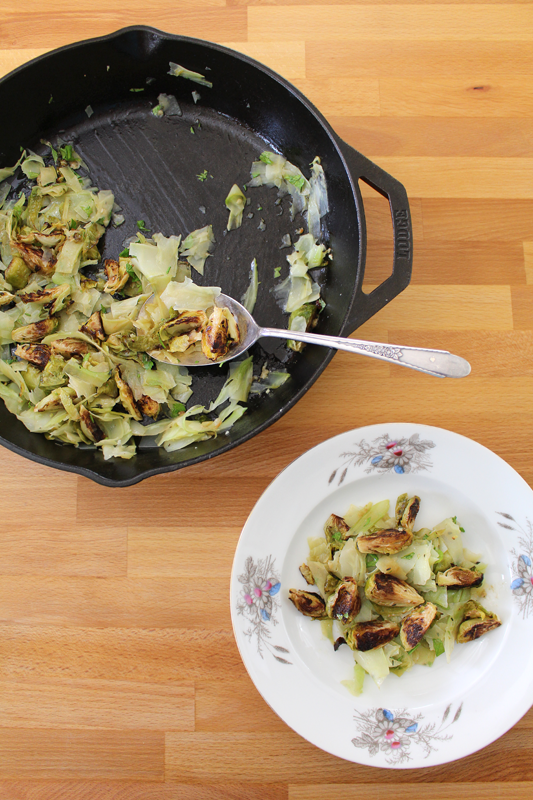
  5. To assemble, spoon some purée down the center of the crêpes. Top with mix ins. Roll up (the easiest way to do this is to hook a fork inside the edge of the crêpe and roll it in on itself). Serve with a squeeze of lemon.
http://www.de-ma-cuisine.com/savory-crepes/

Thursday

26

March 2015

0

COMMENTS

Chicken Noodle Soup

Written by , Posted in Dinner, Fruit, Gluten Free, Herbs, Kid-Friendly, Lunch, Main Dishes, Meat, Pasta, Poultry, Soups, Vegetables

ChickenNoodleSoup-6

I know that Chicken Noodle Soup is one of those meals that’s made when someone feels under the weather. But, I want to enjoy it any day. It’s just so good.

ChickenNoodleSoup-2

It starts with some chicken that’s cooked in a bit of olive oil. The skin gets all crispy and the inside tender and juicy. It takes a while, just be patient. Once the chicken is cooked, it rests for a bit, and gets cool enough to handle. And those crispy bits on the bottom of the pan, they’re on their way to make this soup simply divine.

ChickenNoodleSoup-1

A little butter and oil is added to that same pan. No washing out required. The bits at the bottom will loosen as you stir the veggies and help make the broth a deep, rich brown.

Back to the veggies for a sec – there are tons of ’em. Fennel, carrots, kohlrabi, greens, cauliflower… and even more that you could add, depending on what you have on hand (check out the recipe for more). If you’re using this as an under the weather helper, it’s perfect because it’s packed with nutrients. If you’re not, well, it’s great for the same reason. 😉

ChickenNoodleSoup-3

The veggies are cooked covered, for about 10 minutes. They just need to sweat it all out. No big deal.

ChickenNoodleSoup-4

Once they’re ready, the chicken, which has been shredded, is added, along with the stock.

ChickenNoodleSoup-5

I like to cook the pasta separately. I have a hard time making the right amount of food for just two of us, so this way I can save the leftovers for another day without worrying that the pasta will absorb all the liquid and become a soggy, mushy mess. If you’re going to eat it all in one sitting, feel free to cook the pasta in the soup (you may want to add a bit more stock).

ChickenNoodleSoup-7

The pasta is divided into the bowls and topped with some soup for a hearty and delicious meal.

Happy Eating!

Chicken Noodle Soup

Prep Time: 10 minutes

Cook Time: 1 hour, 7 minutes

Total Time: 1 hour, 17 minutes

Yield: 4

Chicken Noodle Soup

Ingredients

  • 2 T olive oil
  • 3-4 chicken drumsticks (or 2-3 thighs, or 1 breast) (ending up with about 1-2 C cooked and shredded meat)
  • to taste salt
  • to taste pepper
  • 1 T butter
  • 1 t olive oil
  • 1 C fennel (any part), chopped
  • 1 C cauliflower, chopped
  • 1 C carrot, chopped
  • 1 C onion (or shallot or leek), chopped
  • 1-2 C greens (kale, collard greens, chard etc), chopped
  • 1/2 C turnip (or rutabaga), chopped
  • 1/2 C radish, chopped
  • 1/2 C kohlrabi, chopped
  • (could also add celery, broccoli, parsnip, summer squash, bell pepper, peas, green beans, beets, asparagus, or mushrooms)
  • 3 cloves garlic, diced
  • 1 T balsamic vinegar
  • 1/2 t each dried (or 1/2 T fresh) rosemary, thyme, basil, and parsley (or replace all four with tarragon, dill, and parsley)
  • pinch each cayenne, ginger, and paprika
  • 6-8 C stock (vegetable or chicken)
  • 1 C pasta (any kind)
  • 1 T butter
  • 1 T lemon juice
  • lemon slices, for serving

Instructions

  1. Heat a soup pot over medium heat. Add 2 T olive oil. When oil is hot, add chicken and sprinkle with salt and pepper. Cook for about 30-35 minutes (for drumsticks), or until internal temperature reaches 180F, turning every 5 minutes or so.
  2. Remove chicken from soup pot and let cool slightly on a paper towel lined plate. Return soup pot to the heat, add 1 T butter and 1 t olive oil. Add fennel through kohlrabi, stir to scrape browned bits off the bottom of the pan, and cook covered for about 10 minutes, stirring occasionally. Add garlic and cook for 1 minute. Add balsamic vinegar and deglaze the pan, scraping the bottom, about 1 minute.
  3. Add seasonings and stock. Bring to a boil, then reduce to a simmer for 15-20 minutes.
  4. Cook pasta in boiling salted water. Drain.
  5. Remove soup from heat, stir in 1 T butter and lemon juice. Taste and adjust seasoning if needed.
  6. Divide pasta between 4 bowls and top with soup. Serve with a lemon wedge for squeezing.
http://www.de-ma-cuisine.com/chicken-noodle-soup/

Wednesday

25

February 2015

0

COMMENTS

Broccoli and Cauliflower Stem “Pasta”

Written by , Posted in Cheese, Dinner, Fruit, Gluten Free, Herbs, Lunch, Main Dishes, Nuts, Pasta, Roasting, Vegetables, Vegetarian

BroccoliStemPasta-1

You ever have one of those nights when you’re all ready to make dinner and then you realize that you’re missing one of the key ingredients? I know I have. Just today I realized that I don’t have enough beans to make the Enchilada Casserole and the Mac and Cheese with Pinto Beans that I have planned for tonight’s dinner and tomorrow’s lunch. So, I’ll improvise. The mac and cheese will likely end up with garbonzo beans. It may even end up as a better dish.

This happens to me with pasta sometimes. For all of the planning and organizing that I do, I still miss things. Or, something changes and I need an easy dish. Pasta’s a great one for that. But, when I’m out? Well, now that doesn’t matter so much. I have a solution.

BroccoliStemPasta-5

Veggie scraps and stems don’t usually go to waste in our home, because I use them to make stock and then they’re composted. But, what if they could be used for eating?! I mean, there’s a ton of goodness that is being wasted, even if it is going towards the garden.

BroccoliStemPasta-6

I sliced off the tough outer peel. Then, with a vegetable peeler (a mandolin would work here too), I sliced, or peeled them super thin.

BroccoliStemPasta-9

Then they steamed for about 10 minutes. And, much to my delight, had the consistency and texture of fresh homemade cooked pasta.

Winner!

BroccoliStemPasta-3

The stems cooked up while some brussels sprouts roasted. I know that some don’t think they like brussels. I didn’t until a few years ago either. I suspect because I’d never had them roasted. For me, pretty much any veggie roasted will be a hit.

BroccoliStemPasta-4

I tossed them with some olive oil, salt, and pepper. Super simple.

BroccoliStemPasta-7

I thought that, rather than getting a baking sheet dirty, I might as well use an oven proof skillet and roast them in there. They turned out just perfect!

BroccoliStemPasta-8

And then it all came together. A bit of butter, some olive oil, dijon mustard, and some seasonings were added to the pan. They didn’t have long to cook.

BroccoliStemPasta-10

I took it off the heat, added those cooked “pasta” stems, and a good squeeze of lemon.

BroccoliStemPasta-11

A handful of fresh parsley from the garden completed things.

BroccoliStemPasta-12

BroccoliStemPasta-2

It would be great topped with a fried egg, alongside a freshly baked baguette, or, as I ate it, just on it’s own, topped with parmesan and crunchy almonds.

I ate my portion and then picked out the rest of the brussels sprouts and ate them. Sometimes I have a hard time sharing.

Happy Eating!

Broccoli and Cauliflower Stem “Pasta”

Prep Time: 25 minutes

Cook Time: 21 minutes

Total Time: 46 minutes

Yield: 2

Broccoli and Cauliflower Stem “Pasta”

Ingredients

  • 1/2 lb. brussels sprouts, quartered
  • 1 t olive oil
  • to taste salt
  • to taste pepper
  • 2 1/2 - 3 C broccoli and cauliflower stems, thinly sliced or shaved (a veggie peeler works great)
  • 3 T unsalted butter
  • 1 T olive oil
  • 1 t fresh rosemary (or 1/2 t dried), chopped
  • 1/4 t dried thyme (or 1/2 t fresh)
  • pinch cayenne
  • to taste salt
  • to taste pepper
  • pinch ginger
  • 1 clove garlic, minced
  • 1 t dijon mustard
  • 1-2 T fresh parsley, chopped
  • 2 T lemon juice
  • 1-2 T parmesan, shaved
  • 2-4 T almonds, chopped

Instructions

  1. Pre-heat the oven to 425F. Toss brussels sprouts with 1 t olive oil, salt, and pepper. Place in an oven proof skillet cut side down. Roast for 10 minutes, flip carefully to the other cut side, and roast for 7-10 minutes more.
  2. Bring 1" water to a boil in a pot with a steamer basket and lid. Place shaved stems in the steamer basket and cover. Steam for 5-10 minutes, or until tender.
  3. Remove skillet with brussels sprouts from the oven. Place on the stove top (being careful of the handle which will be very hot). Add butter through dijon, and cook over medium-low heat for about a minute, stirring often. Remove from heat. Add parsley, lemon juice, and steamed stems. Taste and adjust seasoning if needed.
  4. Serve topped with parmesan and almonds.
http://www.de-ma-cuisine.com/broccoli-and-cauliflower-stem-pasta/

Thursday

7

August 2014

6

COMMENTS

Peach Sauce

Written by , Posted in Breakfast, Brunch, Canning, Condiments, Dessert, Fruit, Gluten Free, Kid-Friendly, Sauces, Vegetarian

PeachSauce-13

Last week I ordered twenty pounds of peaches as an add on from Abundant Harvest Organics. I thought I’d bitten off more than I could chew (haha, no pun intended) and worried that they may spoil before I got to them.

None did.

And now I have a yummy peach sauce to share with you!

PeachSauce-1

Feel free to substitute your favorite stone fruit if you’d like. Plums, nectarines, apriums, pluots, apricots… they’d all be amazing.

PeachSauce-2

Start by halving the peaches. Remove the pit, and slice or roughly chop. It’s going to be blended in a bit, so don’t worry about the shape.

PeachSauce-5

About eight to ten cups will do just fine. Out of my twenty pounds of peaches, I ended up with roughly 45 cups of sliced peaches in total. This sauce was just a small portion (I froze the rest – more about that another week).

PeachSauce-6

I added two tablespoons of butter to a large hot pot. If you don’t want to use butter, coconut oil would be just fine. The fat adds a rich quality to the sauce that I love. If you don’t want to add either, that’s cool too.

PeachSauce-7

Peaches are dumped into the hot browning butter.

Get ready for the smell. It’s amazing!

PeachSauce-10

After the peaches have cooked for about twenty minutes (and then rested for ten – not a must, I just needed more time to work on a different recipe, so they had to wait), they should look something like this.

PeachSauce-8

PeachSauce-9

I had a few oranges still hanging around from spring boxes (wow they lasted a long time!!), so I whisked them up with the zest and juice from one lemon, a bit of coconut palm sugar, and a pinch of salt.

PeachSauce-11

And then, orangy-lemon juice meet smooshy peaches.

Orangeyou glad I didn’t say… I don’t know… banana?!

Sorry. Kinda.

PeachSauce-12

After the sauce cooked up for a while longer, I blended it up with my hand blender. A regular blender will work just fine too (just be sure to remove the middle part of the lid and cover the hole with a clean kitchen towel).

One more tablespoon of butter is stirred in after the sauce is blended.

Extra richy richness.

PeachSauce-14

This is gonna be good… I’m hoping that Tim will make some more Vanilla Bean Ice Cream so I can top it with some of this sauce. You could make this even more awesome by roasting some fruit to plomp on top. It would be great over French Toast or Cornmeal Pancakes, or used in place of jam.

Or, just eat it by the spoonful…

Happy Eating!

Peach Sauce
 
Recipe Type: Dessert, Sauces, Stone Fruit, Gluten-Free, Breakfast
Author: Rachel Oberg – De Ma Cuisine
Prep time:
Cook time:
Total time:
Sweet summer peaches are cooked up in butter and blended to make a delicious sauce.
Ingredients
  • 3 T unsalted butter (divided 2 T, 1 T)
  • 8-10 C ripe peaches, sliced or roughly chopped
  • 1 t vanilla extract
  • pinch salt
  • juice from 1 lemon
  • zest from 1 lemon
  • juice from 2-3 oranges
  • 3 T coconut palm sugar (brown sugar, maple syrup, or honey will work too)
Instructions
  1. Heat a large pot and add 2 T of butter. When butter is hot, add peaches. Cook over medium-low heat, stirring occasionally, for 20 minutes, or until peaches are very soft. Let stand 10 minutes (optional).
  2. Whisk together vanilla through sugar. Add to peaches. Bring to a boil. Reduce to a simmer and cook for 20 minutes.
  3. Blend with a hand blender (it helps to tip the pot to the side a bit to prevent splattering) or a blender (in batches, with the middle part of the lid removed and a clean towel covering the hole). Stir in remaining 1 T of butter.
  4. To store, ladle into clean pint jars, leaving at least 1/2″ of room at the top. I prefer to store the sauce in the freezer, freezing uncovered, then adding the lids once the sauce is frozen.
 
Notes
Yields 3 pint jars.


Thursday

4

August 2011

0

COMMENTS

Roasted Garlic Butter

Written by , Posted in Condiments, Roasting


Roasted Garlic Butter
Recipe Type: Condement
Author: Rachel Oberg – De Ma Cuisine
Cook time: 45 mins
Total time: 45 mins
Ingredients
  • 1 head of garlic
  • olive oil
  • butter
Instructions
  1. Heat oven to 350F.
  2. Cut top of a head of garlic exposing the cloves, drizzle with olive oil, wrap in foil. Roast 20-45 minutes, depending on your oven.
  3. Let it cool, squeeze cloves out.
  4. Mash into butter.