De Ma Cuisine

Eggs Archive

Thursday

2

July 2015

1

COMMENTS

Potato Salad

Written by , Posted in Dinner, Eggs, Fruit, Gluten Free, Herbs, Kid-Friendly, Lunch, Nuts, Potatoes, Potlucks, Salads, Sides, Vegetables, Vegetarian

PotatoSalad-7

Nothing says summer and comfort food all in one bite like potato salad. My mom makes great potato salad. We ate it a lot growing up (and still do, when we go home to visit). I never get tired of it. There are so many things you can do with potato salad. This one is a classic that’s been tweaked a bit… In a good way.

PotatoSalad-1

For me, classic means hard boiled eggs, potatoes, and a creamy sauce. There might be something crunchy in there too – celery, pickles, red onions, bacon…

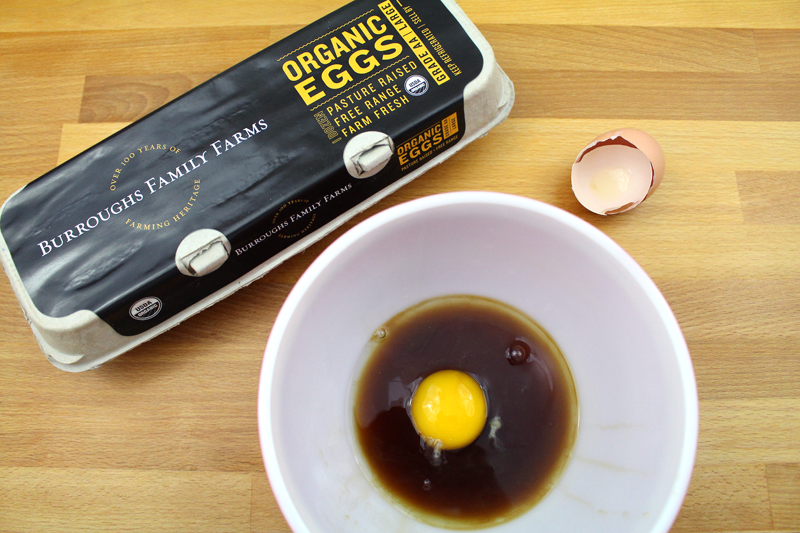
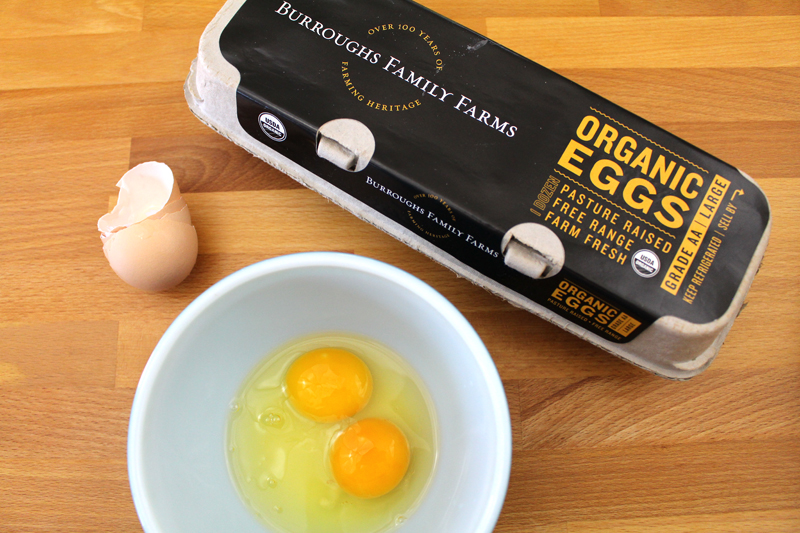
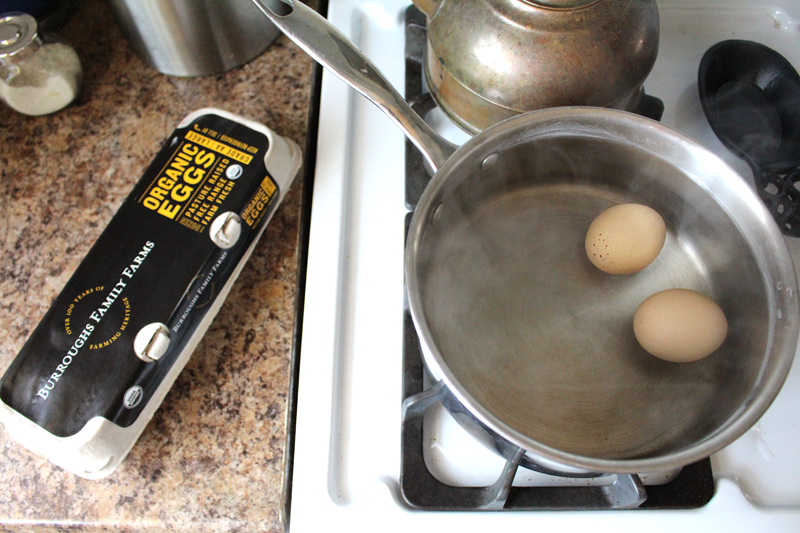
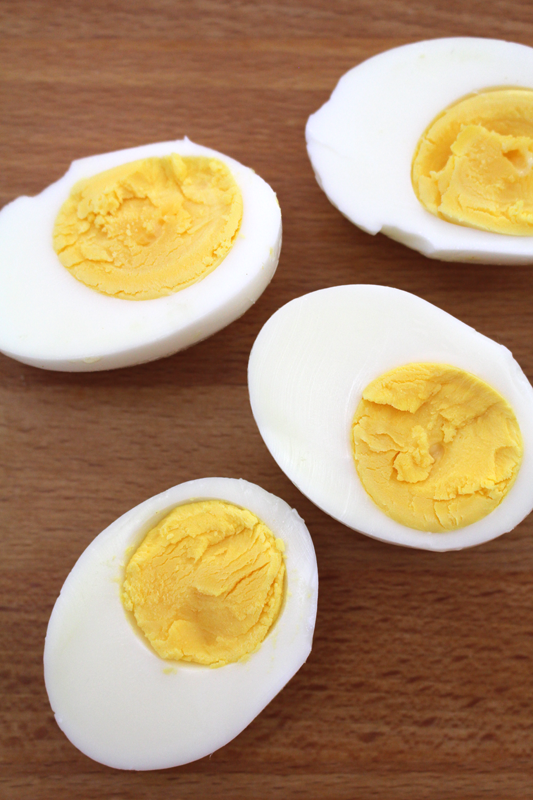
I didn’t vary on the eggs. Hard boiled goodness. I know there are many schools of thought on the perfect way to boil an egg. I do it one of two ways: I bring some water to a boil, add about 1 t white vinegar (so the whites seize up if the shell cracks), then either boil for 15 minutes, or turn the heat off and cover and let them stand for 15 minutes. Recently we watched an episode of Good Eats and Alton Brown did the turn off the heat method, so I tried it. It worked. The other way does too (the way my mom taught me).

PotatoSalad-2

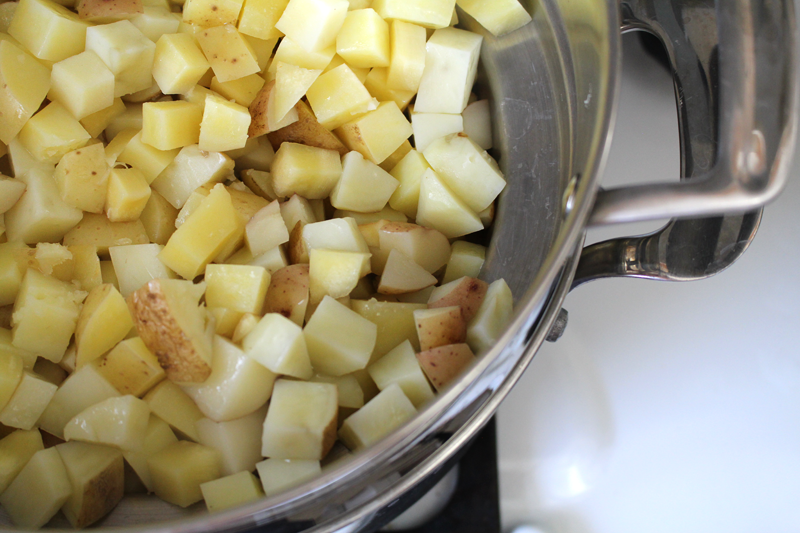
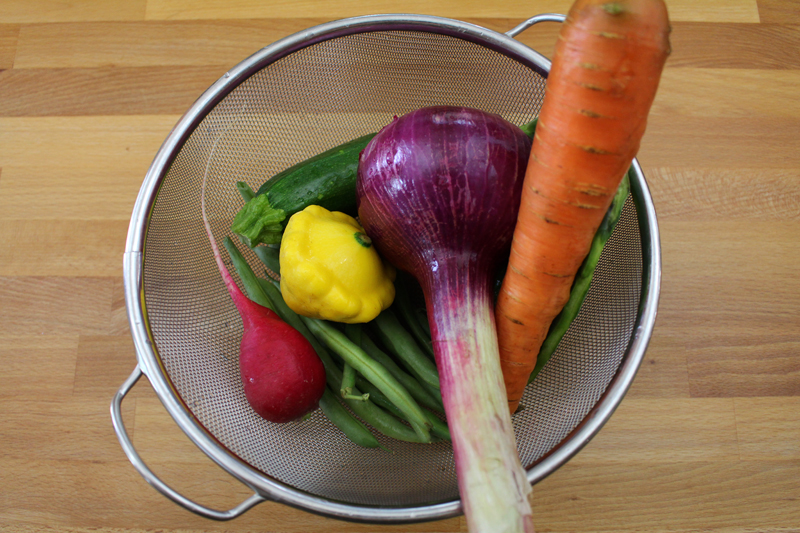
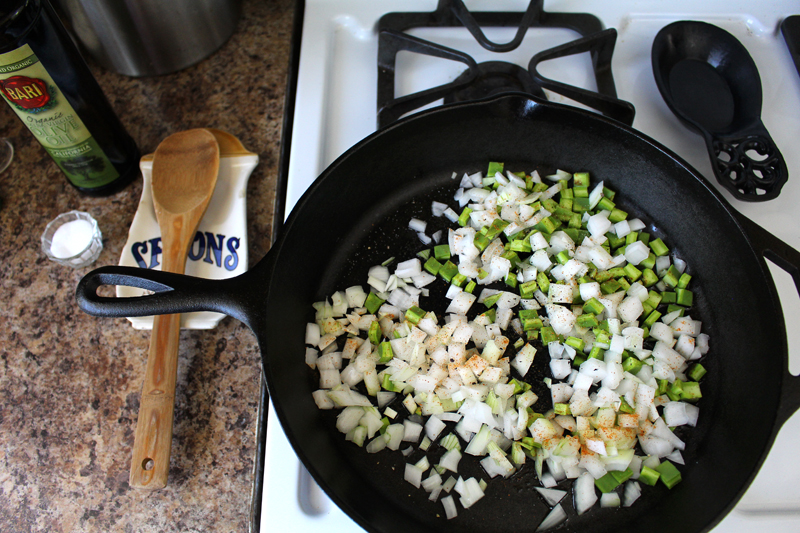
I strayed a bit with the potatoes. Only a bit though. I added some parsnips. I almost added turnips… Maybe next time. But, parsnips, try them if you want to be a little bit creative, but not too. They look like the potatoes (you know, in case anyone is picky about color), and they only taste a tiny bit different. I mean, I know they’re in there and I hardly notice them.

PotatoSalad-3

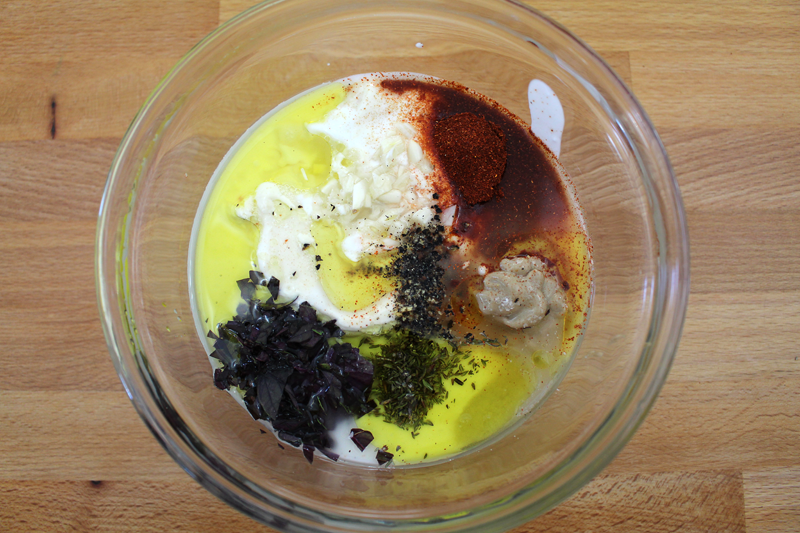
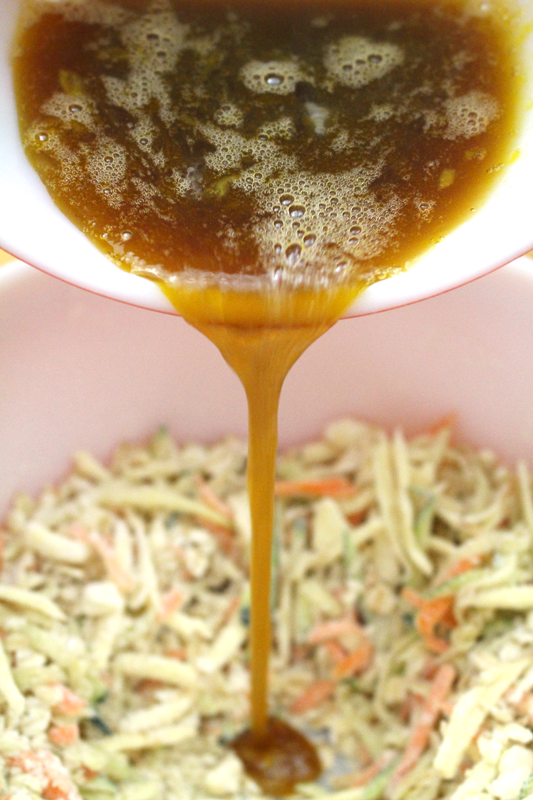
The creamy dressing for my potato salad is usually a combination of yogurt and mayo. This time, I had some homemade mayo on hand (made with Burroughs Family Farm eggs). Since you’re not really supposed to keep homemade mayo around for too long, this was the perfect way to use it up. I also added some plain yogurt, and olive oil (just because I love the taste). There’s some garlic, herbs, and paprika. Salt, pepper, and dijon mustard. I don’t know if I’ve ever followed a potato salad recipe other than my mom’s, so I don’t know how far from normal I’ve gone. I also don’t care all that much. Because Tim thought it tasted great and so did I.

PotatoSalad-4

It’s really a four-step dish. Steam potatoes (then cool). Cook eggs so that the perfectly golden yolks are firm. Whisk dressing. Assemble. And then, usually I stand there “making sure it tastes ok”, which means eating about half of it before it goes into the fridge. It’s one of my favorite things to eat. I take after my mom.

PotatoSalad-5

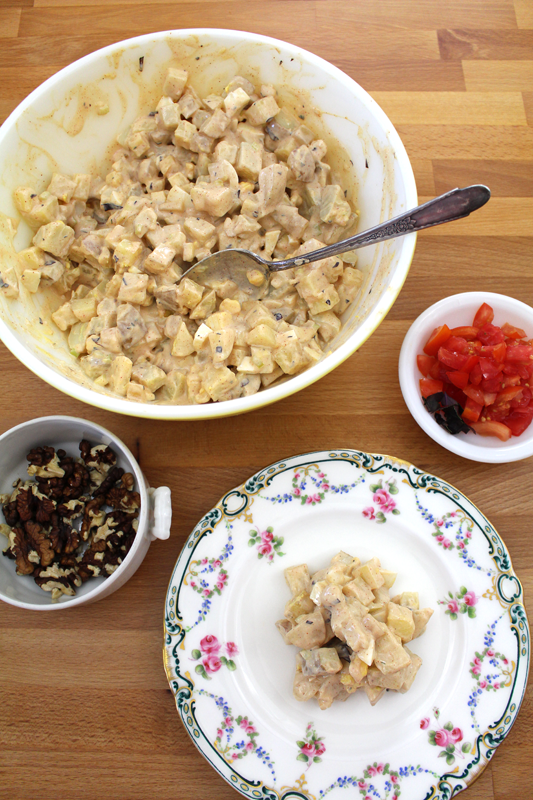
This was great on its own. It was fabulous topped with some chopped walnuts and tomatoes. But, I really couldn’t pick a way that I preferred it. So, if you want it to be more classic, leave the toppings off. If you want to spice things up, add them. If you add them you’re also adding more protein (walnuts), and a healthy fruit (tomato – yes, it’s technically a fruit).

PotatoSalad-6

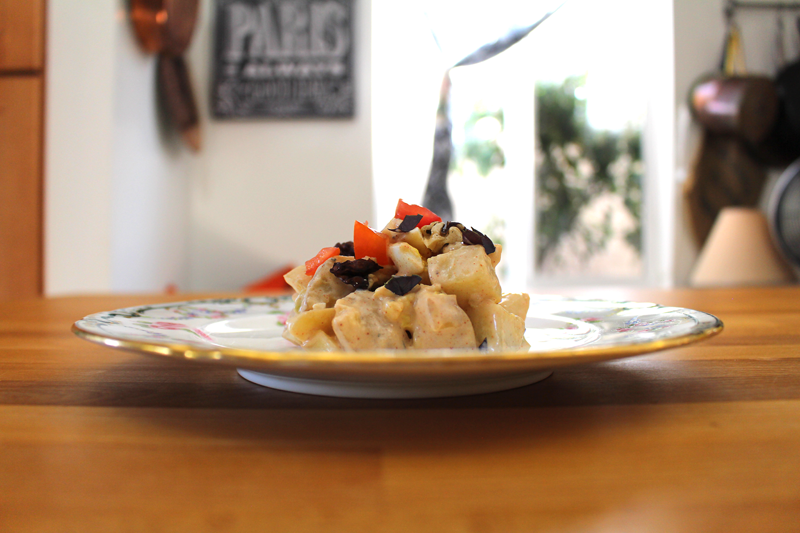
It’s best eaten outdoors, while barbecuing, surrounded by loved ones. But, can also be enjoyed for breakfast (ask my mom), lunch, or dinner, with sandwiches, other salads, burgers, grilled meats and veggies, or just on its own.

Happy Eating!

Potato Salad

Prep Time: 15 minutes

Cook Time: 10 minutes

Total Time: 25 minutes

Yield: 6-8

Potato Salad

Ingredients

  • 2 1/4 lbs (about 8 medium) potatoes, cubed
  • 1/2 lb. (about 2 medium) parsnips (optional, can use all potatoes), cubed
  • 1/2 to 3/4 C mayo (homemade if you have it)
  • 3/4 to 1 C plain yogurt
  • 1-2 T dijon mustard
  • 2 T olive oil
  • 2 cloves garlic, minced
  • 1 T fresh basil, finely chopped
  • 1/2 to 1 hot pepper (optional), ribs and seeds removed, minced
  • 1 t paprika
  • 1 t fresh thyme (or 1/2 t dried)
  • 2 T white vinegar
  • to taste salt
  • to taste pepper
  • 2-4 hard boiled eggs, chopped
  • 1 C tomatoes, chopped, for topping
  • 1/2 C walnuts, chopped, for topping
  • 2 T combo of any or all: chives, parsley, or basil, chopped, for topping

Instructions

  1. Heat a large pot with about 1 1/2" water at the bottom. Bring to a boil. Add potatoes and parsnips to a steamer basket and add to the pot. Cook for about 10-12 minutes, or until they're tender. Cool completely.
  2. Whisk together mayo through pepper. Taste and adjust seasoning if needed.
  3. Toss vegges with dressing. Fold in eggs. Taste and adjust seasoning if needed. Refrigerate for an hour or serve immediately.
  4. Serve topped with tomatoes, walnuts, and herbs, or just on its own.
http://www.de-ma-cuisine.com/potato-salad/


Thursday

18

June 2015

1

COMMENTS

Blueberry Cobbler

Written by , Posted in Baking, Breakfast, Brunch, Dessert, Eggs, Fruit, Gluten Free, Holiday, Kid-Friendly, Vegetables, Vegetarian

BlueberryCobbler-4

My husband, Tim, is the sweets person in our home. I can devour an entire tray of roasted summer squash, a bag of salt and vinegar potato chips, or a plate of bruschetta. But, when it comes to desserts I just don’t really need them all that often (except the lemon curd with strawberries and meringue that we had for dessert on my birthday… or the homemade vanilla mascarpone and chocolate swirl ice cream bon bons that Tim made for my birthday… I need those right now). So when Tim hollers from the other room that a sweet treat that I’ve made is really good, that’s when I know it’s something worth sharing.

BlueberryCobbler-1

Since it’s tougher to experiment with baking than with regular cooking, I don’t do it all that often. There’s just too much room for error. But, I had success a few weeks ago when I made some whole wheat parsnip cookies, so I adapted those as a starting point for a blueberry cobbler.

BlueberryCobbler-2

Any fruit could be used, depending on what’s in season. But, it’s berry season right now, and we’ve got about 6 pounds of blueberries in the fridge. Some might end up as jam, a few in desserts, but most will just be eaten raw. That’s usually my preferred method for consuming berries.

But, while raw is often best, this cobbler got super thick and syrupy. I might just eat the berry portion on their own if it weren’t for the yummy topping that I can’t get enough of. But, if there’s extra, may I suggest those berries over ice cream? And the cobbler topping, well if there’s extra (I had extra because I used a smaller pan), they make great cookies.

BlueberryCobbler-3

That topping has veggies. Sorrynotsorry. Tim yelled that there were squash and carrots in his cobbler. They won’t make your cobbler taste like vegetables, don’t worry. But, my suggestion is that if you have picky family members who don’t like to see anything green at dessert, just stick to parsnips. They’re not as noticeable.

BlueberryCobbler-5

Other items of note: I used a gluten-free flour blend (from Gluten-Free-Girl and The Chef). You can substitute whole wheat or all purpose if you prefer. I used maple syrup as the only sweetener. No refined white sugar here. I’ve been on a maple syrup kick as of late, using it to sweeten everything from yogurt to coffee. But, honey would be great too. Just remember that honey has a distinct taste and may be a bit sweeter than maple syrup, so adjust accordingly. I might go for half honey, half maple syrup to start.

BlueberryCobbler-6

This is a perfect summer dessert for your next barbecue or picnic, but it can also be enjoyed for breakfast. Just add a dollop of Greek yogurt.

Happy Eating!

Blueberry Cobbler

Prep Time: 20 minutes

Cook Time: 1 hour

Total Time: 1 hour, 20 minutes

Yield: 4-6

Blueberry Cobbler

Ingredients

  • 1/2 C gluten-free flour
  • 1/8 t salt
  • 1/4 t baking powder, sifted
  • 1/4 t baking soda, sifted
  • 1/8 t cinnamon
  • pinch ginger
  • 1/4 C butter, cold, cut into small cubes
  • 1/2 C oats
  • 1 C combination of parsnips, carrots, and summer squash (for picky eaters: parsnips are the least visible), grated
  • 1 t lemon zest, chopped
  • 1/4 C maple syrup
  • 1 egg
  • 1 t vanilla extract
  • 1 T cornstarch
  • 1 t vanilla extract
  • 3 T orange juice
  • pinch salt
  • 1/2 C maple syrup
  • 1/4 t cinnamon
  • 2 1/2 C blueberries (strawberries, peaches, nectarines, plums, blackberries, apricots, apples, pears, or persimmons may also be used - chopped if larger fruit)

Instructions

  1. Pre-heat the oven to 350F. Place a rack in the lower third of the oven.
  2. Whisk flour through ginger. Mix in butter with a pastry blender or fingers until chunks of butter are pea sized or smaller. Add oats through parsnips (if veggies weren't grated already, place butter mixture in the freezer while you grate).
  3. In a separate bowl whisk together maple syrup, egg, and 1 t vanilla extract. Make a well in the dry ingredients and add the wet. Stir to combine. Set dough in the fridge while you do the next step.
  4. Whisk cornstarch through 1/4 t cinnamon. Toss with the fruit. Pour fruit in a greased 6x6 or 8x8 baking dish. Top with a large spoonfuls of dough*. Bake for 50-60 minutes, or until topping is no longer gooey and fruit is bubbly and hot (baking time may vary depending on the size of the dish - I used a 6x6 dish). Let stand for 10-20 minutes before serving.

Notes

* Extra dough may be dropped onto an ungreased baking sheet and baked for 12 minutes, cooled for 5 min on the baking sheet, and then cooled on a cooling rack.

http://www.de-ma-cuisine.com/blueberry-cobbler/

Thursday

28

May 2015

0

COMMENTS

Customizable Panzanella Salad

Written by , Posted in Beans, Beef, Bread, Cheese, Condiments, Dairy-Free, Dinner, Eggs, Fish, Fruit, Gluten Free, Grains, Herbs, Legumes, Low Carb, Lunch, Main Dishes, Meat, Nuts, Pork, Poultry, Quick and Easy, Quinoa, Salads, Sides, Toasting, Vegan, Vegetables, Vegetarian

PanzanellaSalad2015-6

There are so many things that this salad can be. It can be vegan, paleo, low-carb, gluten-free, high-protein… It all depends on what you add to it.

PanzanellaSalad2015-1

I made some baguettes a few weeks ago that I wasn’t thrilled with. They’re prefect for croutons though. If you prefer to avoid bread, quinoa or tofu would be great bread replacers. Or, if you’re eating gluten-free, your best gluten-free bread will be just perfect.

PanzanellaSalad2015-2

To make up the bulk of this salad, I opened this week’s Abundant Harvest Organics box then pulled a few things from the produce drawer. But this is where there are so many ways you can make this salad your own.

Beyond tons of veggie options, here are a few ways you could adapt this dish:

Protein a Plenty: Add beans, quinoa (instead of or alongside the bread), tofu, hard boiled eggs, meat (tuna, beef, chicken, turkey, pork), nuts, cheese.

Paleo: Add eggs, meat, and nuts instead of the bread.

Vegan: Leave as is, or add quinoa or tofu.

Gluten-Free: Use your favorite gluten-free bread, or swap out the bread for quinoa.

All the Veggies: I used nopales, onion, carrot, green beans, radish, and summer squash. You could also add: snap peas, greens, tomatoes, bell peppers, corn, eggplant, cucumber… or any other veggies that are in season and you think would taste great.

PanzanellaSalad2015-3

I love the combination of a really good quality olive oil like Bari’s along with balsamic vinegar. But, a mixture of red wine vinegar and lemon juice, or balsamic and lemon juice would also be great. Customize it to make it your own!

PanzanellaSalad2015-4

Riiiiiight before serving add the bread. Or to really avoid soggy bread, put the bread on the plate and top it with salad, letting the dressing soak in slowly. The lesson I learned today: only add as much bread as you’re going to eat. The leftovers will get way soggy (#freetofail).

PanzanellaSalad2015-5

This is one of my favorite ways to welcome summer. But, come fall or winter, just trade the summer veggies for some roasted winter ones and you’ve got a winner all year round.

Happy Eating!

Customizable Panzanella Salad

Prep Time: 15 minutes

Cook Time: 15 minutes

Total Time: 30 minutes

Yield: 4

Customizable Panzanella Salad

Ingredients

  • 3-4 C stale bread (any kind - or could sub 2-3 C quinoa or tofu), cubed
  • 1 t olive oil
  • to taste salt
  • to taste pepper
  • 1/4 to 1/2 C balsamic or red wine vinegar (or half vinegar half lemon juice)*
  • 1 1/2 t dijon mustard
  • pinch cayenne (optional)
  • 2 cloves garlic, diced
  • to taste salt
  • to taste pepper
  • 2 T to 1/4 C olive oil*
  • 3-4 T fresh herbs (basil, parsley, chives, oregano, thyme), chopped
  • 4-6 C any of the following (cubed, chopped, grated, or torn): summer squash, nopales, snap peas, green beans, greens, radishes, tomatoes, bell peppers, corn, eggplant, cucumbers, red onions, nuts, hard boiled eggs, nuts, chicken, beef, tuna, pork, mozzarella, parmesan, cannellini beans, garbonzo beans)

Instructions

  1. Pre-heat the oven to 400F. Toss bread with 1 t olive oil, salt, and pepper, Place on a baking sheet, bake for 10 minutes, flip, and bake for about 5 minutes more (or until they're golden and toasty).
  2. Whisk balsamic vinegar through pepper. Stream in oil as you whisk. Taste and adjust seasoning if desired.
  3. Toss salad contents (except bread, if using quinoa or tofu, add it now) with dressing. Add bread just before serving.
http://www.de-ma-cuisine.com/customizable-panzanella-salad/

Monday

18

May 2015

5

COMMENTS

Veggie and Garbanzo Bean Shakshuka

Written by , Posted in Beans, Breakfast, Brunch, Dinner, Eggs, Fruit, Gluten Free, Herbs, Lunch, Main Dishes, One Dish Dinners, Quick and Easy, Vegetables, Vegetarian

Shakshouka-8

If there’s not a carton of eggs in my refrigerator, I feel a little lost when it comes to meal planning. I use eggs for all of the regular things, like adding them to pancakes, using them in an egg wash for a Chicken Pot Pie or Fish Wellingtons, or whisking them into a silky mayonnaise. But, I also count on them as a staple for our meals.

Fried eggs are one of my favorite foods. I love it when the yolk is still runny (I’m an “over-medium” order) and it spills over the food it’s covering, creating a creamy sauce. They’ve created a way for me to love some foods that I didn’t think I even liked (turnips!). Eggs for the win!

Shakshouka-1

One of the meals I’ve discovered over the past year or so is called Shakshuka. I love it because it feels like an old world dish, similar to peasant food. It’s simple and straightforward, but also super versatile.

You can make it with just tomatoes, onions, garlic, and olive oil. But, if you want to add more to it, you can add tons of veggies. This time I wanted to pack it with a little extra oomph. I added greens, fennel, and asparagus to the usual. And then, garbonzo beans. It’s a dish that’s loaded with nutrients, protein, and great flavor.

I could eat it everyday.

Shakshouka-3

The veggies and beans don’t need to cook for too long – a little under 20 minutes will do. They just kinda stew there in the olive oil, getting all soft, flavors combining… man I’m hungry!

Shakshouka-4

And then the eggs are added. Normally, when I fry eggs, I do it in a screaming hot cast iron. But, since there are other components in the pan, for this dish, I turn the heat down, add the eggs, and cover (so the whites will set).

Shakshouka-5

Eggs, veggies, beans, cast iron… be quiet my grumbling stomach!

Shakshouka-6

And if you thought things couldn’t get any better, it gets topped with fresh herbs and a squeeze of lemon. That’s what I’m talkin’ about!

Happy Eating!

Veggie and Garbonzo Bean Shakshuka

Prep Time: 10 minutes

Cook Time: 24 minutes

Total Time: 34 minutes

Yield: 2-4

Veggie and Garbonzo Bean Shakshuka

Ingredients

  • 1 T olive oil
  • 1 medium onion or leek, chopped
  • 1 C assorted veggies (like fennel, asparagus, zucchini, eggplant, and mushrooms), chopped
  • to taste salt
  • to taste pepper
  • 2 cloves garlic, chopped
  • 1-2 C tomatoes (fresh or canned), diced
  • 1 C garbonzo beans
  • 2 C greens (chard, kale, collards, spinach etc...), roughly chopped
  • 1-2 eggs/serving
  • to taste salt
  • fresh herbs (dill, parsley, chives, basil), chopped, for serving
  • lemon slices, for serving

Instructions

  1. Heat skillet then add oil. When oil is hot, add onion through pepper. Cook for about 3 minutes over medium-low heat, stirring occasionally.
  2. Add garlic through greens and cook for 10-15 minutes, stirring occasionally. Taste and adjust seasoning if desired.
  3. Turn the heat down to low and make a small well for each egg. Add eggs, one per well. Season with salt. Cook covered until eggs are done (about 3-6 minutes, depending on how runny you like the yolk).
  4. Serve topped with fresh herbs and a squeeze of lemon.
http://www.de-ma-cuisine.com/veggie-and-garbonzo-bean-shakshuka/

Monday

11

May 2015

0

COMMENTS

Nopales Wraps

Written by , Posted in Dairy-Free, Dinner, Eggs, Fruit, Gluten Free, Herbs, Low Carb, Lunch, Main Dishes, One Dish Dinners, Quick and Easy, Vegetables, Vegetarian

NopalesWraps-5

It’s nopales time again! Who knew that cactus leaves could be so fun to eat?! Last week I made them into a relish. I also used them in Borscht. Today, I’ve sautéed them with onions, added scrambled eggs, and wrapped it all in a lettuce leaf.

NopalesWraps-1

Nopales have an interesting taste. Kinda like if a green bell pepper was crossed with a green bean, okra, and a lemon. They’re bright, citrusy, and oh so slimy. You can boil them to take away the slime. Or, if you don’t care too much, just pop ’em in the pan. Totally up to you. I wanted to keep this one super quick and easy, so I didn’t bother with boiling.

NopalesWraps-2

I really wanted eggs with this dish. But, you could totally make this a vegan dish by crumbling some tofu into the veggies.

NopalesWraps-3

All there is to it is to crack the eggs, whisk them to combine, and add to the cooked veggies in the skillet.

We’re on our way to a super simple meal!

NopalesWraps-4

I used lettuce for wrapping this time. But, of course tortillas would be a great option too, depending on what you’re craving. If you don’t have lettuce or tortillas, another large, sturdy green leaf will do (like chard or kale). Whether or not you will need a fork and knife will depend on the sturdiness of the wrapping device. With this lettuce picking it up wasn’t an option. The messiness factor was heightened by topping the wrap with Nopales and Tomato Relish, fresh tomatoes, and parsley, rather than adding them to the filling.

NopalesWraps-6

A squeeze of lemon is one of my favorite ways to finish off a dish. And this one’s no different. Bright and citrusy, it’s a great way to complete an interesting and fun take on nopales.

Happy Eating!

Nopales Wraps

Prep Time: 10 minutes

Cook Time: 15 minutes

Total Time: 25 minutes

Yield: 2

Nopales Wraps

Ingredients

  • 1 T olive oil
  • 1/2 to 1 C nopales (or bell pepper), chopped
  • 1 onion, chopped
  • to taste salt
  • to taste pepper
  • pinch cayenne
  • 2 eggs/person (or 7 oz. firm tofu, drained and crumbled)
  • pinch salt
  • 2-4 lettuce leaves, washed and dried (tortillas, chard, or kale could also be used)
  • 1 tomato, chopped, for topping
  • fresh parsley, chopped, for topping
  • Nopales Relish, for topping
  • lemon wedges, for serving

Instructions

  1. Heat a skillet over medium-low. Add oil. Once oil is hot, add nopales through cayenne. Cook for about 10 minutes, or until veggies are tender, stirring occasionally.
  2. Turn heat to low. Whisk together eggs. Pour into skillet. Sprinkle with salt and stir gently until eggs are cooked and set (about 3-5 minutes).
  3. Divide filling between lettuce leaves. Secure with a toothpick. Top with relish, parsley, and a squeeze of lemon.
http://www.de-ma-cuisine.com/nopales-wraps/