De Ma Cuisine

Eggs Archive

Monday

21

September 2015

0

COMMENTS

Whole Wheat Pear Muffins

Written by , Posted in Baking, Bread, Breakfast, Brunch, Dairy-Free, Dessert, Eggs, Fruit, Gluten Free, Grains, Kid-Friendly, Lunch, Nuts, Quick and Easy, Snacks, Vegan, Vegetables, Vegetarian

PearMuffins-7

I’ve never been the best baker. I like to think that it’s because of my lack of skill when it comes to all things science. I got a D in chemistry in high school. Sometimes I wonder, if they’d told me how much I would care about science when I grew up, or if someone had shown me science in action, in the form of different baked goods, if it would have clicked. Maybe not, but I wonder.

So I’m slowly learning about baking. I’m a kinesthetic learner – I learn by doing, so it’s taking some trial and error to figure things out. What comes the most naturally to me when cooking is figuring things out as I go; recipes used for inspiration more than direction. That doesn’t really work with baking. But, I guess I’m learning, because these muffins did.

It helps that I know what the batter should look and feel like. The more I bake the more I know about doughs and batters and the like.

PearMuffins-1

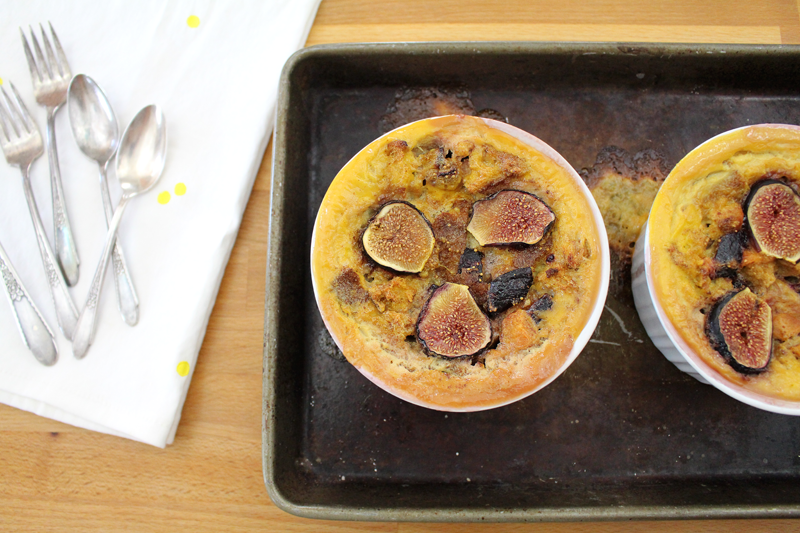
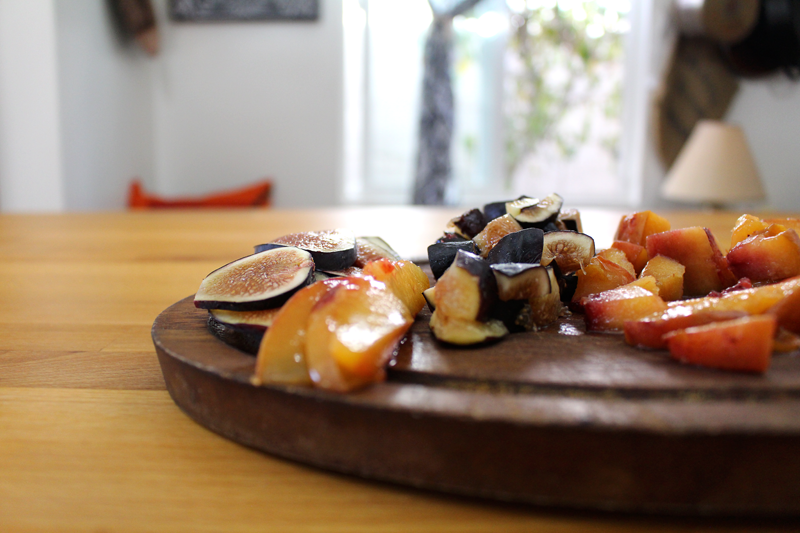
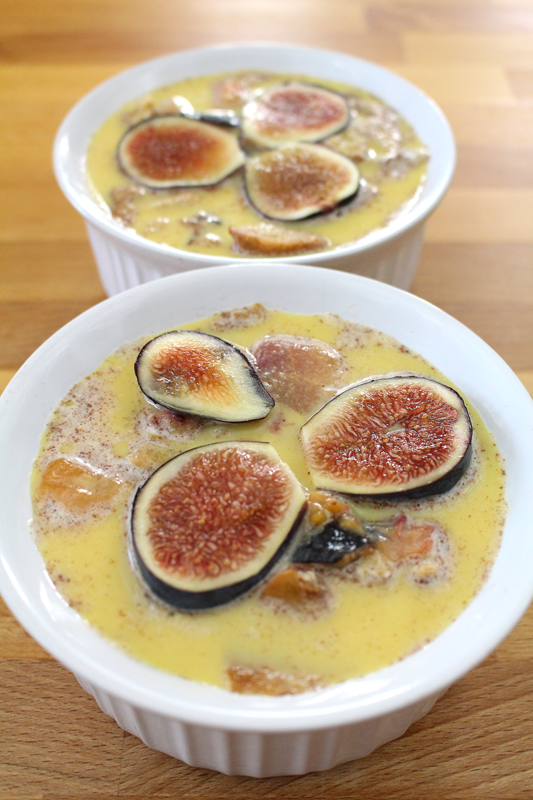
The stars of this recipe are Asian pears and figs, but any seasonal fruit will do: apples, berries, cherries, persimmons… Use what you love and what you have on hand.

PearMuffins-2

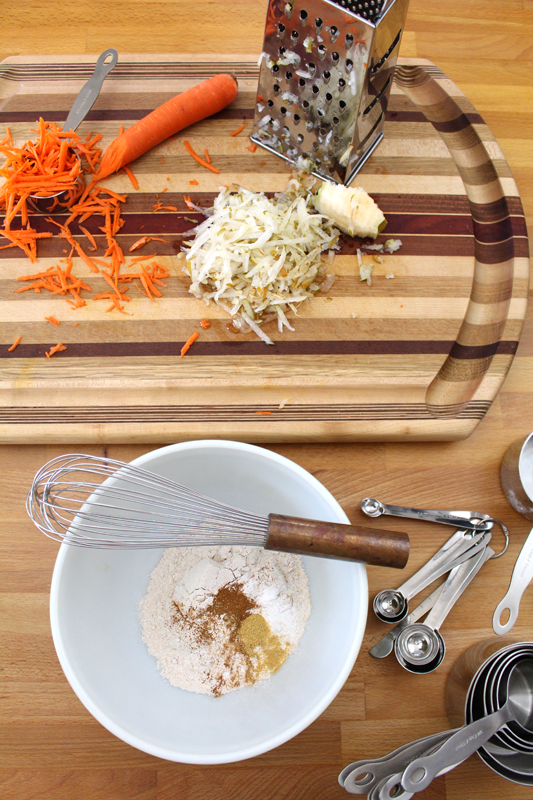
There are also carrots, but you could use parsnips or summer squash in their place.

PearMuffins-3

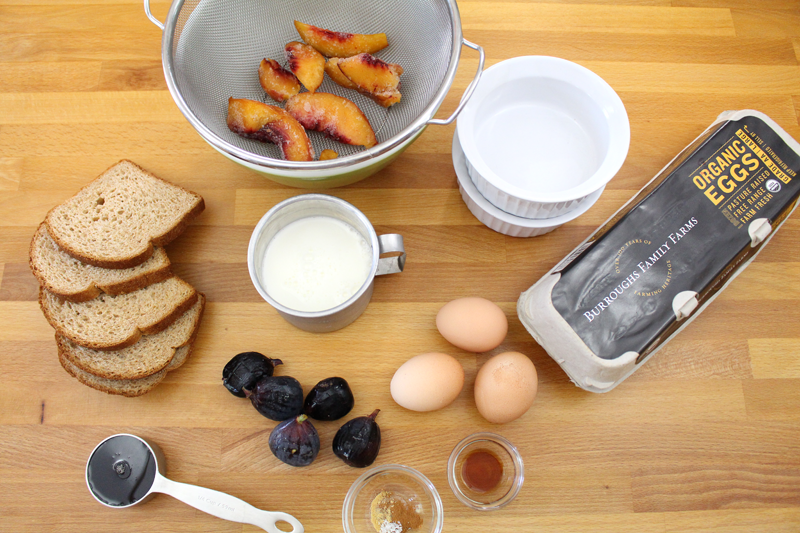
I used whole wheat flour and butter. But, of course, adapt it to suit your family’s needs. You could try a gluten-free flour blend if you’d like, or to make it vegan, use cold coconut oil and substitute flax seeds and water for the egg.

PearMuffins-4

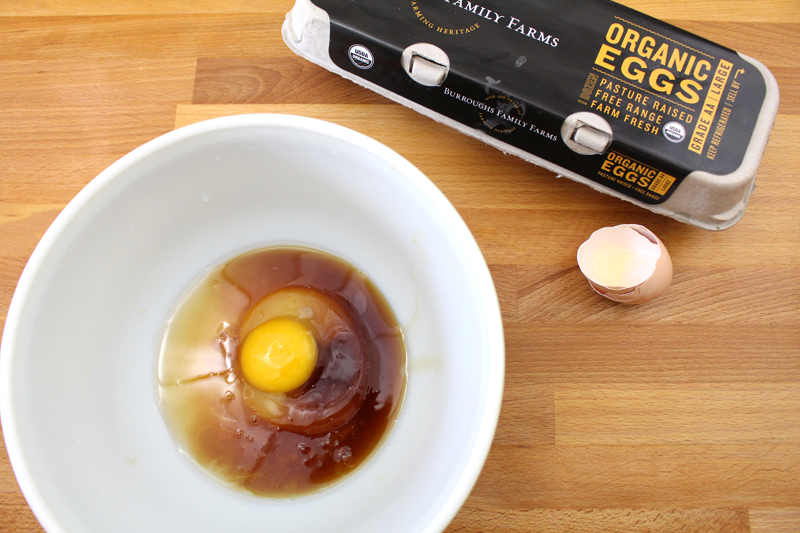
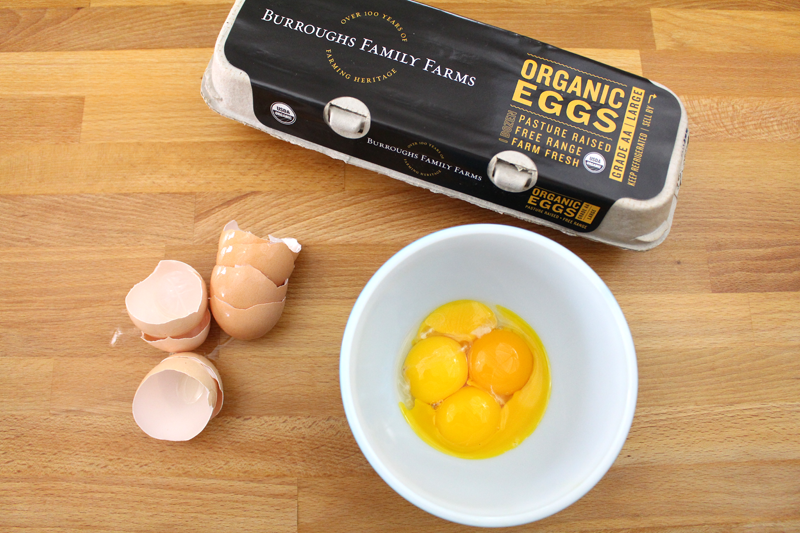
I love Burroughs Family Farms’ eggs, so that’s what I used today. The yolks are always the most brilliant golden yellow. I just can’t get enough!

PearMuffins-5

I’m pretty picky about what I eat when it comes to sugar. I’m ok with the occasional treat, but in general, I avoid refined white sugar like the plague. Instead I like to use honey and maple syrup. Combine that with the oats, whole wheat flour, vegetable, and fruit that these muffins contain, and I feel great about them for breakfast, lunch, or a satisfying snack.

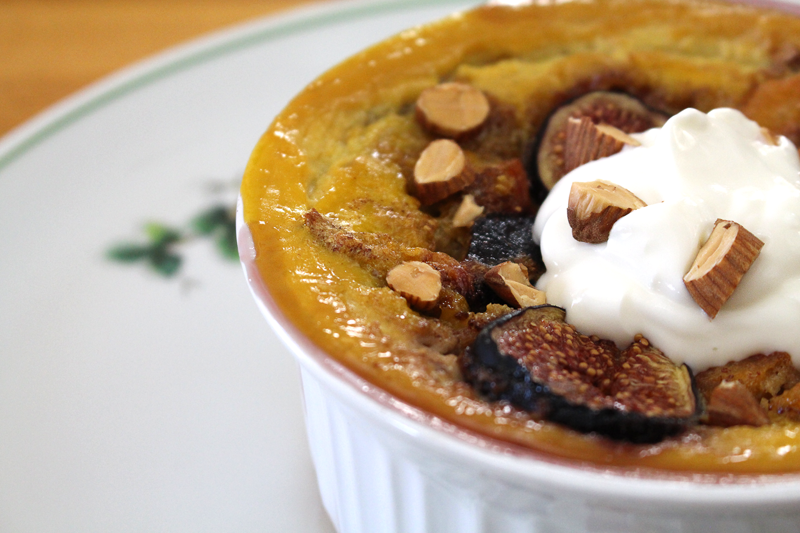
I was totally going to add chocolate chips. I even had them out on the counter. Then I forgot. Add ’em if you’d like. You could also add nuts. I’m not crazy about them in baked goods. But, to bump up the protein, or just because you like them, you could add some almonds or walnuts either to the batter, or gently press them into the top before baking.

PearMuffins-6

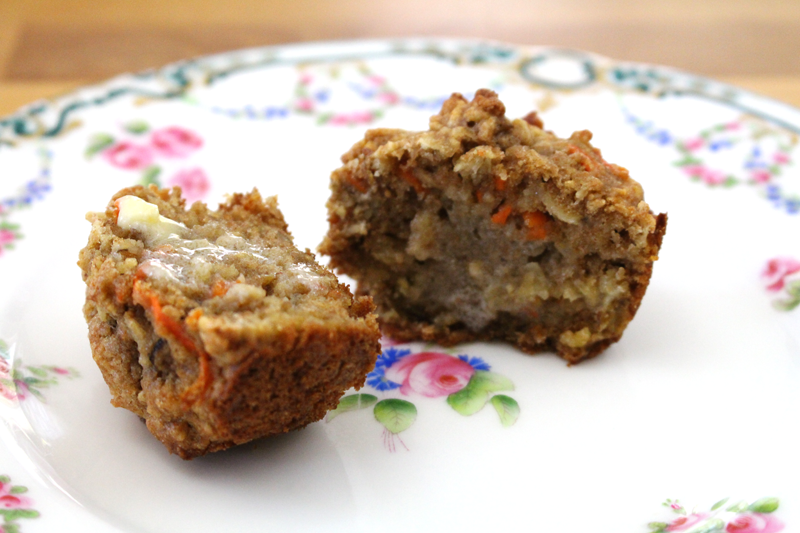
I enjoyed these with some homemade butter. They’d been cooling for a little while when I finally got a taste, but were still warm enough to melt the butter just slightly. But even without butter (which is how I ate my second one), they’re absolutely delicious.

Happy Eating!

Whole Wheat Pear Muffins

Prep Time: 15 minutes

Cook Time: 22 minutes

Total Time: 37 minutes

Yield: 1 dozen

Whole Wheat Pear Muffins

Ingredients

  • 1 C whole wheat flour
  • 1/4 t salt
  • 1/2 t baking powder
  • 1/2 t baking soda
  • 1/4 t cinnamon
  • 1/4 t ginger
  • 1/2 C cold butter (or coconut oil), cut into small chunks
  • 1 C oats
  • 3/4 C any of the following: Asian pears, pears, apples, parsnips, carrots, squash, persimmons, (grated)
  • 1/2 C any of the following: figs, berries, cherries (pits removed), chopped
  • 1/4 C honey (or maple syrup)
  • 1/4 C maple syrup
  • 1 egg (or use ground up flaxseeds and water)
  • 1 t apple cider vinegar
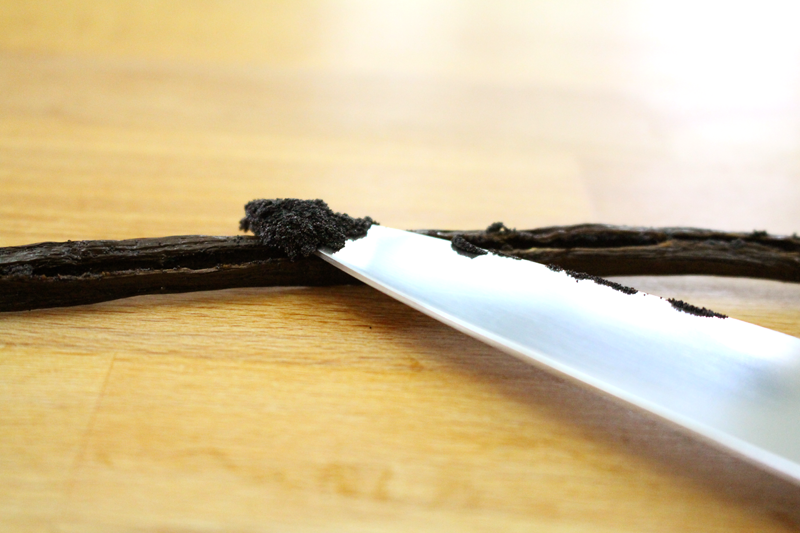
  • 1 t vanilla extract
  • (optional: almonds or walnuts, chopped, for topping)

Instructions

  1. Position the rack in the center of the oven and pre-heat to 350F.
  2. Whisk flour through ginger. Mix in butter with a pastry blender or hands until coarse meal or small (pea sized) chunks remain. Stir in oats through fruit. Set in the freezer while you assemble the wet ingredients.
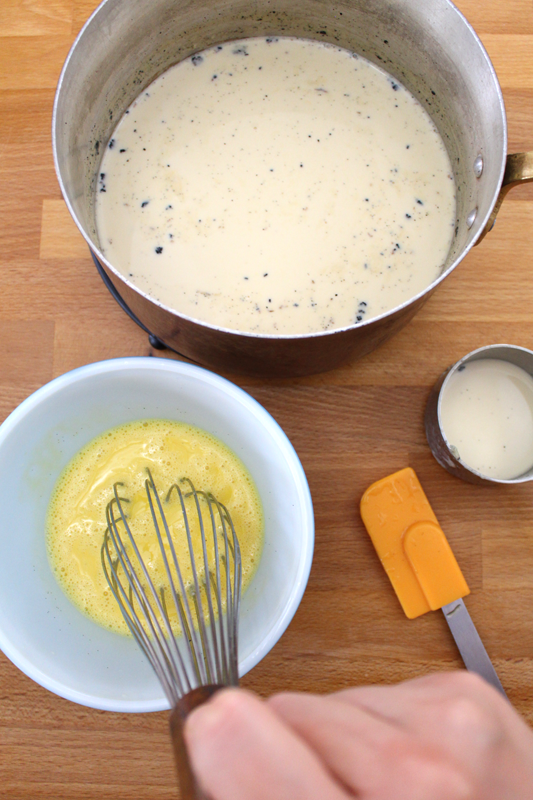
  3. In a separate bowl whisk honey through vanilla. Add to dry ingredients and stir to combine.
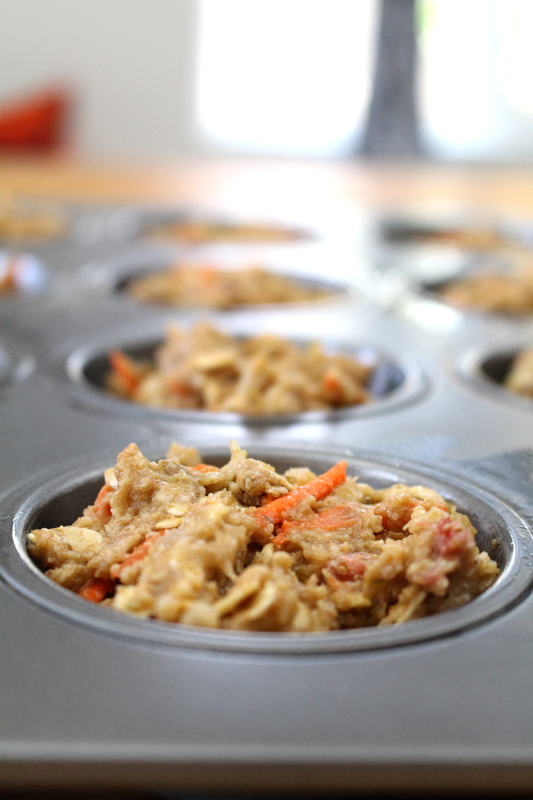
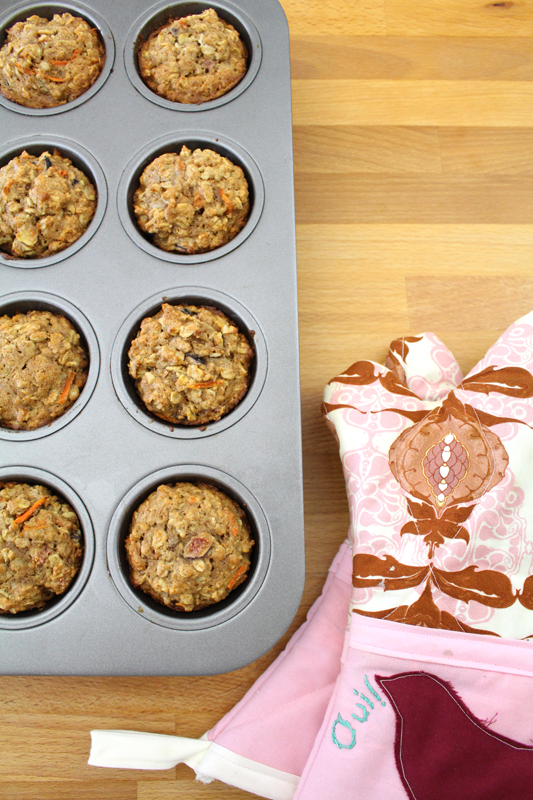
  4. Scoop about 3T of batter into each compartment of a greased muffin pan (should yield 1 dozen). Top with nuts if desired, pressing them gently into the batter. Bake for about 20-22 minutes, or until a toothpick comes out clean and the center of the muffin springs back when touched.
  5. Remove from the oven and cool for about 5 minutes in the pan. Transfer to a cooling rack and cool completely.
http://www.de-ma-cuisine.com/whole-wheat-pear-muffins/

Thursday

17

September 2015

1

COMMENTS

Maple and Vanilla Bean Crème Brûlée

Written by , Posted in Baking, Dessert, Eggs, Gluten Free, Vegetarian

CremeBrulee-8

Crème brûlée is by far my favorite dessert. Ever. When we were in Paris nearly two years ago, we ate as much of it as we could. I never tired of it. I’ve made it a few times at home. Different recipes, different results. Same as when we were in Paris. Each restaurant yielded something a little bit different. Some were more of a crème anglaise (which is more of a thick creamy sauce), some more like what I consider to be a traditional crème brûlée.

There’s just nothing like the subtle sweetness of the rich cream, the cracked sugar on top, the vanilla beans speckled throughout. I’m not much of a sweets person… unless there’s crème brûlée.

CremeBrulee-1

It’s a mixture of egg yolks, cream, and sugar. I separated the egg yolks from the whites (and saved them for dinner), and let them come to room temperature. That way when tempering, they will have less of a jump to warm to the temperature of the cream (more on that later). I used maple syrup and honey instead of sugar, and a mixture of cream and whole milk.

CremeBrulee-2

And then there’s the smell of the vanilla bean. It has to be one of my favorites. To remove the seeds from the pod, split it down the middle and scrape them out with a knife.

CremeBrulee-3

The next few steps are a little bit, not tricky, but particular about how they’re done. The cream, milk, vanilla, honey, maple syrup, and a pinch of salt are heated slowly in a saucepan. No boiling, just until steam rises. Not too difficult.

The next part is where you can get into trouble if you’re not careful… Egg tempering. A bit of the hot liquid is introduced to the cooler eggs, to bring them closer to the temperature of the hot mixture, before they’re added to it. We do this so that the eggs don’t scramble when added to the hot cream. Scrambled egg brûlée is a lot less appealing than crème brûlée.

If you do accidentally scramble them (you know, as long as it’s not all of them), you can strain the lumps out.

CremeBrulee-4

Once the eggs are warmed, they are whisked into the cream mixture. Then they all return to the stove to thicken. You don’t want to let them get too hot, because the eggs could still scramble. I like to stir constantly with a wooden spoon so I can keep an eye on things. After about 5 minutes it started to thicken, and at about 7 minutes, it was thick enough to coat the spoon without running right off. Perfect. Away from the heat it goes.

CremeBrulee-5

At this point, you could just whisk in some melted chocolate and drink it, straight from the saucepan. I didn’t, but I considered it.

You have two other options. If you want to do a quicker, oven-less version, divide the custard mixture between six ramekins, then pop them into the fridge for 2-3 hours, or until thickened and set. This is more of a crème anglaise, but you can still top it with sugar and brûlée it. I made them both ways and they’re both delicious, but my preferred method is for a more traditional crème brûlée. This means putting the ramekins in an oven-proof dish with sides, adding some warm water, and baking until they’re just set.

CremeBrulee-6

After they come out of the oven, they need to cool completely… My one frustration with crème brûlée is how long I have to wait before I get to eat it. Whether they’re done in the oven or not, it’s best to give them 2-4 hours in the fridge to cool and set. I do not like this part.

Whether you wait or not is up to you. I tried them at various stages of cooled doneness and they’re best really cold. But, suit yourself. Sprinkle with some brown sugar and torch ’em! If you don’t have a kitchen torch, you can use the broiler… But, leave the door open and watch them the whole time. They will burn quickly and you don’t want that.

CremeBrulee-7

CremeBrulee-9

And now, it is time. Use the back of your spoon to tap the hard sugar and crack it. Rich, creamy, subtly hinted with vanilla.

If you eat two, I won’t judge.

I did.

Happy Eating!

Maple and Vanilla Bean Crème Brûlée

Prep Time: 5 minutes

Cook Time: 56 minutes

Total Time: 1 hour, 2 minutes

Yield: 6

Serving Size: 1 Ramekin

Maple and Vanilla Bean Crème Brûlée

Ingredients

  • 1 C cream
  • 1 C whole milk
  • 1 vanilla bean, seeds removed*
  • pinch salt
  • 1/4 C maple syrup
  • 1 T honey
  • 4 egg yolks, at room temperature
  • brown sugar, for serving

Instructions

  1. Rub an ice cube over the bottom of a medium-sized saucepan. Add the cream through honey and heat over low, stirring occasionally with a wooden spoon, until steaming (about 12 minutes) (do not boil). Remove from heat.
  2. Whisk eggs in a medium-sized bowl. As you whisk, slowly add about 1/2 C of the hot cream mixture. Add a bit more, until eggs are warm. Then add the egg mixture to the cream mixture. Whisk for 2 minutes off the heat. Return to the stove and cook over low heat, stirring constantly with a wooden spoon, about 6-7 minutes, or until the mixture has thickened slightly, enough to coat the back of a spoon without running right off.
  3. Pour the mixture into 6-3 inch ramekins (fill to about 1" deep). Set in a baking dish and pour warm water about halfway up the outside of the ramekins. Bake at 350F for 25-35 minutes, or until they're just set. Remove from water immediately and cool completely (cool to room temp and then refrigerate for 2-4 hours) before topping with brown sugar and brûléeing.
  4. (For more of a crème anglaise, pour the cream mixture into ramekins and refrigerate for 2-4 hours, or until completely cooled and thickened. Top with brown sugar and brûlée with a torch, or enjoy poured over berries, cakes, or other desserts.)

Notes

*To remove the vanilla seeds from the pod, split it lengthwise down the middle and scrape them out with a knife.

http://www.de-ma-cuisine.com/maple-and-vanilla-bean-creme-brulee/


Thursday

10

September 2015

0

COMMENTS

Veggie Pot Pie

Written by , Posted in Baking, Dairy-Free, Dinner, Eggs, Gluten Free, Herbs, Leftovers, Legumes, Lentils, Main Dishes, One Dish Dinners, Potatoes, Potlucks, Vegan, Vegetables, Vegetarian

VeggiePotPie-5

Pot pie is one of my favorite foods. I think I say that a lot though. So many foods are favorites that I’m starting to lose track. I guess it depends on the season. Pot pie is one of those dishes that I don’t make all that often during the hot summer months. But, when it finally cools down, it’s all that I want to eat (that and soup, always soup). But, this pot pie can be enjoyed any time of the year, because the veggies can be changed up to suit whatever you’ve got on hand.

VeggiePotPie-1

This is a great dish to clean out the produce drawers. That’s what it felt like today. I used mushrooms (great for adding a deep, rich flavor), summer squash (but winter squash would be great here too), carrots, turnips (don’t add too many, otherwise they may overwhelm), eggplant, potatoes, radishes (doesn’t matter what kind), onion, chile pepper, garlic chives, and garlic… It’s at least one of everything that I had on hand, minus the lettuce and tomatoes that I’ll save for another time.

I also added lentils, or you could add tofu if you’d like. They would take the place of the meat in a Chicken Pot Pie, Beef Pot Pie, or Lobster Pot Pie.

VeggiePotPie-2

Since there were so many veggies, they took a while to cook. Once they were tender, I added some veggie stock whisked with some all purpose flour (or you could whisk the stock with some cornstarch for a gluten-free version). Once it came to a boil it began to reduce down and thicken, resulting in a nice rich gravy.

VeggiePotPie-3

At this point, you could just top the oven-proof skillet with pie crust and pop it into the oven. But, today I wanted to do some individual pot pies, so I greased some ramekins and filled them with the hot filling.

If you’re making this ahead of time, the filling can be cooled at this point and then refrigerated or frozen. To use it, defrost in the fridge for a day, then either heat it up first, or pour it into the baking dish and top with pie crust. If your filling is cold you may want to cover your crust with tinfoil partway through the baking time if it starts to get too brown.

Pot pies can also be covered, baked, and cooled completely, then reheated at a later date. To cool quickly, remove the crust to cool separately. Stir the filling often to get cool air into it. Refrigerate once it’s cooled down (if food is too hot when it goes into the fridge, the fridge temperature may raise to an unsafe temperature).

Of course you could also just stand at the stove and eat it out of the pan… 😉

VeggiePotPie-4

I have a favorite pie crust that I make, from Alana’s cookbook, The Homemade Pantry. One crust was perfect for four individual ramekins of pot pie. If you prefer gluten-free, there are flour blends available, or you can just buy a GF crust at your favorite market.

VeggiePotPie-6

I can’t decide what’s more favorite, the beautifully browned crust or the savory gravy soaked veggies. Good thing I get to eat them together.

Happy Eating!

Veggie Pot Pie

Prep Time: 20 minutes

Cook Time: 1 hour, 1 minute

Total Time: 1 hour, 21 minutes

Yield: 4

Veggie Pot Pie

Ingredients

  • 2 T olive oil
  • 1 C any: potatoes, rutabagas, sweet potatoes, chopped
  • 6-7 C combination of any that you like together: carrots, parsnips, turnips, beets, radishes, eggplant, summer squash, winter squash, onion, shallot, leeks, fennel, celery, greens, cabbage, bell pepper, green beans, peas, broccoli, cauliflower, corn, asparagus
  • to taste salt
  • 2-3 cloves garlic, diced
  • 1/2 C lentils or tofu (optional), chopped, if tofu
  • 1/4 C any* (fresh): garlic chives, basil, parsley, oregano, thyme, or rosemary, chopped
  • 1/2 t paprika
  • 1 t dijon mustard
  • 2 T AP flour or 1 T cornstarch whisked with 2 1/4 C cold veggie stock
  • 1 T lemon juice or vinegar
  • 1 pie crust
  • 1 egg (optional), whisked, for brushing
  • salt

Instructions

  1. Pre-heat the oven to 350F.
  2. Heat an oven-proof skillet (unless using individual ramekins, in which case just use a skillet). Add oil. Add veggies and salt. Cook over medium-low for about 15-20 minutes, or until veggies are tender, stirring occasionally. Add garlic through dijon and cook for 1 minute. Add flour or cornstarch and veggie stock mixture and bring to a boil. Reduce to a simmer and cook for about 10 minutes, or until sauce has reduced and thickened and all veggies are tender. Remove from heat and stir in lemon juice or vinegar. Taste and adjust seasoning if desired.
  3. Roll out pie crust. Use it to top the oven-proof skillet, or divide the veggie mixture into 4 greased 6" ramekins and top with pie crust (1 crust should be enough for 4 ramekins). Brush with egg if desired, sprinkle with salt, and use a knife to cut some vent holes in the center.. Bake for 30 minutes, or until crust is browned and flaky.
http://www.de-ma-cuisine.com/veggie-pot-pie/

Monday

7

September 2015

0

COMMENTS

Tuna Boats

Written by , Posted in Appetizers, Dinner, Eggs, Fennel Pollen, Fish, Fruit, Gluten Free, Herbs, Kid-Friendly, Low Carb, Lunch, Main Dishes, Meat, Quick and Easy, Sides, Snacks, Vegetables

TunaBoats-6

There are so many things that you can do with tuna. It makes a fabulous sandwich, one of my favorites. It’s a great addition to pasta, one of my comfort foods. And, it’s good in a boat. Specifically a boat made of veggies.

This is one of those awesome recipes that’s great no matter the season. So I will share one of my favorite ways to make it, and then some mix and match options.

TunaBoats-2

For this recipe, the stars were hard boiled eggs, shallots, and fresh tarragon. Plus the boats: cabbage, tomatoes, and cucumber. It was fabulous.

TunaBoats-1

I started with the eggs. My method for hard boiling is what my mom taught me: boil water, add 1t white vinegar, add eggs, boil for 15 minutes, cool eggs under cold running water. I like to peel the eggs right away, while they’re still a bit warm. They’re easier to peel.

TunaBoats-3

TunaBoats-4

After the eggs, the rest came together in no time.

TunaBoats-5

We loved the cucumber boats, the tomato boats were yummy, but the cabbage boats were our favorite. There was something so perfect about the slightly sweet cabbage that went so well with the tuna and egg mixture.

Since tuna goes with so so many things, it didn’t seem fair to limit the recipe to just a these few ingredients. So here are some mix and match ideas. Mix a little something that you think would taste great together, from each of the five categories, for a quick and easy treat.

Creamy/Liquidy

Mayo, yogurt, rice vinegar, balsamic vinegar, aioli, Dijon mustard, soy sauce, silken tofu, olive oil, sesame oil.

Herbs

Basil, cilantro, dill, chives, fennel pollen, parsley, Rosemary, sage, thyme, tarragon.

Seasonings

Cayenne, paprika, pepper, salt.

Extras

Bacon, arugula, bell pepper, celery, back/white/fava/green beans, capers, chile peppers, hard boiled eggs, garlic, ginger, leeks, lemon zest, red onions, pancetta, scallions, shallots, radishes, tomatoes, salsa, olives.

Serve In

Avocado, cucumber, cabbage, carrots, celery, kale, chard, mixing, lettuce, radicchio, daikon radishes, radishes, fennel, beets, jicama, shiitakes.

Some may be best cooked and scooped out (beets and carrots). They could be served with the veggies at room temperature, or even chilled. Others will just need the seeds or some of the flesh scooped out (any good bits could be mixed with the tuna or saved for later). Those of the leafy variety need just be separated.

And now, here are some combos that I came up with, all of which I can’t wait to try.

French Inspired Tuna, tarragon or basil, hard boiled eggs, and mayo, served in a tomato or cucumber.

Asian Inspired Tuna, sesame oil, soy sauce, rice vinegar, onion, chile pepper, and cilantro, served in summer squash, tomato, or cabbage.

Mediterranean Inspired Tuna, olives, olive oil, paprika, lemon zest, parsley, basil, dill, white beans or garbanzo beans, and red onion, served in cucumber, bell pepper, or tomato.

Mexican Inspired Tuna, yogurt, salsa, black beans, cilantro, chile pepper, bell pepper, tomato, and red onion, served in avocado, tomato, or bell pepper.

Italian Inspired Tuna, garlic, rosemary, parsley, basil, thyme, tomato, lemon juice, olive oil, and balsamic vinegar, served in tomato, fennel, bell pepper, or summer squash.

Happy Eating!

Tuna Boats

Prep Time: 10 minutes

Cook Time: 15 minutes

Total Time: 25 minutes

Yield: 2-3

Tuna Boats

Ingredients

  • 2 hard boiled eggs
  • 1-2 T mayo
  • 1-2 T plain yogurt
  • 1 T olive oil
  • 1 T tarragon or basil, chopped or cut in a chiffonade
  • pinch cayenne
  • to taste salt
  • 1 T shallot or red onion, diced
  • 1-5oz. can tuna
  • cucumber, tomato, or cabbage (halved, center scooped out if applicable), for serving

Instructions

  1. Cook eggs (boil water, add 1t white vinegar, add eggs, boil for 15 minutes, drain, pour cool water over, peel right away).
  2. Combine eggs through tuna. Taste and adjust seasoning if desired.
  3. Scoop tuna mixture into cucumber, tomatoes, and cabbage.
http://www.de-ma-cuisine.com/tuna-boats/

Monday

17

August 2015

2

COMMENTS

Bread Pudding with Seasonal Fruit

Written by , Posted in Baking, Bread, Breakfast, Brunch, Dairy-Free, Dessert, Eggs, Fruit, Gluten Free, Lunch, Main Dishes, Nuts, Vegetarian

BreadPudding-4

Today I’ve come up with a treat for the sweet tooth that’s both dessert and main dish. It’s a variation on a bread pudding, but we ate it for lunch.

BreadPudding-1

It’s sweet, but not too, thanks to the maple syrup. It’s filling enough to be the star, thanks to the eggs and bread. It’s a great way to get some fruit into a dish, thanks to whatever fruit is in season. We’ve got figs and peaches on hand, so that’s what I used.

BreadPudding-2

During the spring and summer the figs and peaches could be swapped out for blueberries, strawberries, or plums. In the cooler months, pears, apples, and persimmons would be perfect. Perfect for any time of the year. If you don’t have fresh fruit, frozen works (just drain it a bit first). You could even add some jam. I used softer figs and frozen peaches, that way they kinda became one with the eggy-bread mixture.

I was thinking that this would be yummy if it was chocolatey. You could add cocoa powder to the egg mixture (hello chocolate and cinnamon!). You could add chocolate chips too. I think figs or berries would be fabulous with chocolate.

Whatever bread you have on hand will be great. Gluten-free, whole wheat, croissants, baguettes… I like to use stale bread, but mostly because I feel bad using fresh bread for something like this.

BreadPudding-3

I filled two 6″ ramekins to make two main dish sized portions. But, you could use smaller ramekins or one larger dish. Adjust the baking time accordingly.

BreadPudding-5

To serve, I topped with some Greek yogurt and chopped almonds. You could also add some fresh fruit, walnuts, pecans, cream or crème fraîche, or if you’ve got an extra sweet sweet tooth, a drizzle of maple syrup.

Happy Eating!

Bread Pudding with Seasonal Fruit

Prep Time: 10 minutes

Cook Time: 50 minutes

Total Time: 1 hour

Yield: 2-4

Bread Pudding with Seasonal Fruit

Ingredients

  • 1 t coconut oil (or canola)
  • 2 C stale bread (any kind), torn in small(ish) pieces
  • 3 eggs
  • 1 T white vinegar
  • 1 C whole milk (any kind)
  • 1/4 t cinnamon
  • pinch ginger
  • pinch salt
  • 1/4 C maple syrup
  • 1 t vanilla
  • 2 C fairly ripe seasonal fruit (berries, figs, stone fruit, apples, persimmons, pears), most chopped, a few sliced for topping
  • toppings (optional): chopped nuts, fresh fruit, plain yogurt, crème fraîche, maple syrup, cream

Instructions

  1. Pre-heat the oven to 350F.
  2. Pour vinegar into a measuring cup. Add milk to the 1 C line. Stir and let stand for about 5 minutes (it will thicken slightly and become buttermilk).
  3. Grease two 6" ramekins with coconut oil. Add bread and fruit. Toss.
  4. Whisk together eggs through vanilla. Pour over bread and fruit. Top with sliced fruit. Place ramekins on a baking sheet. Bake for 40-50 minutes, or until eggs are mostly set and have come to at least 160F. Remove from the oven and let them stand on a cooling rack for 10-20 minutes.
  5. Top with desired toppings.
http://www.de-ma-cuisine.com/bread-pudding-with-seasonal-fruit/