De Ma Cuisine

shallot Archive

Friday

22

January 2016

0

COMMENTS

Hearty Kale and White Bean Quesadillas

Written by , Posted in Beans, Breakfast, Cheese, Dinner, Gluten Free, Herbs, Legumes, Lunch, Main Dishes, Quick and Easy, Sandwiches, Sides, Snacks, Vegan, Vegetables, Vegetarian

KaleBeanQuesadillas-5

When I plan our menu I try to include a good variety of foods, so we don’t get bored. Sometimes they’re a little more complex, have multiple steps, and more ingredients. Other times they’re simple, basic, super easy. Scrambled eggs and toast makes a great dinner. So do quesadillas.

Quesadillas are probably our go-to, in a pinch, anyone can make it meal. If I’ve planned ahead, I will try to add some beans so it’s not just tortillas and cheese. If I’ve really planned ahead, we may even have homemade tortillas. But, sometimes, just the basics will do. We just need to eat something, and we need to eat that something right now.

KaleBeanQuesadillas-1

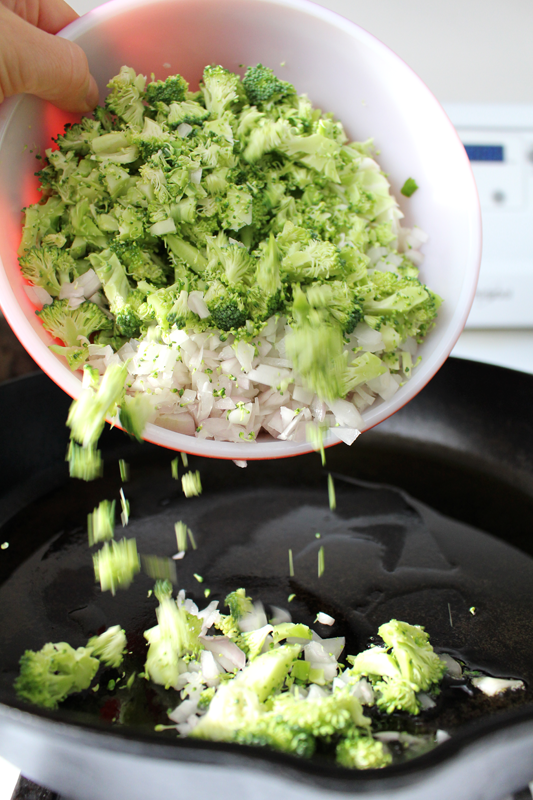
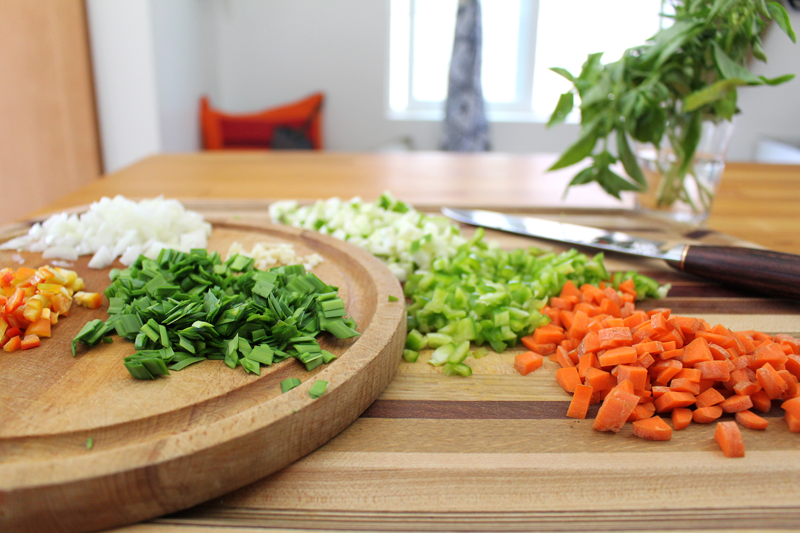
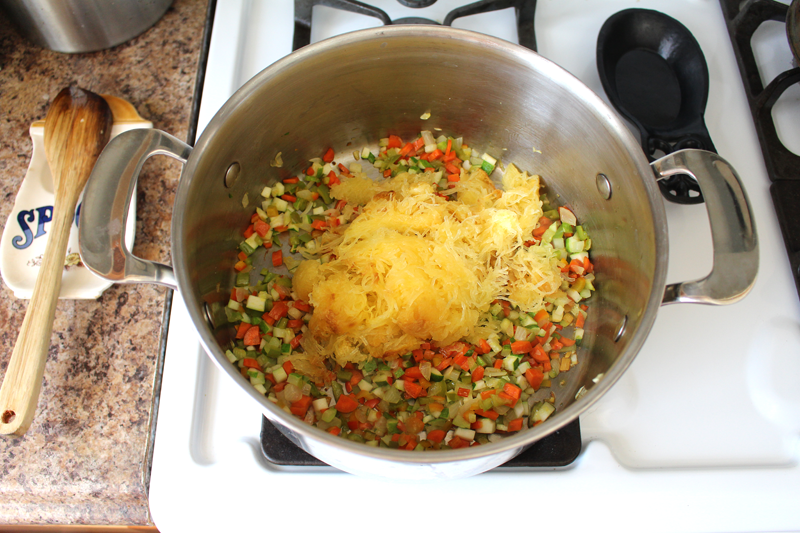
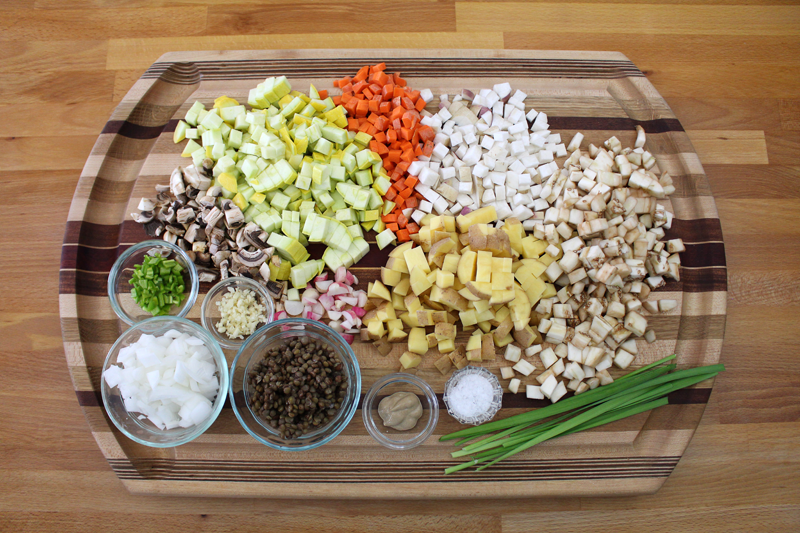
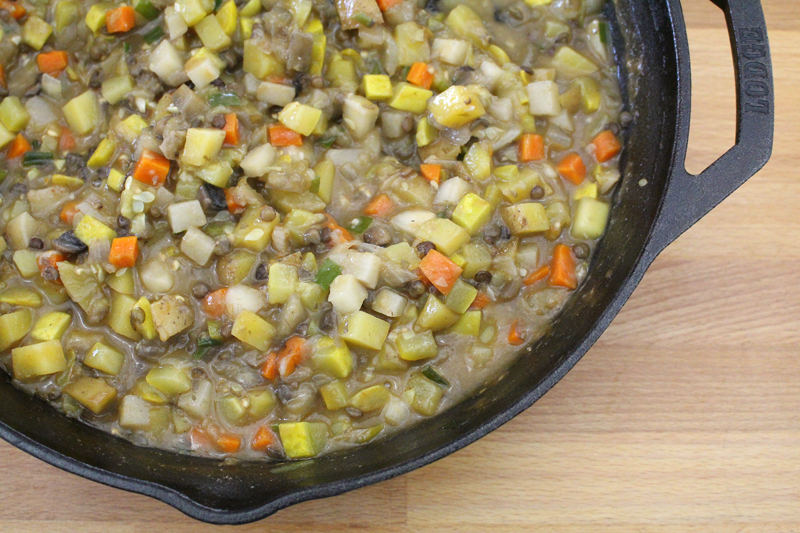
This recipe is a happy medium. I had time to prep and plan, so there are both veggies and beans. I also made a lot and froze the leftovers, so next time we want quesadillas, the filling can be pulled out and reheated. These are pretty versatile. I just took what I had on hand that I thought would go with beans and cheese, finely chopped it, and threw it into a pan.

KaleBeanQuesadillas-2

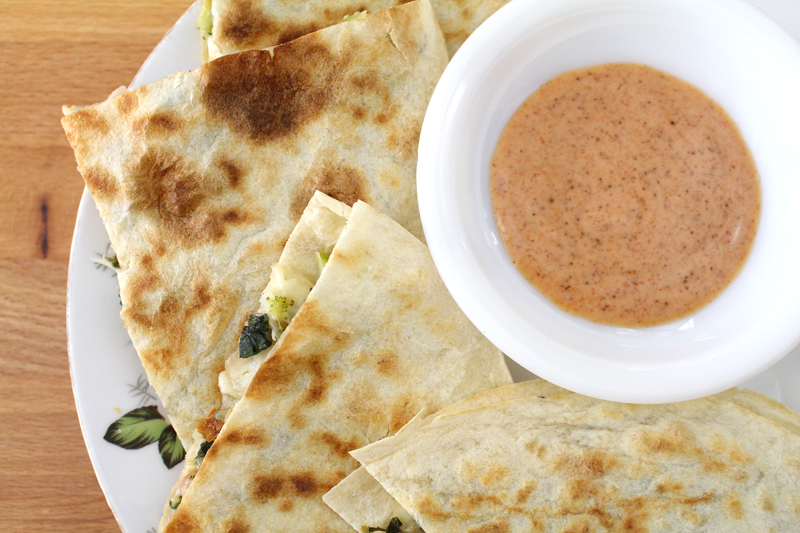
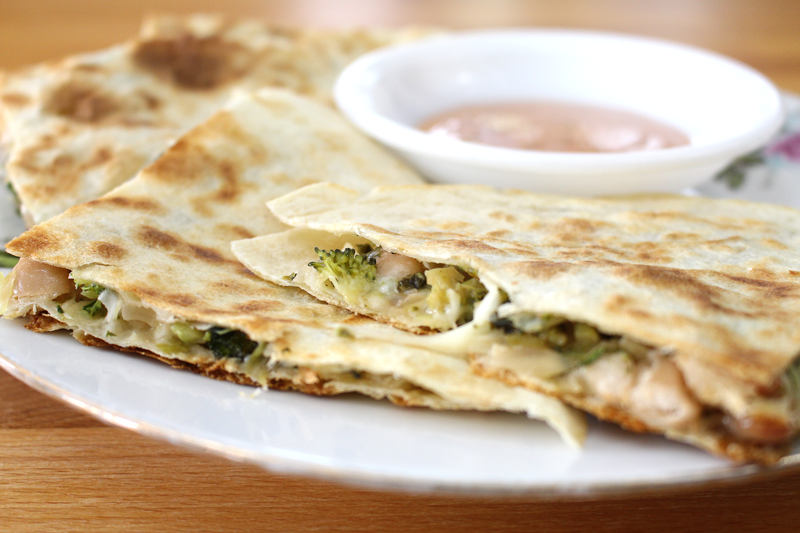
While the veggies and beans cooked, I whisked together a quick dip. But, if there’s no time for dip, or you’re out of yogurt or silken tofu, salsa will be just fine.

KaleBeanQuesadillas-3

I added pepper jack this time. It’s a great melting cheese and I love the spice that it adds. If you don’t do dairy, I’ve heard that nutritional yeast is great.

KaleBeanQuesadillas-4

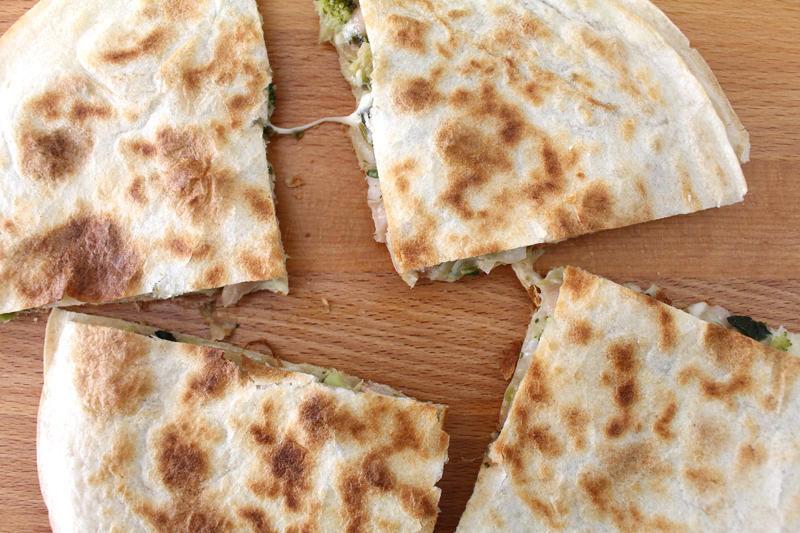
I like my quesadillas super crispy outside and gooey inside. Tim prefers his a little less crispy. I used flour tortillas this time, but corn would be fabulous too. I had been working on another recipe on the same day and I wasn’t hungry when these were done. So I cooled them and saved them for dinner. When I reheated them they had an awesome crisp to them that I totally wasn’t expecting. Almost like the cooling and reheating had done something awesome to the layers in the tortilla. I’m totally down for cold leftovers (mostly because I’m too lazy to heat them up). This time I’m glad I took the time.

KaleBeanQuesadillas-6

I’m sure we will be enjoying these again soon. I’ve almost always got quesadillas on the menu and ingredients for them in the fridge.

Happy Eating!

Hearty Kale and White Bean Quesadillas

Prep Time: 10 minutes

Cook Time: 15 minutes

Total Time: 25 minutes

Yield: 4

Hearty Kale and White Bean Quesadillas

Ingredients

  • 1 T olive oil
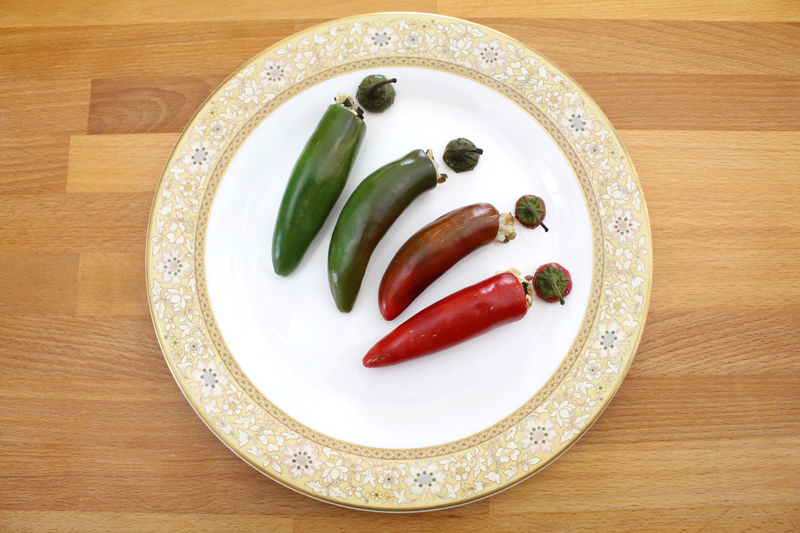
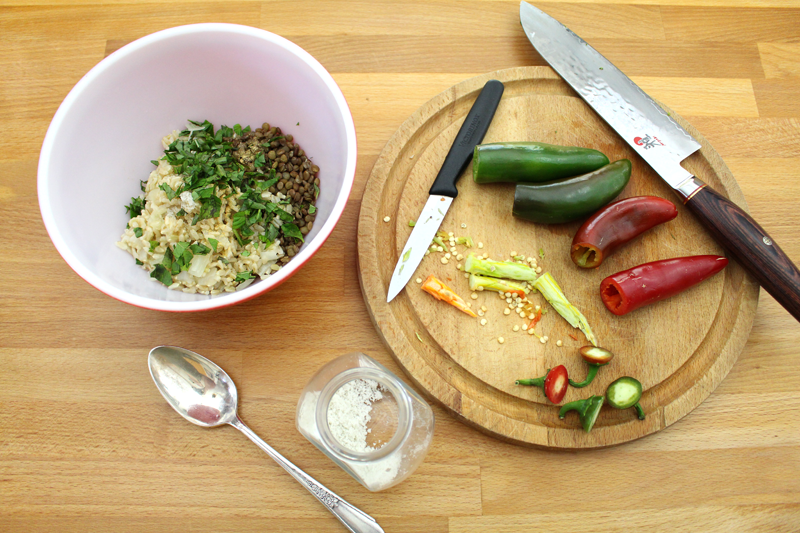
  • 2 C (combination of any) broccoli, cabbage, shallots, bell pepper, cauliflower, chile pepper, radish (any type), summer squash, leek, onion; finely chopped
  • to taste salt
  • 1 clove garlic, diced
  • 2 C any type of greens (kale, chard, spinach, mustard greens, mizuna, etc..), ribs removed, chopped
  • 2 C white beans, drained if canned
  • 2 t lime or lemon juice
  • 1 C yogurt or silken tofu
  • sprinkle cayenne
  • 1/2 t chili powder
  • 1/2 t paprika
  • splash maple syrup (optional)
  • 1 T chives (optional), chopped
  • 1-2 t lime or lemon juice
  • to taste salt
  • 8 tortillas (any type)
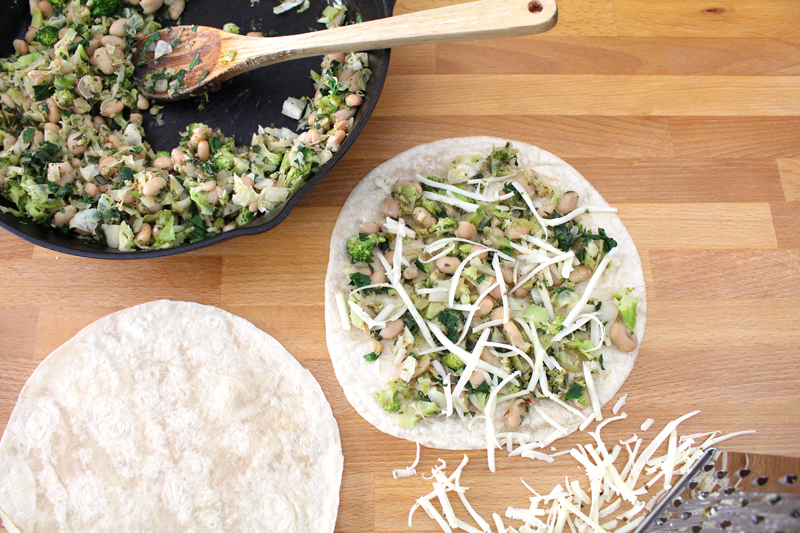
  • 1 C cheese (pepper jack, cheddar, or feta), grated or crumbled (could also use a sprinkle of nutritional yeast)

Instructions

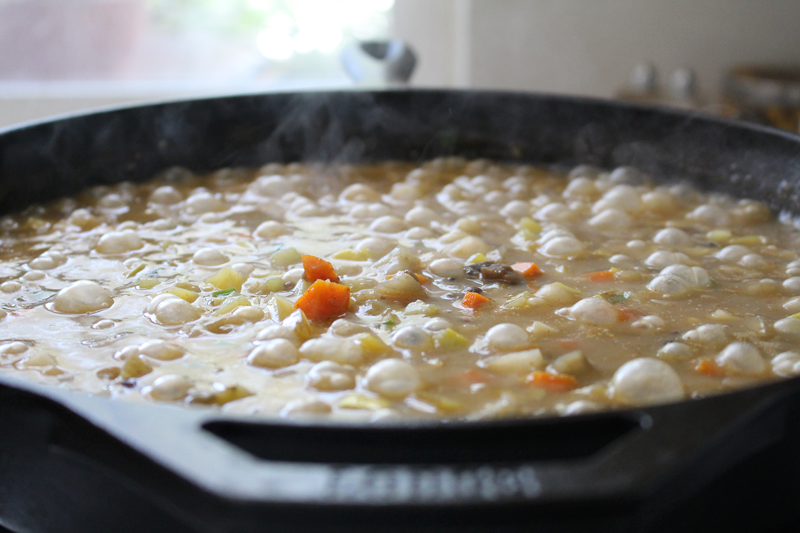
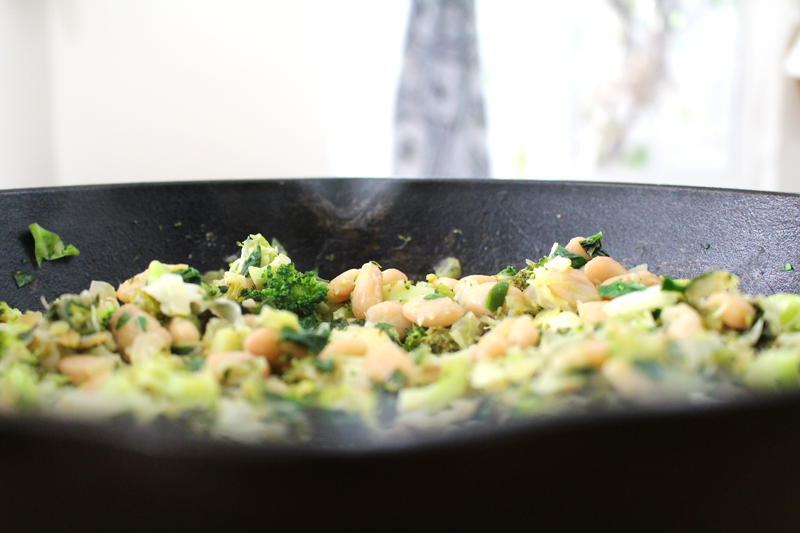
  1. Heat a skillet. Add oil. Add the 2 C of veggies and salt and cook for 5 minutes, or until tender, over medium-low heat, stirring occasionally. Add garlic, greens, beans, and lime juice. Cook for 5 minutes more. Taste for seasoning.
  2. While the veggies cook, whisk together dip: yogurt/silken tofu through salt. Taste for seasoning and set aside.
  3. Top a tortilla with 1/4 of the bean and veggie mixture. Top with cheese (or nutritional yeast) and then another tortilla. Repeat with remaining tortillas and bean mixture.
  4. Heat a clean skillet. Cook each quesadilla, flipping once, until to desired crispness and cheese is melted (I like about 2-3 minutes/side). Slice into wedges and serve with dip.
http://www.de-ma-cuisine.com/kale-white-bean-quesadillas/

Monday

21

December 2015

0

COMMENTS

Wilted Mustard Greens with Acorn Squash and Pear

Written by , Posted in Dairy-Free, Dinner, Fruit, Gluten Free, Quick and Easy, Salads, Sides, Vegan, Vegetables, Vegetarian

MustardGreensAcornSquash-6

Two months ago I would have laughed if you’d told me that my fingers would be so cold that I’d have a hard time typing today. That I’d have two sweatshirts on with both hoods pulled up. Two pairs of socks, plus slippers, and that I’d be wrapped in a blanket. Yeah, I’m cold (and I refuse to turn the heater on). But, the great thing about cold weather is that it’s much easier to warm up than it is to cool down. I can keep adding blankets and layers of clothing. I can bake or make soup, and drink lots of tea. As cold as I am right now, I much prefer it to the months and months of hot and sweaty.

MustardGreensAcornSquash-1

I don’t use the oven a whole lot during the summer and into the fall. It’s just too hot. So at this time of year, I bake and roast veggies a little more often. It’s yummy and, as a bonus, the house warms up a bit.

MustardGreensAcornSquash-2

For this recipe I roasted some acorn squash wedges that I’d rubbed with olive oil and I also roasted its seeds. Roasted squash is one of my favorites. It’s super versatile – from pastas to soups to pizza, it’s a winner. But, the seeds are great too. I like to toss them with a bit of oil and a pinch of salt and then roast until they’re crispy. It doesn’t take too long and they’re really tasty.

MustardGreensAcornSquash-3

Because I used an acorn squash for this dish, I left the peel on. I don’t prefer to eat it, but it’s easy enough to scrape the flesh from it, and I think it looks pretty. If you want to peel before you roast, that’s cool too. It just seemed easier to me to wait.

MustardGreensAcornSquash-4

This isn’t really your average salad. It’s got mustard greens, instead of lettuce, and they’re wilted, instead of raw. I added pears (or you could use apples) and cooked them with the greens just a bit. The dressing is made up of orange juice, maple syrup, and molasses. They all go into the pan with everything else. Think Wilted Spinach Salad with lots of awesome twists.

MustardGreensAcornSquash-5

If you have spinach or other greens, they’ll be great too. Lemons instead of oranges, give them a try (or go for half and half so it’s not too tart). I added shallots, but red onion would be fab. And if you’re not crazy about the seeds from the squash, you could chop up some nuts instead (or hey, do both!).

This would make a lovely side for a holiday dinner, or you could reheat leftovers and serve them with scrambled eggs and toast for breakfast. However you serve it, I hope you enjoy it with good company, in good cheer.

Merry Christmas!


Wilted Mustard Greens with Acorn Squash and Pear

Prep Time: 10 minutes

Cook Time: 30 minutes

Total Time: 40 minutes

Yield: 2-3

Wilted Mustard Greens with Acorn Squash and Pear

Ingredients

  • 1 medium-sized acorn squash (may substitute with other types of winter squash), seeds removed and reserved, peeled if desired, sliced
  • 2 T olive oil
  • to taste salt
  • 1 bunch mustard greens (or mizuna, kale, chard, spinach, or any other greens you have on hand), ribs removed, chopped
  • to taste salt
  • 2 cloves garlic, minced
  • 1/2 t fresh ginger, minced
  • 1/4 C shallot or onion or leek, sliced
  • 1 t maple syrup
  • 1 t molasses
  • pinch cayenne
  • 1 T orange or lemon zest
  • 1/4 C orange juice
  • 1 ripe pear or apple, sliced
  • 1/2 T lemon juice

Instructions

  1. Pre-heat the oven to 350F.
  2. Rub squash with 1 t oil and sprinkle with salt. Roast for 15 minutes, flip, and roast for about 15 more (or until squash is tender and pierces easily with a sharp knife).
  3. Toss squash seeds with 1 t oil and a pinch of salt. Roast on a baking sheet for about 10-15 minutes, or until crispy, stirring once. Salt lightly once removed from the oven.
  4. Heat skillet and add remaining oil. Add greens and a pinch of salt. Cook over medium-low heat for about 5 minutes, stirring occasionally. Add garlic through orange juice and cook for about 5 minutes more, stirring occasionally. Add pears or apples and cook for about 5 minutes, or until fruit is a bit tender, adding more orange juice if needed. Remove from heat and add lemon juice and taste for seasoning.
  5. Serve greens topped with roasted squash and roasted seeds.
http://www.de-ma-cuisine.com/mustard-greens-squash-pear/

Thursday

1

October 2015

0

COMMENTS

Cream of Squash Soup

Written by , Posted in Dairy-Free, Dinner, Gluten Free, Herbs, Lunch, Main Dishes, Roasting, Soups, Vegan, Vegetables, Vegetarian

Summer2015Garden

This summer, like most summers, I planted a garden. We used the compost that I’d been working on for a year. We bought organic dirt, and I rummaged around for the seeds that I’d been saving. Some were from packages (and probably a few years old at best), some saved from last year’s Abundant Harvest Organics produce. They were planted with eager anticipation. It happens every spring. The daily ritual of watering, peering into the black dirt to see if there’s even one sprout. And for days, there’s nothing. And then it’s like a thousand tiny miracles happen overnight. There are tiny sprouts, some shyly emerging from the dirt, as if unsure. Some are a bit more bold and brave, seeming to grow inches in minutes.

Most of the brave ones are squash.

My composter is the type that you add kitchen scraps to and then roll around outside to mix it up. So it doesn’t have a layer of dirt dirt at the bottom the way some do. It doesn’t bother me to have partially decomposed fruits and veggies mixed in with the dirt. No big deal. Except that I didn’t know that it’s really best to add the compost about a month before you plant. Gives the volunteers some time to die off.

Now I know.

I’d planted summer squash, watermelon, cantaloupe, green beans, snap peas, tomatoes, basil, potatoes… and more. I ended up with a few of the things I’d hoped for and some that I hadn’t intended at all.

Winter squash. In the summer. Oh well, the growing process is fun no matter what I end up with. And I learned something from it, so double win.

SquashCarrotSoup-1

Thankfully the winter squash will keep foreeeeeeever on the counter. I harvested this spaghetti squash in like July (um because I accidentally pulled out the plant when I was clearing out some dead vines). I was saving it for something special… or just fall. I don’t really know. It just didn’t get eaten and all-of-a-sudden it’s soup time again and the winter squash are screaming to be used.

I will comply.

SquashCarrotSoup-2

Every year I look forward to fall so I can get back to the thing I love most: All. The. Soup. It’s one of the best ways to get so many veggies into a dish. Today I had peppers (sweet and chile), onion, carrot, garlic, and squash (both summer and winter) on hand. I had a ton of garlic chives and fresh basil too.

SquashCarrotSoup-3

I roasted the squash yesterday so that this would be pretty quick. A bit of olive oil on the inside and out, a hot oven, an hour or so, and they’re done. I let them cool and then refrigerated overnight. All I had to do to the squash today was scrape it out and add it at the right time. Easy.

SquashCarrotSoup-4

I’m always amazed at what happens when veggies, stock, vinegar, and some salt are simmered for a while. It’s a little like magic.

SquashCarrotSoup-5

This is pretty much a straight up vegetable soup, until you add the coconut milk or cream. That’s what makes it extra special. But, if you don’t have either, don’t sweat it. Just make an awesome Squash and Carrot Soup and call it good.

SquashCarrotSoup-6

Like most soups, this will probably taste best tomorrow, so I’ll just go ahead and add it to the menu again.

Happy Eating!


Cream of Squash Soup

Prep Time: 15 minutes

Cook Time: 1 hour, 48 minutes

Total Time: 2 hours, 3 minutes

Yield: 3-4

Cream of Squash Soup

Ingredients

  • 1/2 spaghetti squash (or other variety), seeds removed (once cooked, roughly chop the spaghetti-like strands so they aren't too long)
  • 1 t + 2 T olive oil
  • 2 1/2-3 C veggies (any): bell or sweet pepper, summer squash, carrots, parsnips, cauliflower, celery, green beans, radish, chile pepper (ribs and seeds removed), onion, shallot, leek; diced
  • to taste salt
  • 2-3 cloves garlic, minced
  • 1 t maple syrup or honey
  • 1 T balsamic vinegar
  • 1/4 t dried (or 1/4 T fresh) thyme
  • 4-6 C veggie stock (could also use chicken)
  • 1/4 C fresh herbs: basil, garlic chives, parsley; diced
  • coconut milk or heavy cream, for serving

Instructions

  1. Pre-heat oven to 350F.
  2. Brush squash with 1 t olive oil (inside and out). Roast cut side down for about 60 minutes, or until flesh is tender. Set aside. (This step can be done ahead of time, squash cooled and refrigerated for up to a few days.)
  3. Heat a soup pot over medium-low. Add 2 T olive oil. When oil is hot, add veggies and salt. Cook for about 10 minutes, stirring occasionally. Add squash and garlic. Cook for 2 minutes. Add balsamic vinegar and cook for 1 minute. Add thyme (if using dried) and stock. Bring to a boil, then reduce to a simmer and cook for 30 minutes, or until veggies are tender. Add fresh herbs and cook for 3-5 minutes more. Taste and adjust seasoning if desired.
  4. Serve with a bit of coconut milk or cream swirled into each bowlful of soup.
http://www.de-ma-cuisine.com/cream-of-squash-soup/

Thursday

10

September 2015

0

COMMENTS

Veggie Pot Pie

Written by , Posted in Baking, Dairy-Free, Dinner, Eggs, Gluten Free, Herbs, Leftovers, Legumes, Lentils, Main Dishes, One Dish Dinners, Potatoes, Potlucks, Vegan, Vegetables, Vegetarian

VeggiePotPie-5

Pot pie is one of my favorite foods. I think I say that a lot though. So many foods are favorites that I’m starting to lose track. I guess it depends on the season. Pot pie is one of those dishes that I don’t make all that often during the hot summer months. But, when it finally cools down, it’s all that I want to eat (that and soup, always soup). But, this pot pie can be enjoyed any time of the year, because the veggies can be changed up to suit whatever you’ve got on hand.

VeggiePotPie-1

This is a great dish to clean out the produce drawers. That’s what it felt like today. I used mushrooms (great for adding a deep, rich flavor), summer squash (but winter squash would be great here too), carrots, turnips (don’t add too many, otherwise they may overwhelm), eggplant, potatoes, radishes (doesn’t matter what kind), onion, chile pepper, garlic chives, and garlic… It’s at least one of everything that I had on hand, minus the lettuce and tomatoes that I’ll save for another time.

I also added lentils, or you could add tofu if you’d like. They would take the place of the meat in a Chicken Pot Pie, Beef Pot Pie, or Lobster Pot Pie.

VeggiePotPie-2

Since there were so many veggies, they took a while to cook. Once they were tender, I added some veggie stock whisked with some all purpose flour (or you could whisk the stock with some cornstarch for a gluten-free version). Once it came to a boil it began to reduce down and thicken, resulting in a nice rich gravy.

VeggiePotPie-3

At this point, you could just top the oven-proof skillet with pie crust and pop it into the oven. But, today I wanted to do some individual pot pies, so I greased some ramekins and filled them with the hot filling.

If you’re making this ahead of time, the filling can be cooled at this point and then refrigerated or frozen. To use it, defrost in the fridge for a day, then either heat it up first, or pour it into the baking dish and top with pie crust. If your filling is cold you may want to cover your crust with tinfoil partway through the baking time if it starts to get too brown.

Pot pies can also be covered, baked, and cooled completely, then reheated at a later date. To cool quickly, remove the crust to cool separately. Stir the filling often to get cool air into it. Refrigerate once it’s cooled down (if food is too hot when it goes into the fridge, the fridge temperature may raise to an unsafe temperature).

Of course you could also just stand at the stove and eat it out of the pan… 😉

VeggiePotPie-4

I have a favorite pie crust that I make, from Alana’s cookbook, The Homemade Pantry. One crust was perfect for four individual ramekins of pot pie. If you prefer gluten-free, there are flour blends available, or you can just buy a GF crust at your favorite market.

VeggiePotPie-6

I can’t decide what’s more favorite, the beautifully browned crust or the savory gravy soaked veggies. Good thing I get to eat them together.

Happy Eating!

Veggie Pot Pie

Prep Time: 20 minutes

Cook Time: 1 hour, 1 minute

Total Time: 1 hour, 21 minutes

Yield: 4

Veggie Pot Pie

Ingredients

  • 2 T olive oil
  • 1 C any: potatoes, rutabagas, sweet potatoes, chopped
  • 6-7 C combination of any that you like together: carrots, parsnips, turnips, beets, radishes, eggplant, summer squash, winter squash, onion, shallot, leeks, fennel, celery, greens, cabbage, bell pepper, green beans, peas, broccoli, cauliflower, corn, asparagus
  • to taste salt
  • 2-3 cloves garlic, diced
  • 1/2 C lentils or tofu (optional), chopped, if tofu
  • 1/4 C any* (fresh): garlic chives, basil, parsley, oregano, thyme, or rosemary, chopped
  • 1/2 t paprika
  • 1 t dijon mustard
  • 2 T AP flour or 1 T cornstarch whisked with 2 1/4 C cold veggie stock
  • 1 T lemon juice or vinegar
  • 1 pie crust
  • 1 egg (optional), whisked, for brushing
  • salt

Instructions

  1. Pre-heat the oven to 350F.
  2. Heat an oven-proof skillet (unless using individual ramekins, in which case just use a skillet). Add oil. Add veggies and salt. Cook over medium-low for about 15-20 minutes, or until veggies are tender, stirring occasionally. Add garlic through dijon and cook for 1 minute. Add flour or cornstarch and veggie stock mixture and bring to a boil. Reduce to a simmer and cook for about 10 minutes, or until sauce has reduced and thickened and all veggies are tender. Remove from heat and stir in lemon juice or vinegar. Taste and adjust seasoning if desired.
  3. Roll out pie crust. Use it to top the oven-proof skillet, or divide the veggie mixture into 4 greased 6" ramekins and top with pie crust (1 crust should be enough for 4 ramekins). Brush with egg if desired, sprinkle with salt, and use a knife to cut some vent holes in the center.. Bake for 30 minutes, or until crust is browned and flaky.
http://www.de-ma-cuisine.com/veggie-pot-pie/

Monday

10

August 2015

0

COMMENTS

Chile Pepper Poppers

Written by , Posted in Appetizers, Cheese, Dairy-Free, Dinner, Gluten Free, Grains, Herbs, Legumes, Lentils, Quinoa, Rice, Roasting, Sides, Vegan, Vegetables, Vegetarian

StuffedHotPeppers-4

Try saying “chile pepper poppers” over and over again. I like how it feels to say it. Kinda like how I like the feel of the word “cake”. I think I like the word “cake” more than I actually like cake itself.

I’m done now.

I’ve seen different varieties of pepper poppers before, but never actually tried to make them. They’re often filled with cheese. Yum! But, I wondered if maybe they could be filled with something a little more nutrient dense. Cheese, I’m down with, but let’s add a little more.

StuffedHotPeppers-1

I opted for green lentils, which I’m totally digging right now, and brown rice.  Along with mint and basil for a cool and fresh taste.

I used jalapeños this time. And to be honest, for me, they were too spicy. But, I used what I had on hand (and then drank a big glass of milk after I ate a whole one and my mouth burned up). Next time, I’d opt for a much milder pepper.

The tricky thing about these is since the pepper is staying almost whole, it’s hard to be sure that all the ribs and seeds are gone. I mean, I did the best I could, but there might have been more heat left in there then if I’d halved it and taken the ribs and seeds out that way.

On the Scoville scale, Chipotle, Fresno peppers, jalapeños, and wax peppers (like the Hungarian wax pepper) are rated at 3,500-10,000 Scoville Heat Units. Milder peppers are: Jalapeños (yes, they appear in two categories), Anaheim peppers, and poblano peppers (or ancho), at 1,000-4,000 SHU. And milder still: banana peppers, peperoncini, and pimentos come in at 100-900. Bell peppers are rated at a 0. The spectrum ranges from a pepper called the Carolina reaper at 2,200,000 SHU to the banana, paprika, Cubanelle, peperoncini, and pimento peppers are 100-900 SHU. (1) That’s a big range.

I use jalapeños all the time, buuuuut I don’t usually (ever) eat a whole one… in one sitting… in a three minute time period. They’re usually diced and added to dips, or Succotash, or Tacos. The heat is dispersed.

Next time I’d probably choose an Anaheim pepper or something even milder. A bell pepper would be nice. Or if you’ve got more tomatoes than you know what to do with, stuff those.

Lesson learned.

StuffedHotPeppers-2

I’m usually ok on my own for these posts. I’ve figured out how to photograph with one hand, while the other works. But today I needed both hands, and I needed a picture of it from above. I did consider trying to hold the camera with my chin and shoulder. I thought better of it and asked Tim, who now does freelance work from home too, for help instead. (Don’t tell him what I was thinking of doing, m’kay? 😉 )

StuffedHotPeppers-3

Once I settled on trying to shove the filling in with the handle of a spoon (after a few failed attempts with other utensils), I got the poppers roasting. I opted for the toaster oven, since it’s one bazillion degrees out right now. And my toaster oven opted to crap out on me, resulting in partially roasted pepper poppers. But, they were done enough, they were hot and bubbly, just not quite as soft as I would have liked (hence the 30-60 minute suggestion in the recipe – that way you can have ’em how you want ’em).

StuffedHotPeppers-5

With the right pepper for you, these are a nice little treat. Appetizer, lunch, side at dinner… There was a lot more filling than I ended up needing. But, I chopped up the leftover peppers, with filling, and added them to some green beans and summer squash that were sautéeing in olive oil. The filling got a little crispy (which makes me happy), the chopped up peppers added just a kick of heat, the lentils were there for protein, the rice to get in some grains. Oh and then I topped it with a fried egg. So, I’d make all the filling, if you’re ok with leftovers*. You can pop it in the freezer if you’re not going to eat it in a few days. Winner winner we just made tomorrow’s dinner.

StuffedHotPeppers-6

Happy Eating!

Chile Pepper Poppers

Prep Time: 15 minutes

Cook Time: 1 hour, 30 minutes

Total Time: 1 hour, 45 minutes

Yield: 3-5 (chile peppers) or 2-4 (bell peppers)

Serving Size: 2 chile peppers or 1 bell pepper

Chile Pepper Poppers

Ingredients

  • 1/2 C uncooked green lentils (need about 1/2 C cooked)
  • 1 1/2 C water
  • 1/2 C uncooked brown rice (or quinoa) (need about 1/2 C cooked)
  • 1 C water
  • 1 C onion (or shallot), chopped
  • to taste salt
  • pinch ginger
  • 1 T fresh Thai basil (or any variety basil), chopped
  • 1 T fresh mint, chopped
  • 1-2 T feta or extra firm tofu, crumbled
  • 6-10 large hot peppers* (or 2-4 bell peppers), stem sliced off, ribs and seeds removed using a paring knife (do not use fingernails)

Instructions

  1. Cook lentils with water (about 15-20 minutes, or according to package's instructions) (don't overcook). Drain if there is extra water.
  2. Cook rice (according to package's instructions), after about 15 minutes stir in onions. Continue to cook until rice is done (don't overcook).
  3. Pre-heat the oven to 350F.
  4. Mix lentils and rice with salt through mint. Taste and adjust seasoning if needed. Mix in feta or tofu. Stuff into peppers using the end of a spoon. Stand in a small ramekin (and place on a baking sheet) or lay flat on a baking sheet (some filling may spill out). Roast for about 30-60 minutes, or until peppers have softened slightly.

Notes

Filling may yield more than needed. Leftovers are great reheated in a skillet with some olive oil, veggies, and topped with a fried egg or piece of crispy tofu. *Use peppers as hot as you would like. On the Scoville scale, Chipotle, Fresno peppers, jalapeños, and wax peppers (like Hungarian wax pepper) are rated at 3,500-10,000 Scoville Heat Units. Milder peppers are: Jalapeños, Anaheim peppers, poblano (or ancho), at 1,000-4,000 SHU. And milder still: banana peppers, peperoncini, and pimentos come in at 100-900. Bell peppers are rated at a 0.

http://www.de-ma-cuisine.com/chile-pepper-poppers/

*To cool leftover rice, here’s what I like to do: Let it cool on the counter for a bit, then put it in the fridge, stirring every once in a while, keeping it fluffy (and not too packed into the container so it will cool properly).

(1) https://en.wikipedia.org/wiki/Scoville_scale