De Ma Cuisine

Rachel O Archive

Monday

30

March 2015

1

COMMENTS

Artichoke Heart Dip

Written by , Posted in Appetizers, Cheese, Condiments, Dairy-Free, Fruit, Gluten Free, Herbs, Lunch, Sides, Snacks, Vegan, Vegetables, Vegetarian

ArtichokeHeartDip-9

When I was a kid we ate artichokes dipped in mayo. Nothing fancy. We each got a whole artichoke and we dipped then scraped it all off with our teeth. That’s the simple way to do artichokes. And you could do that here too. Just steam the artichokes, dip the leaves, then when you get down to the heart, scrape out the choke and dip it too. But, I liked the idea of dipping the artichoke leaves into a dip that contains the heart. It feels a little bit like eating an egg and some chicken in the same dish. Kinda wrong, but maybe really right.

Definitely right.

ArtichokeHeartDip-1

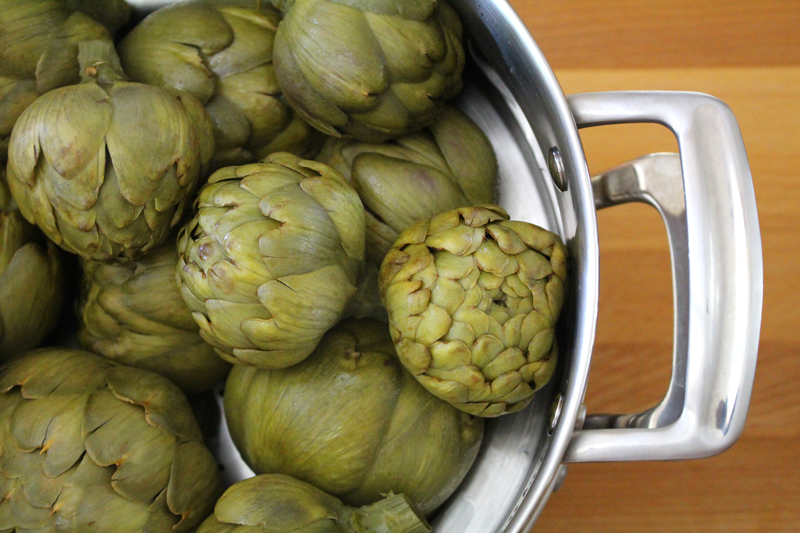
The artichokes that I had didn’t take long to steam. Maybe 15 or 20 minutes once the water came to a boil. It could take longer depending on their size.

ArtichokeHeartDip-3

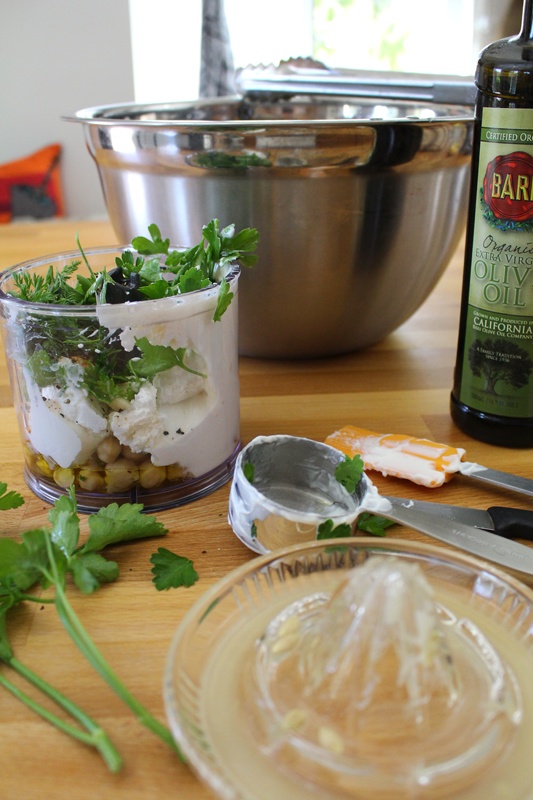
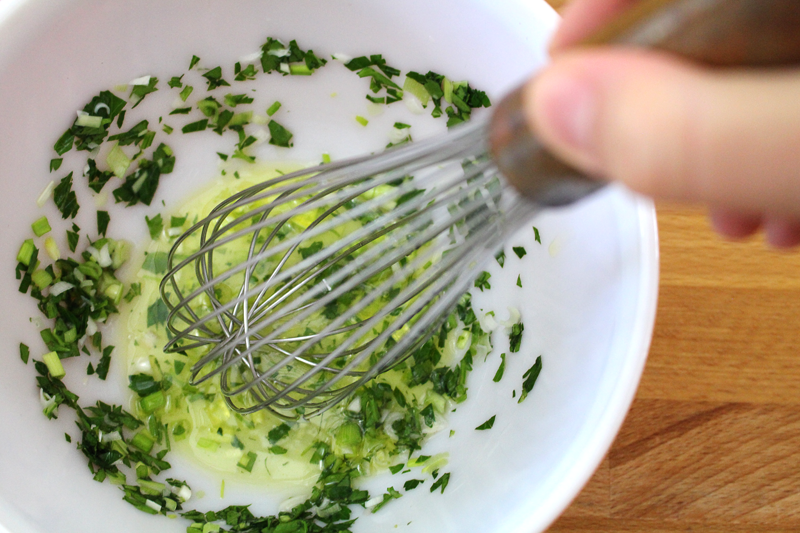
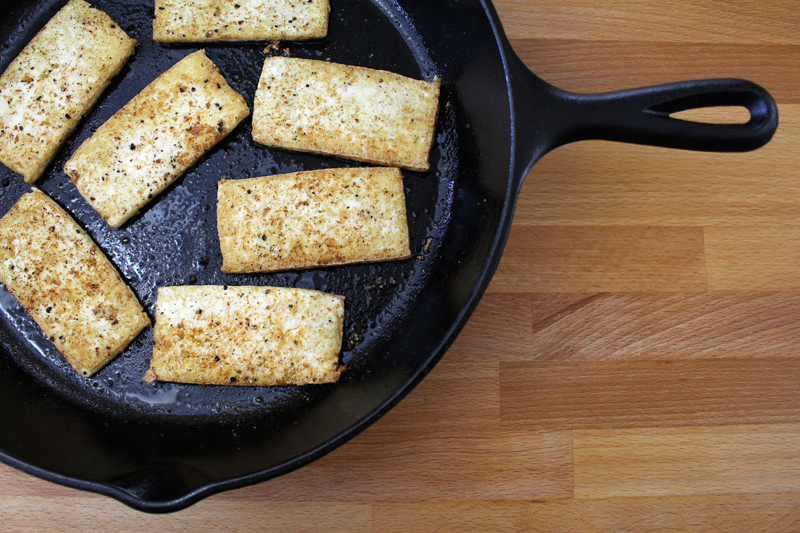
While the artichokes steam, the dip comes together quickly. It’s a combination of things like chickpeas, fresh parsley, and olive oil. I used some ricotta and Greek yogurt for creaminess, but if you want this to be a vegan dish, try using silken tofu instead.

ArtichokeHeartDip-2

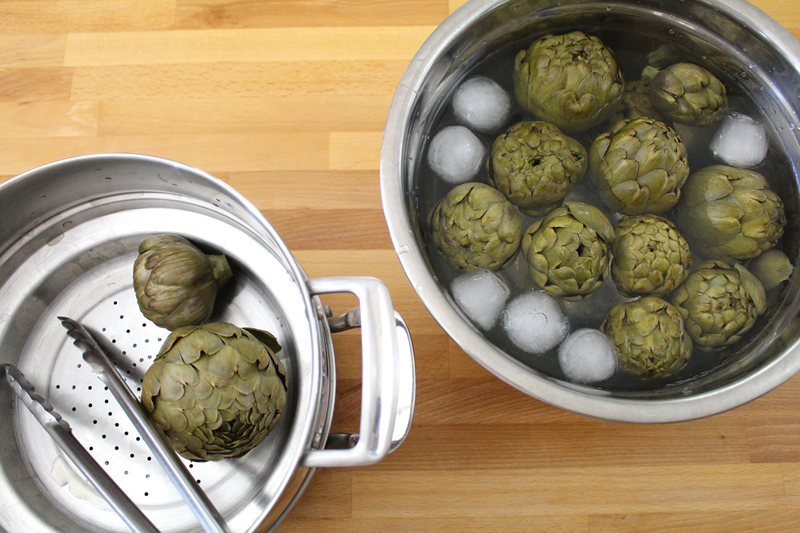
The cooked artichokes hop into an ice bath. This stops the cooking and cools them down so they don’t burn the fingers.

ArtichokeHeartDip-4

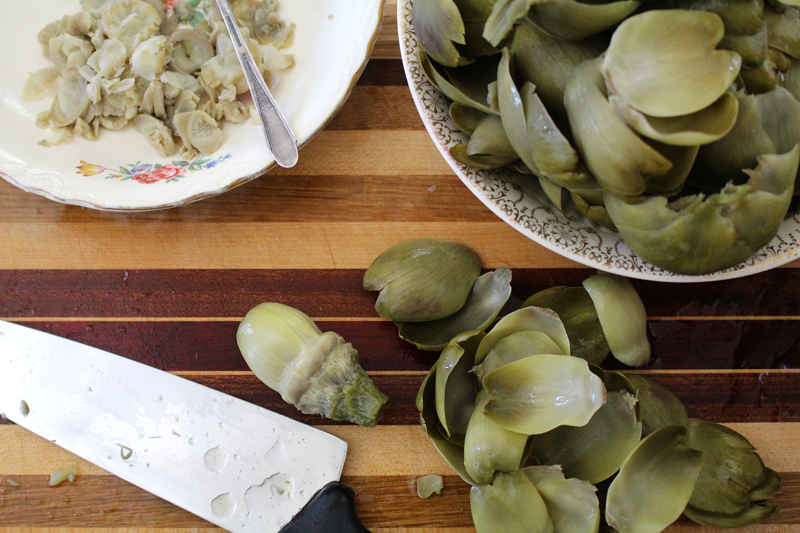
The artichoke leaves are removed and saved for later.

ArtichokeHeartDip-5

ArtichokeHeartDip-6

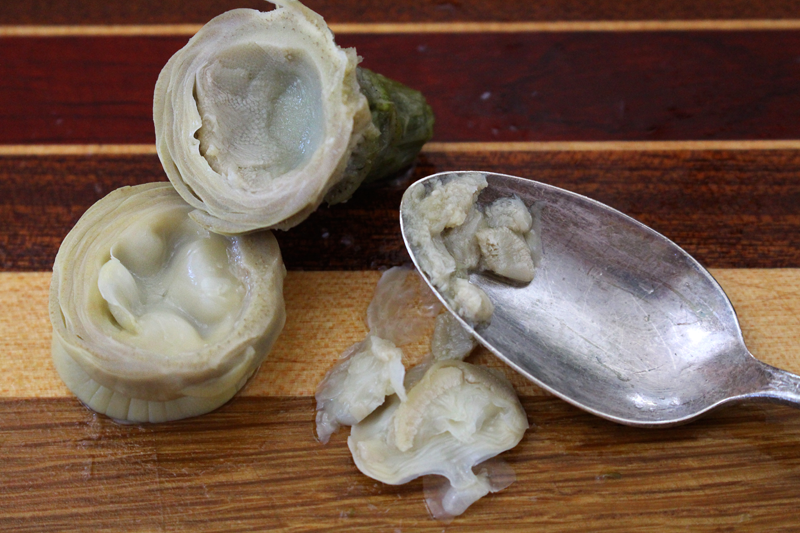
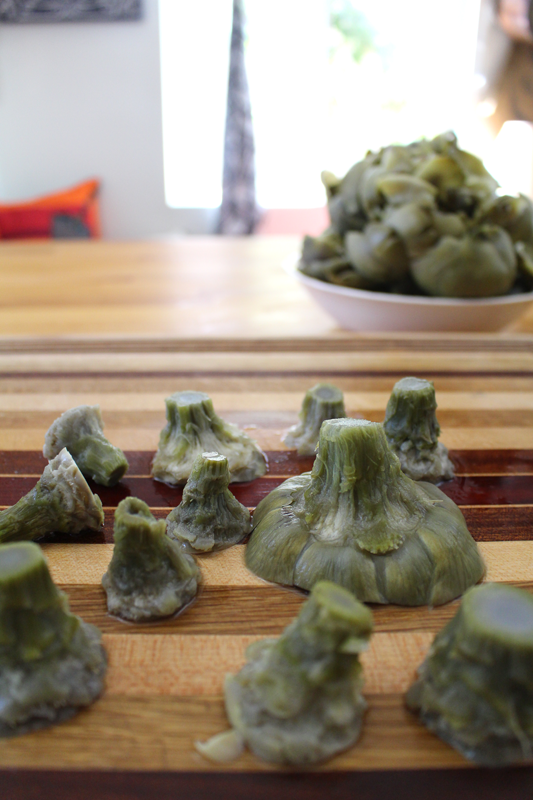
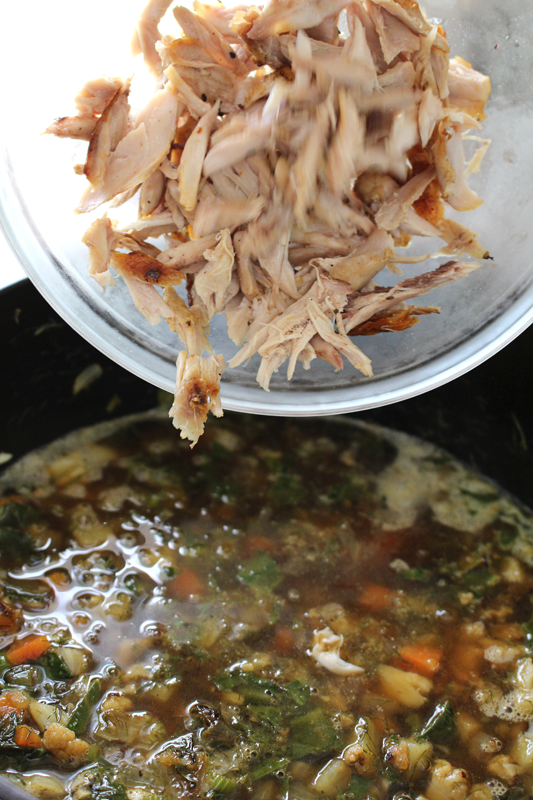
The fuzzy choke is removed and the hearts and stems are chopped up (be sure to discard any tough leaves that may be left on there). They’re added to the dip and stirred in. You could blend them if you want, but I like the added texture that the chunks of tender artichoke bring.

ArtichokeHeartDip-8

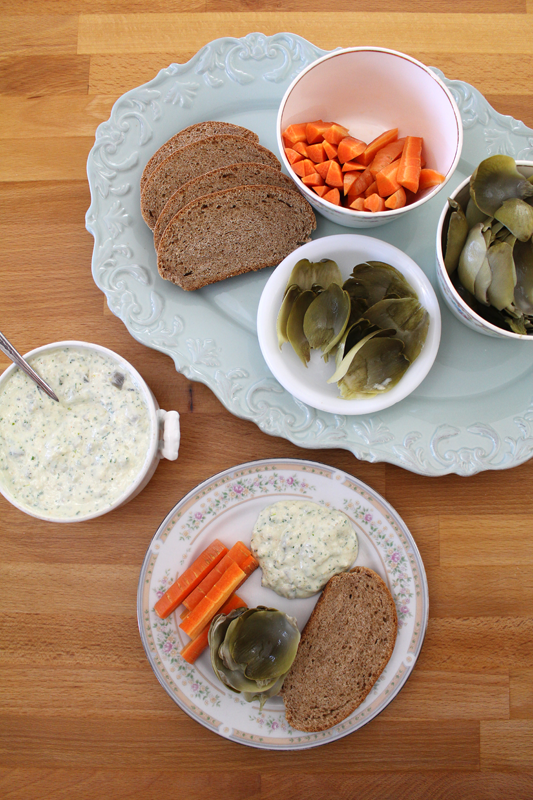
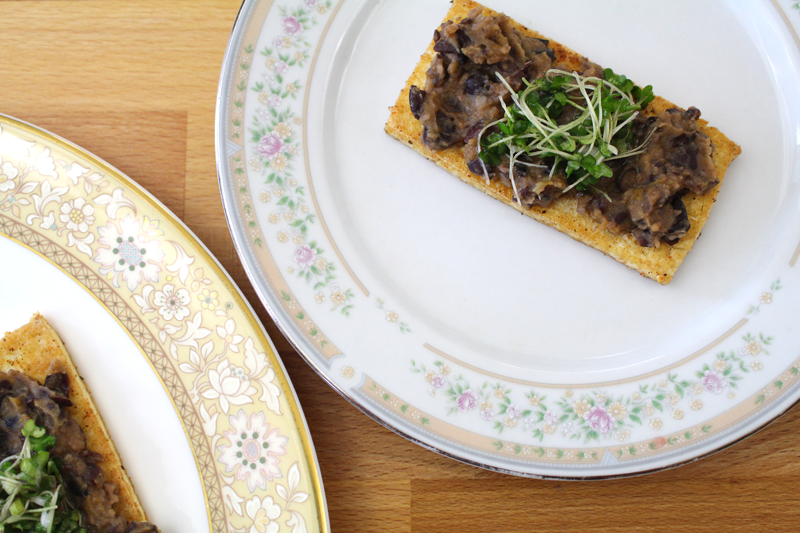
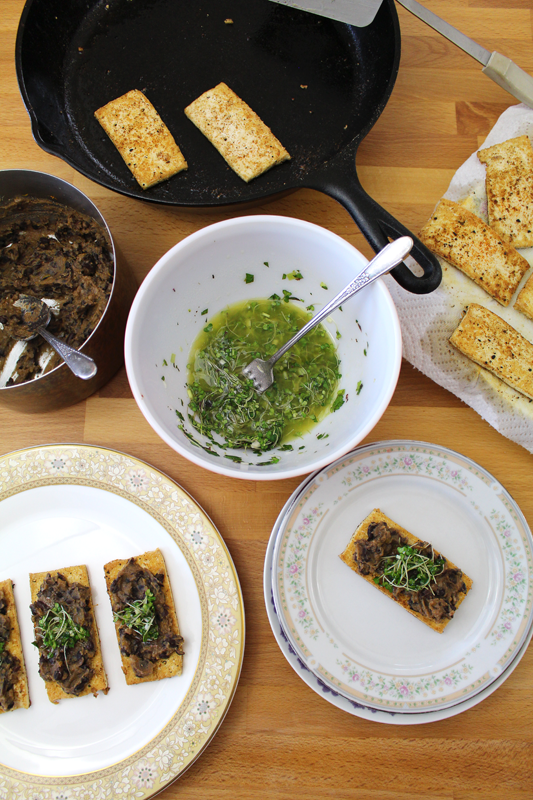
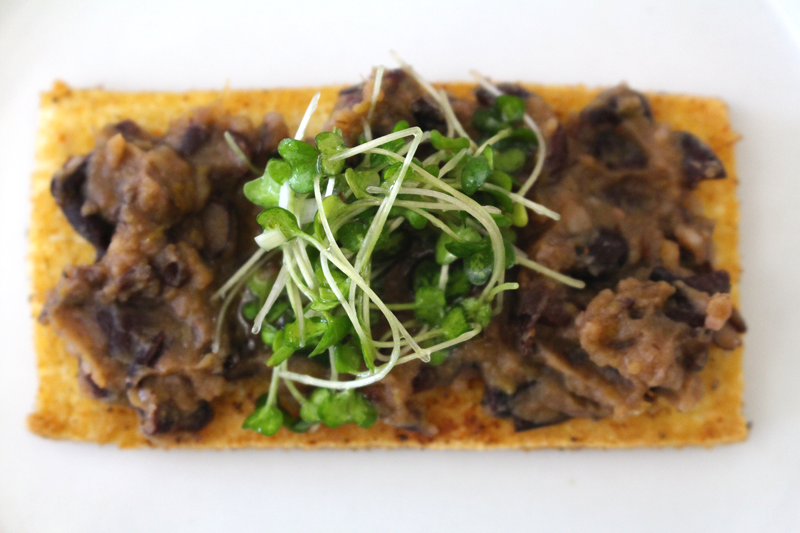
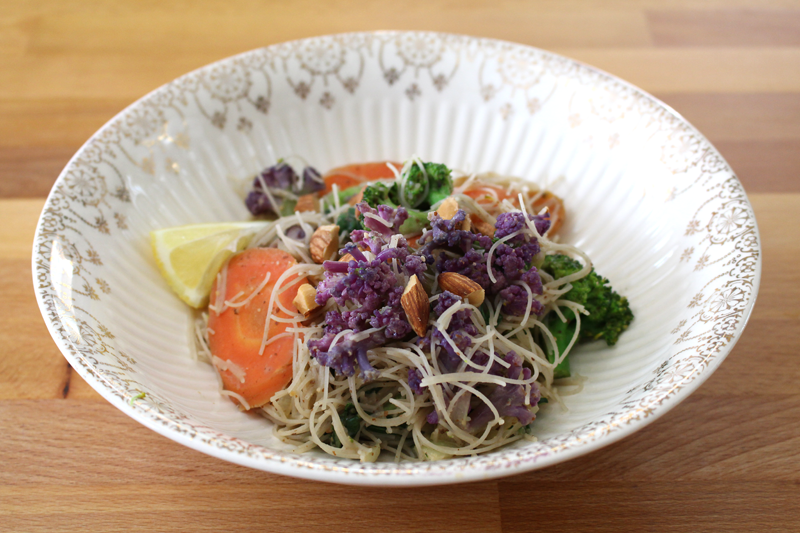
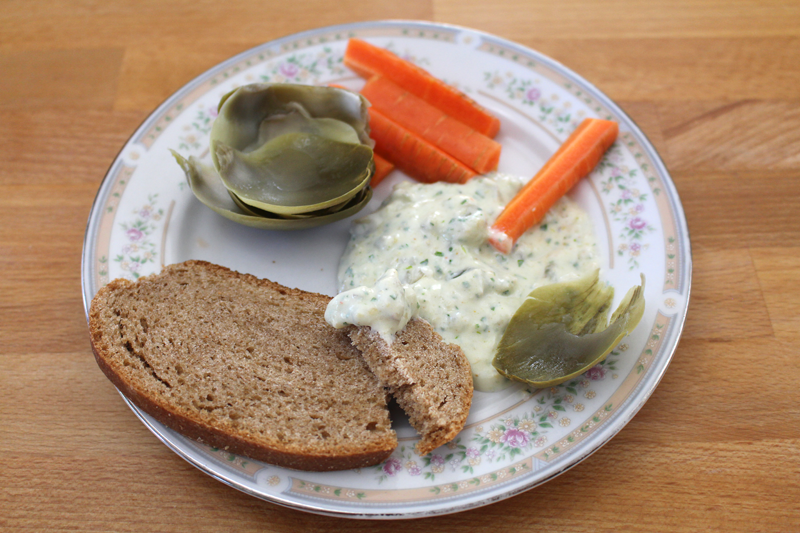
I ate this for lunch today: carrot sticks, artichokes, and a few slices of homemade bread. Other raw veggies like snap peas, green beans, fava beans, bell peppers, celery, fennel, mushrooms, and tomatoes (ok, not a vegetable, but close enough) could be fabulous too.

ArtichokeHeartDip-7

Perfect for lunch, snack, or an appetizer at your next dinner party.

Happy Eating!

Artichoke Heart Dip

Prep Time: 30 minutes

Cook Time: 20 minutes

Total Time: 50 minutes

Yield: 2.5 cups

Artichoke Heart Dip

Ingredients

  • 10-12 medium sized artichokes, stems trimmed, bottom 2-4 rows of leaves removed
  • 5 oz. ricotta cheese or soft (silken) tofu
  • 1/2 C Greek yogurt or soft (silken) tofu
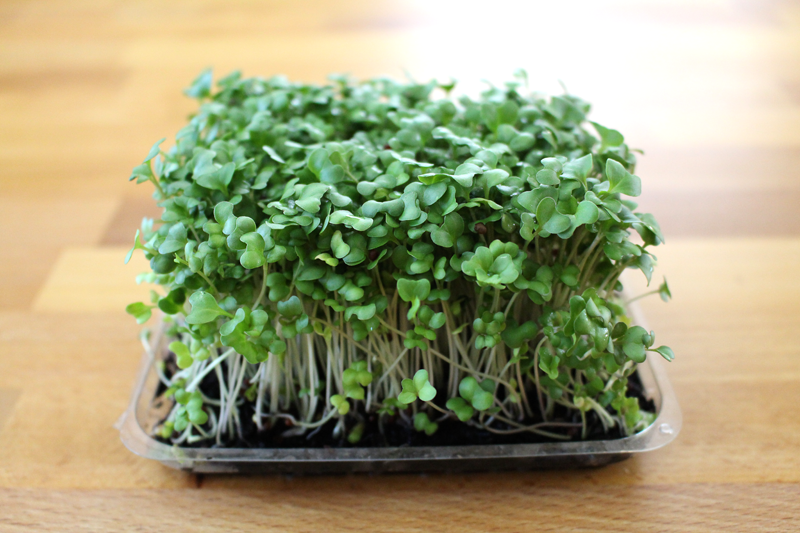
  • 2 T carrot greens (just the tops, no stems) (optional)
  • 1/2 C chickpeas
  • 1/4 C fresh parsley
  • 1 stalk green garlic, roughly chopped
  • 1-2 cloves garlic
  • 1/4 C olive oil
  • 2-3 T lemon juice
  • to taste salt
  • to taste pepper
  • good pinch cayenne
  • ice water
  • juice from 1/2 lemon
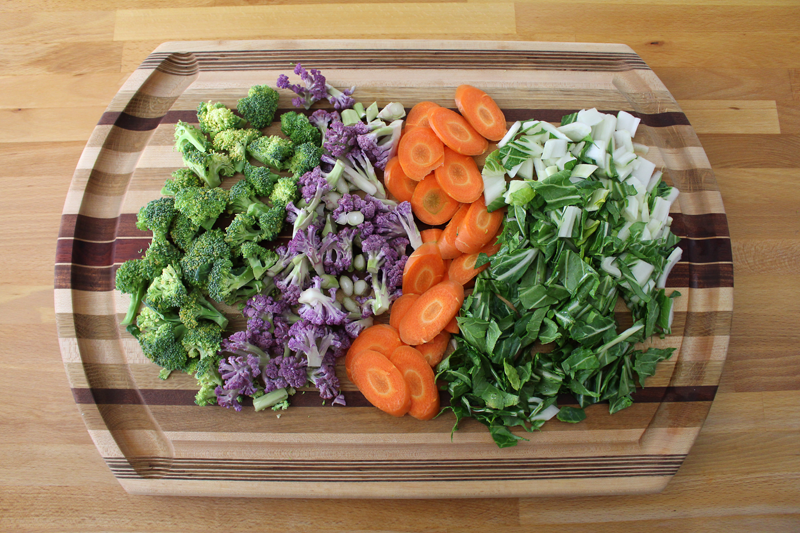
  • carrots, sliced, for serving

Instructions

  1. Place artichokes in a steamer basket in a pot with 1 1/2 -2" water. Cover and bring it to a boil then simmer and steam for 15-20 minutes (or until tender and stems pierce easily with a sharp knife).
  2. Blend (with a hand blender or in a food processor, regular blender could work too) ricotta or tofu through cayenne. Blend for about 1 minute, or until it's as smooth as you'd like it. Taste and adjust seasoning if needed. Chill it in the fridge until you need it.
  3. When artichokes are tender, remove them from the pot and plunge into ice water that has the juice of half a lemon mixed in. When they're cool enough to handle, pull off most of the leaves (stop when you get to the small ones) and set them aside for later. Slice off the tougher top part off the leaves (you can save the tender bottom part for dipping) and slice through the top of the heart. Scrape out the choke (the fuzzy center) in the heart (and if there's any on the leaves scrape that, if you're going to eat them). Once each heart is done, return it to the lemon water. Once all hearts are done, chop up and stir in to the ricotta mixture (or you can blend it in if you prefer). Taste and adjust seasoning if needed.
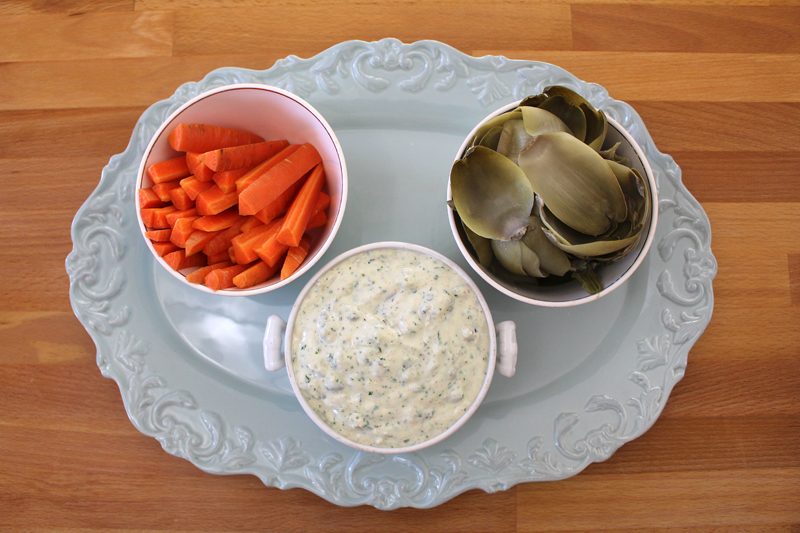
  4. Serve dip with carrots and artichoke leaves for dipping.
http://www.de-ma-cuisine.com/artichoke-heart-dip/

Thursday

26

March 2015

0

COMMENTS

Chicken Noodle Soup

Written by , Posted in Dinner, Fruit, Gluten Free, Herbs, Kid-Friendly, Lunch, Main Dishes, Meat, Pasta, Poultry, Soups, Vegetables

ChickenNoodleSoup-6

I know that Chicken Noodle Soup is one of those meals that’s made when someone feels under the weather. But, I want to enjoy it any day. It’s just so good.

ChickenNoodleSoup-2

It starts with some chicken that’s cooked in a bit of olive oil. The skin gets all crispy and the inside tender and juicy. It takes a while, just be patient. Once the chicken is cooked, it rests for a bit, and gets cool enough to handle. And those crispy bits on the bottom of the pan, they’re on their way to make this soup simply divine.

ChickenNoodleSoup-1

A little butter and oil is added to that same pan. No washing out required. The bits at the bottom will loosen as you stir the veggies and help make the broth a deep, rich brown.

Back to the veggies for a sec – there are tons of ’em. Fennel, carrots, kohlrabi, greens, cauliflower… and even more that you could add, depending on what you have on hand (check out the recipe for more). If you’re using this as an under the weather helper, it’s perfect because it’s packed with nutrients. If you’re not, well, it’s great for the same reason. 😉

ChickenNoodleSoup-3

The veggies are cooked covered, for about 10 minutes. They just need to sweat it all out. No big deal.

ChickenNoodleSoup-4

Once they’re ready, the chicken, which has been shredded, is added, along with the stock.

ChickenNoodleSoup-5

I like to cook the pasta separately. I have a hard time making the right amount of food for just two of us, so this way I can save the leftovers for another day without worrying that the pasta will absorb all the liquid and become a soggy, mushy mess. If you’re going to eat it all in one sitting, feel free to cook the pasta in the soup (you may want to add a bit more stock).

ChickenNoodleSoup-7

The pasta is divided into the bowls and topped with some soup for a hearty and delicious meal.

Happy Eating!

Chicken Noodle Soup

Prep Time: 10 minutes

Cook Time: 1 hour, 7 minutes

Total Time: 1 hour, 17 minutes

Yield: 4

Chicken Noodle Soup

Ingredients

  • 2 T olive oil
  • 3-4 chicken drumsticks (or 2-3 thighs, or 1 breast) (ending up with about 1-2 C cooked and shredded meat)
  • to taste salt
  • to taste pepper
  • 1 T butter
  • 1 t olive oil
  • 1 C fennel (any part), chopped
  • 1 C cauliflower, chopped
  • 1 C carrot, chopped
  • 1 C onion (or shallot or leek), chopped
  • 1-2 C greens (kale, collard greens, chard etc), chopped
  • 1/2 C turnip (or rutabaga), chopped
  • 1/2 C radish, chopped
  • 1/2 C kohlrabi, chopped
  • (could also add celery, broccoli, parsnip, summer squash, bell pepper, peas, green beans, beets, asparagus, or mushrooms)
  • 3 cloves garlic, diced
  • 1 T balsamic vinegar
  • 1/2 t each dried (or 1/2 T fresh) rosemary, thyme, basil, and parsley (or replace all four with tarragon, dill, and parsley)
  • pinch each cayenne, ginger, and paprika
  • 6-8 C stock (vegetable or chicken)
  • 1 C pasta (any kind)
  • 1 T butter
  • 1 T lemon juice
  • lemon slices, for serving

Instructions

  1. Heat a soup pot over medium heat. Add 2 T olive oil. When oil is hot, add chicken and sprinkle with salt and pepper. Cook for about 30-35 minutes (for drumsticks), or until internal temperature reaches 180F, turning every 5 minutes or so.
  2. Remove chicken from soup pot and let cool slightly on a paper towel lined plate. Return soup pot to the heat, add 1 T butter and 1 t olive oil. Add fennel through kohlrabi, stir to scrape browned bits off the bottom of the pan, and cook covered for about 10 minutes, stirring occasionally. Add garlic and cook for 1 minute. Add balsamic vinegar and deglaze the pan, scraping the bottom, about 1 minute.
  3. Add seasonings and stock. Bring to a boil, then reduce to a simmer for 15-20 minutes.
  4. Cook pasta in boiling salted water. Drain.
  5. Remove soup from heat, stir in 1 T butter and lemon juice. Taste and adjust seasoning if needed.
  6. Divide pasta between 4 bowls and top with soup. Serve with a lemon wedge for squeezing.
http://www.de-ma-cuisine.com/chicken-noodle-soup/

Wednesday

18

March 2015

0

COMMENTS

Crispy Tofu with Black Bean Purée and Microgreens

Written by , Posted in Appetizers, Beans, Dairy-Free, Dinner, Fruit, Gluten Free, Herbs, Legumes, Lunch, Main Dishes, Quick and Easy, Sandwiches, Sides, Snacks, Vegan, Vegetables, Vegetarian

CrispyTofuBlackBeanPureeMicrogreens-8

I think of this dish as a sort of open faced sandwich. We eat bread in our house. We also eat gluten. But, there are plenty of folks who don’t. There are also plenty of vegan-loving people out there. This is a shout out to all of you. But, but but but, not just for you GF+V friends! Because let me tell you, as a carnivore and gluten-eater, I loved this meal. So much so that I re-heated the leftovers and ate it again for dinner the day that I made it.

CrispyTofuBlackBeanPureeMicrogreens-1

My goal was to make a bean purée (ish) topping. I love to eat beans. They’re full of protein and add so much to most any dish. But, I didn’t want it to taste like I’d just opened a can of beans and mashed them up. So I added things like a touch of lemon and vinegar for acidity and brightness, butternut squash for creamy richness, and cayenne for a hint of spice.

CrispyTofuBlackBeanPureeMicrogreens-2

Which all tasted great topped with these super cute microgreens. Hello yum! Hello packed with nutrients!

CrispyTofuBlackBeanPureeMicrogreens-3

I mixed up a lemony dressing to toss the microgreens in. Note: wait until right before serving to toss them. They will wilt if left too long (lesson learned). If you have extra dressing, just save it for tomorrow’s lunch, use it for drizzling on some soup, or make a double batch of these yummy treats and have a party!

CrispyTofuBlackBeanPureeMicrogreens-4

I’m seriously digging crispy pan fried tofu these days. I love to sprinkle it with lots of cayenne and a bit of ginger (plus salt and pepper). In a super hot pan they’ll cook in no time at all.

CrispyTofuBlackBeanPureeMicrogreens-7

The tofu gets spread with beans and topped with the microgreens (mine were kinda swimming in the dressing, so I had to quickly consume as many as possible – not a problem).

CrispyTofuBlackBeanPureeMicrogreens-5

The perfect little gluten-free, vegan treat for lunch, dinner, snack, appetizer… maybe even for breakfast!

Happy Eating!

Crispy Tofu with Black Bean Purée and Microgreens

Prep Time: 10 minutes

Cook Time: 22 minutes

Total Time: 32 minutes

Yield: 2-3

Crispy Tofu with Black Bean Purée and Microgreens

Ingredients

  • 1 C black beans (if canned, drained and rinsed)
  • 1/4 C water
  • 1 T lemon juice
  • 1 t rice vinegar
  • sprinkle cayenne
  • 1/4 C mashed butternut squash or sweet potato
  • to taste salt
  • to taste pepper
  • 1/4 C lemon juice
  • 1 T parsley, minced
  • 1 t mint, minced
  • 1 T green garlic/green onion/chives/garlic, minced
  • to taste salt
  • 2-3 T olive oil
  • 1-2 C microgreens
  • olive oil, for frying
  • 14 oz. tofu (extra firm or firm)
  • to taste salt
  • to taste pepper
  • to taste cayenne
  • to taste ground ginger

Instructions

  1. Heat beans, water, 1 T lemon juice, rice vinegar, cayenne, squash, salt, and pepper in a saucepan over medium-low heat for about 10 minutes, stirring occasionally. Mash, taste and adjust seasoning if needed, and set aside and keep warm.
  2. Whisk lemon juice, parsley, mint, green garlic, and salt. Stream in olive oil while whisking. Taste and adjust seasoning if needed. Set aside.
  3. Heat a large skillet over medium-high. Add olive oil. Add tofu and sprinkle with salt, pepper, cayenne, and ginger. Cook for about 2-3 minutes per side, or until golden brown and crispy. Work in batches so the pan isn't overcrowded, adding more oil as needed. Set on a paper towel lined plate as they are done.
  4. Spread beans on top of tofu, toss microgreens with dressing (right before serving, being careful not to overdress, as they will get soggy) and place them on top of the beans.
http://www.de-ma-cuisine.com/crispy-tofu-with-black-bean-puree-and-microgreens/

Monday

16

March 2015

0

COMMENTS

What Are You Throwing Away That You Could Be Using?

Written by , Posted in How To, Thoughts

VegetableStock2_4

Over the years as we’ve tried to reduce our carbon footprint and our grocery budget, we’ve been making more of an effort to throw out less. For us, that means that we’re recycling, reusing, using things fully, and composting. 

Recycling is something that my family has always done. It’s nothing new, but it’s important. If you’re new to recycling, check with your city to see their guidelines on what can and can’t be recycled. Many grocery stores accept used plastic bags. If you can avoid using them, great (reusable bags are available everywhere these days, some stores even give you a small credit for each one used). If not, better to bring them somewhere they can be recycled than adding them to the trash.

BlueberryJam-1

Before anything goes out the door, we try to use it as much as we can in the home. For example, once things like yogurt and salsa (that come in a safe plastic container or a glass jar) have been eaten, the vessel gets washed and used for leftovers and homemade stocks. (We don’t own a microwave, so we don’t re-heat leftovers in containers. If we did, we would re-heat in glass, as it’s said to be safer than plastic.) If I have more than I can possibly use, then they’ll go into the recycling. But, if possible, they get used again and again. Jam jars are washed and reused (just the ring for the lid won’t seal again).

DryingHerbs-5

Reusing is also something that I grew up with. In Canada milk comes in bags. Once the milk had been drunk, we’d wash the bags and use them for lunches. It was a little bit embarrassing to be the kid with the washed out milk bag and whole wheat bread sandwich. It felt like everyone else had ziplocks and white bread. Now it just makes me smile, because I get it. The money that’s saved and the trash that we’re avoiding by reusing is totally worth it.

And then there’s the food itself. I’m trying to be better at using it all with somewhat of a “nose to tail” approach, whether it’s a chicken or some broccoli. After the food has been fully used, then the veggie scraps go into the compost and anything that needs to be thrown away goes in the trash.

BroccoliStemPasta-5

Use Before You Throw Away

  1. Chicken bones and giblets: Use them to make chicken stock (same goes for beef, turkey, and pork bones). (The jars with straight sides are the best for freezing liquids, as they’re less likely to crack and stock will slide out easier, even if it’s still frozen. Cool completely and freeze with the lid off. Add the lid once it’s completely frozen.)
  2. Vegetable peels and ends, herb stems, wilted greens, old veggies: Turn them into vegetable stock.
  3. Herb stems (tougher ones, like rosemary): use as skewers for meat and vegetables.
  4. Broccoli and cauliflower stems: Use them to make “pasta” (save the tough outer peel for stock).
  5. Winter squash: Roast then use them as a soup tureen.
  6. Potatoes and sweet potatoes that have sprouted: Cut them into about 1″ chunks and plant them. (I have had a sweet potato plant growing for about 3 years. They have pretty leaves that I’ve let grow into a vine, harvesting only one sweet potato a few weeks ago.)
  7. Plastic food bags: Snip off the corner and use as a piping bag for cake decorating or macaron making.
  8. Egg shells: Crush and sprinkle around plants that snails like to eat.
  9. Egg cartons: Add a little dirt and use to plant seeds to start a garden.
  10. Water that was used to boil or steam veggies: Save to boil beans or pasta. Save to make veggie stock. Cool completely and use to water plants.
  11. Citrus peels: Before removing the peel from the fruit, use a zester or fine grater to zest or grate, and freeze for later use.
  12. Veggies with seeds: Save seeds for planting (I’ve had success doing this with green beans, peas, summer and winter squash, basil, melons, and tomatoes – green beans, peas, and tomatoes have been the most successful).
  13. Bread crusts: Freeze and use for croutons, bread crumbs, and Baked French Toast.
  14. Coffee grounds: Add to the compost pile to bump up the nitrogen.
  15. Parmesan cheese rinds: Add them to stews and bean dishes – they’ll add a nutty parmesan richness and can be discarded before serving.
  16. Pasta water: Near the end of the cooking time add 1/2 to 1 C of the starchy water that your pasta has been cooking in to the sauce. It will help the sauce stick to the pasta.
  17. The last few tablespoons of yogurt: Use them to make your own homemade yogurt.

Once you’ve made the most of your food, discard it as needed. If you’re interested in composting, CSA’s like Abundant Harvest Organics has worm casings for sale on their add ons page. The butcher paper from the weekly box of AHO produce can be torn into strips and added, along with the veggies that were boiled for your veggie stock, and the broccoli and cauliflower peels. And, some cities even give away free composters, all you have to do is ask!

Do you have any tips and tricks to share? How are you reducing your carbon footprint? Do you have a compost pile or vegetable garden? If you do, do you have any advice?

Monday

9

March 2015

3

COMMENTS

Almond Butter Stir Fry

Written by , Posted in Dairy-Free, Dinner, Fruit, Gluten Free, Herbs, Lunch, Main Dishes, Nuts, One Dish Dinners, Pasta, Quick and Easy, Quinoa, Rice, Sides, Vegetables, Vegetarian

AlmondButterStirFry-9

Stir Fry is one of those dishes that’s packed with flavor, nutrients, and is ready in a flash. Perfect for those tired nights when you don’t know what to make for dinner.

AlmondButterStirFry-1

There’s just something about the colorful veggies. Purple cauliflower, bright orange carrots, green broccoli… they’re such happy and friendly colors. You could totally switch up the veggies depending on what you’ve got on hand and what’s in season. Sugar snap peas, bell peppers, onions, and green beans would all be fabulous.

AlmondButterStirFry-2

I like to add nut butters to bump up the protein in a dish, especially if I’m opting to keep it vegetarian (which I did for this dish, but you could definitely add meat, or keep it vegetarian and add some pan fried tofu). Also, I just like the taste. Today I used almond butter. It’s not quite as in your face as peanut butter is, yet it still brings the same nutty yumminess.

AlmondButterStirFry-3

The sauce is whisked together before the veggies go in to the wok. Since they are cooked over fairly high heat, stirred almost constantly, and cook quickly, I don’t want to take chances with anyone burning while I whisk up the sauce.

AlmondButterStirFry-4

They cook so fast that the veggies still retain their bright, beautiful colors.

AlmondButterStirFry-5

Sauce is added and will just cook for a minute or two.

AlmondButterStirFry-6

I like to toss the noodles (or rice or quinoa) with the veggies and sauce. That way I can make sure that they all get nice and coated.

AlmondButterStirFry-7

And then it’s ready to be topped with almonds and some lemon juice. You could absolutely add chopped green onions, sesame seeds, and cilantro too.

AlmondButterStirFry-8

I like using rice noodles with Stir Fry. Some don’t even require any cooking – they just warm up in a bowl of hot water. They stand up great to re-heating the next day too. Rice or quinoa – also great. Or how about fried rice? Yum! Or, how about rice noodles with a fried egg on top?! Now we’re talking… Of course it was great just the way I made it – topped with almonds and a good squeeze of lemon.

Happy Eating!

Almond Butter Stir Fry

Prep Time: 15 minutes

Cook Time: 10 minutes

Total Time: 25 minutes

Yield: 4

Almond Butter Stir Fry

Ingredients

  • 1/4 C almond butter
  • 1 t honey
  • 3 T to 1/4 C water
  • 2 T lemon juice
  • 1/2 to 1 T liquid aminos (or GF soy sauce)
  • 1/8 t ground ginger
  • 1/8 t ground coriander
  • pinch cayenne
  • 2 T olive oil
  • 1-2 C broccoli, bite sized pieces
  • 1-2 C cauliflower, bite sized pieces
  • 1 C carrots (or celery), sliced on a bias
  • (sugar snap peas, bell peppers, onions, green beans would also be great)
  • to taste salt
  • to taste pepper
  • 1-2 C greens (or cabbage), chopped
  • 2 cloves garlic, diced
  • lemon slices, for serving
  • almonds, chopped, for serving
  • rice noodles, rice, or quinoa, for serving
  • fresh herbs (chives, cilantro) (optional), chopped, for serving

Instructions

  1. (Optional: Cook rice or quinoa, if serving one of those with the dish. Cook a protein, if desired.)
  2. Whisk together almond butter through cayenne. Taste and adjust seasoning if needed.
  3. (If using rice noodles, follow instructions on package and cook/warm now.) Heat a wok or large skillet over medium or medium-high heat. Add oil. When oil is hot, add broccoli through pepper. Cook for about 5 minutes, stirring almost constantly. Add greens and garlic, cook for 1-2 minutes more. Stir in the sauce and cook for 1-2 minutes more. (Optional) Toss with rice/quinoa/rice noodles if desired and cook for 1 minute more.
  4. Serve topped with a squeeze of lemon and almonds, and fresh herbs, if desired.
http://www.de-ma-cuisine.com/almond-butter-stir-fry/