De Ma Cuisine

Rachel O Archive

Monday

6

October 2014

0

COMMENTS

Grape Toasts

Written by , Posted in Appetizers, Baking, Bread, Cheese, Fruit, Kid-Friendly, Lunch, Quick and Easy, Sandwiches, Sides, Snacks, Toasting, Vegetables, Vegetarian

GrapeToasts-4
One of my all time favorite snacks is crackers and cheese with grapes. When I used to teach aerobics many years ago, I’d come home starving, and would eat like it had been a really long time since I’d last eaten (when in fact it had probably just been a few hours).

Back then, I wasn’t eating seasonally. I didn’t realize that grapes were a late summer/early fall fruit. I didn’t know, guys. I mean, the grocery stores have almost everything available year round. I didn’t really question where things were coming from or if it was beneficial to be eating things that were coming from so far away. I didn’t realize that they were often so flavorless because they were picked green and transported to us, so we could have oranges in June and peaches in December.

That’s just the way it was.

No longer.

At least, not for us, if we can help it.

I love that we’re eating with the seasons. Some say it’s better for your health, some say it doesn’t matter. Whatever. I’m not going to argue with them. Potential health benefits aside, I love that by buying things that are in season, we’re supporting our local/California farmers. We’re also doing the environment a favor by not buying foods that are shipped from ridiculously far away, whenever possible. We’re just two of us here in our little home, but we’re trying to do our part.

This means we wait all year for things like grapes.

It’s worth it.

GrapeToasts-11

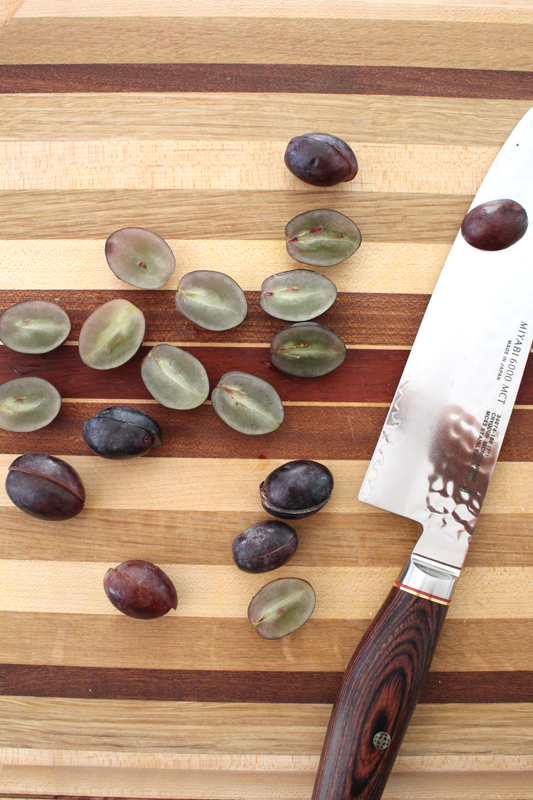
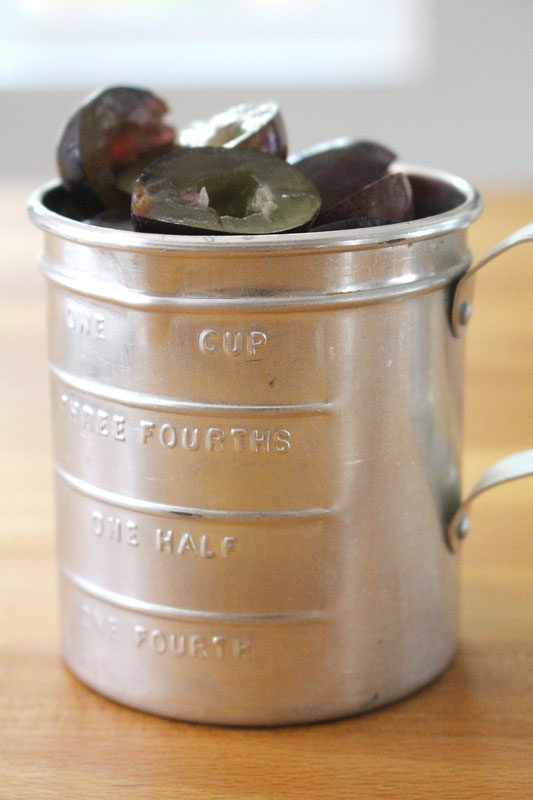
These sweet fall treats are sliced in half, seeds removed.

GrapeToasts-10

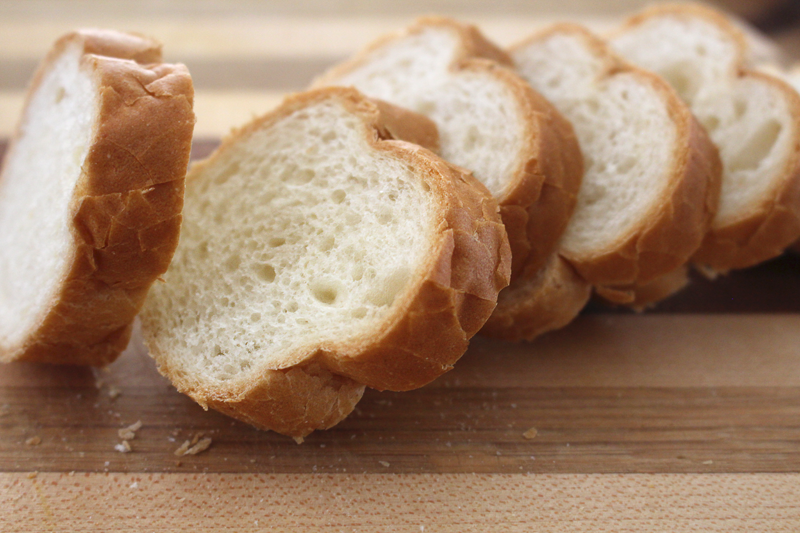
A baguette is sliced about 1/2″ thick.

I would always prefer homemade. But, I don’t have any right now. They’re a bit of a process, so I don’t make them as often as I wish I would. Every time I do I decide that I’m never going to buy a baguette again (unless we’re back in Paris, obviously). Then we run out and the cycle starts over.

I digress.

GrapeToasts-8

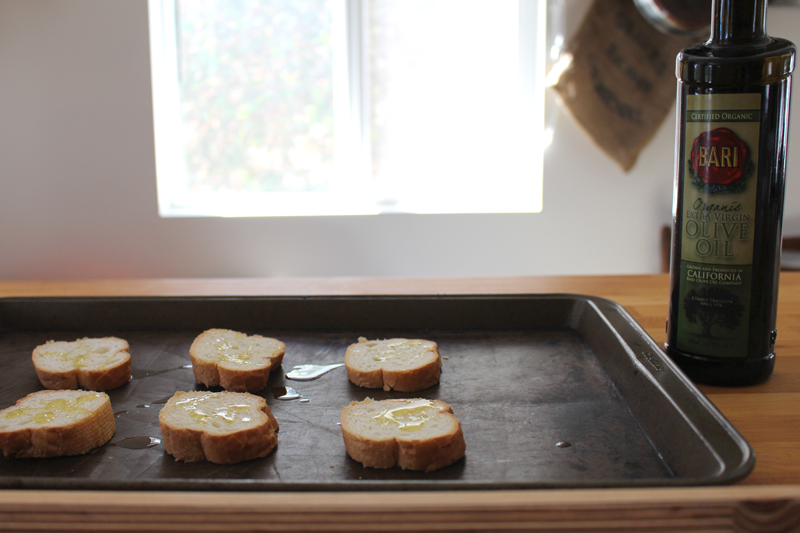
Bari’s olive oil is second to none. This goodness gets drizzled on the baguette.

GrapeToasts-9

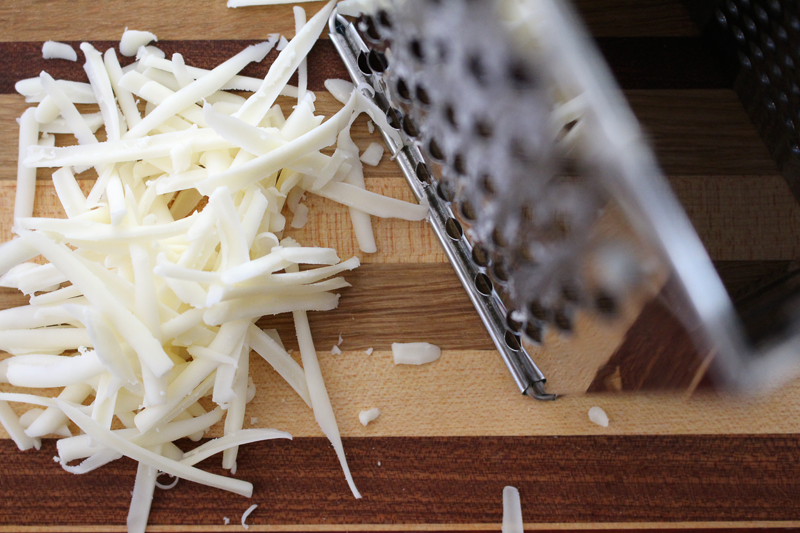
So many good things come from a sentence that begins with, “cheese is grated”. Cheddar or monterey jack would be great. Gruyère would be awesome. Havarti would be divine. Use whatever cheese is your favorite, even if it’s not one of my suggestions.

GrapeToasts-7

GrapeToasts-6

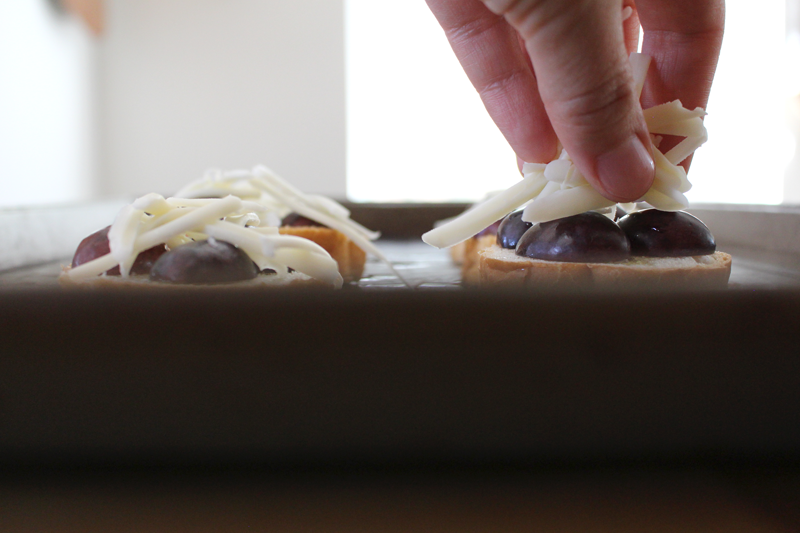
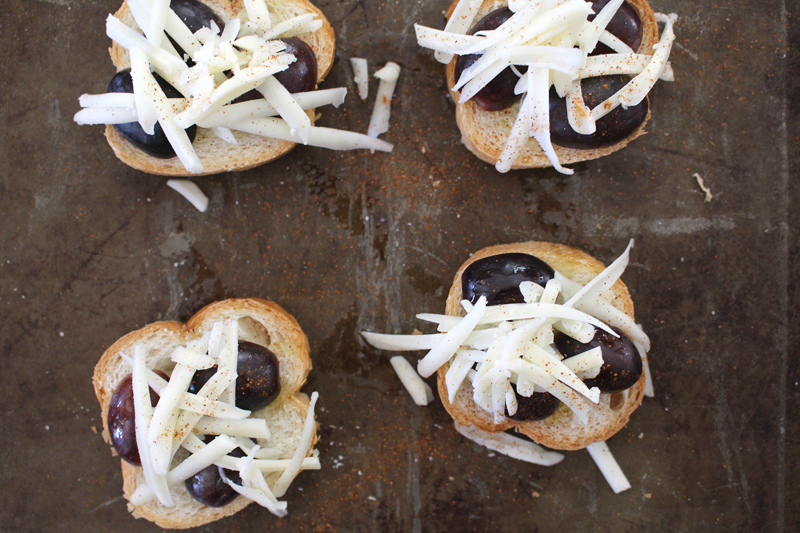
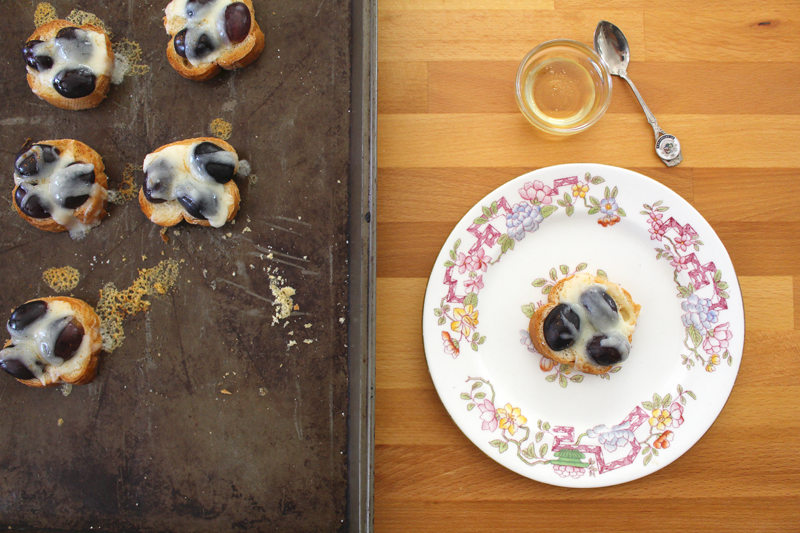
A generous plomp of the cheese is placed on the grapes. And then it’s sprinkled with a bit of cayenne.

GrapeToasts-5

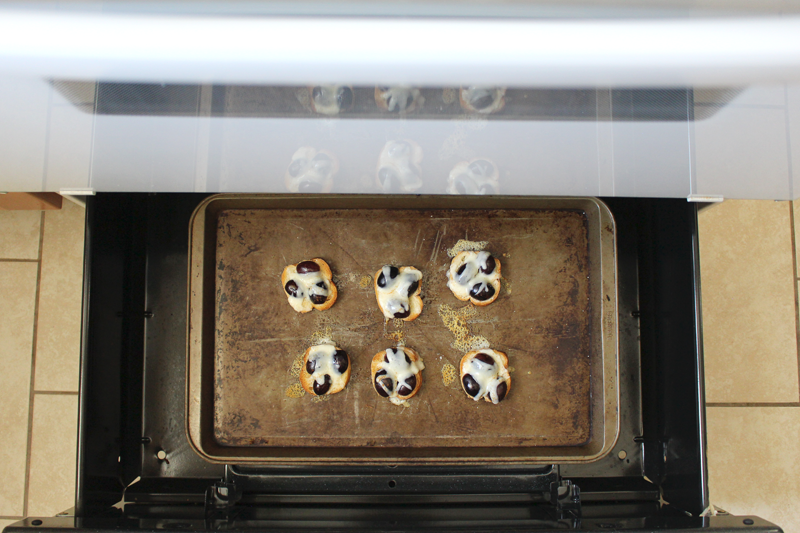
I’ve used the broiler at our new house now twice. I’m a little bit scared of it. No one knows why. I think it’s that it gets so very hot and can burn things when they’re forgotten about for just a minute. Thankfully, the stove has one of those broiler drawers that pulls out, so I don’t have to lay on the floor to check on the foods. Makes it much less scary.

GrapeToasts-1

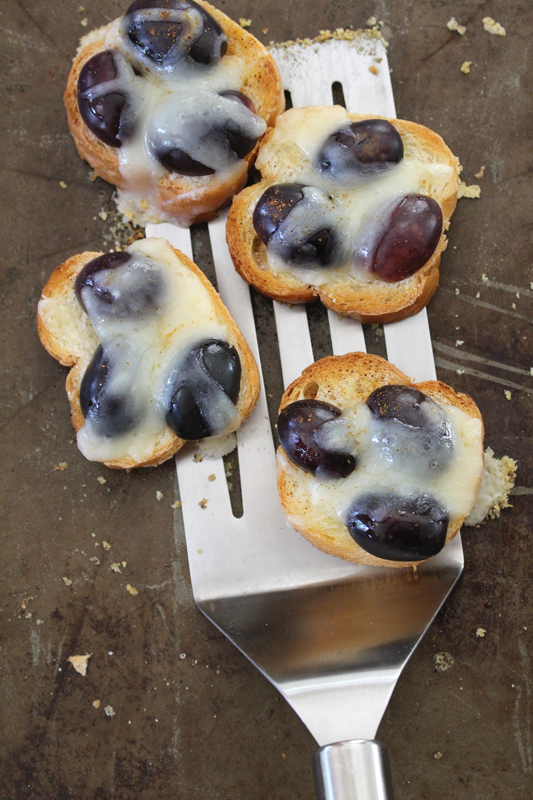
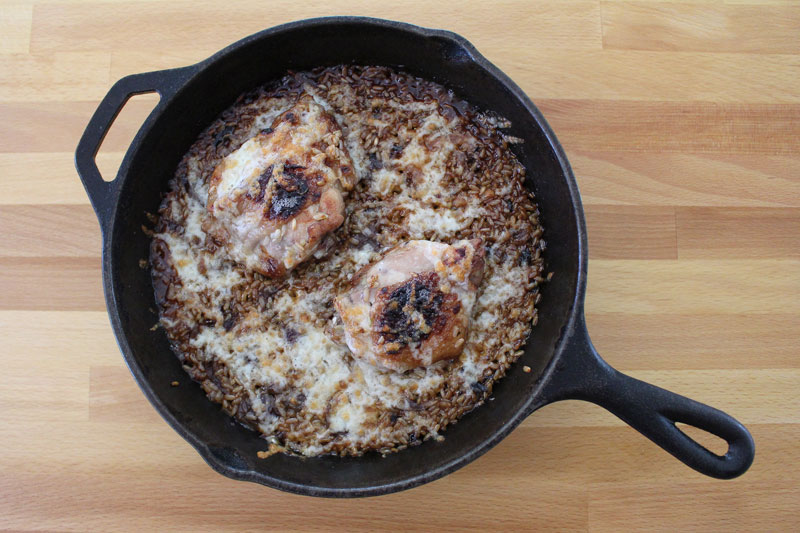
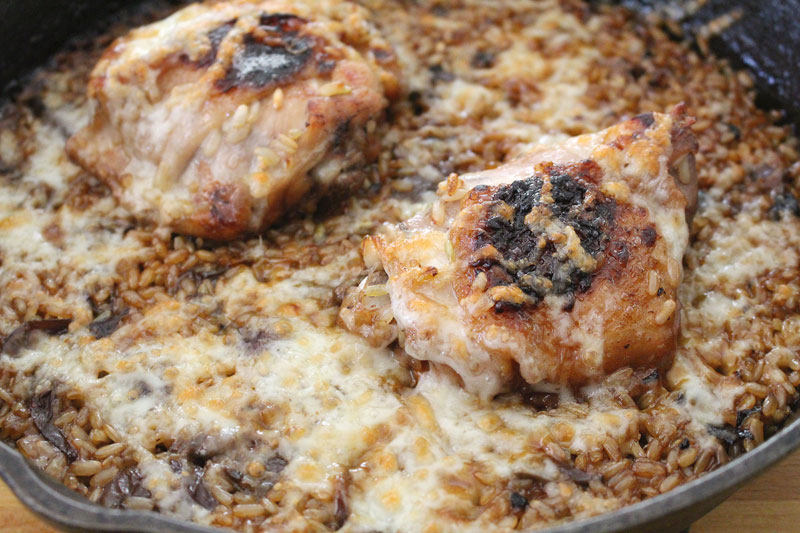
I love the little crispy cheese crumbles that get stuck to the pan. I don’t usually share those.

GrapeToasts-3

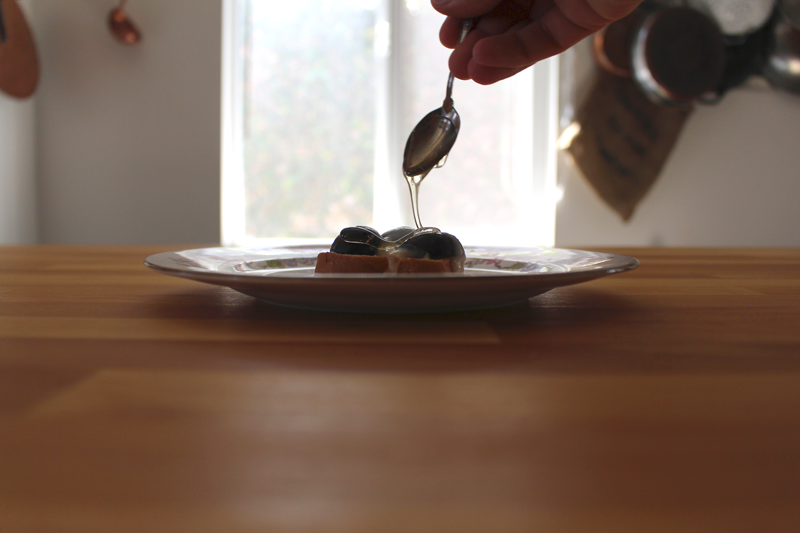
Last step is to drizzle each toast with a bit of honey.

GrapeToasts-2

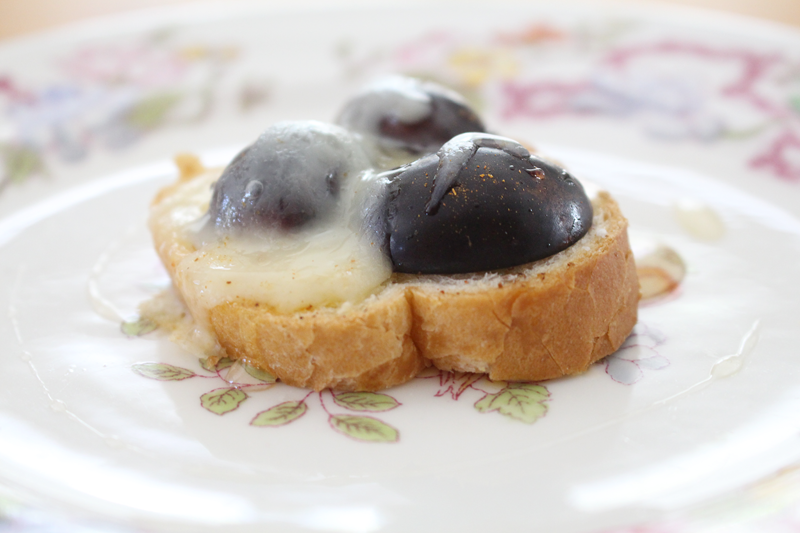
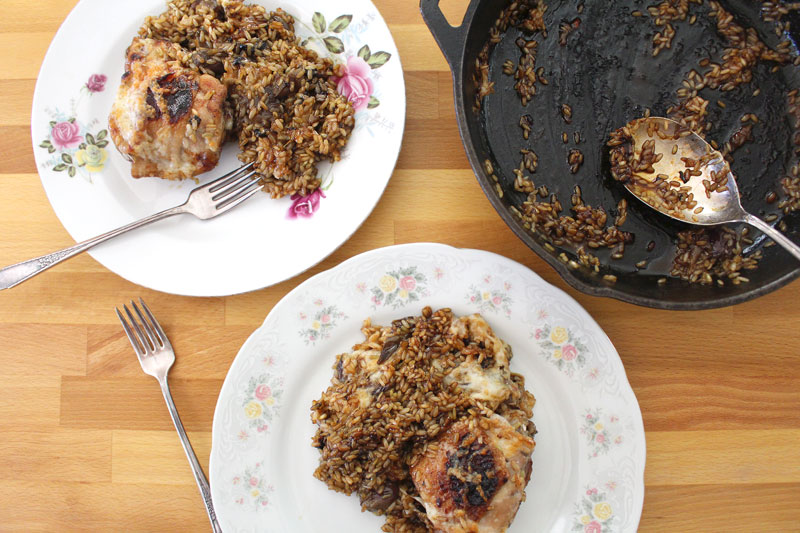
A little sweet, savory, kick of spicy treat. Perfect for right now.

Happy Eating!

Grape Toasts
Recipe Type: Appetizer, Snack, Fruit, Cheese
Author: Rachel Oberg – De Ma Cuisine
Prep time: 5 mins
Cook time: 3 mins
Total time: 8 mins
Serves: 2
Ingredients
  • 6 slices baguette, about 1/2″ thick
  • 1 t olive oil
  • 9-12 grapes, halved lengthwise and seeded
  • to taste salt
  • 1/4 C cheddar or monterey jack cheese
  • pinch cayenne
  • 1 t honey
Instructions
  1. Drizzle bread with oil. Top with grapes, a sprinkle of salt, cheese, and a sprinkle of cayenne.
  2. Broil for about 2-3 minutes, or until cheese is melted.
  3. Serve drizzled with honey.
3.2.1311

Monday

15

September 2014

0

COMMENTS

Cheesy Chicken and Grapes with Rice

Written by , Posted in Braising, Cheese, Dinner, Fruit, Gluten Free, Grains, Kid-Friendly, Lunch, Main Dishes, Meat, Poultry, Rice

CheesyChickenAndGrapesWithRice-7

We don’t usually have a problem finishing off the grapes (or most any fruit that comes our way from Abundant Harvest Organics). We usually eat it raw. But, sometimes it’s super fun to try something new.

Like grapes with chicken and rice.

Oh yes I did.

CheesyChickenAndGrapesWithRice-1

It all starts with some thighs. I had a package of two, so that’s what I used. Add more (using a larger skillet) if your family needs more.

It’s seasoned simply, with cayenne and salt. This is gonna be a simple, humble dish, where the flavors really shine.

Shine chicken shine.

Go grape! Go grape! It’s grrrrrrrrrrrrape!

(I don’t know… Sorrynotsorry. I blame it on the Christmas music I’m listening to, in the 100 degree weather, to prepare for a concert in December… Not really. But, the heat makes my brain a little kooky.)

CheesyChickenAndGrapesWithRice-2

I made chicken stock the other day and then froze it. So, to quickly defrost the stock, I brought it to a boil. I don’t normally use hot stock when cooking rice (except when making risotto). So, you could use cold stock, if you’ve planned ahead and put it in the fridge overnight. I didn’t. Just adjust the cooking time as needed.

CheesyChickenAndGrapesWithRice-3

Once the stock + rice + chicken comes to a boil, reduce to a simmer and cook for a few minutes.

CheesyChickenAndGrapesWithRice-4

While these few minutes pass, halve and de-seed some grapes.

Eat them all.

Halve and de-seed some more.

CheesyChickenAndGrapesWithRice-5

Add the grapes to the skillet. Pick them off the top of the chicken, and stir slightly into the rice. Then cook for a good long while (you know, until the rice is done and the chicken is hot). You may need to add more liquid partway through, and stir every once in a while.

CheesyChickenAndGrapesWithRice-6

Is one of your favorite snacks crackers and cheese with grapes? Do you wait expectantly for fall to arrive, so you can eat this snack as often as possible?

I do.

So, why not add some cheddar to the mix? Right?!

CheesyChickenAndGrapesWithRice-8

It’s sprinkled on and popped in to the broiler for just about 3 minutes. It’s like a bazillion degrees in there, so it’s not gonna take long. Don’t leave the kitchen to go wash your hair while it broils. You may have a smoky situation on your hands if you do.

Also, you remembered to use an ovenproof skillet, right? I know you did. But, just making sure. ‘Cause if you decided to not use one AND wash your hair while it broils, well, that’d be just disastrous. Let’s avoid kitchen catastrophes when possible.

CheesyChickenAndGrapesWithRice-9

Once the rice is cooked, the chicken and rice all kinda brown a bit, creating this amazing sauce that I just want to soak up with a piece of crusty bread.

CheesyChickenAndGrapesWithRice-10

Apples go so nicely with grapes and cheese, so serve some (on their own, or in a salad) with this easy, comforting dish that welcomes fall (cough cough, seriously, fall, let’s do this now, enough with the hundred degree weather).

Happy Eating!

Cheesy Chicken and Grapes with Rice
Recipe Type: Dinner, Main Dish, Meat, Chicken, Fruit, Grapes
Author: Rachel Oberg – De Ma Cuisine
Prep time: 10 mins
Cook time: 96 mins
Total time: 1 hour 46 mins
Serves: 2-3
Ingredients
  • 2 T olive oil
  • 2-3 chicken thighs
  • to taste salt
  • dash cayenne
  • 2-3 C hot chicken or vegetable stock (or water)
  • 1 C brown rice
  • 1 C grapes, halved, seeds removed
  • 1 C cheddar cheese, grated
  • 1 apple, sliced, for serving
Instructions
  1. Heat an ovenproof skillet over medium heat. When it’s hot, add olive oil. When oil is hot, add chicken. Sprinkle with salt and cayenne. Sear on each side for 3 minutes.
  2. Add 2 C stock, rice, and salt. Stir gently around chicken (make sure all rice is in stock, not on top of chicken). Bring to a boil, then reduce to a simmer for 10 minutes.
  3. Add grapes, and simmer, adding more liquid if needed, cooking until chicken reaches 180F and rice is to desired tenderness, about 45-50 minutes (cooking uncovered, until the last 20-30 minutes), stirring occasionally.
  4. Taste and adjust seasoning if needed. Top with cheese and broil for 3 minutes.
  5. Serve with a side of apples.
3.2.1311

Monday

18

August 2014

0

COMMENTS

Beef and Bean Enchiladas

Written by , Posted in Baking, Beans, Beef, Cheese, Dinner, Fruit, Gluten Free, Kid-Friendly, Legumes, Lunch, Main Dishes, Meat, Potlucks, Vegetables

BeefBeanEnchiladas-11

Enchiladas are one of my go-to meals when I want to bring dinner to friends. It’s pretty quick and easy to make, it’s hearty, and it can be pretty healthy.

They’re also one of Tim’s favorites.

I try to have some in the freezer at all times.

BeefBeanEnchiladas-2

I mean, take a look at all of the veggies I’ve piled in here. I had celery on hand, but normally I’d use bell peppers (note: if you’re using celery, make sure it’s really cooked down and soft). I also have been putting summer squash in everything, so why not these too?!

BeefBeanEnchiladas-1

Also corn. In everything. I am addicted.

This winter when we had a million spaghetti squash I cooked a bunch of ’em and froze the flesh. I’ve been slowly using it. If you don’t have any cooked spaghetti squash you could just add more beans and summer squash.

Tim doesn’t mind when I sneak spaghetti squash into things like this. But, he did note that he got a pretty squashy bite, so stir it in pretty well if that might bother someone in your family. 😉

BeefBeanEnchiladas-4

I like to cook up the filling first. That way they take less time in the oven. Plus then I can make sure that all the veggies are soft. No one wants a crunchy this or that, unless it’s supposed to be there.

BeefBeanEnchiladas-5

Tim built me a beautiful, huge kitchen island when we moved. So I have tons of space to lay out all the tortillas I could ever need.

I’m thankful for this workspace.

The sauce gets divided evenly between the tortillas.

BeefBeanEnchiladas-6

The ends get folded in and then it’s rolled up. My whole wheat tortillas cracked a bit. No big deal.

BeefBeanEnchiladas-3

I like a bit of sauce in the bottom of the pan. If you like it extra saucy, add more! I used what I had in the freezer, so normally I’d make it a bit juicier than this looks (the recipe is adapted to be saucier).

BeefBeanEnchiladas-7

Rolled up and ready for cheeeeeeeeese.

BeefBeanEnchiladas-8

You could add way more cheese if you’d like, but I didn’t want to go overboard. Moderation, right?!

BeefBeanEnchiladas-10

After these came out of the oven, I put half of them into freezer safe containers so they will be ready for lunches. The rest we devoured.

BeefBeanEnchiladas-9

If you’re gonna bring these to some friends, send along a container of Greek yogurt (or sour cream), salsa, corn chips, and guacamole (if you’re feeling extra generous). Make them a simple green salad with some chopped fresh tomatoes and a container of homemade Ranch dressing (whisk together a bit of yogurt, mayo, fresh herbs, garlic, salt, and pepper). And for dessert, how about some Fruit Crisp that can be added to the leftover Greek yogurt for breakfast the next morning?

If you’re serving it tonight for your family, serve it exactly the same way.

Happy Eating!

Beef and Bean Enchiladas
Recipe Type: Main, Easy, Beans, Beef, Vegetables, Dinner, Main Dishes
Author: Rachel Oberg – De Ma Cuisine
Prep time:
Cook time:
Total time:
Serves: 4-6
Perfect for a hearty dinner tonight, or to make to take to a friend in need.
Ingredients
  • 1 t olive oil
  • 1/4 to 1/2 C bell peppers (or celery), chopped
  • 1/2 to 1 C summer squash, chopped
  • pinch salt
  • 1-2 C Chili (I used Beef Chili), or 1 lb. ground beef
  • 8-15 oz. kidney beans
  • 1 1/2 C cooked spaghetti squash (or add more beans and summer squash)
  • 1/4 C salsa
  • 1 C corn
  • 1/2 t chili powder (or more if using ground beef)
  • pinch ginger
  • to taste salt
  • to taste pepper
  • 1/2 to 1 C tomato sauce (add an extra 1/4 C if using ground beef)
  • to taste salt
  • to taste pepper
  • 8-10 tortillas
  • 1 C cheese, grated (Monterey/Pepper Jack or Cheddar)
  • Greek yogurt, for topping
  • 1-2 fresh tomatoes, chopped, for topping
  • jalapeño, chopped, for topping (optional – if you like it extra spicy)
Instructions
  1. Pre-heat oven to 350F.
  2. Heat a skillet, add olive oil. When oil is hot, add bell peppers/celery, summer squash, and a pinch of salt. Cook for about 5 minutes, or until veggies are tender, over medium heat, stirring occasionally. (Note: if using raw ground beef, cook first, then add veggies when beef is almost done. Add the extra 1/4 C tomato sauce with the beans in the next step.)
  3. Mix together chili, beans, spaghetti squash, salsa, corn, chili powder, ginger, salt, and pepper. Add to skillet. Bring to a boil, reduce to a simmer, and cook for about 5 minutes. Taste and adjust seasoning if needed.
  4. Mix tomato sauce with salt and pepper. Pour into the bottom of a greased 9×13 baking dish.
  5. Divide the beef and bean filling between the tortillas. Fold ends in and roll up. Place seam side down in tomato sauced pan. Top with salsa and cheese. Bake for 20 minutes, uncovered, or until cheese is melted.
  6. Serve topped with yogurt and fresh tomatoes (and jalapeño if desired).
Notes
Gluten-free if you use corn tortillas.

Monday

4

August 2014

1

COMMENTS

Summer Pizza

Written by , Posted in Baking, Cheese, Dinner, Fruit, Herbs, Lunch, Main Dishes, Pizza, Quick and Easy, Vegetables, Vegetarian

SummerPizza-8Eeets thyme fur peeeetsa.

Sorry. Kinda. It’s been one of those days. Sometimes stress is released in the form of weirdness.

And managed by eating pizza.

SummerPizza-2

Cutting veggies is therapeutic too. I have lots of cutting boards, and two are designated for onions and garlic. My beautiful new cutting board is not one of them. I never want anything sweet to accidentally taste like raw onions. Nope. Yuck. So I have two cutting boards with an X on the back that are special and a little bit stinky. 

SummerPizza-1

We had a similar pizza to this the other week. Ahem, I did. Tim doesn’t agree that squash belongs on a pizza. He will eat it in pretty much anything else though, so it’s cool. He made his own personal pizza and I made mine. Mine had lots of veggies. His didn’t. They both tasted good.

SummerPizza-3

I used Alana’s recipe for the pizza crust (from her cookbook). You can use hers, or whatever you would normally use. I like my crust thin and crispy. If you like it thicker and chewier, adjust the recipe accordingly.

Because of my taste for crispness, I like to par-bake the crust a bit before topping it.

Par-bake means to partially bake it (as par-cook means to partially cook).

I topped it with a bit of olive oil and some herbs, because I wanted two layers of herby flavor. (Helpful tip: If you need some bread to go accompany a dish and you don’t have a baguette on hand, you could just all the way bake the crust and eat it like a sort of focaccia bread.)

SummerPizza-4

Then it’s topped with some tomato sauce (it’s also great with olive oil if you don’t like sauce), and more herbs.

SummerPizza-5

Lots of different veggies, like kale, zucchini, corn, and tomato (tomato is a fruit, but in this case let’s pretend it’s a veggie since it’s acting like one), but not so many that it weighs down the pizza. It’s still a light summer meal.

SummerPizza-6

I opted for some parmesan and an aged cheddar. Because it’s what I have in the fridge.

I’d planned to use feta, but it’s smelled baaaaad. There’s stinky cheese and then there’s steeeeenky cheese.

SummerPizza-7

It’s topped with a bit of basil (from my garden – all the basil that I got as an add-on from AHO last week is gone gone gone). And as soon as the last photo was taken I ate as much as I could, as quickly as possible because I was starving! And then I ate it again today before I typed up this post.

Happy Eating!

Summer Pizza
Recipe Type: Main, Dinner, Pizza
Author: Rachel Oberg – De Ma Cuisine
Prep time:
Cook time:
Total time:
Serves: 4
Summer squash, corn, and tomatoes all top this light summer pizza.
Ingredients
  • 2 t olive oil, divided
  • 1 pizza crust
  • 2 t dried Italian herbs (mixture of basil, rosemary, oregano, thyme, and parsley), divided
  • to taste salt
  • to taste pepper
  • 1/4 C tomato sauce (optional – could also just use olive oil)
  • 12-15 slices zucchini/summer squash
  • 8-10 tomato slices
  • 2 T raw corn (frozen is fine)
  • 1/4 C kale (spinach, chard, collard greens), cut in a chiffonade (small ribbons)
  • 2 T green onions, chopped
  • 1/2 C cheese (parmesan and cheddar), grated
  • to taste salt
  • to taste pepper
  • fresh basil, for topping
Instructions
  1. Pre-heat oven to 450F.
  2. Grease pizza pan with 1 t olive oil. Press out crust onto pan so it’s fairly thin. Top crust with remaining olive oil, and sprinkle with 1 t Italian herbs, salt, and pepper. Bake for about 5 minutes (optional – you can bake it all at once too).
  3. Top par-baked crust with sauce, remaining Italian herbs, veggies, cheese, salt, and pepper. Bake an additional 7 minutes (or until crust is to desired crispness and cheese is melted – it will be longer for thicker crusts).
  4. Serve topped with fresh basil.

Wednesday

11

December 2013

5

COMMENTS

Three Bean Chili – In the Kitchen with Rachel O – Video

Written by , Posted in Beans, Beef, Dinner, Fruit, Gluten Free, In the Kitchen with Rachel O, Legumes, Main Dishes, Meat, One Dish Dinners, Soups, Vegetables

ThreeBeanChili_1

Beans beans beans. I love beans. I wonder if I have too many foods that I love. Nah. I just had this awful thought, “What if I hated as many foods as I love!?” That would be terrible. Let’s not even go down that path. Shudder…

ThreeBeanChili_5


I have made chili about one million different ways. Long before I knew I liked to cook, eons before blogging was even a thing, I liked to make chili. Back then I thought it tasted good. I have no idea if it actually did, since I don’t time travel (I think that that’s the second time I’ve mentioned time travel on here in a short time… I’m cool with that… Tim should be very proud). I suppose that as my chili recipe has evolved, so has the taste. It’s a good thing to learn, grow, change, don’t you think? I mean, if we go deep for a minute, would I want to be the person I was a year ago, 5 years ago, 10, 15, or 20 years ago? Heavens no. I’ve learned, I’ve changed, I hope that I’ve become a better version of myself. As we mature, that’s what tends to happen.

Kinda like a good chili. The recipe changes over the years. Ingredients are added and subtracted, cooking times speed up and slow down. The chili itself gets deeper and richer as time passes, gently simmering over the fire. A great metaphor for our lives I think. I want to be chili. With a depth, a richness, a savory quality that can only come from years of well seasoned living.

ThreeBeanChili_2

ThreeBeanChili_3

ThreeBeanChili_6

This is a well seasoned, deep chili. It can cook for a shorter time or you can let it go for longer. It’s simple, yet rich. It’s hearty. It will fill you right up, but might leave you wanting more, because it tastes so good. It’s perfect with your favorite cornbread. Um, but then what isn’t? Cornbread is one of those foods that I could eat forever. I like it cold the next day, standing in front of the fridge with the door open, starving, needing a snack. It is the perfect solution to that problem. It’s great heated up in the toaster with a fried egg for breakfast. Or, with the leftover chili. That’s always a good idea.

ThreeBeanChili_4

Here’s to lives and food that have depth, richness, and are well seasoned.

Happy Eating!

Three Bean Chili
Recipe Type: Main Dish, Dinner, Soup, Chili, Hearty, Stove Top, One Dish Dinner, Easy, Meat, Beef, Legumes, Beans, Vegetables
Cuisine: American
Author: Rachel Oberg – De Ma Cuisine
Prep time:
Cook time:
Total time:
Serves: 4-6
Ingredients
  • 1/2 lb. ground beef
  • 1 C onion, chopped
  • 1 serrano pepper, ribs and seeds removed, diced
  • 3 cloves garlic, diced
  • 2 tomatoes, chopped
  • 1 C black beans
  • 1 C kidney beans
  • 1 C cranberry beans
  • 1 t salt
  • 1/4 t pepper
  • 1/4 t ginger
  • 1 t chili powder
  • 1 t sweet paprika
  • 2 T tomato paste
  • 2 T balsamic vinegar
  • 2-3 C vegetable stock (beef or chicken would work too)
  • 1 T honey
  • 1 t butter
Instructions
  1. Heat soup pot and add beef. Break up and cook for a few minutes. Add onion and serrano pepper, and cook for 5 minutes over medium heat, stirring occasionally.
  2. Add garlic, tomato paste, balsamic vinegar, and tomato. Cook for 2 minutes.
  3. Add beans, seasonings, stock, and honey. Bring to a boil, reduce to a simmer and cook for 30-60 minutes, stirring occasionally.
  4. Remove from heat and stir in butter.
  5. Taste and adjust seasonings if needed.
  6. Serve with your favorite cornbread.

Happy Eating!