De Ma Cuisine

Orange Archive

Friday

29

January 2016

2

COMMENTS

Pickled Beets and Cabbage

Written by , Posted in Canning, Condiments, Dairy-Free, Gluten Free, Pickling, Quick and Easy, Vegan, Vegetables, Vegetarian

PickledVeggies-3

Pickles are one of life’s great mysteries. I don’t quite understand why or how they are so awesome. They just are. They can add so much to a dish. They’re fun to eat. And, they’re a lot simpler to make than I would have thought. I’ve tried to make pickles a few times before. I’ve followed recipes and made up my own. Nothing worked. I tried with raw veggies and lots of apple cider vinegar. Nothing tasted good. So I was a little apprehensive when I was thinking about pickling for a post… But, I have to say, I was pleasantly surprised.

PickledVeggies-2

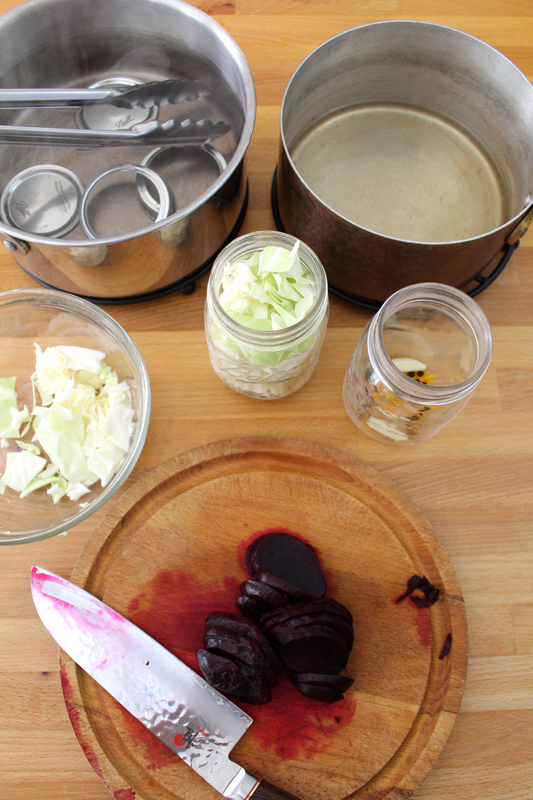
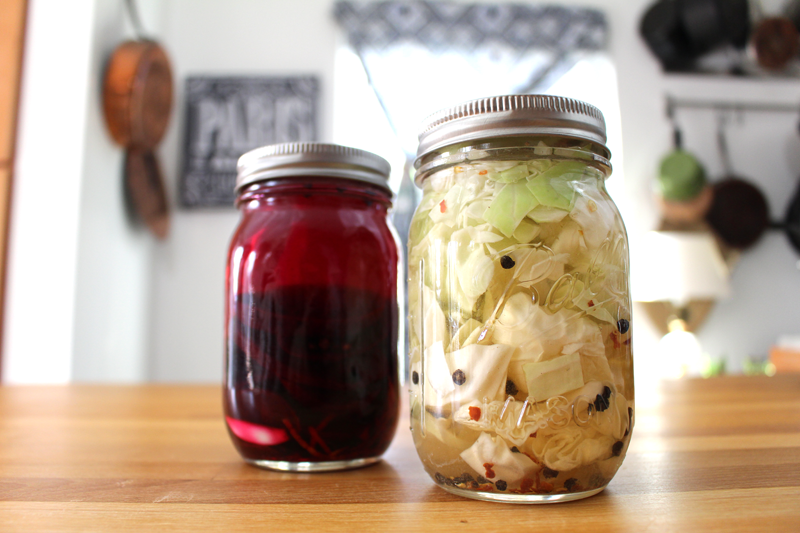
It all starts with some veggies. I chose steamed beets (because I’d tried to pickle raw beets once… nope, not a good idea) and raw cabbage. I used them because that’s what I had on hand. But, I think that with this particular brine, I might also try carrots, cauliflower, radish, green beans, greens, leeks, cucumber, or onions. I’d steam any root veggies and cauliflower, but I’d probably leave the rest raw.

For the brine, I went with white vinegar and rice vinegar. I like their mild flavors. I also added some water, salt, and honey. Water to dilute a bit, honey to counter the sharp vinegar, and salt, well, because I like salt (and I think you’re supposed to use salt when pickling, although this was just plain table salt, not pickling salt).

PickledVeggies-1

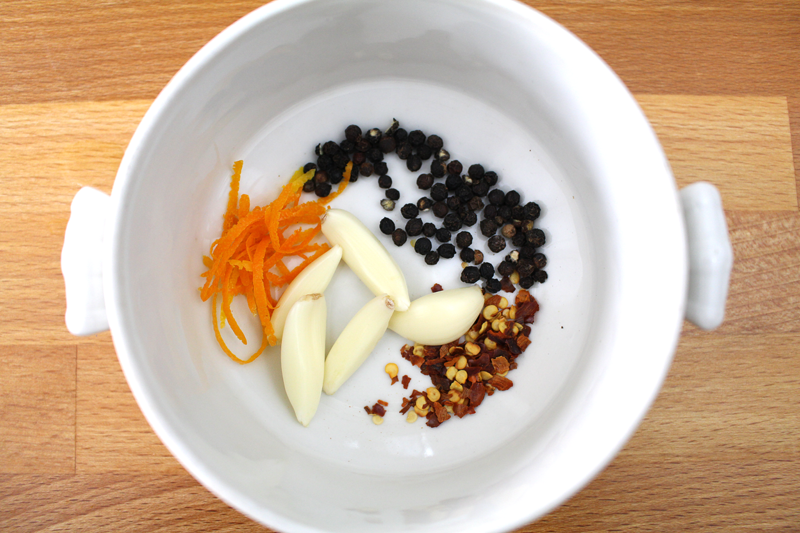
I added a few extras, based on the veggies I was using. To go with the beets I used: garlic, orange zest, and peppercorns. With the cabbage I used garlic, red pepper flakes, and peppercorns. You could also add dill, chives, fresh ginger, or lemon zest, depending on the veggie to be pickled.

PickledVeggies-5

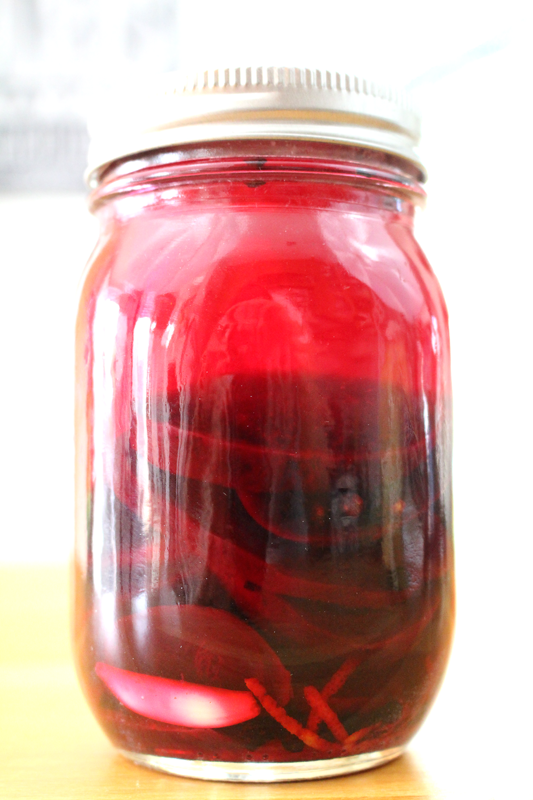
I let them sit for about a week and a half in the fridge before trying them. I don’t know if I needed to, but I did.

PickledVeggies-4

Now that they’re open, I’ve eaten the pickled beets 3 days in a row. I just can’t get enough. Tim even tried one the other day and didn’t hate it. He wasn’t crazy about the texture of the beets (they’re soft, like they are when steamed), but he really liked the flavor of the brine. For me, the beets are exactly the texture I was hoping for. They’re tender and vinegary with just a hint of sweet. And the cabbage, it’s gone. I ate it. All. By. Myself. I tried it raw, I added it to a stir fry, and I added it (and the pickled garlic) to some lentils and topped it with a fried egg, paprika, cayenne, and chili powder. I can’t wait until the next time cabbage comes in our Abundant Harvest Organics box. I know exactly how I want to use it.

Happy Eating!

Pickled Beets and Cabbage

Prep Time: 15 minutes

Cook Time: 35 minutes

Total Time: 50 minutes

Yield: 2 pints

Pickled Beets and Cabbage

Ingredients

  • 3-4 C any: beets, cabbage, carrots, cauliflower, radish, green beans, greens, leeks, cucumber, onions; chopped, shredded, sliced, quartered (depending on type of veggie)
  • 1 1/2 C vinegar (white vinegar and rice vinegar)
  • 1 1/2 C water
  • 1 T + 1 t salt
  • 1 T + 1 t honey
  • 1/4 C any extras (choose based on veggies using): peppercorns, garlic, dill, chives, fresh ginger, lemon zest, orange zest, red pepper flakes

Instructions

  1. Sterilize jars and lids.
  2. Steam any root veggies or cauliflower until tender (about 20-30 minutes, depending on the veggie) and then cut as desired. Leave things like cabbage, green beans, greens, leeks, and onions raw.
  3. Bring brining liquid (vinegar through honey) to a boil, then reduce to a simmer and cook for 5 minutes.
  4. Place extras in the bottom of the jars, place veggies in the jars, packing fairly tightly but leaving about an inch of space at the top. Pour brining liquid over, filling to cover veggies. Wipe the rims and cover with the lid. Cool to room temperature then refrigerate.
http://www.de-ma-cuisine.com/pickled-beets-and-cabbage/

Monday

11

January 2016

0

COMMENTS

Chopped Salad with Oranges Greens and Nuts

Written by , Posted in Dairy-Free, Fruit, Gluten Free, Lunch, Nuts, Quick and Easy, Salads, Sides, Vegan, Vegetables, Vegetarian

ChoppedSalad-4

Salads get a bit of a bad rap as a “diet food”. Ugh. I don’t even like the word “diet” and I really like salads. They’re a great compliment to so many foods and can even be a wonderful meal on their own.

The salad that I’m talking about here is a veggie filled chopped salad that could fit into both categories. It would be fabulous paired with a stir fry, some roasted chicken, or a big bowl of chili. But, add some crispy tofu or chicken to it and it turns into the main dish.

ChoppedSalad-1

I love a salad with lots of great crunch. It can come in the form of great raw veggies, seeds, and one of my favorites: nuts. For this salad, I chopped up some raw walnuts from my in-laws’ tree. I toasted them on the stove top for a few minutes, then tossed them with some spices.

ChoppedSalad-3

For this wintery salad, I thought a great honey-mustard dressing would be the perfect compliment. It’s a simple mixture of honey and mustard, of course (if you don’t do honey, try some maple syrup), along with some fresh squeezed orange juice, rice vinegar, and olive oil. I love creamy slaws and salads, but sometimes I want something a little bit lighter. This was perfect.

ChoppedSalad-2

I used what I had on hand for the rest of the salad: broccoli, greens, cabbage, radish, shallot, and chopped orange. You could totally substitute with carrots, cauliflower, and red onions. You could use leeks and any kinda greens that you think would taste good (like bok choy, spinach, kale, mizuna…). It’s kinda like a cross between a chopped salad and an awesome coleslaw. Call it what you like, as long as you call it…

ChoppedSalad-5

It’s great to take to a potluck, to enjoy alongside a grilled cheese sandwich at lunch, or to go with a tasty Chicken Pot Pie for dinner. Done, done, and done.

ChoppedSalad-6

Happy Eating!

Chopped Salad with Oranges Greens and Nuts

Prep Time: 20 minutes

Cook Time: 3 minutes

Total Time: 23 minutes

Yield: 6-8

Chopped Salad with Oranges Greens and Nuts

Ingredients

  • 1 1/2 C raw nuts (almonds, walnuts, pinenuts), chopped
  • pinch cayenne
  • to taste salt
  • 2 C greens (kale, chard, spinach, mizuna), chopped
  • 1 C cabbage, shredded
  • 1 C broccoli or cauliflower, finely chopped
  • 1 C radish or carrot, grated
  • 1/4 C shallot, leek, or red onion, minced
  • 2 C orange, chopped (drained in a strainer to catch excess juice for dressing)
  • 4 t dijon mustard
  • 2 t honey (or maple syrup)
  • to taste salt
  • 2 T rice vinegar
  • 1/4 C orange juice
  • 6 T olive oil

Instructions

  1. Heat a dry skillet. Add nuts and toast for 3 minutes over medium-low, turning often. Toss with cayenne and salt and set aside.
  2. (If using kale, massage with a bit of salt and some olive oil, using hands, for 3-5 minutes.) Toss greens through shallot.
  3. Whisk dijon through rice vinegar, add orange juice that's drained from chopped orange and top up to make 1/4 C. While whisking, stream in olive oil to create an emulsion. Taste for seasoning.
  4. Toss veggies with oranges and dressing. Top with nuts.
http://www.de-ma-cuisine.com/chopped-salad-oranges-greens/

Friday

8

May 2015

0

COMMENTS

Whole Wheat Parsnip Cookies

Written by , Posted in Baking, Breakfast, Cookies, Dessert, Eggs, Fruit, Grains, Kid-Friendly, Quick and Easy, Snacks, Vegetarian

ParsnipCookies-6

I’m not much of a baker. It’s just not something that comes naturally to me. With baking it’s important to follow the recipe. There’s a reason that each ingredient is there. I can’t just add what I have on hand and substitute something if I feel like it. Because it’s all science.

I was never great at science in school. I do wonder if I might have done a little better if there had been experiments that involved cooking. You know, let us make cookies with whatever we wanted to. See what works and what doesn’t. Then learn about why. Since that class wasn’t offered at my school, I’m learning now, slowly…ParsnipCookies-1

I think that my first substitution attempt when baking might have been when I figured that using the same amount of honey in place of granulated sugar would be fine. Wrong. I ended up with a burned outside and still liquid inside banana bread. That was disappointing. But, I learned from my mistake. Freedom to fail.

So this time I played it safe. I figured out what I thought would make up a good cookie. I think I know what the dough should be like, so it seemed like a good place to start.

I still wasn’t expecting them to turn out, but I was gonna do my best.

I wanted to incorporate parsnips. Parsnips are wonderful when roasted and dipped into a creamy sauce. But, what about something sweet, almost like what you’d do with carrots in a carrot cake? I figured it was worth a try.

ParsnipCookies-2

I don’t make very many cookies. I’m just not a sweets person. But, I think normally recipes will have you cream the butter and sugar together. I went for more of a scone technique, where the butter was cold and added to the already combined dry ingredients.

ParsnipCookies-3

The parsnips, apple, and some lemon zest were added to the butter-flour mixture. I figured they might do well when coated with flour. And then once the wet ingredients were whisked together, they were added too. To make what looked like cookie batter to me!

ParsnipCookies-4

When I used to make cookies with my mom as a kid, we’d use two spoons to scoop the dough out. You could also just use your hands and roll a ball of dough between your palms. Whatever works. The spoons keep the hands clean and you don’t waste the batter that covers them.

I like fluffy, puffy, soft cookies over thin crispy ones. So I didn’t press them down.

ParsnipCookies-5

I thought about trying to make these vegan, but decided against it since making a cookie recipe was already enough of a risk. But, here are some ways that you could adapt it, if you wanted to (at your own risk 😉 ).

Carrots or summer squash instead of parsnips.

Orange zest instead of lemon zest.

Coconut oil instead of butter (treat it the same way – make sure it’s cold, then work very quickly).

Flax seeds and water instead of egg.

Maple syrup instead of honey.

Just keep in mind that it’s science and your changes may result in cookies slightly different from mine. But, we’re free to fail, free to learn from our mistakes, free to keep on trying. If I’d stopped at ruined banana bread, I’d never have known the loveliness of these cookies. They may be my new favorite. Not too sweet, super soft, and made with whole wheat flour and honey, so I feel fine about the three that I’ve eaten this afternoon.

Happy Eating!

Whole Wheat Parsnip Cookies

Prep Time: 15 minutes

Cook Time: 12 minutes

Total Time: 27 minutes

Yield: 19-20 cookies

Whole Wheat Parsnip Cookies

Ingredients

  • 1 C whole wheat flour
  • 1/4 t salt
  • 1/2 t baking powder, sifted
  • 1/2 t baking soda, sifted
  • 1/4 t cinnamon
  • pinch all spice
  • pinch nutmeg
  • 1 C oats
  • 1 t lemon zest (or orange zest), chopped
  • 1/3 C apples, grated and chopped
  • 1 C parsnips (or carrots or summer squash), grated, and chopped
  • 1/2 C butter, cold, cut into small chunks
  • 1/2 C honey
  • 1 egg
  • 1 t apple cider vinegar
  • 1 t vanilla extract

Instructions

  1. Pre-heat the oven to 350F. Place a rack in the lower third of the oven. Line two baking sheets with parchment paper (or silpat mats).
  2. Whisk together flour through nutmeg. Mix in butter with a pastry blender or hands until pea sized chunks remain. Stir in oats, lemon zest, apples, and parsnips.
  3. In a separate bowl whisk together honey through vanilla. Add to dry ingredients and stir to combine.
  4. Scoop batter using two tablespoons, or hands and drop onto prepared baking sheets (do not flatten). Bake for 12 minutes, or until cookies are mostly set and golden around the edges (they will keep cooking for a bit as they cool). Cool on a cooling rack for at least 10 minutes before serving.
http://www.de-ma-cuisine.com/whole-wheat-parsnip-cookies/