De Ma Cuisine

gluten-free Archive

Monday

29

September 2014

0

COMMENTS

Creamy Cucumber and Tomato Salad

Written by , Posted in Appetizers, Fruit, Gluten Free, Herbs, Lunch, Quick and Easy, Salads, Sides, Vegetables, Vegetarian

CreamyCucumberTomatoSalad-4

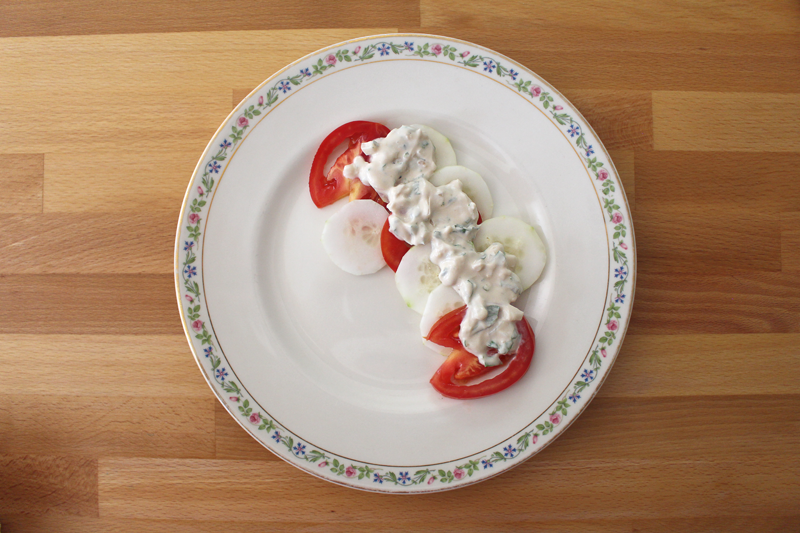
Creamy dreamy salad. Perfect for these last days of summer. The tomato is ripe and sweet, the cucumber crisp and cool, the dressing bright and herb-filled. It’s one of my favorite ways to eat salad.

CreamyCucumberTomatoSalad-1

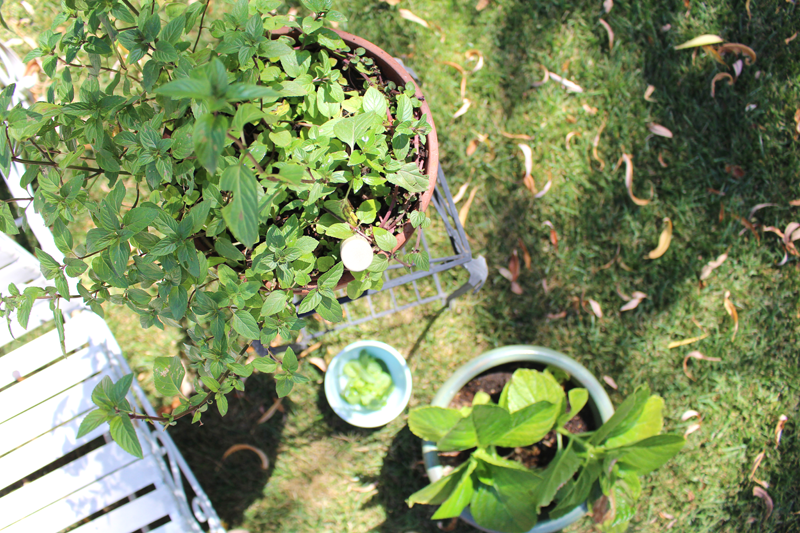
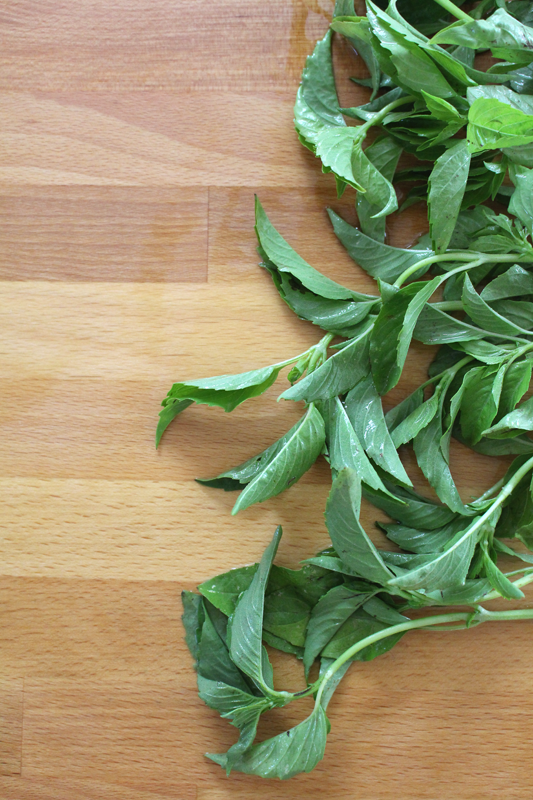
A couple of months ago, I planted a sprig of mint in the dirt. No roots, just thought I’d try it and see if anything happened.

It grew.

I have more mint than I know what to do with. And I’m not complaining.

It adds a wonderful refreshing taste to this dish.

CreamyCucumberTomatoSalad-8

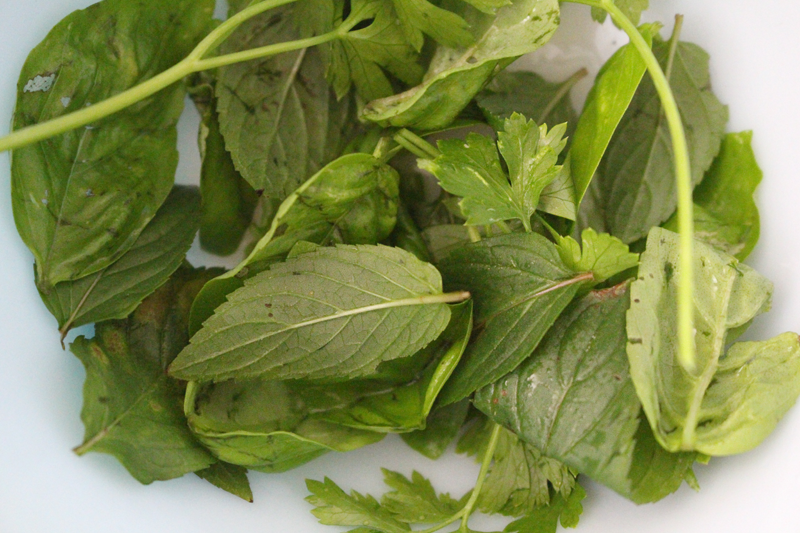
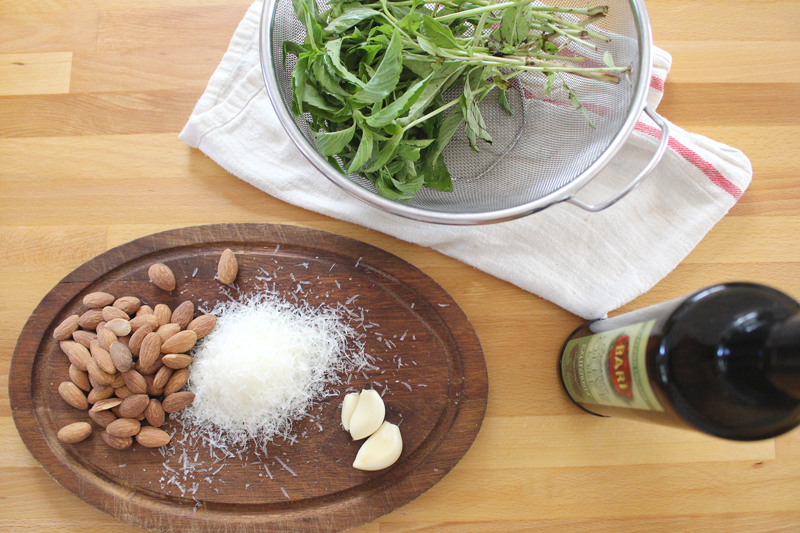
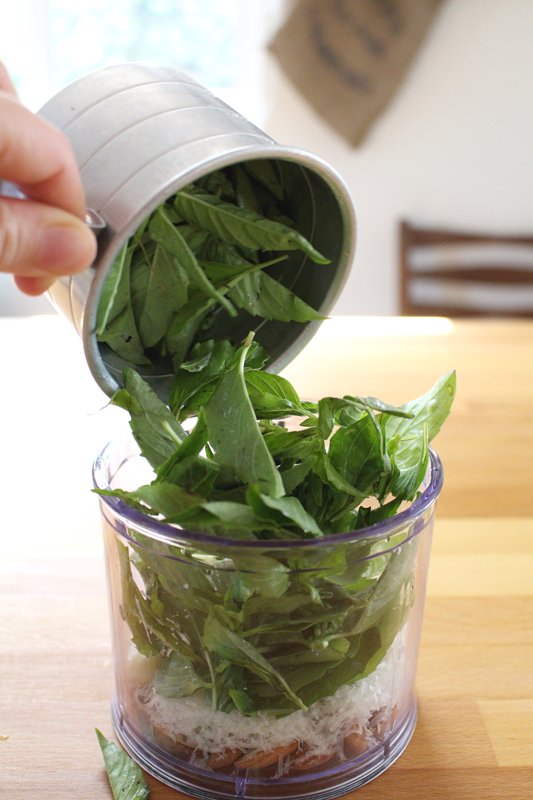
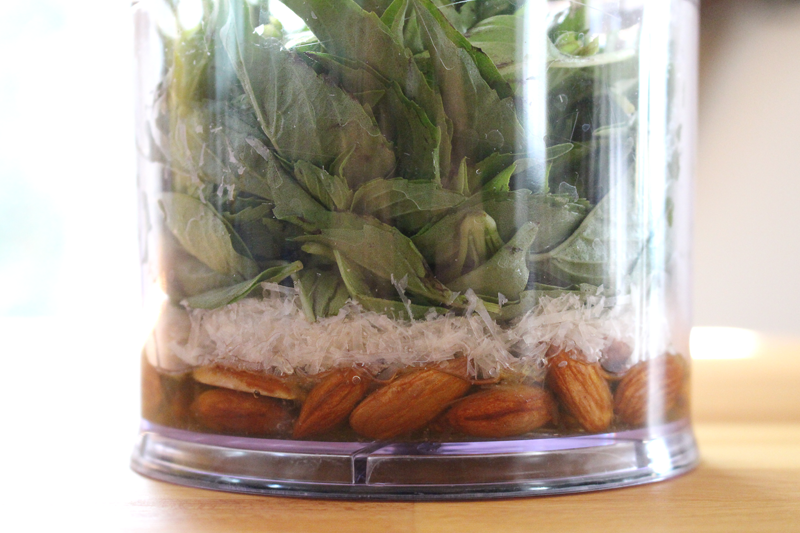
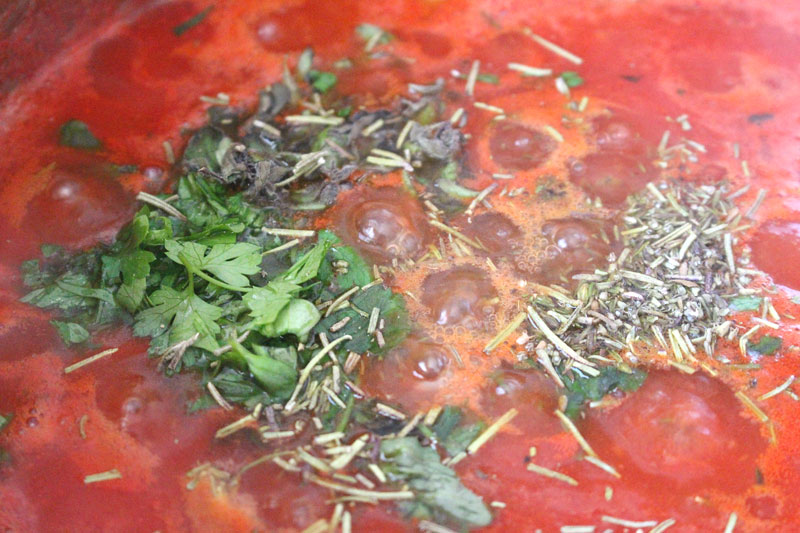
I’m also growing some parsley and basil in my garden. I can never have enough of these fresh herbs. When they come in our Abundant Harvest Organics box, sometimes they’re gone in a day (like when I made Basil Pesto). I love being able to step just outside the door and snip off whatever I need for a dish.

CreamyCucumberTomatoSalad-3

CreamyCucumberTomatoSalad-7

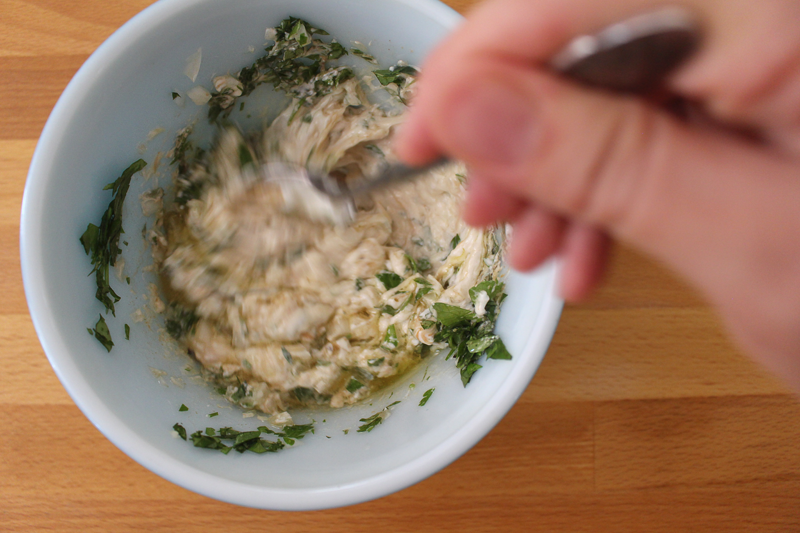
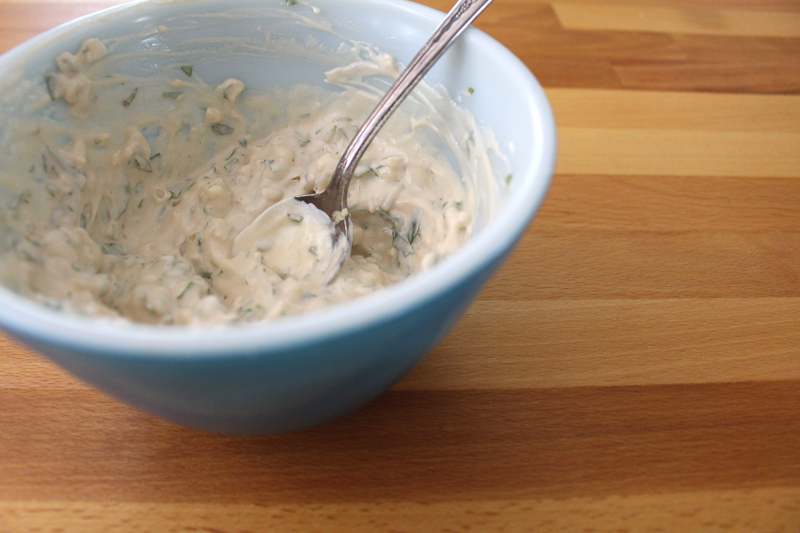
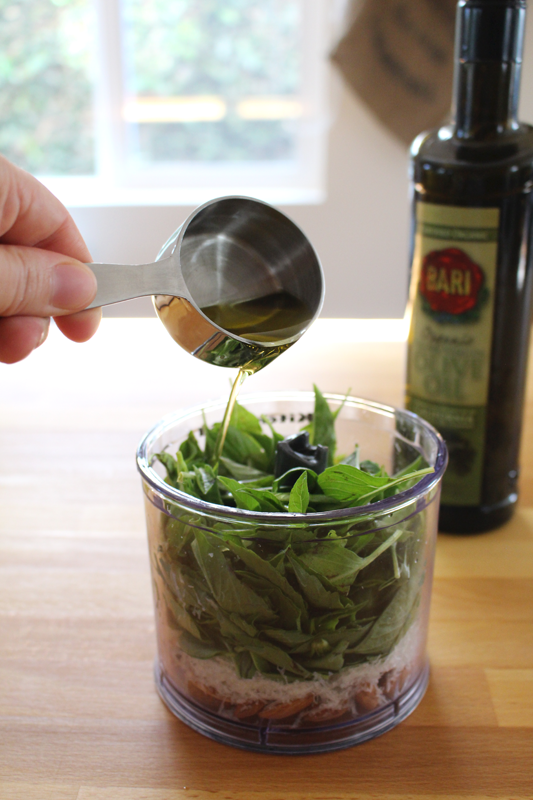
Those fresh herbs are the highlight to an easy dressing. I’ve also added some Greek yogurt, fresh onion and garlic (just a bit), some balsamic vinegar, and some olive oil for flavor. The herbs might be the star, but those flavors all go so well together.

Also, raw onion, I know… But, try it – it’s not too much, and when it’s minced and mixed in with all those other flavors, it’s not overpowering. If you don’t feel like braving onion breath, just leave it out, or use some chives. They’ll work just fine.

CreamyCucumberTomatoSalad-6

I thought I’d peel the cucumbers. Not a requirement. But, I thought it would be nice. It’s one of the few veggies that I do peel.

CreamyCucumberTomatoSalad-5

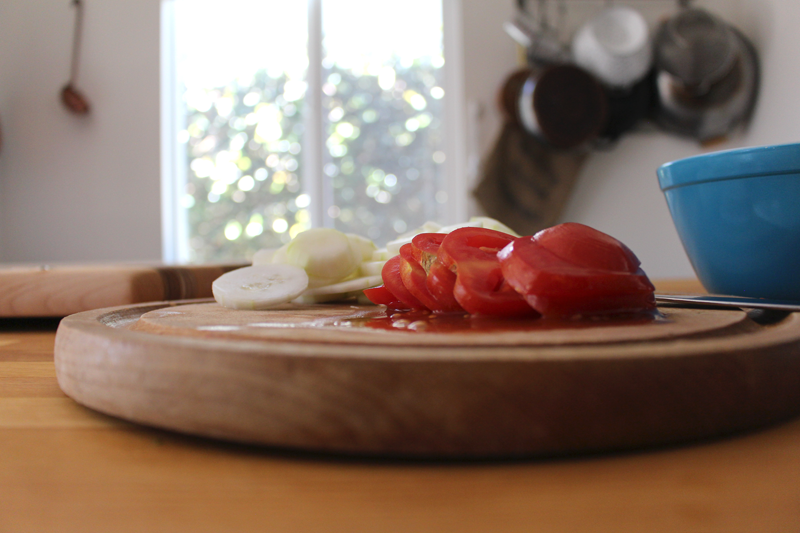
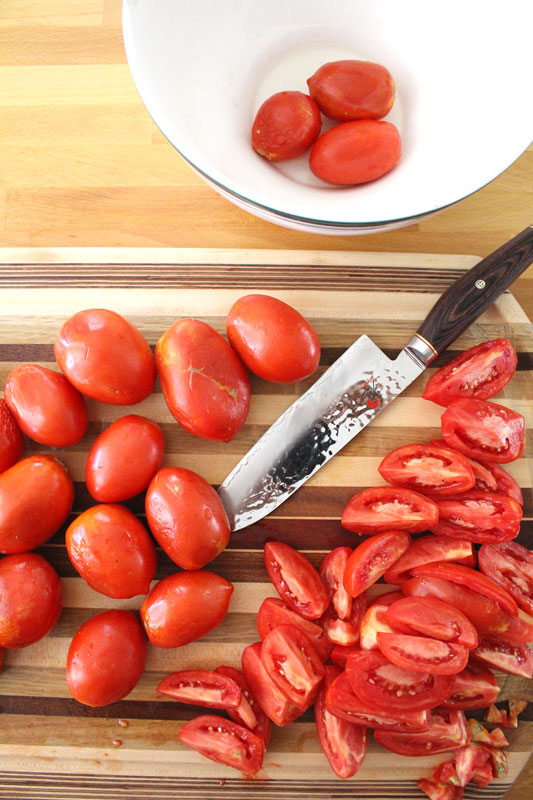
Tomatoes are sliced, not too thick, not too thin.

CreamyCucumberTomatoSalad-2

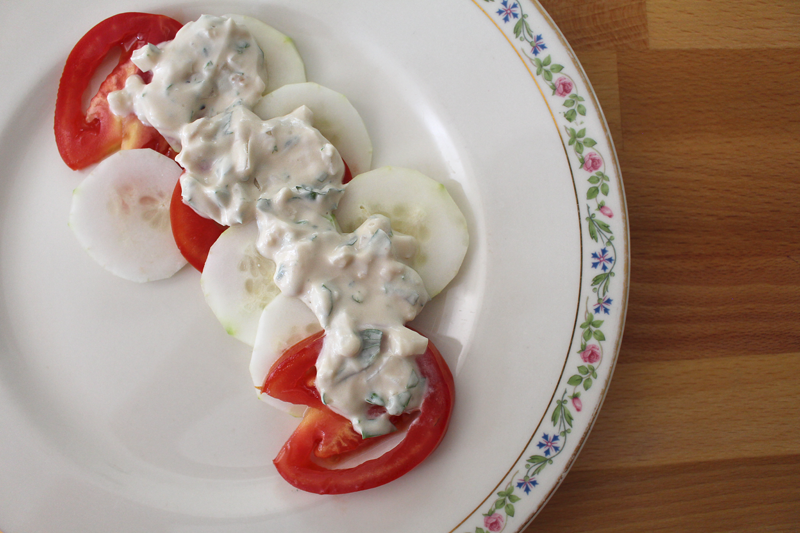
And just like that, dressing is drizzled over and you have a great side.

CreamyCucumberTomatoSalad

You could make double the dressing and save it so you can eat this salad every day. It could be used as a dip for carrots and celery, you could dip a Grilled Cheese into it, you could dip pretzels, crackers, or sesame sticks in it.

But, the best way to eat it, I think, is to use it on this salad, and to pair it with the Fish Wellingtons that I made the other week. I’d definitely suggest making both, then inviting a good friend over for lunch.

Happy Eating!

Creamy Cucumber and Tomato Salad
Recipe Type: Salad, Side, Lunch, Vegetarian, Quick and Easy
Author: Rachel Oberg – De Ma Cuisine
Prep time:
Total time:
Serves: 2-4
Ingredients
  • Dressing: 1/2 C Greek yogurt
  • 1 T fresh basil, chopped
  • 1 T fresh mint, chopped
  • 1 T fresh parsley, chopped
  • 1 T onion or shallot, minced
  • 1 clove garlic, minced
  • 2 T olive oil
  • to taste salt
  • to taste pepper
  • splash balsamic vinegar
  • Salad: 1-2 cucumber, peeled and sliced into rounds
  • 2-3 tomatoes, sliced into rounds
Instructions
  1. Whisk together dressing ingredients. Taste and adjust seasoning if needed.
  2. Place cucumber and tomato on plates, alternating slices of each. Top with dressing.


Thursday

25

September 2014

0

COMMENTS

How to Make Pesto – Part 1 – Basil Pesto

Written by , Posted in Appetizers, Cheese, Condiments, Gluten Free, Herbs, How To, Nuts, Quick and Easy, Snacks, Storage/Prep, Vegetables, Vegetarian

BasilPesto-7

This is gonna be one of the simplest things you’ve never made. At least that’s what I thought when I made it for the first time about a month ago.

I don’t know why I’d waited this long.

I was missing out.

BasilPesto-6

It literally takes about 10 minutes.

It takes nuts (I had almonds).

It’s great with cheese (I used parmesan).

Garlic is essential (as it is to most things).

Olive oil holds it together.

And something green rounds it all out.

BasilPesto-5

In this case, the green is basil.

We will get into other types of pesto on another day.

For today, let’s stick to the basics.

BasilPesto-4

It’s important to use good olive oil… always, not just for pesto. I know the people at Bari. They’re awesome. I’ve gone in to their mill and seen them in action. I’ve tasted oil that was olives that same morning. This is seriously spectacular stuff.

BasilPesto-3

You can use whatever blending device you prefer. I have a great KitchenAid hand blender that is perfect for pesto. It came with this cute little food processor attachment, which works well for this task.

BasilPesto-2

Now, here’s a little trick I’ve tried.

Two tricks actually.

The first one is: To get the parchment paper to lay flat, scrunch it into a ball, wrinkle it all up, then smooth it out. No more curling up and rolling away.

Second: By portioning out the pesto in advance, there’s no need to wait for the whole container to thaw to use it. Just pop off a layer and leave it in the fridge overnight (in a sealed container), or on the counter for a little while, to bring it to room temperature.

BasilPesto-1

You could stand there eating it out of the bowl (your significant other may ask you if you’ve been eating salami, because of the garlic breath… no big deal… yes, this has happened at our house before). Raw garlic is good for your immune system, so go ahead! Or, ahem, get some good bread and slather it with pesto. I mean, c’mon. That’s dinner right there.

If you want a little more than just pesto and bread for dinner, how about a twist on a Caprese Salad to start with? Layer some sliced tomatoes with fresh mozzarella and top with pesto. Or, on the salad note, you could add it to a Panzanella if you’d like – mix it in with the dressing. You could follow that with some Chicken Parmesan topped with Pesto alongside some Roasted Bell Peppers and Squash.

If you want a vegetarian dinner, Eggplant Parmesan would be great topped with pesto. Serve it with some Roasted Zucchini and Crusty Bread for mopping up.

I could eat pizza most days. You could go simple and do mozzarella and pesto. You could add some chicken to the mozz and pesto. You could keep it vegetarian and add tomatoes or zucchini.

Basil always works in soups. You could top a Roasted Eggplant Soup with pesto. Add it to a Minestrone Soup. Serve it on toast alongside (and be sure to save a few bites to mop up any last drops of soup).

You could mix it in to some wild rice. Serve that alongside the Chicken or Eggplant Parmesan for a nice meal.

And finally, for breakfast, you could poach some eggs and drizzle them with pesto. Serve with your favorite toast.

Happy Eating! 

Basil Pesto
Recipe Type: Condiment, Sauce, Topping, Basil, Gluten-Free
Author: Rachel Oberg – De Ma Cuisine
Prep time:
Total time:
Ingredients
  • 1/2 C almonds or pine nuts
  • 2 C packed down (about 1 bunch) fresh basil
  • 2-3 cloves garlic
  • 1/4 to 1/2 C olive oil
  • to taste salt
  • 2 T to 1/4 C parmesan cheese
Instructions
  1. Place all ingredients in a blending apparatus (food processor, hand blender, blender) and blend, adding more olive oil and scraping down the sides as needed.
  2. Taste and adjust seasoning if needed.
  3. Divide into 4 and spread on four pieces of parchment paper, which can be stacked in a freezer safe container.


Thursday

18

September 2014

0

COMMENTS

How to Make Tomato Sauce

Written by , Posted in Dairy-Free, Dinner, Fruit, Gluten Free, Herbs, How To, Kid-Friendly, Sauces, Storage/Prep, Vegan, Vegetables, Vegetarian

Tomato-Sauce-7

Tomatoes are one of the best things about summer.

Actually, all the fruits and veggies that we’ve been getting are the best.

They’re all favorites.

I want them to last all year long. I know that in a month or two, when it finally starts to cool down, I will be thankful for the heartier root veggies, apples, and pears that will be coming. But, for now, let’s keep talking about summer. ‘Cause I’m not quite ready to be done with it yet.

Tomato-Sauce-1

One of the ways to prolong summer is by preserving its fruits and veggies. So, like I’ve done a few times before, let’s talk about saving summer. In the form of a special tomato sauce.

It starts with a bunch of Roma tomatoes. They’re my favorite for sauce. They have less seeds and goopy bits, and I find them a little less watery… Hooooowever, use what you have! Use what you have! Use what you have!!!

I quartered mine, sliced off the hard bit at the end, and then roughly chopped them. They’re going to be blended later, so precision isn’t necessary. You may have noticed that I didn’t peel them. Later you will notice that I don’t strain them. You can if you want, but a little tomato peel and seeds don’t bother me.

Tomato-Sauce-2

They cook up for a few minutes, then are mashed up with a potato masher. This just speeds things along a bit, breaking down-wise.

Tomato-Sauce-3

If you want to have just a plan tomato sauce, blend it up here and cook for an hour and a half or two.

I know how I like my tomato sauce, so I thought I’d get ahead of the game a little, and add some onions, garlic, herbs, and a few other things to the mix before blending.

It’s up to you.

Choose your own adventure.

My adventure has a whole head of garlic in it. Just the way I like it.

Oh mah goodness the smell in our kitchen was just fantastic. A whole head of garlic is just like heaven to me.

Tomato-Sauce-4

I have basil, parsley, and oregano growing in my garden right now. I added those summer favorites, along with some dried thyme and rosemary. Plus a glug of balsamic vinegar and a drizzle of honey.

Tomato-Sauce-5

Then I cooked it all up until the water had mostly evaporated and the sauce was thick.

Tomato-Sauce-6

Quick blend with the hand blender (or the regular blender).

Taste. Add more salt if you want, but remember that you will probably be using this along with other things, so under-salting is ok here.

And only here.

Tomato-Sauce-8

I had some jars sterilized and ready. I will store these in the freezer, since I don’t want to process them in a water bath for 35 minutes. Is it just me, or does anyone else get nervous about the jars breaking and losing their precious sauce? I don’t have a canning set, and I’m definitely not risking jars in a large pot of boiling water bumping in to each other.

Tomato-Sauce-9

The next thing to do is to figure out how to use this amazing sauce. 

Easy.

You can pair it with things like pasta, meats, and breads. It will go great with veggies too.

Specifically, you could make Eggplant or Squash Parmesan, Spaghetti and Meatballs, Deconstructed Lasagne, Meat and Cheese Lasagna, and Summer Pizza.

And oh my gosh you totally should use it to make Meatball Subs. Like right now. I’m serious.

Or, if you just can’t wait, grab some crusty bread and dip it in to the sauce. Good idea right?!

Happy Eating!

Tomato Sauce
Recipe Type: Condiment, Fruit, Vegetable, Vegan, Vegetarian, Gluten-Free, Dairy-Free
Cuisine: Italian
Author: Rachel Oberg – De Ma Cuisine
Prep time: 20 mins
Cook time: 140 mins
Total time: 2 hours 40 mins
Ingredients
  • 5 pounds Roma tomatoes, roughly chopped
  • 1 t salt
  • Extras: 2 T olive oil
  • 2 onions, roughly chopped
  • 1 head (about 12 cloves) garlic, roughly chopped
  • pinch pepper
  • 1/4 fresh basil, roughly chopped
  • 2 T fresh parsley, roughly chopped
  • 2 T fresh oregano, roughly chopped
  • 1 t dried rosemary, crushed
  • 1 t dried thyme
  • 2 T balsamic vinegar
  • 1 T honey
Instructions
  1. Combine tomatoes and salt in a large pot. Cook over medium heat, stirring occasionally, for about 10 minutes. Mash with a potato masher and cook for 10 minutes more.
  2. (If you don’t want to add anything else, skip to step 5.)
  3. Add olive oil to a hot pan. Add onions (bell pepper, zucchini) and cook over medium heat with a pinch of salt for about 10 minutes, stirring occasionally. Add garlic and cook, stirring constantly, for 3 minutes more.
  4. Add onion mixture, herbs, vinegar, and honey to the tomatoes. Use a spatula to get all the garlic infused oil from the pan. Stir once to combine.
  5. Blend with a hand blender, or in batches in a regular blender – removing the plug from the lid and covering with a clean towel.
  6. Bring back to a boil, then reduce to a simmer and cook for 1.5 – 2 hours, or until sauce has thickened, stirring occasionally.
  7. Sterilize your canning jars, bands, and lids in a pot of boiling water for at least 10 minutes at a rolling boil (or in the dishwasher).
  8. Pour sauce in to jars, leaving an inch or so (or a bit less) at the top for expansion.
  9. Store in the freezer once they have cooled completely.*
3.2.1311

(Yields about 2.5 pints or 5 C sauce.)

*To process jars in a water bath Ball suggests that you add 1 T lemon juice to each jar before filling and process in a water bath for 35 minutes. Do this if you want to store at room temperature – only store at room temperature if they have sealed properly).

Monday

15

September 2014

0

COMMENTS

Cheesy Chicken and Grapes with Rice

Written by , Posted in Braising, Cheese, Dinner, Fruit, Gluten Free, Grains, Kid-Friendly, Lunch, Main Dishes, Meat, Poultry, Rice

CheesyChickenAndGrapesWithRice-7

We don’t usually have a problem finishing off the grapes (or most any fruit that comes our way from Abundant Harvest Organics). We usually eat it raw. But, sometimes it’s super fun to try something new.

Like grapes with chicken and rice.

Oh yes I did.

CheesyChickenAndGrapesWithRice-1

It all starts with some thighs. I had a package of two, so that’s what I used. Add more (using a larger skillet) if your family needs more.

It’s seasoned simply, with cayenne and salt. This is gonna be a simple, humble dish, where the flavors really shine.

Shine chicken shine.

Go grape! Go grape! It’s grrrrrrrrrrrrape!

(I don’t know… Sorrynotsorry. I blame it on the Christmas music I’m listening to, in the 100 degree weather, to prepare for a concert in December… Not really. But, the heat makes my brain a little kooky.)

CheesyChickenAndGrapesWithRice-2

I made chicken stock the other day and then froze it. So, to quickly defrost the stock, I brought it to a boil. I don’t normally use hot stock when cooking rice (except when making risotto). So, you could use cold stock, if you’ve planned ahead and put it in the fridge overnight. I didn’t. Just adjust the cooking time as needed.

CheesyChickenAndGrapesWithRice-3

Once the stock + rice + chicken comes to a boil, reduce to a simmer and cook for a few minutes.

CheesyChickenAndGrapesWithRice-4

While these few minutes pass, halve and de-seed some grapes.

Eat them all.

Halve and de-seed some more.

CheesyChickenAndGrapesWithRice-5

Add the grapes to the skillet. Pick them off the top of the chicken, and stir slightly into the rice. Then cook for a good long while (you know, until the rice is done and the chicken is hot). You may need to add more liquid partway through, and stir every once in a while.

CheesyChickenAndGrapesWithRice-6

Is one of your favorite snacks crackers and cheese with grapes? Do you wait expectantly for fall to arrive, so you can eat this snack as often as possible?

I do.

So, why not add some cheddar to the mix? Right?!

CheesyChickenAndGrapesWithRice-8

It’s sprinkled on and popped in to the broiler for just about 3 minutes. It’s like a bazillion degrees in there, so it’s not gonna take long. Don’t leave the kitchen to go wash your hair while it broils. You may have a smoky situation on your hands if you do.

Also, you remembered to use an ovenproof skillet, right? I know you did. But, just making sure. ‘Cause if you decided to not use one AND wash your hair while it broils, well, that’d be just disastrous. Let’s avoid kitchen catastrophes when possible.

CheesyChickenAndGrapesWithRice-9

Once the rice is cooked, the chicken and rice all kinda brown a bit, creating this amazing sauce that I just want to soak up with a piece of crusty bread.

CheesyChickenAndGrapesWithRice-10

Apples go so nicely with grapes and cheese, so serve some (on their own, or in a salad) with this easy, comforting dish that welcomes fall (cough cough, seriously, fall, let’s do this now, enough with the hundred degree weather).

Happy Eating!

Cheesy Chicken and Grapes with Rice
Recipe Type: Dinner, Main Dish, Meat, Chicken, Fruit, Grapes
Author: Rachel Oberg – De Ma Cuisine
Prep time: 10 mins
Cook time: 96 mins
Total time: 1 hour 46 mins
Serves: 2-3
Ingredients
  • 2 T olive oil
  • 2-3 chicken thighs
  • to taste salt
  • dash cayenne
  • 2-3 C hot chicken or vegetable stock (or water)
  • 1 C brown rice
  • 1 C grapes, halved, seeds removed
  • 1 C cheddar cheese, grated
  • 1 apple, sliced, for serving
Instructions
  1. Heat an ovenproof skillet over medium heat. When it’s hot, add olive oil. When oil is hot, add chicken. Sprinkle with salt and cayenne. Sear on each side for 3 minutes.
  2. Add 2 C stock, rice, and salt. Stir gently around chicken (make sure all rice is in stock, not on top of chicken). Bring to a boil, then reduce to a simmer for 10 minutes.
  3. Add grapes, and simmer, adding more liquid if needed, cooking until chicken reaches 180F and rice is to desired tenderness, about 45-50 minutes (cooking uncovered, until the last 20-30 minutes), stirring occasionally.
  4. Taste and adjust seasoning if needed. Top with cheese and broil for 3 minutes.
  5. Serve with a side of apples.
3.2.1311

Monday

8

September 2014

0

COMMENTS

Massaged Kale and Tuna Salad

Written by , Posted in Dairy-Free, Dinner, Fish, Fruit, Gluten Free, Lunch, Main Dishes, Meat, Quick and Easy, Salads, Sides, Vegetables


MassagedKaleTunaSalad-6Sometimes I just need a good salad. Salads are versatile and delicious, but sometimes aren’t hearty enough to be considered a main course. So I like to add a bit of protein so there’s a bit more to it.

For this salad, I chose tuna. Because it’s what I had. Because I like it. I used canned for this one. But, then a few weeks later I discovered fresh tuna at the grocery store, and the leftovers from that dinner would work just as well (maybe better, hello, fresh!).

You could also use chicken, turkey, ham, quinoa, garbonzo beans, or lentils.

‘Cause why not?!

MassagedKaleTunaSalad-1

Then there’s the kale. It’s one of my favorite green veggies. But, I also love chard and spinach too. If you don’t have any of these dark green goodies, regular lettuce will work fine too (just don’t do the massaging step). A hearty butter lettuce works great, but use what you have in your fridge.

MassagedKaleTunaSalad-2

Kale is tossed with a bit of olive oil and some salt, then massaged for a few minutes. Your hands will turn green. That’s normal.

MassagedKaleTunaSalad-3

It will get darker and feel a bit limp, like it does when it’s cooked. I love kale this way. Easier to digest and super yummy.

MassagedKaleTunaSalad-4You can really use whatever dressing you’d like. Although I’d suggest some sort of vinaigrette or something lemony. I just squeezed some lemon and drizzled a bit of balsamic over top. Perfect with the olive oil that was already all over the kale.

MassagedKaleTunaSalad-5

I like a lotta crunch in my salads. Usually nuts and carrots do the trick. Sometimes croutons are added. Here I’ve also got apples, because I happened to have some on hand. But, again, use what you have (and what goes well with tuna, or whatever protein you’ve chosen).

ButterLettuceFruitTunaSalad_1

At other times, I’ve also used grapes (in season now, so yummy with tuna!), cucumber, apples, cheddar, and almonds. This is one of my favorite combinations. It would go well with a nice butter lettuce, or the massaged kale.

Tuna-Salad

Tomato is also a good addition.

Use what’s in season and what will compliment the other ingredients, and you’re sure to find a winning combination.

MassagedKaleTunaSalad-7

However you toss it together, this hearty salad will hold up well prepared the night before for a work or school lunch. But, like most foods, it’s best eaten fresh, right after you’ve made it, standing at the kitchen island, out of the serving bowl… or maybe that’s just me.

Happy Eating!

Massaged Kale and Tuna Salad
Recipe Type: Main, Lunch, Side, Salad, Fish
Author: Rachel Oberg – De Ma Cuisine
Prep time:
Total time:
Serves: 2
Ingredients
  • Tuna: 1 can tuna, drained (or about 5-6 oz. leftover cooked tuna)
  • 1/2 lemon, juiced
  • 1 t olive oil
  • pinch cayenne
  • to taste salt
  • to taste pepper
  • 2 T green onions, chopped
  • Salad: 3 C kale, torn into small pieces
  • 1-2 T olive oil
  • 1-2 T lemon juice
  • 1/2 to 1 T balsamic vinegar
  • to taste salt
  • to taste pepper
  • 1/4 C carrot, thinly sliced into rounds (or instead of carrots and green onions, try: grapes, cheddar cheese, cucumber, and apple)
  • 1 apple, roughly chopped
  • 1/4 C roasted and salted almonds, roughly chopped
  • (could also add chopped tomato)
Instructions
  1. Combine all tuna ingredients together. Taste and adjust seasoning if needed.
  2. Pour 1 T oil and a bit of salt onto kale. Massage with hands for 2-3 minutes (or until kale looks darker, wiltier, and a bit like it is cooked).
  3. Top kale with tuna and remaining ingredients.