De Ma Cuisine

Dairy-Free Archive

Friday

27

June 2014

2

COMMENTS

Vegan Fruit Crisp

Written by , Posted in Baking, Breakfast, Brunch, Dairy-Free, Dessert, Fruit, Gluten Free, Kid-Friendly, Quick and Easy, Vegan, Vegetarian


VeganFruitCrisp-8

A few weeks ago we were invited to a barbecue at the house of some friends. I brought the dessert. The only dessert.

One of my favorite go-to desserts is fruit crisp. I like to make it because it’s easy and because my mom used to make it all the time when I was growing up, so I have a sentimental attachment to it.

For this particular evening, I chose to make it because the friends who hosted are vegans. I wasn’t sure about trying to make a vegan cake. So I went with simple, and adapted my crisp to suit them.

Their son, Theo, was not impressed. He was expecting dessert. To a three year old, dessert means cake.

Oops.

The still warm crisp was dished out. Generous helpings. I was anxious to know if they liked it. As Theo was handed his plate his little face just crumpled and the cutest three year old voice says, “That’s not desse-wrt! Where’s the cake?”

Thankfully his parents liked it. 😉

VeganFruitCrisp-1

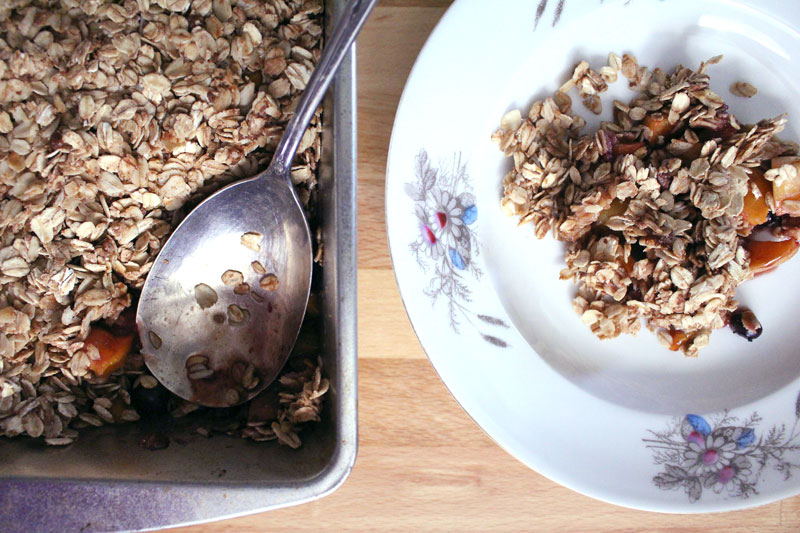
It’s the perfect dessert for whatever fruit is in season. Spring and summer: berries and stone fruit. Fall and winter: apples, pears, persimmons, and grapes. And it makes a fabulous breakfast the next day. Cold with some Greek yogurt, that’s how I like it. Or just standing in front of the fridge with the door open, shoveling spoonfuls into my mouth as I try to decide what to make for dinner. (I know, I know, I’m not supposed to decide with the fridge door open… My mom has told me a thousand times…)

VeganFruitCrisp-2

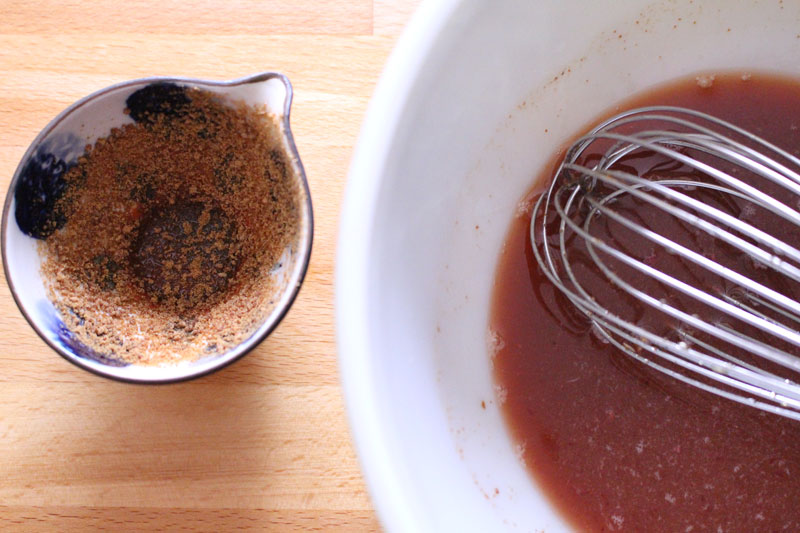
Sugars and juice are whisked together. Sweet sweet. But, it’s honey, maple syrup, and coconut palm sugar. No refined white sugar here. You can use white or brown sugar if you prefer. This is how I like it though.

VeganFruitCrisp-3

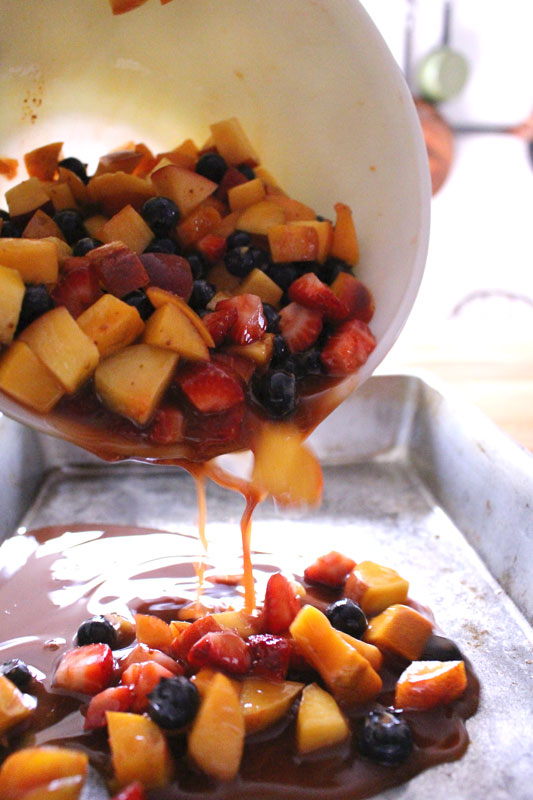
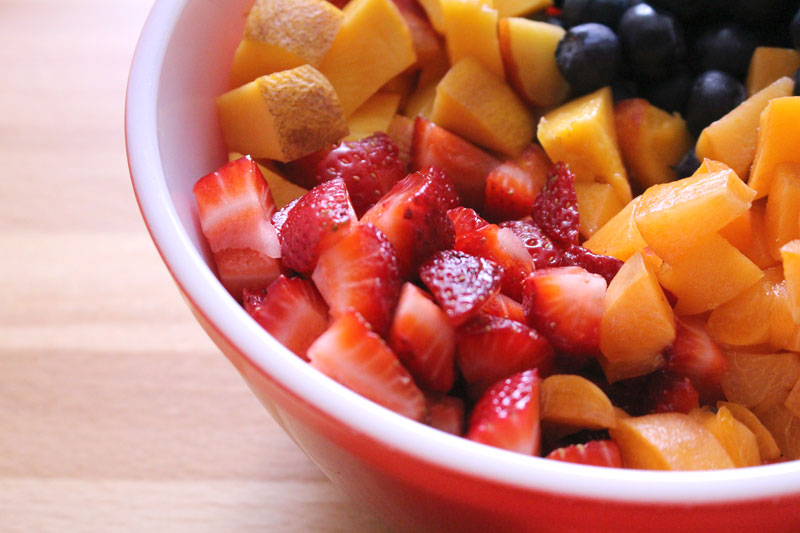
Super sweet and juicy, the fruit is tossed with the liquid and poured into a greased baking dish.

VeganFruitCrisp-4

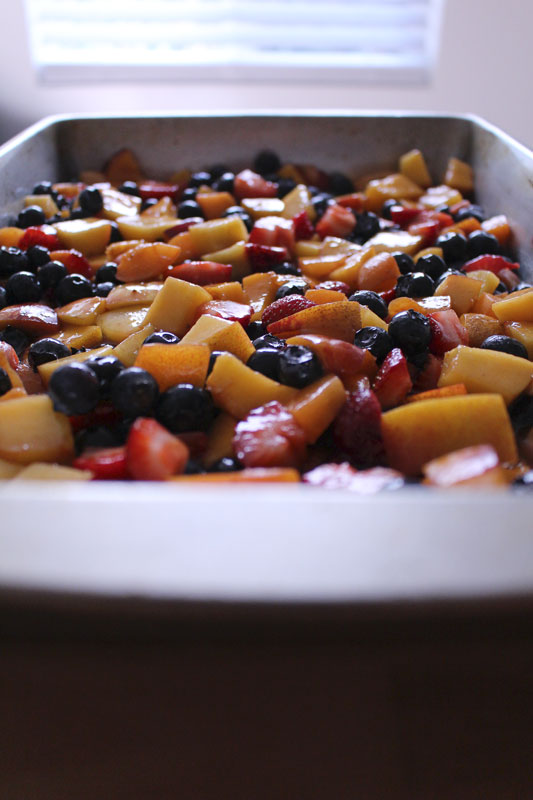
I opted for summer fruits, because that’s what’s in season. Aren’t the colors pretty?

VeganFruitCrisp-5

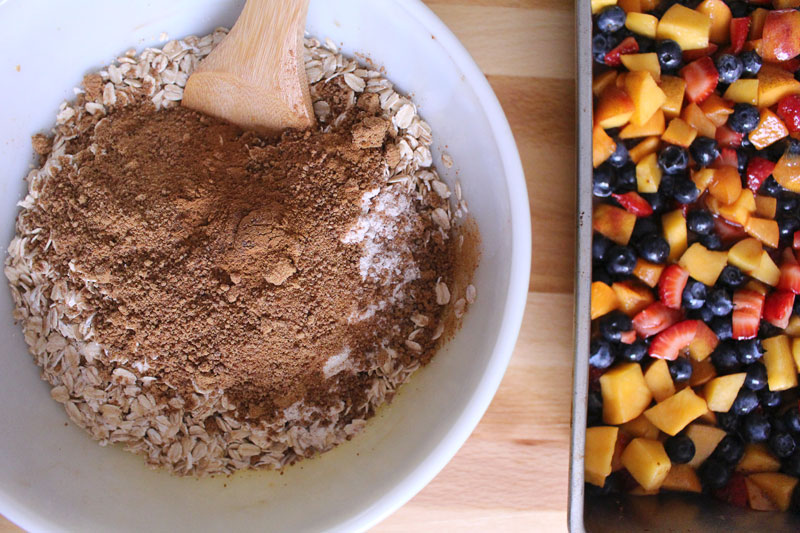
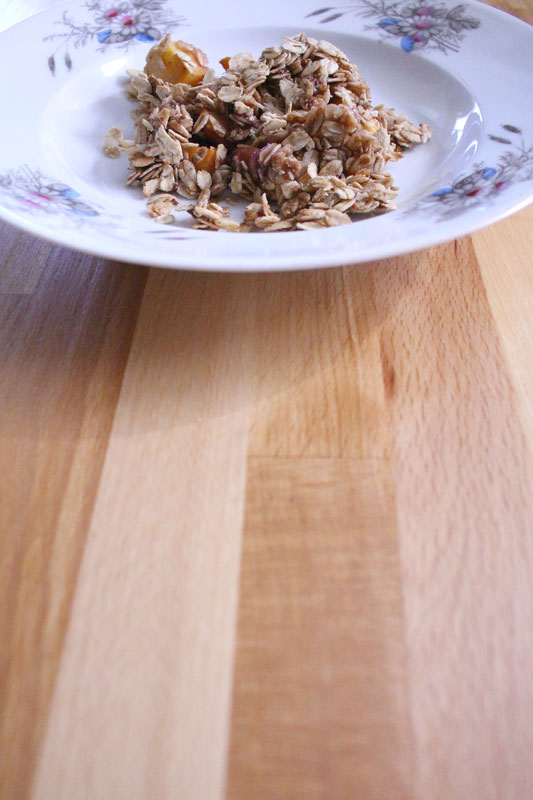
A slightly less sweet, oaty, crumbly mixture will top the fruit.

VeganFruitCrisp-6

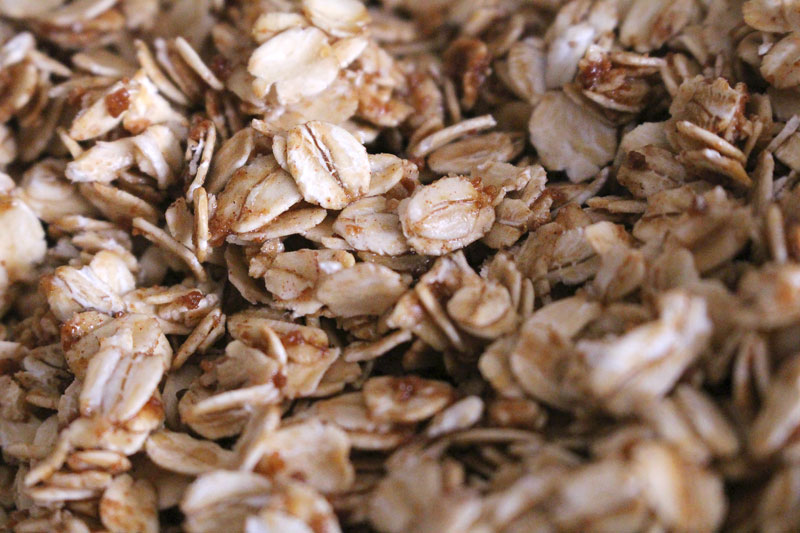
Oats for hearty goodness. And to make this a perfectly acceptable next day breakfast.

VeganFruitCrisp-7

Invite your favorite people over, or bring this to a barbecue.

Just be sure to remind them that it’s not cake.

(Sorry Theo.)

Happy Eating!

Vegan Fruit Crisp
 
Recipe Type: Dessert, Vegan, Fruit
Author: Rachel Oberg – De Ma Cuisine
Prep time:
Cook time:
Total time:
Serves: 8-10
Perfect for any time of year, for vegans and non-vegans alike.
Ingredients
  • 2 C blueberries
  • 1 C strawberries (could sub blackberries), chopped
  • 2 C (heaping) nectarines (could sub apples, pears, plums, persimmons), chopped
  • 1/2 C apriums/apricots (could sub peaches), chopped
  • 1 T cornstarch
  • 1 t vanilla extract
  • 3 T orange juice
  • pinch salt
  • 1/3 C honey
  • 1/3 C coconut palm sugar (honey, maple syrup, or brown sugar will work too)
  • 1/3 C maple syrup (or honey)
  • 4 C oats
  • 1/3 C coconut palm sugar
  • 2 T whole wheat or Gluten-free flour
  • 1 t cinnamon
  • dash nutmeg
  • pinch allspice
  • 1/3 C maple syrup
  • 3 T coconut oil, melted
  • 2 T honey
  • 1 T coconut oil, plus more for greasing the pan
Instructions
  1. Pre-heat the oven to 350F.
  2. Combine fruit in a bowl.
  3. Whisk together cornstarch, vanilla, orange juice, salt, honey, coconut palm sugar, and maple syrup. Toss with fruit.
  4. Combine oats, flour, coconut palm sugar, cinnamon, nutmeg, and allspice. Add maple syrup, oil, and honey.
  5. Pour fruit into a greased 9×13 baking dish. Top with oat mixture. Press down slightly with a spatula. Bake for about 45 minutes, or until bubbly and hot.
  6. Let stand for at least 10 minutes before serving – it’s best just a little warmer than room temperature.
 
Notes
If you’d prefer a non-vegan crisp, use butter instead of coconut oil. If you have vegan friends who don’t eat honey, just use maple syrup. For gluten-free, use your favorite GF flour and oats.

Monday

28

April 2014

1

COMMENTS

Massaged Kale Salad with Radish and Apple

Written by , Posted in Dairy-Free, Dinner, Gluten Free, Herbs, Lunch, Quick and Easy, Salads, Sides, Vegetables, Vegetarian

MassagedKaleSaladWithRadishes9

Kale kale kale kale.

MassagedKaleSaladWithRadishes1

Radish radish radish radish.

MassagedKaleSaladWithRadishes2

(Sung as I’m writing to the tune of Beethoven’s Symphony No. 5. Yes.)

Things I’ve been really into lately (besides singing regular words in non-fitting songs): Massaged Kale Salads.

What a wonderful phenomenon. Massaging the kale makes it easier to digest because it is broken down a bit before you eat it (I learned this from my friend, Genevieve’s blog).

Good digestion is important, so why not!?

(Now I’m listening to Symphony No. 5 instead of just singing it to myself… it’s making me type fast because it’s super intense!)

MassagedKaleSaladWithRadishes3

Olive oil and salt are our massage aids.

MassagedKaleSaladWithRadishes4

Then add two hands (after you’ve taken a photo… don’t try grabbing your camera or phone with your after massaging hands… they will be all green and oily).

MassagedKaleSaladWithRadishes5

Massaged kale will make the room smell all springy, grassy, and fresh.

I like this.

It will become dark, limp, and will decrease in volume.

It’s like science in a bowl.

MassagedKaleSaladWithRadishes6

More science, if you want, while making the dressing. By adding the olive oil last, and whisking it in, an emulsion is created.

If you want simpler, just toss some lemon juice, salt, and oil on to the salad. That’ll work too.

MassagedKaleSaladWithRadishes8

Buuuut, I think dressings are pretty easy to make. Plus my dad-in-law gave me a cool old whisk with a copper handle, so it makes whisking super fun.

This one has a little more than just lemon and olive oil, but not by much. There’s a bit of thyme, a pinch of cayenne, and a smidge of honey.

MassagedKaleSaladWithRadishes7

I wanted the salad to look pretty, even if I was just going to mess it up in a minute. I think it kinda looks like a flower.

I used some of the veggies that I’d gotten in this week’s Abundant Harvest Organics box: kale (obviously), radishes, and a carrot. Apple is added for a bit of sweetness, to counter the a little bit tart lemony dressing.

MassagedKaleSaladWithRadishes10

If you have any leftovers, you could toss them into a skillet for lunch tomorrow and scramble some eggs once the veggies are tender.

To make this into a main dish, you might add some grilled chicken or beef.

Quick and easy, massaged kale peasy… I don’t know…

Happy Eating!

Massaged Kale Salad with Radish and Apple
Recipe Type: Salad, Raw, Greens, Vegetables, Vegetarian
Author: Rachel Oberg – De Ma Cuisine
Serves: 4-6
Ingredients
  • 1 bunch kale, sliced into ribbons or chopped
  • 1-2 T olive oil
  • salt
  • 3-4 radishes, thinly sliced
  • 1/4 C almonds, chopped
  • 1 apple, chopped
  • 1 carrot, thinly sliced
  • dressing: 1/8 to 1/4 C lemon juice
  • 1 t red wine vinegar
  • 1/4 to 1/2 t dried thyme (fresh: 1/2 to 1 t)
  • dash cayenne
  • to taste, salt
  • 1 t honey
  • to taste, olive oil
Instructions
  1. Combine kale with olive oil and salt. Massage with hands for about 3-4 minutes, or until kale is darker in color and a bit limp.
  2. Whisk lemon juice through honey. Stream in olive oil as you whisk, creating an emulsion. Taste and adjust seasoning if needed.
  3. Top kale with radishes, almonds, apple, carrot, and dressing.
3.2.1269

Monday

14

April 2014

1

COMMENTS

Roasted Asparagus with Almonds and Crispy Bacon

Written by , Posted in Dairy-Free, Dinner, Gluten Free, Lunch, Meat, Pork, Quick and Easy, Roasting, Sides, Vegetables

AsparagusWithCrispyBacon-9

What a treat spring’s veggies are. Light and flavorful, they seem to bring a breath of fresh air to the table. I love hearty winter veggies, don’t get me wrong. But, there’s just something about those first crisp, slender, bright green asparagus that makes my heart happy.

Especially when they’re topped with bacon and almonds.

What a simply delightful side for your first spring barbecue.

AsparagusWithCrispyBacon-1

I read in last week’s Abundant Harvest Organics newsletter that asparagus stalks can grow up to ten inches in a day! What!? Imagine if we grew that much in a day… that would be weird. (Now I’m giggling to myself picturing really tall tall tall skiiiiiiiinny people who don’t fit in their houses… oh dear…)

AsparagusWithCrispyBacon-4

This recipe is an easy one. You ready? Asparagus is tossed with olive oil, salt, and pepper.

AsparagusWithCrispyBacon-5

I love to roast veggies any time of the year, so that’s what I did with the asparagus.

Favorite.

AsparagusWithCrispyBacon-7

Things get a little bit crispy and nutty in the oven. This is the best part about roasting veggies. I could probably eat a whole pan by myself.

AsparagusWithCrispyBacon-2

AsparagusWithCrispyBacon-3

Thick and delicious bacon compliments the asparagus nicely. It goes into a cold pan, which keeps it from curling too much. I’m not sure about the splattering though… sometimes I cover the pan… baking the bacon also works well.

AsparagusWithCrispyBacon-6

You could be fancy and wrap the bacon around a few stalks of asparagus to roast it. I thought about it, but then I thought that I’m too lazy practical. Chopping distributes the bacon a little better and takes way less time. But, if you’re in need of some serious bacon, or if you want something a little bit fancier, feel free to experiment.

The bacon and the almonds are chopped up in my version.

This was my Oma’s cutting board. I love having things that were once hers. It makes the fact that she’s gone a little more bearable. I have little pieces of her in the kitchen… that sounds weird… you know what I mean.

Oma means Grandma.

Mine was a fabulous cook.

I think she would enjoy the bacon and asparagus combination. Who wouldn’t?! I wonder, if there are any non-asparagus lovers out there, if they might enjoy it all roasted and topped with bacon and almonds.

Worth a try.

AsparagusWithCrispyBacon-10

Unless you live with me, a hungry food blogger, who might just devour it all and not save you any… Might.

AsparagusWithCrispyBacon-8

I want to make this again and again, it’s so good, and so easy. At the end, half a lemon is squeezed over the deliciousness. Make it for a spring brunch, an Easter dinner, or just to eat by yourself as you play Words with Friends with your brother.

Happy Eating!

Roasted Asparagus with Almonds and Crispy Bacon
Recipe Type: Side, Dinner, Vegetables, Pork, Bacon, Roasting, Quick and Easy
Author: Rachel Oberg – De Ma Cuisine
Prep time:
Cook time:
Total time:
Serves: 2-4
Ingredients
  • 1 bunch asparagus, ends trimmed
  • 4 slices bacon
  • 1 T olive oil
  • salt
  • pepper
  • 1/4 almonds (I used roasted and salted), chopped
  • 1/2 lemon, juiced
Instructions
  1. Pre-heat the oven to 425F.
  2. Place bacon strips into a cold skillet. Turn on heat and cook until crispy. Remove from pan and drain on a paper towel lined plate.
  3. Toss asparagus with oil, salt, and pepper. Place on a baking sheet and roast for 5 minutes. Turn and roast 5-8 minutes more, or until they are as crispy as you would like.
  4. Top asparagus with bacon and almonds. Pour lemon juice over.
  5. Serve immediately.


Wednesday

9

April 2014

0

COMMENTS

How To: Take the Bite Out of Radishes

Written by , Posted in Dairy-Free, Dinner, Fruit, Gluten Free, Herbs, How To, Lunch, Quick and Easy, Roasting, Sides, Vegan, Vegetables, Vegetarian

RoastedRadishes1

Radishes they have a bit of a bite.

They’re peppery.

I get it.

They can be great raw, when mixed with the right flavors (ahem, two recent posts: Radish and Feta Toasts, and Radish Slaw).

They’re super in soups (yep, did that on purpose), tasty in frittatas, impossibly good (and impossible to detect) in Shepherd’s Pie.

Buuuut, let’s try one more way. Let’s roast them.

Let’s tame the heck out of them.

Oh, and this is gonna be really simple.

You ready?!

RoastedRadishes2

When I was working on this recipe I tried a few different things. I was going to make a sauce for the radishes, or maybe add a little more to them when roasting. But I realized that they didn’t need it.

They have a fun and interesting flavor. Why mask it?

I thought they’d be good quartered. They could be halved, or left whole. Just adjust the roasting time.

Then they’re tossed with just a few things: thyme, olive oil, salt, and pepper.

RoastedRadishes3

On to a baking sheet and they’re ready for the oven.

I told you it was going to be easy.

RoastedRadishes4

Just like their flavor, the colors become muted.

The remind me a bit of Easter eggs.

RoastedRadishes5

They’re served with a squeeze of lemon.

Simple as that. They’ve been tamed.

RoastedRadishes6

In my experience, cooking is generally a good way to tame a bold food. Whether it’s braised, roasted, sautéed, grilled… the heat usually mellows things out. However, if you’d like to try keeping things raw, mixing with complimentary flavors will also do the trick.

For radishes, think things like:

Lemon + dill + crab cucumber + cream cheese.

Lemon juice + olive oil + parsley + onions.

Shrimp soy sauce + scallions.

I like to chop or grate loud veggies when they’re going to be eaten raw (hello garlic, red onion, and radish!). It lets them continue to sing, just a little bit quieter, in harmony with the other ingredients.

RoastedRadishes7

There’s no need shy away from radishes any more. Whether they’re raw or cooked, I’ve got you covered.

Happy Eating!

Roasted Radishes
Recipe Type: Side, Roasting, Vegetarian, Vegan, Vegetables, Radishes
Author: Rachel Oberg – De Ma Cuisine
Prep time: 5 mins
Cook time: 25 mins
Total time: 30 mins
Serves: 2
Taming radish’s peppery bite by roasting them.
Ingredients
  • 1 bunch (about 8) radishes, tips and tails removed, quartered
  • 1 t olive oil
  • to taste salt
  • to taste pepper
  • 1/4 t dried thyme, crushed
  • lemon wedges, for serving
Instructions
  1. Pre-heat the oven to 375F.
  2. Toss radishes with olive oil, salt, pepper, and thyme. Place cut side down on a baking sheet and roast for 15-20 minutes. Flip and roast for 5 minutes more.
  3. Serve with a squeeze of lemon.
3.2.1269

Monday

31

March 2014

0

COMMENTS

Crostini with Sausage and Braised Greens

Written by , Posted in Appetizers, Braising, Bread, Dairy-Free, Dinner, Lunch, Meat, Pork, Sandwiches, Sausage, Sides, Snacks, Toasting, Vegetables

CrostiniWithSausageAndBraisedGreens6

I may have a new favorite way to eat greens.

For a second, forget about what I know you must be anticipating as amazingness in the crostini. Ok. Done? Just for a moment… Because we need to talk about greens.

Not too long ago I talked about bitter greens and offered a few suggestions for their unbittering. I mentioned, but didn’t go into detail about braising. But, now that I’ve tried it, I may never go back to any other way of cooking greens. (Ok, that maaaaay be a bit dramatic…)

Braised greens are simply amazing.

Seriously.

CrostiniWithSausageAndBraisedGreens1

Llano Seco sent me a ham hock. I just had to try braising the greens with it. Oooooh boy! What a fun treat. If you can find one, I’d totally recommend it. It will be worth it. If you can’t, vegetarian is wonderful as well. I’ve made braised greens both ways. I’ve enjoyed them all immensely.

The greens braised for about two hours. I’ve tried them after shorter amounts of time and they’re great too. So if you don’t have a lot of time, don’t worry about it. But, if you’ve got a few hours to spare, try it. (And by a few hours I mean a tiny bit of time to get the ingredients into a pot, then just one eyeball on the pot every so often.) The result is tender, flavorful, AWESOME greens.

They’re not only perfect to top our little crostini, but this big batch can be frozen and later added to soups, rice dishes, or used to top some Paris Potatoes.

CrostiniWithSausageAndBraisedGreens5

Now we can talk about the crostini.

Sorry. Wait. I need to interrupt myself again to tell you that I made these, then I stood beside the photography table and devoured them. I just couldn’t stop.

Interruption over.

So there was a ham hock in the greens. Then there’s some Llano Seco Italian Sausage that’s chopped up and heated in a few tablespoons of the braising liquid. You could really just end there with the greens and sausage. Pile it all on some rice or potatoes and call it dinner.

But, I didn’t do that.

CrostiniWithSausageAndBraisedGreens2

I wanted some little toasts. So I sliced up a baguette, drizzled it with olive oil, and sprinkled with salt and pepper. They toasted up in the oven for a few minutes.

CrostiniWithSausageAndBraisedGreens3

They were topped with some of the greens, and a few pieces of sausage. And then… a squeeze of lemon. One of my favorite ways to finish a dish.

CrostiniWithSausageAndBraisedGreens4

If you can, share with friends. They will be glad you did.

CrostiniWithSausageAndBraisedGreens7

Happy Eating!

Crostini with Sausage and Braised Greens
Recipe Type: Side, Snack, Sandwich, Toast, Meat, Sausage, Greens, Vegetables, Pork, Braising
Author: Rachel Oberg – De Ma Cuisine
Serves: 4-5
Ingredients
  • Braised Greens: 2 T olive oil
  • 2 C celery, chopped
  • 1 radish, diced
  • 2 cloves garlic, diced
  • 7 C vegetable stock
  • 1 ham hock
  • 8-9 C greens (mixture of any: chard, kale, collards, spinach…), roughly chopped
  • salt
  • pepper
  • 2 T white vinegar
  • Crostini: 10-20 slices of baguette
  • olive oil
  • salt
  • pepper
  • 1 clove garlic (optional)
  • 3-4 T braising liquid
  • 2-3 Italian sausages, halved and chopped
  • lemon wedges, for serving
Instructions
  1. Heat a soup pot. Add oil. Add celery, radish, garlic, salt, and pepper, and cook over medium-low heat for 5-10 minutes, stirring occasionally.
  2. Add ham hock and cook for 2 minutes. Add greens and vinegar and cook for 2 minutes more.
  3. Add stock and bring to a boil. Reduce to a simmer and cook for 1-2 hours, stirring every once in a while.
  4. Pre-heat oven to 350F.
  5. Drizzle baguette slices with olive oil, and sprinkle with salt and pepper. Bake for 5-10 minutes, or until crispy. Rub with a clove of garlic if desired.
  6. Add 3-4 T of the braising liquid to a skillet and add the sausage. Cook for about 5 minutes, or until heated through.
  7. Top each slice of toasted baguette with some greens (try to avoid too much braising liquid so they don’t get soggy), a few pieces of sausage, and a squeeze of lemon.
  8. Serve immediately.
3.2.1269