De Ma Cuisine

celery Archive

Thursday

29

January 2015

0

COMMENTS

Red Choi Stir Fry with Tofu and Almonds

Written by , Posted in Dairy-Free, Dinner, Lunch, Main Dishes, Nuts, Pasta, Quick and Easy, Quinoa, Rice, Sauces, Vegetables, Vegetarian

RedChoiStirFry-8

It makes me super happy when I’ve made something that’s loaded with veggies, and Tim, unprompted, tells me how much he likes it. What a guy! Good thing he liked it so much (even the tofu!), because I am sold.

RedChoiStirFry-1

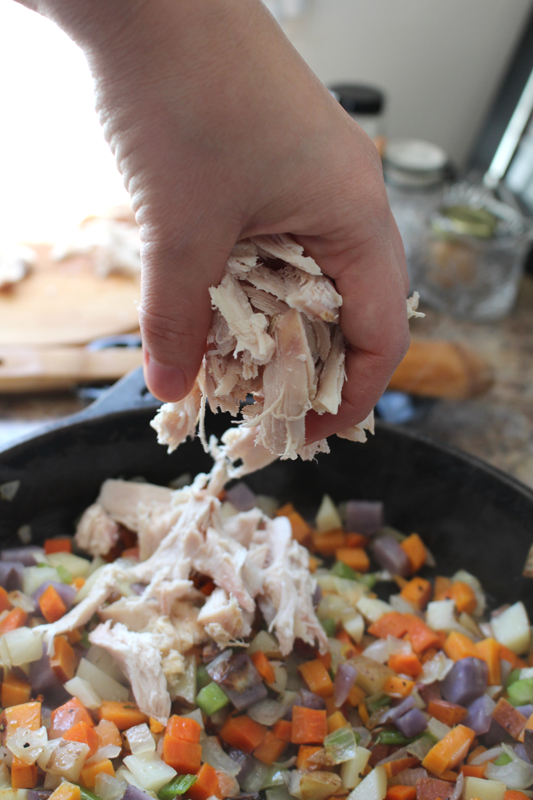
First of all, tofu is a cheap way to get some protein into a dish. I know, I know, not everyone is crazy about soy. So, if you’re not a tofu fanatic, that’s awesome too! Be who you are, right?! If you’d like, add some chicken instead, Tempeh is great too (but also a soybean product), beef and pork would also be super yum. Or, go totally vegetarian and add some more nuts (even a scoop of peanut or almond butter mixed into the sauce would be great).

See how easy that was?! Substitution central over here. This is one where there’s something for everyone.

Oh yeah, and if you’re vegan, omit the fish sauce. (No duh, Rachel. You knew that… We taught our 2 year old niece to say, “No duh, Uncle Tim” over the holidays. It was one of the highlights of the trip. Especially when she started saying it to Oma too.) I’d planned to make this a vegan dish. I was going to add some honey, then remembered that some vegans don’t eat honey. I finished cooking and realized that fish sauce is obviously not vegan. Eye roll and shrug of the shoulders. I can’t expect my brain to work perfectly all the time. 😉

RedChoiStirFry-2

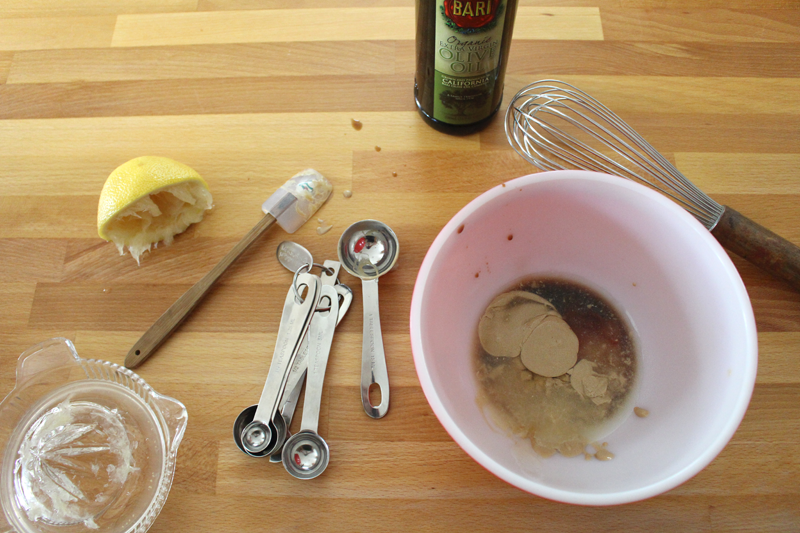
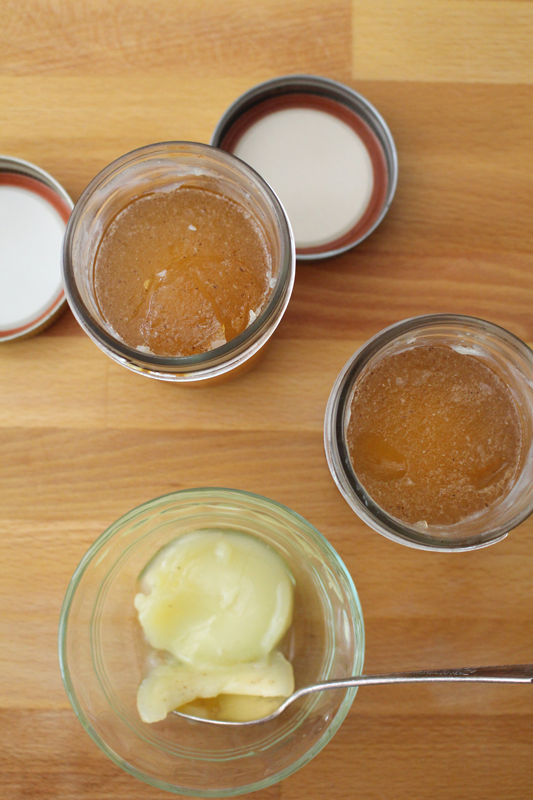
This is my go-to stir fry sauce. It’s simple. Soy sauce (or a gluten-free version, which tastes remarkably similar), fish sauce, and rice vinegar. Sometimes I use cornstarch and water, to act as a thickener. Either way, we think it tastes great.

RedChoiStirFry-3

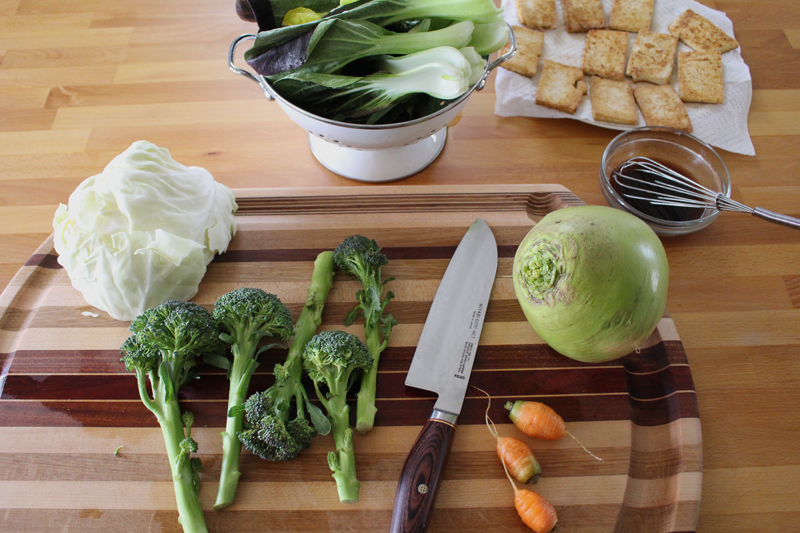
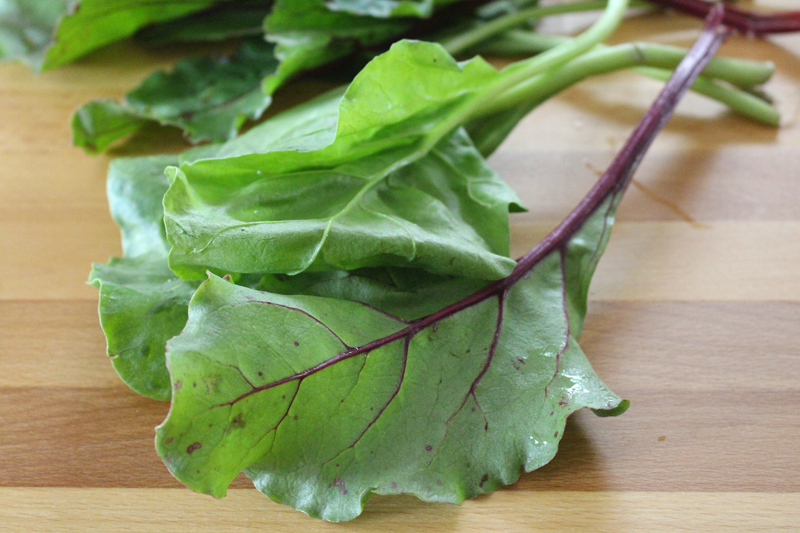
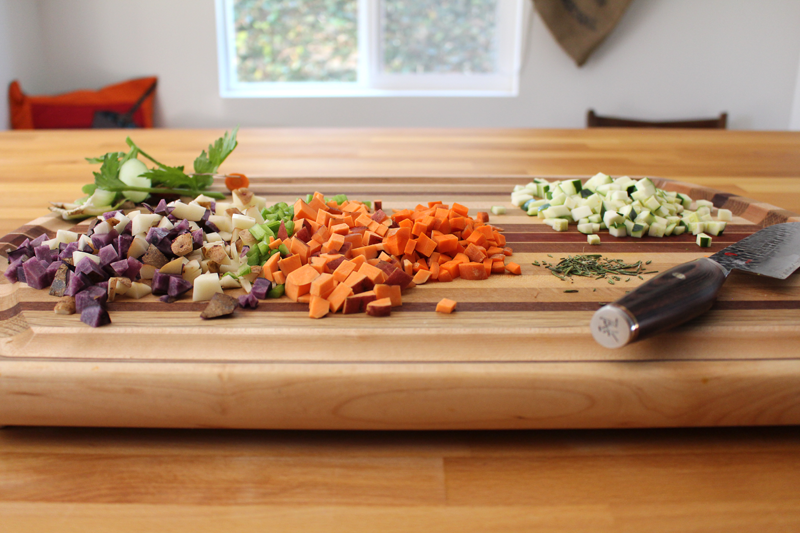
Stir Fry is one of those awesome meals for using up whatever veggies are hanging out in the fridge. It’s also a way to pack in many many veggies, but can also be great if you’ve just got broccoli and an onion left at the end of the week. My goal, this time, was to find a way to use the red choi. The rest of the veggies are kinda just a bonus. Plus, it’s a great dish for cabbage using up. And, tastes great with an Asian slaw on the side. Yep, do it, get your cabbage on!

RedChoiStirFry-4

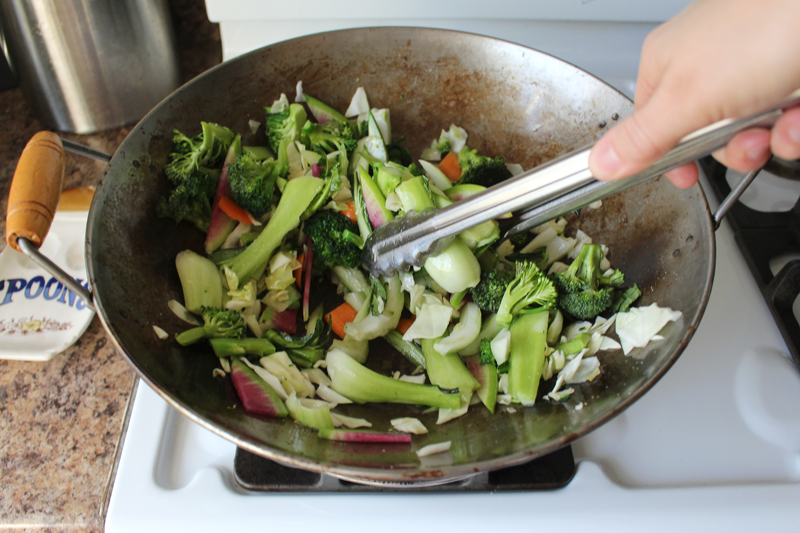
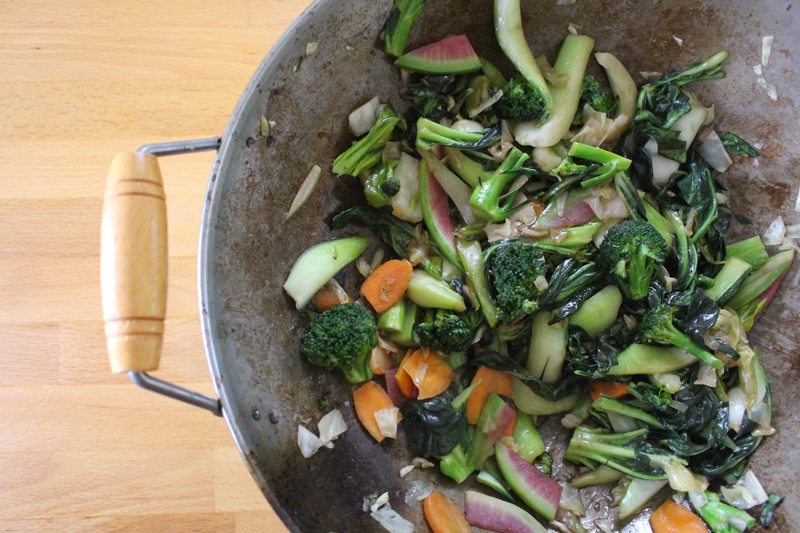
Anoooooother reason I love Stir Fry, it’s so incredibly quick to prepare. Veggies cook over higher heat, so they cook fast and retain their bright color. A friend gave me a wok, so now I don’t throw veggies all over the stove.

Don’t forget, keep those veggies moving. High heat means they’re gonna burn if you leave them unattended.

RedChoiStirFry-5

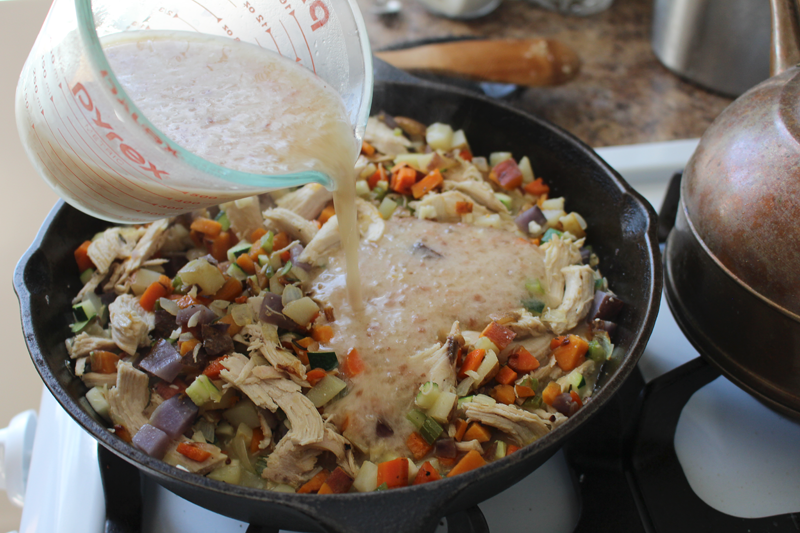
Once the veggies are cooked (see how greeeeeeeen they are still!?), sauce goes in, cooks for like 2 minutes more, and then you’re done!

RedChoiStirFry-6

You could stand there and eat it out of the wok. Totally fine with me.

RedChoiStirFry-7-

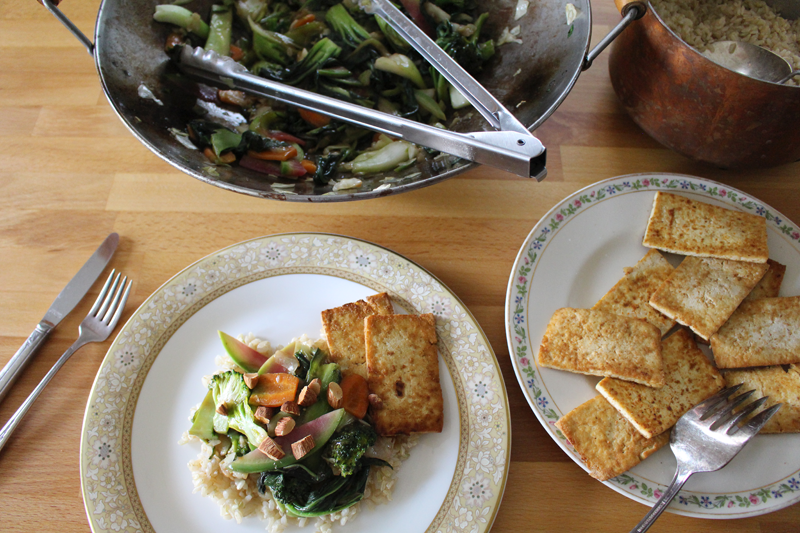
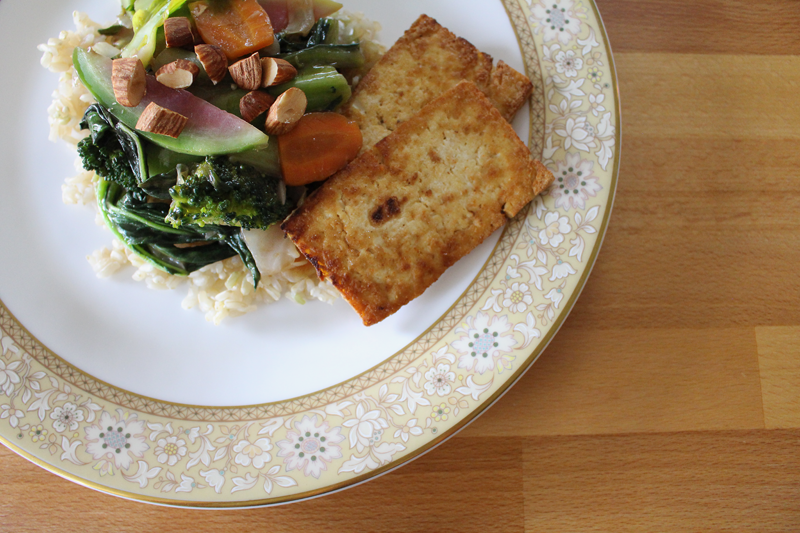
But, maybe a better option is to scoop some rice onto a plate, slide some tofu next to it, and pile on those veggies.

If you’ve already eaten 5 pieces of the crispy tofu, I understand. I may have done the same.

May have.

Happy Eating!

Red Choi Stir Fry with Tofu and Almonds

Prep Time: 10 minutes

Cook Time: 21 minutes

Total Time: 31 minutes

Yield: 2-4

Red Choi Stir Fry with Tofu and Almonds

Ingredients

  • 1 C brown rice (rice noodles, quinoa, or bulgur wheat would also be great)
  • 2 C water
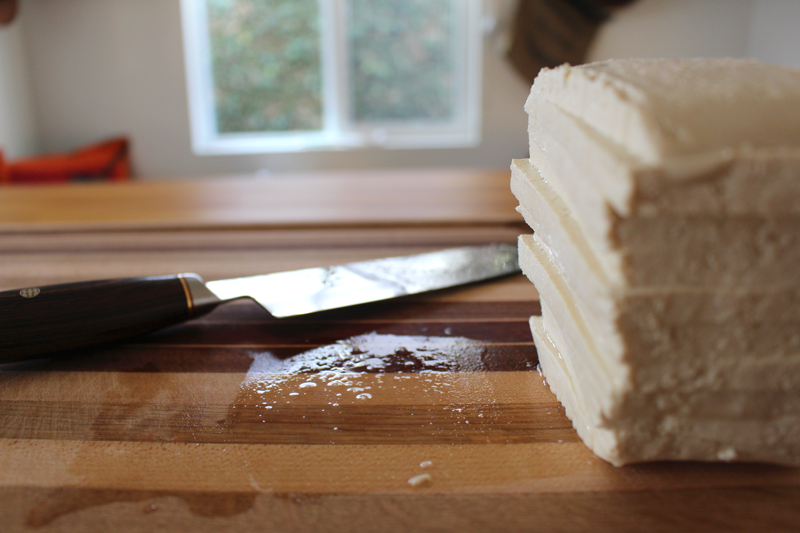
  • 1 block firm tofu, sliced about 1/8" to 1/4" thick
  • to taste salt
  • pinch cayenne
  • pinch ginger
  • 2 t olive oil, divided
  • 1 T soy sauce
  • 1 T rice vinegar
  • 1/4 C cold water
  • 1 T cornstarch
  • pinch ginger
  • 2 T olive oil
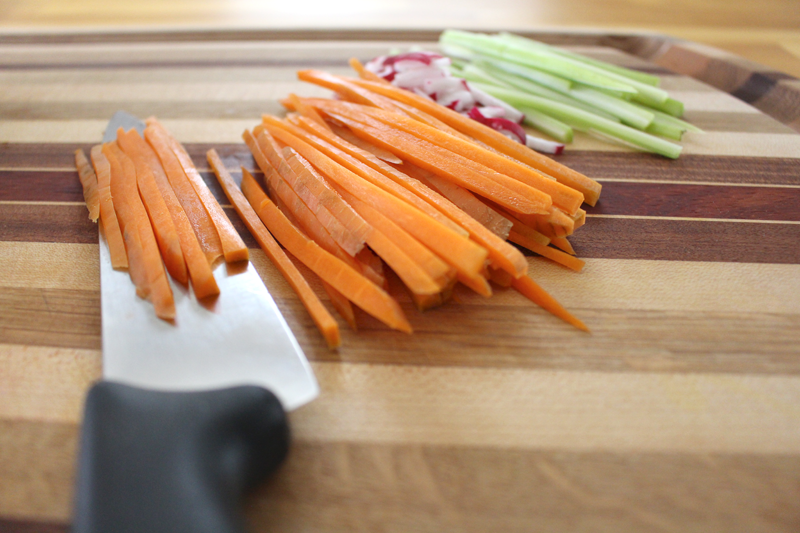
  • 1/4 C carrots or celery, thinly sliced
  • 1-2 C broccoli or cauliflower, cut into bite sized pieces
  • 2-4 T radish, thinly sliced
  • 1 C cabbage (or collard greens or kale), chopped
  • 1 head red choi stems, chopped
  • (could also add: snap peas, bean sprouts, green beans, summer squash, butternut squash)
  • pinch salt
  • 2 cloves garlic, minced
  • 1 head red choi leaves, chopped
  • 2 T almonds, chopped, for serving

Instructions

  1. Cook rice.
  2. While rice cooks, sprinkle both sides of the tofu with salt, cayenne, and ginger. Heat skillet over medium to medium-high heat, add 1 t olive oil, when it's hot add tofu, working in batches so the pan isn't overcrowded, cook for about 2-3 minutes per side (or until sides are browned and crispy), adding more oil as needed. Remove from pan and place on a paper towel lined plate.
  3. Whisk together soy sauce through ginger. Set aside.
  4. Heat a wok or large skillet over medium-high heat. Add 2 T olive oil. When oil is hot, add carrots through salt. Cook, stirring constantly (picking veggies up with tongs and moving them around works best for me), for about 5 minutes. Add garlic and red choi leaves and cook for about 2 minutes more.
  5. Stir in sauce. Cook for 1-2 minutes (or until sauce has thickened).
  6. Taste and adjust seasoning if needed.
  7. Serve over rice, topped with chopped almonds.

Notes

If it's not essential for this to be vegetarian, 1 t fish sauce is a good addition to the sauce.

http://www.de-ma-cuisine.com/red-choi-stir-fry-with-tofu-and-almonds/

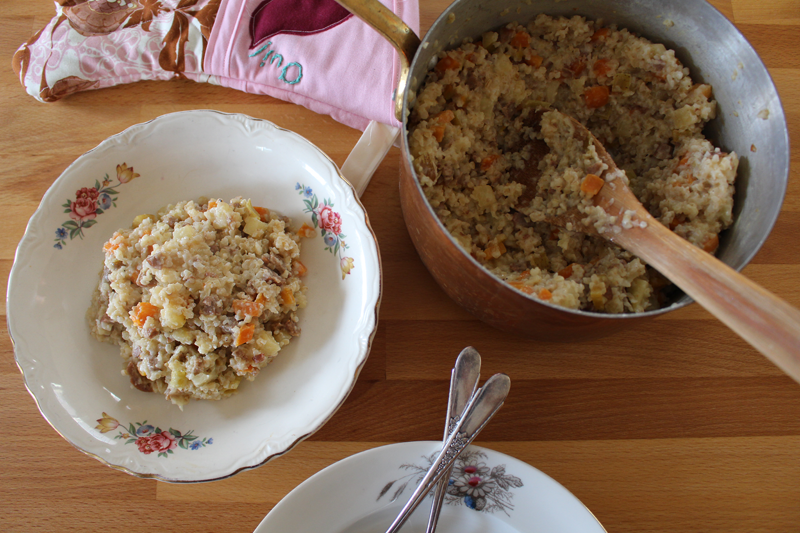
P.S. Those leftovers, plomp it all together in a pan and heat it up. The rice will love the sauce, and get a little bit crispy and extra yummy.

Monday

26

January 2015

0

COMMENTS

Bulgur Wheat with Sausage and Apples

Written by , Posted in Cheese, Dinner, Fruit, Grains, Main Dishes, Meat, Pork, Quick and Easy, Rice, Sausage, Vegetables

BulgurRisotto-6

I am a big fan of quick weeknight dinners. I’m all for slow-cooked, braised, take the whole afternoon to cook kinda meals. But, most weekdays I’m tired, there are dirty dishes in the sink, and I just want to eat something. Now.

This dish kinda has it all. It’s simple, but satisfying. Especially if you have some crusty bread with butter to go alongside. We did not, but maybe if I plan ahead for eating the leftovers we will. 😉

BulgurRisotto-2

Bulgur wheat is one of my go-tos. It’s similar tasting to brown rice, but cooks quicker. Also, bulgur is a fun word to say. The dog is staring at my while I repeat it to myself right now.

BulgurRisotto-1

I made this over the summer for the first time. I used zucchini. Since it’s winter and I had a bunch of carrots in my garden, that’s what I used this time. They went nicely with the apple-sausage combination I had going on. I think butternut squash or sweet potatoes would also taste great, if that’s what you have on hand.

BulgurRisotto-3

While the bulgur cooks, the rest of the meal comes together. It’s a really quick and easy dinner to prepare. A little chopping, two pots, and you’re ready to go.

BulgurRisotto-4

I added a few spoonfuls of plain yogurt and a splash of whole milk for creaminess. And the first time I made it, I added some parmesan cheese. I didn’t have any this time, but if I did, I’d definitely add it, so I left it in the recipe.

BulgurRisotto-5

We will probably have the leftovers for dinner tonight, even though I haven’t figured out the bread situation.

Happy Eating!

Bulgur Wheat with Sausage and Apples

Prep Time: 10 minutes

Cook Time: 20 minutes

Total Time: 30 minutes

Yield: Serves 3 or so.

Bulgur Wheat with Sausage and Apples

Ingredients

  • 1 C bulgur wheat (I used coarse) (could use brown rice or quinoa to make it gluten-free - adjust cooking time accordingly)
  • 2 C water
  • 1 T olive oil
  • 1 C carrots* (or zucchini in the summer), chopped
  • to taste salt
  • to taste pepper
  • 2 C apple, chopped
  • 2 fully cooked sausage links (I used Argentine inspired), removed from casing (could substitute lentils to make it vegetarian)
  • 2-3 T Greek or plain yogurt
  • splash whole milk (any kind you like - cow, almond, coconut...)
  • 1/2 C parmesan, grated (optional)
  • lemon wedges, for serving
  • *butternut squash, pumpkin, mushrooms, corn, cabbage, onion, celery, leeks, spinach, or tomatoes would also be yummy additions. Cooking time may vary depending on the type of veggies used.

Instructions

  1. Bring the bulgur and water to a boil in a medium-sized saucepan. Reduce to a simmer and cook partially covered for about 15-20 min or so (or until tender).
  2. Heat a pan, add the olive oil, and when it's hot, add the carrots, some salt, and pepper. Cook over medium-low heat for about 5 minutes. Add the apple and cook for about 5 minutes more. Add the sausage and cook for 5 minutes more, or until the sausage is heated through.
  3. Stir in the yogurt, milk, and parmesan. Cook for 1-2 minutes more. Taste and adjust seasoning if desired.
  4. Serve with a squeeze of lemon.
http://www.de-ma-cuisine.com/bulgur-wheat-with-sausage-and-apples/

Thursday

11

December 2014

0

COMMENTS

Spring Rolls with Spicy Honey Mustard Dipping Sauce

Written by , Posted in Appetizers, Dairy-Free, Dinner, Fish, Fruit, Gluten Free, Herbs, Lunch, Meat, Nuts, Quick and Easy, Sauces, Sides, Snacks, Vegan, Vegetables, Vegetarian

SpringRolls-8

Today, I was inspired to try something new. Something I’ve never attempted before.

Spring Rolls.

What a fun idea!

SpringRolls-1

I felt like I was playing as I cut the avocado and veggies into matchsticks.

SpringRolls-2

And then as I whisked the dip and the emulsion came together, I knew I was on to something. Because honey and mustard compliment each other so well, lemon adds a bright note, and Sriracha brings the spice.

SpringRolls-3

SpringRolls-4

I just followed the instructions on the back of the rice paper package, which instructed me to soak the paper in warm water for 5 seconds (if your package says something different, by all means, follow those instructions).

SpringRolls-5

A few long sticks (or many short sticks, depending on the type of radish used) are added to the center of the paper.

SpringRolls-6

Then the paper is folded in half, keeping the sticks in the center.

SpringRolls-7

Sides are folded in towards each other, then it’s all rolled up.

I don’t know if this is how an expert would make these. But, it’s how I did it, and they worked just fine.

SpringRolls-10

After rolling, slice in half on a bias (because it looks fancy).

SpringRolls-9

You could totally switch up the dip, if you have a favorite Asian dip to use. You could just dip in wasabi and soy sauce too. You could also play with the contents of the rolls. I think that the following would be wonderful additions (maybe not all at the same time though):

– cucumber

– cilantro

– green onions

– bean sprouts

– sugar snap peas

– napa cabbage

– sesame seeds

– almonds

– tofu

– fried tempeh

– salmon

– shrimp

– crab

Obviously, the seafood would make these not vegan. Also, I’d cook any meat I was planning to use as I prefer it that way. If you don’t, and know how to safely prepare sashimi, then go for it.

I served these raw. I liked the crisp veggies in the sticky rice paper with the sweet and spicy dip. But, maybe next time I will try cooking the filling (not the avocado though) and then pan frying for a minute or two. Could be fun. Hmmm… maybe tomorrow.

Happy Eating!

Spring Rolls with Spicy Honey Mustard Dipping Sauce

Spring Rolls with Spicy Honey Mustard Dipping Sauce

Ingredients

  • Dip: 2 T lemon juice
  • 2 T dijon mustard
  • 1 T plus 1 t honey
  • 1 to 1 1/2 t Sriracha (or your favorite hot sauce)
  • 2 t soy sauce
  • to taste salt
  • 3 T olive oil
  • Rolls: 1 small ripe but firm avocado, julienned/cut into 4" matchsticks
  • 1/2 carrot, julienned/cut into 4" matchsticks
  • 2 celery ribs, julienned/cut into 4" matchsticks
  • 4 small radishes, julienned/cut into 1"-4" matchsticks
  • (Other options could include: cucumber, cilantro, green onions, bean sprouts, napa cabbage, sugar snap peas, sesame seeds, almonds, crab, shrimp, salmon, tofu, and fried tempeh.)
  • 10-15 pieces of rice paper
  • warm water

Instructions

  1. Whisk together lemon juice through soy sauce. While whisking, stream in olive oil. Taste and adjust quantities if needed.
  2. Follow rice paper package's instructions for soaking. (Should be around 5 seconds in warm water.) After soaking (one at a time), set on a plate and place about 4 pieces of each: avocado, carrot, celery, and radish (you may need more radishes if they are shorter pieces). Fold the paper in half, keeping the filling in the middle, fold the ends in towards each other, then roll it up. Slice in half.
  3. Serve with sauce for dipping.
http://www.de-ma-cuisine.com/spring-rolls-with-spicy-honey-mustard-dipping-sauce/

Monday

8

December 2014

0

COMMENTS

Cannellini and Beet Green Soup with Feta

Written by , Posted in Beans, Cheese, Dinner, Gluten Free, Herbs, Legumes, Lunch, Main Dishes, One Dish Dinners, Soups, Vegetarian

CannelliniBeetGreenSoup-12

Let me tell you how my day was. It was fine. Nothing out of the ordinary happened. Nobody made me take a late lunch break. No one threw out the food I’d brought for lunch. I just waited too long to eat all on my own. When it came time to make the soup for this post, I was waaaaay too hungry to wait for it to finish cooking. So I ate a big pile of crackers with peanut butter and jam on them.

And then I made the soup.

CannelliniBeetGreenSoup-1

It’s a simple one, made with humble ingredients. Beginning with a mirepoix, which is just a fancy way of saying the traditional French flavor base for many dishes: carrot, celery, and onion. This soup included. Not because it’s a fussy soup. It’s just what I had on hand.

CannelliniBeetGreenSoup-2

Veggies sit for a bit in a hot pot (are you saying “hot pot hot pot hot pot hot pot” out loud now too? No? Ok.) with some salt and pepper. They are stirred occasionally. They get all tender and delicious. Garlic is added. Because it always should be. Then a bit of red wine vinegar is used to deglaze the pan.

CannelliniBeetGreenSoup-3

I made a zillion cups of veggie stock the other week. I wondered how I’d use it all before I had enough veggie scraps to make more. Then two of the jars cracked in the freezer (which I’d found as I prepared for this soup, oh yay) and I only had half a zillion to use.

I don’t know if the lesson is to not use glass containers for veggie stock in the freezer. It was cold, and I left plenty of room at the top, these ones just expanded sideways for some reason… Bummer.

CannelliniBeetGreenSoup-4

The stock was partially frozen still, even after defrosting in the fridge for a day. No big deal if it is. It’ll boil eventually.

CannelliniBeetGreenSoup-5

And the house will get all warm and cozy and soup smelling-y.

I don’t think I’ve mentioned yet, in this post, how much I love that it’s finally cold.

Cold being a relative term – I’m talking cold like it’s in the 50’s at night, not cold like my brother, Josh, is experiencing, where it’s -19C/-2F.

But, it still needs to be said.

I love this season.

CannelliniBeetGreenSoup-6

I love the root veggies that I’m totally craving. The warm comfort foods that don’t make me sweat while I’m eating. The oven that can be turned on without having the AC on full blast at all.

CannelliniBeetGreenSoup-7

This soup would actually work well in the summer months. It feels light, while being full of beany protein, subtle oregano, and bright beet greens. But, let’s forget about summer for now. I’m totally into this chilly, cloudy weather. It makes me want to skip with glee.

CannelliniBeetGreenSoup-8

The soup is finished off with a pat of butter. If you’re making this a vegan version, just drizzle some good quality olive oil onto each bowlful as you serve it (and skip the part later on where I talk about cheese… or use your favorite vegan cheeeeeese).

CannelliniBeetGreenSoup-9

Butter gives the soup a glossy, creamy feel.

CannelliniBeetGreenSoup-10

The last thing you must do before the soup can be eaten: top with a bit of feta. Trust me. This makes the soup. (Vegans, remember your instructions from before?)

CannelliniBeetGreenSoup-11

Of course, it might have also been great with a huge stack of crackers for dipping. But, I ate all the crackers at first lunch. It would be wonderful with a freshly made baguette, but we’re fresh out. So, it’s just good on its own, standing at the kitchen island, eating as if I hadn’t just eaten thirty five pb&j crackerwiches.

Happy Eating!

Cannellini and Beet Green Soup with Feta

Cannellini and Beet Green Soup with Feta

Ingredients

  • 2 T olive oil
  • 1 onion, chopped
  • 1 celery stalk, chopped
  • 1 carrot, chopped (or mixture of carrot and radish)
  • to taste, salt
  • to taste, pepper
  • 1 clove garlic, chopped
  • 1 T red wine vinegar
  • 4-5 C vegetable stock
  • 1-15 oz. can cannellini beans, drained and rinsed
  • 1 t dried oregano (or 1 T fresh), crushed (could substitute 1 T fresh dill, chopped)
  • 1 C (1 bunch) beet greens (washed well, including stems, to save for stock), chopped (or kale, spinach, or chard)
  • 1/2 T lemon juice
  • 1 t unsalted butter
  • feta, crumbled, for topping

Instructions

  1. Heat a soup pot. Add oil. When oil is hot, add onion through pepper. Cook over medium-low heat for about 9-10 minutes, stirring occasionally. Add the garlic and cook for 1 minute more. Add the vinegar and cook for another minute.
  2. Add the stock, beans, and oregano. Bring to a boil, then reduce to a simmer for about 15 minutes. Add the beet greens and cook for 10 minutes more.
  3. Remove from the heat and stir in the butter and then lemon juice. Taste and adjust seasonings if needed.
  4. Serve topped with feta.
http://www.de-ma-cuisine.com/cannellini-and-beet-green-soup-with-feta/

Monday

27

October 2014

0

COMMENTS

Chicken Pot Pie

Written by , Posted in Baking, Dinner, Herbs, Leftovers, Lunch, Main Dishes, Meat, One Dish Dinners, Potatoes, Poultry, Vegetables

ChickenPotPie-12

Today is one of those fall days where it actually feels like fall. I’m wearing jeans and a sweater and am totally comfortable.

I’m also going through the photos that I took of the Chicken Pot Pie that I made the other week and drooling. We ate the leftovers for dinner last night, otherwise I’d probably be heating them up for lunch right now.

So that’s a little bit about my life.

Fall weather and Chicken Pot Pie make me happy.

So do things like my dog’s whiskers, the way the sky can turn such brilliant shades of orange and pink after the sun’s gone down, and a good Skype conversation with my dad.

ChickenPotPie-13

I have to tell you, this particular Chicken Pot Pie recipe is one of my favorites. After tasting the sauce I yelled, “Oh my gosh!”, to no one but myself. So, I just had to share it with you.

ChickenPotPie-1

It’s a simple pie with humble ingredients. I make this often enough, and use what I have on hand. So it can range from things like carrots, potatoes, and celery, to parsnips, squash, and peas. It feels like the kind of meal that’s been made for years and years and years, by people who at the end of the day, just want something nourishing and delicious to fill their bellies.

This meal fits that exactly.

ChickenPotPie-2

A couple of weeks ago I roasted some chicken. The leftovers and pan drippings were frozen. Saved just for this meal. The bones went into the freezer, for the next time I need to make stock. I defrosted the chicken in the fridge overnight and then shredded it and dropped it into the cooked veggies. 

ChickenPotPie-3

I usually use chicken stock for this dish. But, this time I had pan drippings. You can tell the difference by the jiggliness of it. The pan drippings jiggle, while stock is more liquid. The fat will rise to the top of both. I like to scrape it off (and give it to the dog as a treat).

ChickenPotPie-4

For this type of dish, I find it a little bit easier to just whisk the thickening agent (flour or cornstarch) together with some of the liquids, and add it to the pan. It thickens nicely once it boils. A traditional roux can be made instead (you know, where you heat some fat, then add an equal amount of flour and cook for about 30-60 seconds, then whisk in the stock and let it thicken), if you prefer.

ChickenPotPie-5

ChickenPotPie-6

ChickenPotPie-8

After it boils and thickens, the milk is added. I don’t like it when the sauce breaks, so I like to leave the milk out until the end. Then heat it ever so gently, just until steam rises.

ChickenPotPie-9

Once the seasoning is checked, the skillet is set on a baking sheet (in case of overflow – I’d rather clean that than the inside of the oven).

ChickenPotPie-7

Pie crust is rolled out. I used Alana’s recipe (from her cookbook).  I tried to work quickly, but since the skillet and filling were both so hot, it got a little soft. It didn’t seem to matter in the end though.

ChickenPotPie-10

The crust is brushed with egg and sprinkled with some of the sea salt that we brought back from Paris. Just because it feels fancy and I like the crunch.

ChickenPotPie-11

And then it bakes and bakes and suddenly it’s done and the air smells like so much goodness that I almost can’t contain myself. I want to devour the entire pie before it’s cooled and before my friend arrives for lunch.

But, I don’t. I restrain myself. I eat a normal sized portion and don’t even yell about how good it is in the middle of our conversation (although she did interrupt us to ask about the pie crust). I like when things get interrupted because something is just too good to keep quiet about.

ChickenPotPie-14

Happy Eating!

Chicken Pot Pie

Prep Time: 15 minutes

Cook Time: 50 minutes

Total Time: 1 hour, 5 minutes

Yield: 4

Chicken Pot Pie

Ingredients

  • 2 T olive oil
  • 1 carrot (or parsnip), chopped
  • 2 small potatoes (or combination of 1-1 1/2 C potato, radish, turnip, or rutabaga), chopped
  • 1 small sweet potato (or 1 C peeled acorn or butternut squash), chopped
  • 1 small onion (or 2 shallots), chopped
  • 2 stalks celery (or 1 fennel bulb), chopped
  • to taste salt
  • to taste pepper
  • 1 t fresh rosemary (or thyme), chopped
  • 1 small summer squash, (or 1/2 C cauliflower or peas), chopped
  • 1-2 C chicken, cooked and shredded
  • 2-3 cloves garlic, chopped
  • 1 1/2 C chicken (or vegetable) stock or chicken pan drippings
  • 2 T all purpose flour (or 1 T cornstarch)
  • 1/2 C cold water
  • 1/2 C milk
  • 1 pie crust
  • 1 egg, beaten
  • coarse sea salt
  • lemon wedges, for serving

Instructions

  1. Pre-heat oven to 375F.
  2. Heat an oven proof skillet. Add oil. When oil is hot, add carrot through rosemary. Cook covered, over medium-low heat, stirring occasionally, for 10 minutes. Add summer squash and chicken and cook for about 3-5 minutes more, or until veggies are tender. Add garlic and cook for 1 minute more.
  3. Whisk stock or pan drippings with flour and water. Add to the skillet, turn the heat to high, and bring it to a boil. Let it thicken for about 2-3 minutes. Whisk in the milk, turn heat to medium-low, and cook for 1-2 minutes, or until steam rises, but do not boil. Remove from heat, taste and adjust seasoning if needed. Set on a baking sheet.
  4. Roll out pie crust. Top the filling with the crust (careful, the skillet is hot!). Make a few air vents with a sharp knife. Brush with the egg and sprinkle with the coarse sea salt. Bake for 22-30 minutes, or until crust is browned and flaky.
http://www.de-ma-cuisine.com/chicken-pot-pie-2/