De Ma Cuisine

Raspberries Archive

Monday

23

November 2015

1

COMMENTS

Rustic Persimmon Tart

Written by , Posted in Baking, Brunch, Dairy-Free, Dessert, Eggs, Fruit, Gluten Free, Vegan, Vegetarian

PersimmonTart-5

I’m a sucker for pie crust. But, confession, I’m not actually crazy about pie itself. I just love a good crust. When I make Chicken or Veggie Pot Pie, it’s my favorite part. I make it in big batches and keep it in the freezer for days when I’m in the mood to bake.

PersimmonTart-1

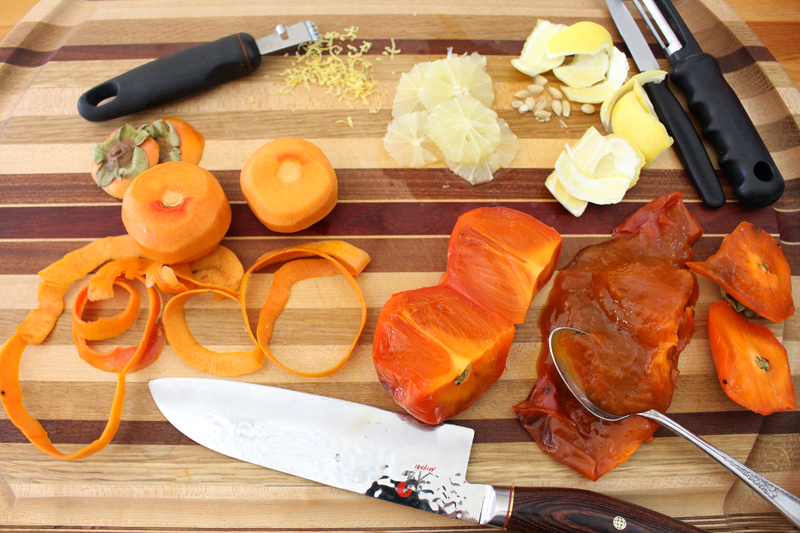
Today, it was time for a tart. I’ve been waiting and waiting for my hachiya persimmons to ripen. Finally, they’re ready. If you’ve ever wondered if you could use a hachiya persimmon before it’s ripe, wonder no more. Just don’t do it. It will make your mouth pucker and get that gross dry feeling that you might not understand if you’ve never experienced it. Trust me, you’re better off heeding my warning. Wait. Until. They’re. Ripe.

You can hasten the ripening process by placing them next to, or in a paper bag with, apples and bananas, which give off ethylene gas. You can also put them in the freezer. Or, just leave them on the counter for a few weeks like I did. You’ll know they’re ready when they feel like a water balloon and you think your fingers are going to break through the skin without even squeezing.

Ready. Ready. Ready.

PersimmonTart-2

While this recipe makes enough filling for two tarts, I saved half for another recipe. But, maybe you want to make two because this would be the perfect dessert for Thanksgiving dinner (you’re welcome), or for breakfast the next day (double welcome).

PersimmonTart-3

It would be a great idea to switch out the ingredients depending on what you have on hand. No persimmons? No problem. Try apple sauce and apple slices. No lemons (or maybe they’re too tart for your taste)? Use oranges. Want to go vegan? Skip the egg wash or try coconut milk. Oh, and use a butter-free crust. Gluten-free? There are lots of GF options these days, so find one at your local market, or visit the Gluten-Free Girl’s site to find out how to make your own.

PersimmonTart-4

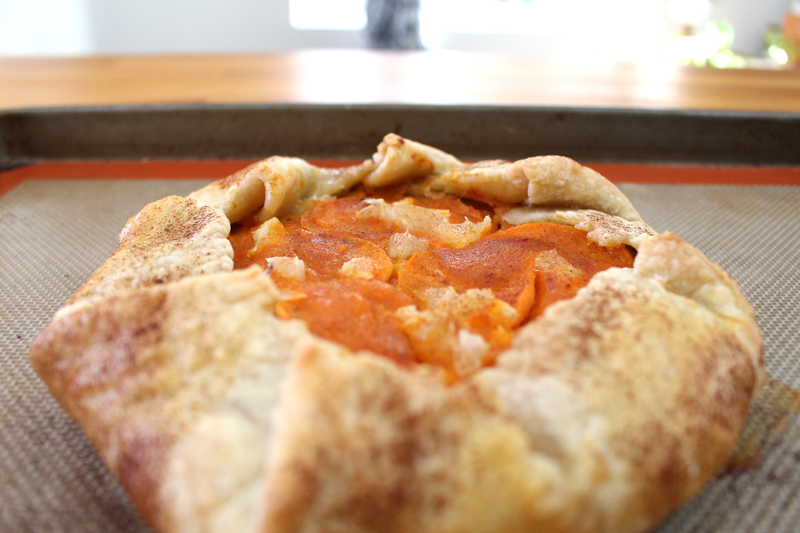
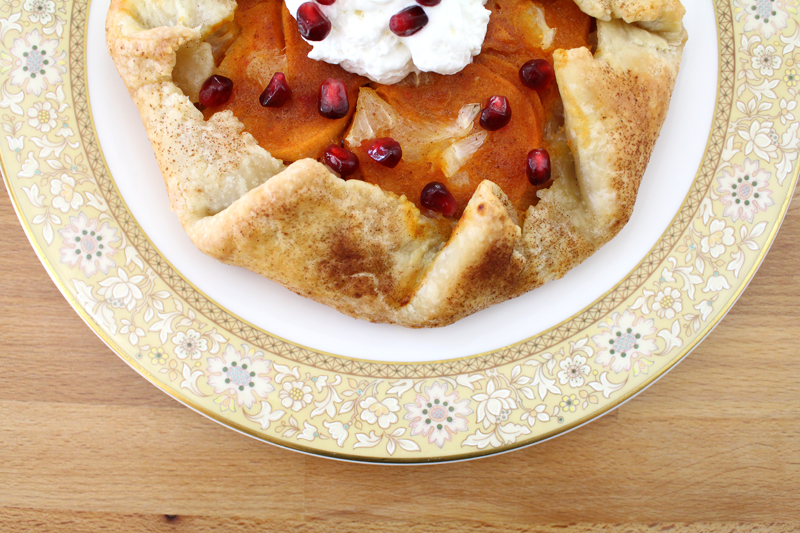
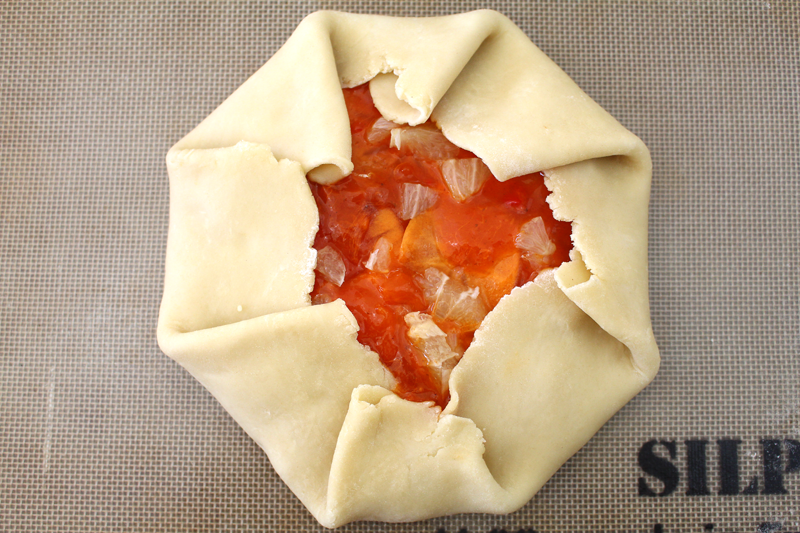
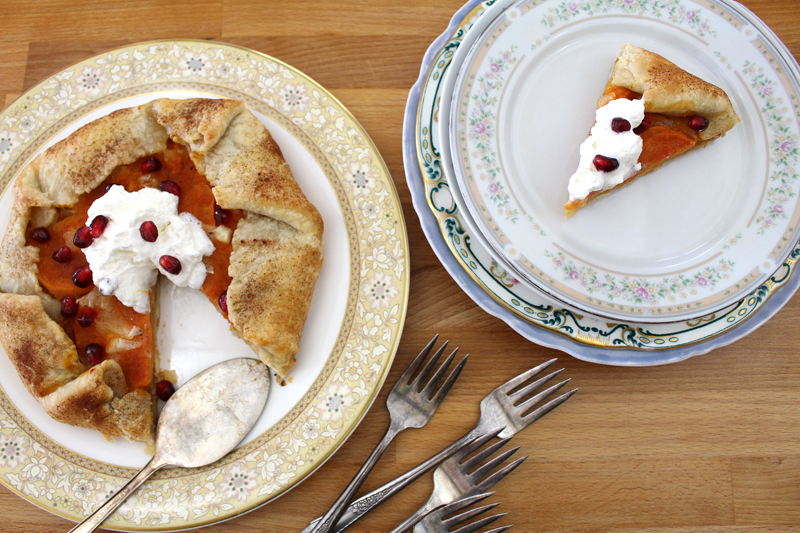
I like the rustic look of this tart, otherwise known as a galette. You get to see the pretty filling with the edges folded up all around. Plus, after it cools (yes, let it cool completely before eating), it’s easy to slice up and eat it out of hand. No plates required. That’s winning to me (because the dishes! always with doing the dishes!).

PersimmonTart-7

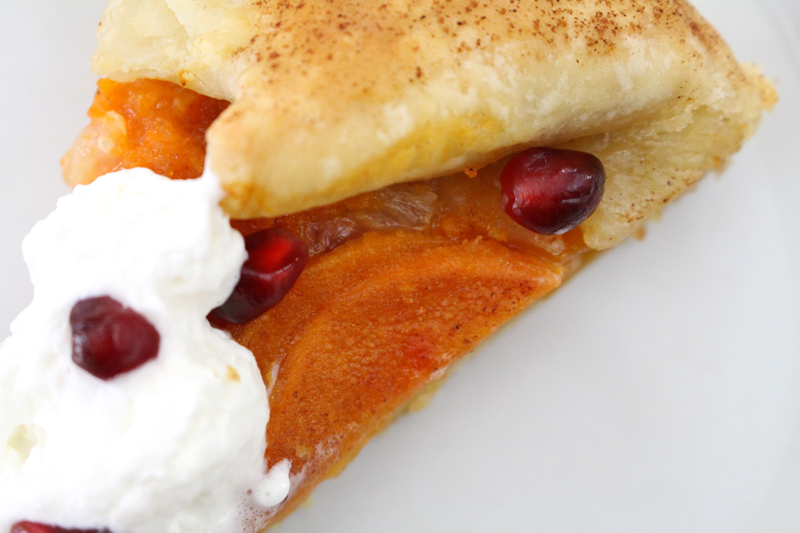
I topped the tart with a dollop of maple syrup sweetened whipped cream and some pomegranate seeds. The seeds add a juicy burst of flavor that’s the perfect compliment to the flaky crust, and deep, sweet filling.

PersimmonTart-6

Happy Eating! 

Rustic Persimmon Tart

Prep Time: 20 minutes

Cook Time: 30 minutes

Total Time: 50 minutes

Yield: 8-10

Rustic Persimmon Tart

Ingredients

  • 1 t lemon or orange zest
  • 2 C persimmon pulp (super ripe) (about 2 hachiya persimmons)
  • 1 T orange juice
  • 1 T maple syrup
  • 1/8 t cinnamon
  • pinch nutmeg
  • pinch salt
  • 2 pie crusts
  • 4 fuyu persimmons (could also use apples, pears, figs, cherries, berries, grapes, or stone fruit), peeled and sliced
  • 2 lemon or small orange, peeled and chopped
  • egg white, (optional), for brushing
  • cinnamon
  • whipped cream (optional), for topping
  • pomegranate seeds, for topping

Instructions

  1. Pre-heat the oven to 375F.
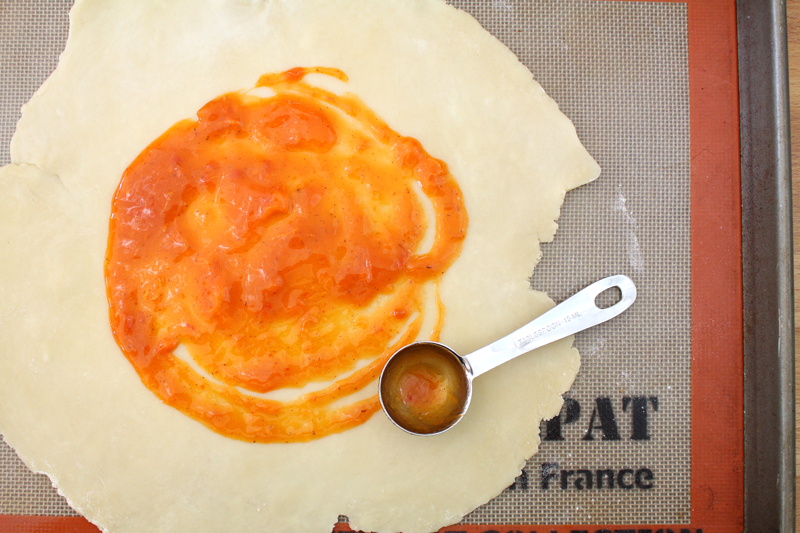
  2. Combine lemon/orange zest through salt. Taste for sweetness.
  3. Roll out pie crusts in a circle on a lightly floured surface. Place on a parchment or Silpat lined baking sheet (use one with edges in case the filling runs). Spread about 3 T at a time of the hachiya mixture in the center of each crust. Top with some fuyu slices and lemon/orange chunks. Repeat until all of the hachiya mixture and slices are gone. Gently fold the edges of the crust up and around the filling, leaving the center open. Brush crust with egg and sprinkle everything with cinnamon. Bake for 25-30 minutes, or until crust is golden and flaky and filling is hot and bubbly.
  4. Remove from the oven and cool to room temperature.
  5. Serve topped with whipped cream and pomegranate seeds.
http://www.de-ma-cuisine.com/rustic-persimmon-tart/

Thursday

3

July 2014

0

COMMENTS

Honey and Maple Syrup Sweetened Berry Jam

Written by , Posted in Breakfast, Brunch, Canning, Condiments, Dairy-Free, Dessert, Fruit, Gluten Free, Kid-Friendly, Vegetarian

StrawberryJamSecondTime-5One of my favorite things about summer is the fruit. The nectarines are amazing, the plums are incredible, and the berries… they are the best!

We had raspberries in the garden growing up, so they are my emotional favorite. Tim’s family has blackberries, so they’re a favorite too. But there’s just something about blueberries and strawberries… I love ’em.

I’m always so sad when their season ends (as it is ending now). I’m thankful for the others, don’t get me wrong. But, I want berry season to last as long as possible.

BlueberryJam-2

There are plenty of ways to preserve these summer treasures. You can freeze washed berries, pitted cherries, and halved stone fruit on a baking sheet, and then pop them into a bag. You can make tons of crisps and cobblers and wrap them up really well and freeze them for November. You can make sauces and smoothies to be pulled out when the weather has turned cold.

And, you can make jam.

Last summer I decided that I would try. Surprisingly, it turned out. The catch was that I wanted to make it sans pectin and sugar. I didn’t know if you could, but I wanted to.

And I did.

I made three kinds: cherry, strawberry, and blueberry.

We ran out a few months ago. This year, I don’t intend to run out. So I made a ton. First strawberry (which follows the same recipe), then blueberry.

StrawberryJamSecondTime-4

Before you start, make sure you have clean jars and lids (the lid is the flat piece, and is not re-useable if you want them to seal, the band is the part that wraps around the jar and screws into place).

I don’t have a dishwasher, so I used a pot of boiling water and boiled for about ten minutes.

StrawberryJamSecondTime-3

I love lemon zest, so I opted to add a bunch for a hint of brightness, instead of only using lemon juice.

In general, if possible, any time I use a lemon, I zest it first. Why waste such goodness?! If there’s any extra, it goes into the freezer.

StrawberryJamSecondTime-2

Strawberry jam is a bit more of a process than blueberry. There’s hulling and chopping involved. 

It’s gonna be messy.

But it’s worth it.

StrawberryJamSecondTime-6

When I was making the strawberry, I forgot how much the stuff bubbles up. I had to move it to two pots, since the one was a bit too small.

I was wiser with the blueberries.

BlueberryJam-3

BlueberryJam-4

It’s not going to be thick thick, like jam made with pectin. But, it will thicken up a bit. Cook it until it’s as thick as you want it (you can test it by putting a plate in the freezer and putting a dollop of jam on it so it will cool quickly, then test to see how runny it is), even if that’s longer than the time listed in the recipe.

StrawberryJamSecondTime-1

BlueberryJam-5

Jars are filled and left to cool on the counter for a bit. You should hear the lids popping as they seal. Sealed or not, I like to store them in the freezer (after fully cooling in the fridge), even after they’re opened. (There are different opinions on how long properly canned homemade jam will last unrefrigerated. (1) Since I didn’t pressure cook or process the jam in boiling water after adding it to the jars, I opted to be extra safe and keep them in the freezer, even if they did seal. In my experience, they have lasted as long as it took to consume them – less than a year, in the freezer. I hope that this summer’s batch will last more than a year, stored in the freezer. Once opened, stored in the fridge, they usually are fine for a month or two, maybe more. Just keep an eye out for mold. Jams with less sugar and that aren’t commercially prepared tend to have a shorter shelf life. (1) So be mindful of that, and whether or not you have pressure cooked them, when deciding where to store them.)

This jam is perfect for the usual toast or English muffin, to top ice cream, or to be eaten by the spoonful by a hungry food blogger.

Happy Eating! 

Blueberry or Strawberry Jam
Recipe Type: Condiment, Fruit, Preserving, Canning
Author: Rachel Oberg – De Ma Cuisine
Ingredients
  • 12 C blueberries or strawberries (strawberries: hulled and chopped)
  • 4 C honey
  • 1 C maple syrup
  • 3 T lemon zest
  • 3/4 C lemon juice
Instructions
  1. Bring berries through lemon zest to a boil. Mash with a potato masher. Once it comes to a rapid boil, cook for 3-5 minutes.
  2. Reduce heat to a simmer and cook for about 20 minutes.
  3. Remove from heat, stir in lemon juice, and let stand for 5 minutes.
  4. Ladle into jars, leaving about 1/2″ of space at the top. Cover with the lid and let stand for 15-30 minutes.
  5. Store at room temperature if they’ve sealed, or in the freezer if they haven’t (or if you just want to).
  6. Makes about 6 pints (or 12 half pints).
Notes
To sanitize jars, place in a large pot and cover with water (about 1 inch over the top of jars). Bring to a boil and boil for about 10 minutes.
3.2.1303

(1) I have referenced this site for information on the shelf life of jam.