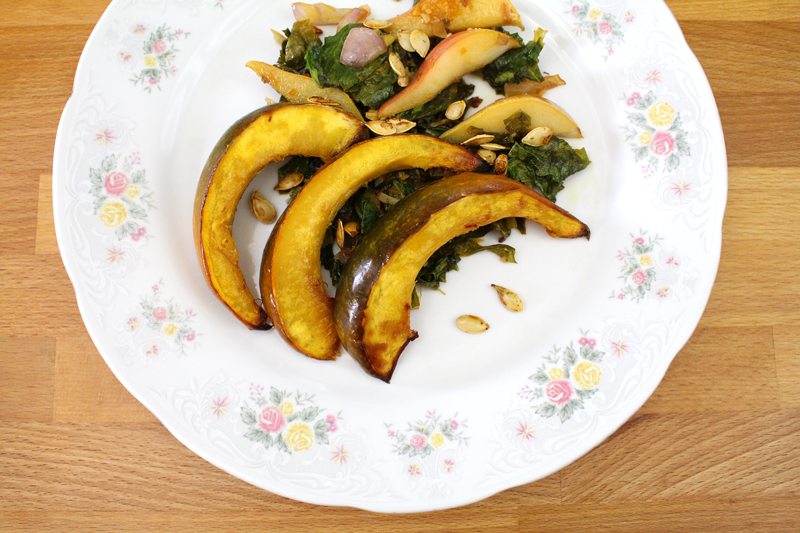
Wilted Mustard Greens with Acorn Squash and Pear
Written by Rachel, Posted in Dairy-Free, Dinner, Fruit, Gluten Free, Quick and Easy, Salads, Sides, Vegan, Vegetables, Vegetarian
Two months ago I would have laughed if you’d told me that my fingers would be so cold that I’d have a hard time typing today. That I’d have two sweatshirts on with both hoods pulled up. Two pairs of socks, plus slippers, and that I’d be wrapped in a blanket. Yeah, I’m cold (and I refuse to turn the heater on). But, the great thing about cold weather is that it’s much easier to warm up than it is to cool down. I can keep adding blankets and layers of clothing. I can bake or make soup, and drink lots of tea. As cold as I am right now, I much prefer it to the months and months of hot and sweaty.
I don’t use the oven a whole lot during the summer and into the fall. It’s just too hot. So at this time of year, I bake and roast veggies a little more often. It’s yummy and, as a bonus, the house warms up a bit.
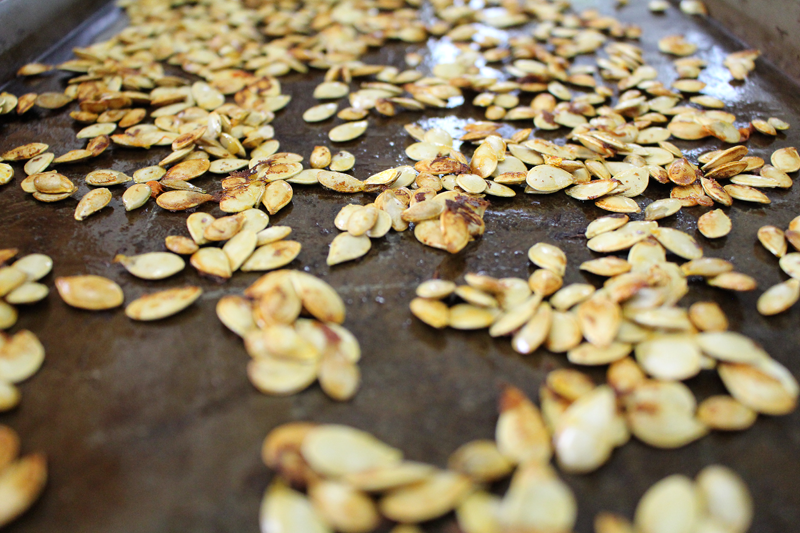
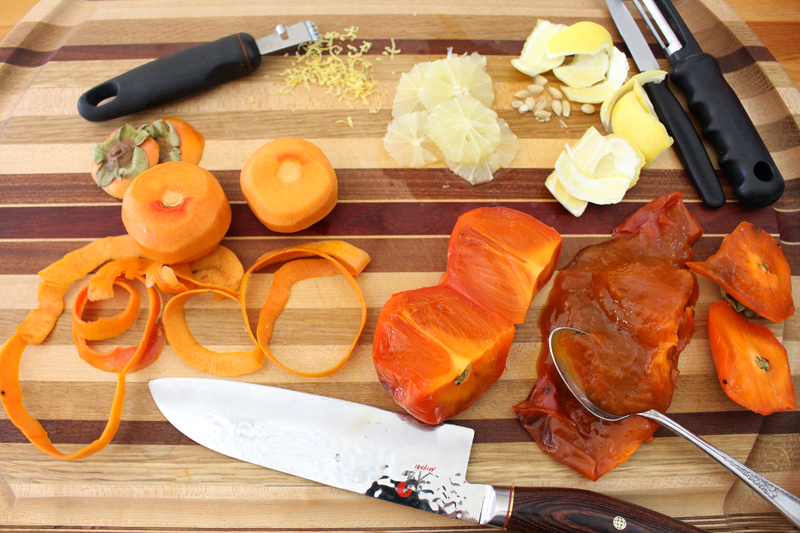
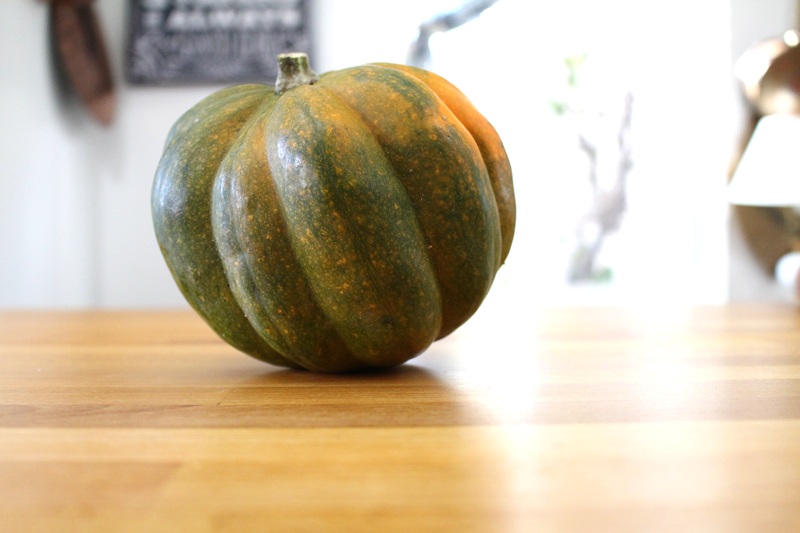
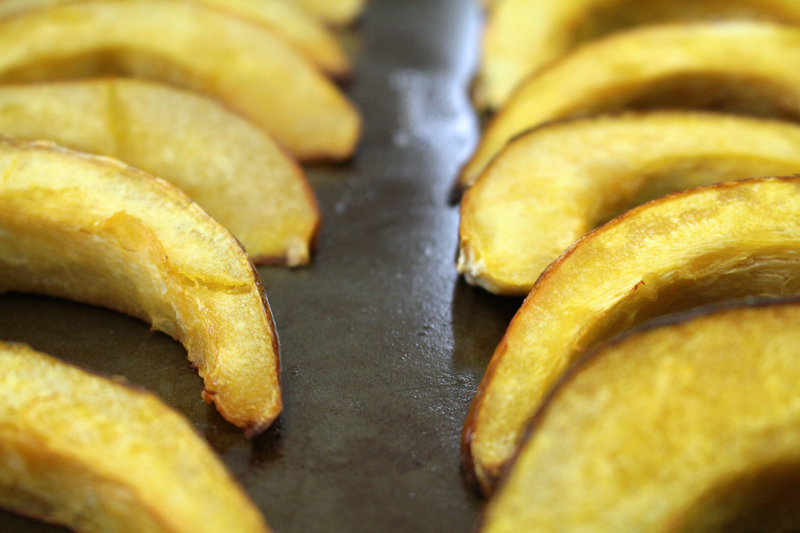
For this recipe I roasted some acorn squash wedges that I’d rubbed with olive oil and I also roasted its seeds. Roasted squash is one of my favorites. It’s super versatile – from pastas to soups to pizza, it’s a winner. But, the seeds are great too. I like to toss them with a bit of oil and a pinch of salt and then roast until they’re crispy. It doesn’t take too long and they’re really tasty.
Because I used an acorn squash for this dish, I left the peel on. I don’t prefer to eat it, but it’s easy enough to scrape the flesh from it, and I think it looks pretty. If you want to peel before you roast, that’s cool too. It just seemed easier to me to wait.
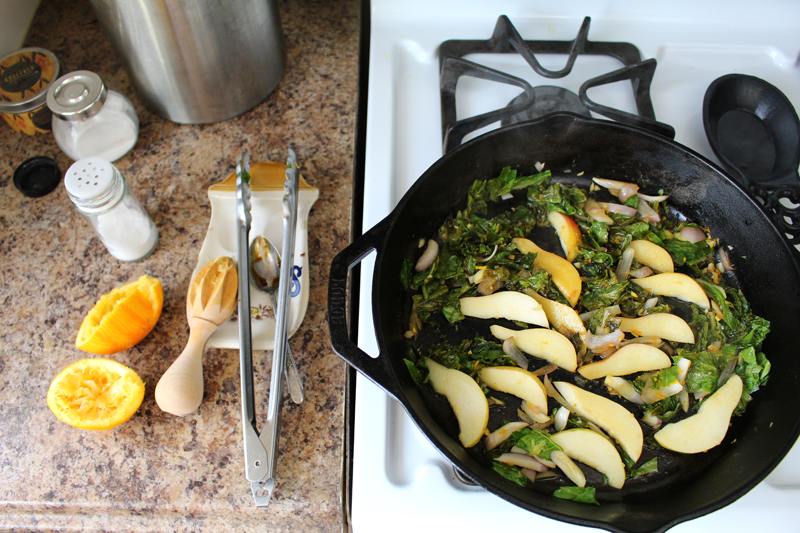
This isn’t really your average salad. It’s got mustard greens, instead of lettuce, and they’re wilted, instead of raw. I added pears (or you could use apples) and cooked them with the greens just a bit. The dressing is made up of orange juice, maple syrup, and molasses. They all go into the pan with everything else. Think Wilted Spinach Salad with lots of awesome twists.
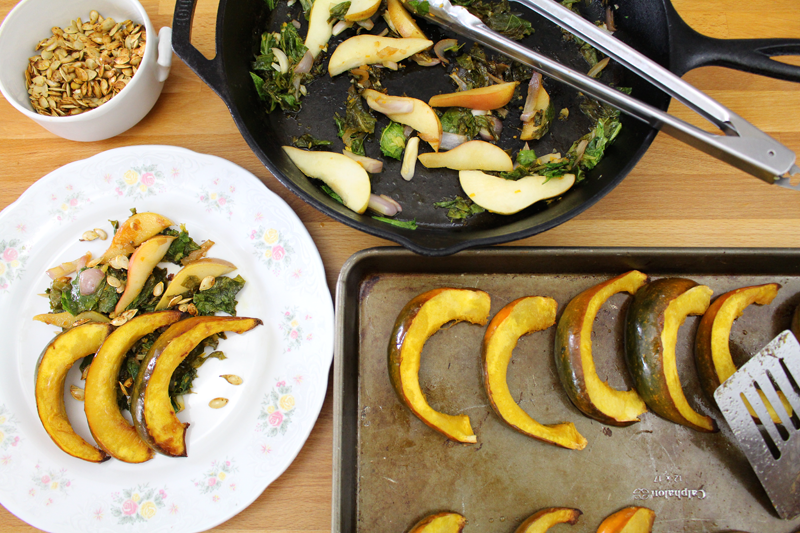
If you have spinach or other greens, they’ll be great too. Lemons instead of oranges, give them a try (or go for half and half so it’s not too tart). I added shallots, but red onion would be fab. And if you’re not crazy about the seeds from the squash, you could chop up some nuts instead (or hey, do both!).
This would make a lovely side for a holiday dinner, or you could reheat leftovers and serve them with scrambled eggs and toast for breakfast. However you serve it, I hope you enjoy it with good company, in good cheer.
Merry Christmas!
Ingredients
- 1 medium-sized acorn squash (may substitute with other types of winter squash), seeds removed and reserved, peeled if desired, sliced
- 2 T olive oil
- to taste salt
- 1 bunch mustard greens (or mizuna, kale, chard, spinach, or any other greens you have on hand), ribs removed, chopped
- to taste salt
- 2 cloves garlic, minced
- 1/2 t fresh ginger, minced
- 1/4 C shallot or onion or leek, sliced
- 1 t maple syrup
- 1 t molasses
- pinch cayenne
- 1 T orange or lemon zest
- 1/4 C orange juice
- 1 ripe pear or apple, sliced
- 1/2 T lemon juice
Instructions
- Pre-heat the oven to 350F.
- Rub squash with 1 t oil and sprinkle with salt. Roast for 15 minutes, flip, and roast for about 15 more (or until squash is tender and pierces easily with a sharp knife).
- Toss squash seeds with 1 t oil and a pinch of salt. Roast on a baking sheet for about 10-15 minutes, or until crispy, stirring once. Salt lightly once removed from the oven.
- Heat skillet and add remaining oil. Add greens and a pinch of salt. Cook over medium-low heat for about 5 minutes, stirring occasionally. Add garlic through orange juice and cook for about 5 minutes more, stirring occasionally. Add pears or apples and cook for about 5 minutes, or until fruit is a bit tender, adding more orange juice if needed. Remove from heat and add lemon juice and taste for seasoning.
- Serve greens topped with roasted squash and roasted seeds.