De Ma Cuisine

Egg Archive

Monday

30

March 2020

0

COMMENTS

Peanut Butter Bacon and Cheddar Dog Cookies

Written by , Posted in Baking, Cheese, Cookies, Dog, Dog Treat, Gluten Free, Grains, Pets

In my life, I haven’t experienced another relationship like the one between a dog and their humans. Can you imagine what life would be like if we got as excited as they do when our favorite person came home from work, or asked us if we wanted to take a walk with them? They forgive our bad attitudes and forget the grumpy mornings. They just want to be around us. Their tails flap excitedly when we walk into the room. They love us so much.

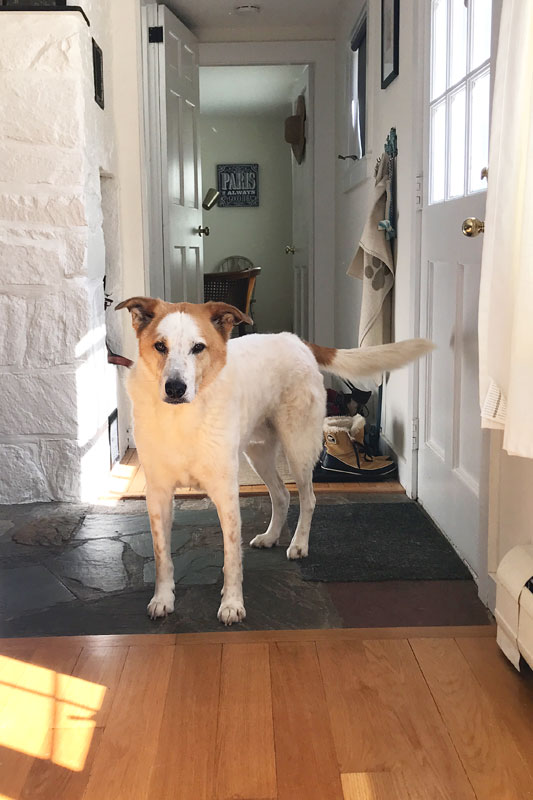
It was our best dog’s birthday the other day. He turned twelve. We tried to return some of the love he has shown us for all these years with treats and homemade cookies. And we let him dictate the plan for the day, which meant everyone lounged around until like 6pm then got hyper and went for a walk.

I winged it with the cookies. I’m not a baker, but sometimes I try. I’ve baked enough that I’ve got a general idea of what to do to make a cookie. Still, it’s a bit of a guessing game.

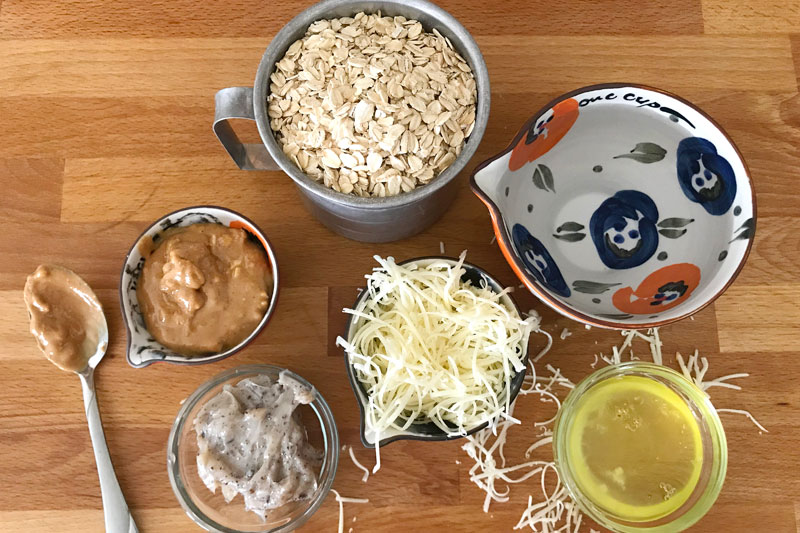
I wanted to incorporate some of Brando’s favorite things: bacon, cheese, and peanut butter. We don’t have a lot of flour left, so I did without. I made oats into oatmeal. And I used egg whites to bind it all together.

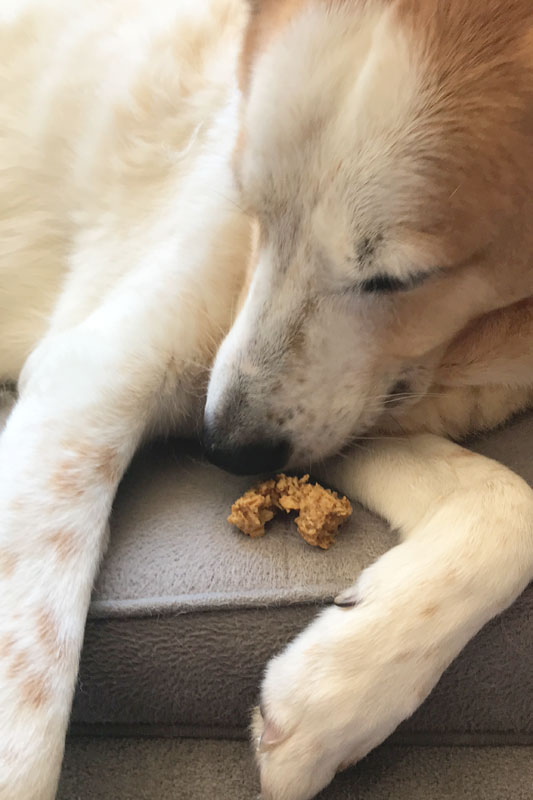
Brando ate his cookies while we watched the tiger show. Are you watching it? I can’t decide if I’m glad that we did. I guess it’s given us something to think about besides the Coronavirus. ¯\_(ツ)_/¯

(Singing and clapping) “THIS IS YOUR BIRTHDAY SONG. IT ISN’T VERY LONG.” Happy birthday Brando. We love you a lot!!

Peanut Butter Bacon and Cheddar Dog Cookies

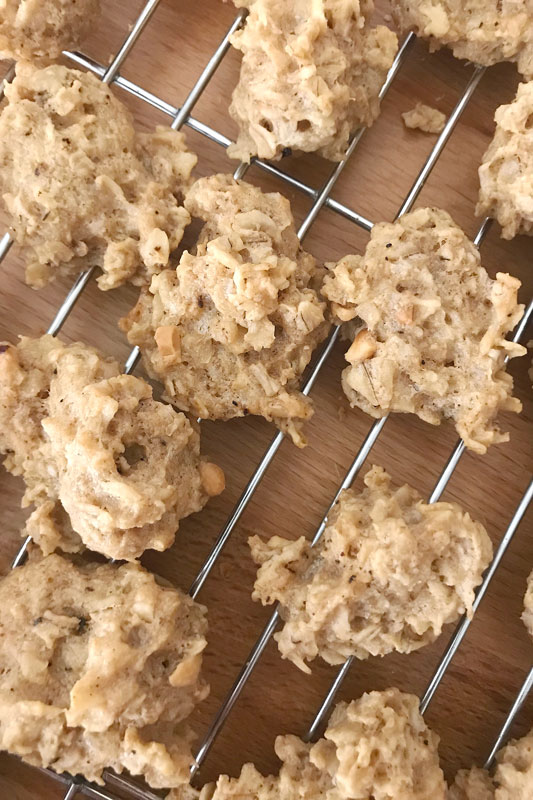
Yield: 40 small cookies

Ingredients

  • 2 cups rolled oats
  • 2 cups water
  • 1/4 cup crunchy peanut butter
  • 3-4 tablespoons egg whites
  • 2 1/2 tablespoons bacon grease (or olive oil)
  • 1/3 cup grated cheddar cheese

Directions

  1. Pre-heat the oven to 300°F with an oven rack in the middle position.
  2. Cook the oats and the water in a medium-sized saucepan until the oats have softened, about 10 minutes.
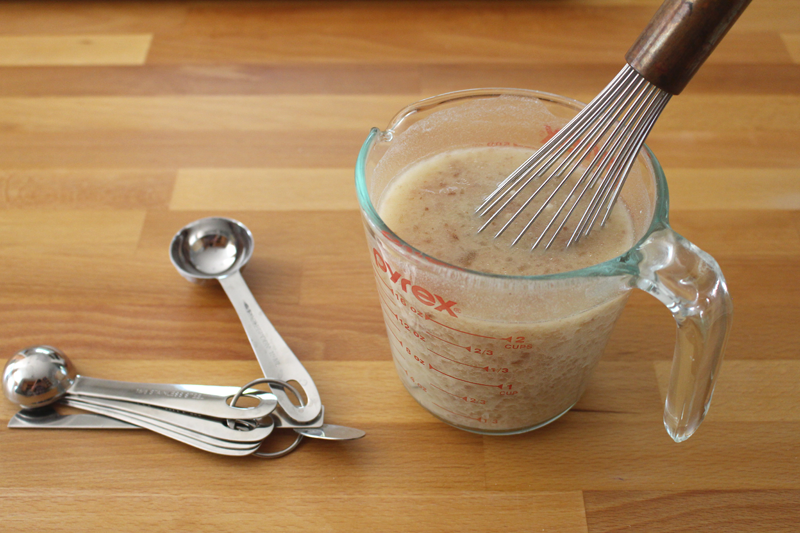
  3. In a medium-sized bowl, whisk together the peanut butter, egg whites, and bacon grease. Then add the cheese. Fold in the cooked oats and mix until combined.
  4. Using a spoon, drop the dough onto un-greased baking sheets, about 1 1/2 tablespoons per cookie. Leave a bit of space between cookies, but they don’t need too much. Bake until the cookies are set and a bit browned, about 35-45 minutes, rotating the pans every 15 minutes. Cool for 5-10 minutes on the baking sheet, then transfer to a cooling rack to cool completely, about an hour.

Friday

18

December 2015

0

COMMENTS

Grilled Egg and Cheese Sandwiches

Written by , Posted in Breakfast, Brunch, Cheese, Eggs, Gluten Free, Kid-Friendly, Lunch, Quick and Easy, Sandwiches, Vegetarian

GrilledCheeseFriedEgg-5

It’s important to me for us to eat well balanced, healthy meals. I usually have our menu planned in advance, but some weeks things just don’t seem to come together the way I’d hoped they would. Other weeks they do. But, no matter the week, the outlook is always a little better if I have a few staples on hand. Some, like eggs, are just good to have around. There’s always something to eat when we’ve got eggs. Eggs + lentils + sweet potatoes = lunch. An egg over pasta = dinner. Eggs poached in some leftover soup = a quick, easy, comforting meal.

For this we have eggs.

Some other staples that I always try to have on hand are: cheese, milk, bread, yogurt, nut butter, nuts, and chips and salsa. With these ingredients I find it much less intimidating to plan a menu, or just a quick meal when what’s meant to be made isn’t happening.

GrilledCheeseFriedEgg-1

Grilled cheese has been a favorite of mine for as long as I can remember. Grilled Cheese and Tomato Soup remind me of rainy days growing up, and are one of my all-time favorite comfort foods. Now, as a grown up, grilled cheese and any kind of soup is on the menu often, especially at this time of year. It’s quick and easy, which is perfect for this busy season.

GrilledCheeseFriedEgg-2

I do most of the cooking in our home. I like it like that. But, every once in a while Tim comes up with something and I just kinda shake my head in amazement. There’s not much that he’s not good at. Cooking included. One evening, after he’d worked late, he came home and made himself a grilled cheese. I’d already eaten dinner, so I said that I didn’t need one. I regretted that decision later. He’d put mustard and butter on the outside, and added sliced pickles to the inside. It was delightful. So for this recipe, I took a page out of his book and added mustard to the olive oil that I like to spread on the bread. The mustard goes down first, oil second, so the oil will kinda protect the mustard from burning.

GrilledCheeseFriedEgg-3

Once the sandwiches are mostly cooked, I like to scooch them over to one side, and slide the empty side of the skillet over the flame and add a little more olive oil and some eggs. For me, a well seasoned cast iron skillet works best here. I like to turn the heat up a bit so the edges of the eggs get a bit crispy in the olive oil. I like my eggs over medium (runny yolk, set whites) and the high heat helps me to accomplish this. I flip the eggs carefully, turn off the heat, and let them sit for a few seconds for the whites to finish.

GrilledCheeseFriedEgg-4

During the summer when tomatoes are in season I’d probably add a few slices, and maybe some lettuce and homemade mayo. Right now, just an egg will do.

GrilledCheeseFriedEgg-6

If the yolks are still runny, I love to sop ’em up with the sandwich… Making sure to have a napkin on hand, as these tend to get a bit messy.

Happy Eating!

Grilled Egg and Cheese Sandwiches

Prep Time: 5 minutes

Cook Time: 10 minutes

Total Time: 15 minutes

Yield: 2

Serving Size: 1 sandwich

Grilled Egg and Cheese Sandwiches

Ingredients

  • 2 t dijon mustard
  • 2 t olive oil
  • 4 slices bread
  • to taste salt
  • 4-6 slices cheese (Gouda, pepper jack, colby jack... or whatever you like that melts well)
  • 1 egg/sandwich
  • salt, for eggs

Instructions

  1. Spread dijon and olive oil on the outside of each slice of bread. Sprinkle with salt. Put cheese on the un-mustard side. Close sandwiches (leaving both mustard sides out).
  2. Heat a skillet over medium-low heat. When it's hot add the sandwiches. Cook for 4-5 minutes on one side, turning to be sure it's browning evenly if needed. Flip and cook for a few minutes more. When they're almost done, push the sandwiches to one side, and move the other side over the flame (or if using a smaller skillet, cook sandwiches until done and remove them from the skillet). Turn the heat up a bit and add some olive oil to the pan. Add eggs and cook, flipping if desired, until they reach desired doneness. Salt the eggs.
  3. Open the sandwiches and top each with an egg. Slice each one in half to serve.

http://www.de-ma-cuisine.com/grilled-egg-cheese-sandwiches/

Monday

27

October 2014

0

COMMENTS

Chicken Pot Pie

Written by , Posted in Baking, Dinner, Herbs, Leftovers, Lunch, Main Dishes, Meat, One Dish Dinners, Potatoes, Poultry, Vegetables

ChickenPotPie-12

Today is one of those fall days where it actually feels like fall. I’m wearing jeans and a sweater and am totally comfortable.

I’m also going through the photos that I took of the Chicken Pot Pie that I made the other week and drooling. We ate the leftovers for dinner last night, otherwise I’d probably be heating them up for lunch right now.

So that’s a little bit about my life.

Fall weather and Chicken Pot Pie make me happy.

So do things like my dog’s whiskers, the way the sky can turn such brilliant shades of orange and pink after the sun’s gone down, and a good Skype conversation with my dad.

ChickenPotPie-13

I have to tell you, this particular Chicken Pot Pie recipe is one of my favorites. After tasting the sauce I yelled, “Oh my gosh!”, to no one but myself. So, I just had to share it with you.

ChickenPotPie-1

It’s a simple pie with humble ingredients. I make this often enough, and use what I have on hand. So it can range from things like carrots, potatoes, and celery, to parsnips, squash, and peas. It feels like the kind of meal that’s been made for years and years and years, by people who at the end of the day, just want something nourishing and delicious to fill their bellies.

This meal fits that exactly.

ChickenPotPie-2

A couple of weeks ago I roasted some chicken. The leftovers and pan drippings were frozen. Saved just for this meal. The bones went into the freezer, for the next time I need to make stock. I defrosted the chicken in the fridge overnight and then shredded it and dropped it into the cooked veggies. 

ChickenPotPie-3

I usually use chicken stock for this dish. But, this time I had pan drippings. You can tell the difference by the jiggliness of it. The pan drippings jiggle, while stock is more liquid. The fat will rise to the top of both. I like to scrape it off (and give it to the dog as a treat).

ChickenPotPie-4

For this type of dish, I find it a little bit easier to just whisk the thickening agent (flour or cornstarch) together with some of the liquids, and add it to the pan. It thickens nicely once it boils. A traditional roux can be made instead (you know, where you heat some fat, then add an equal amount of flour and cook for about 30-60 seconds, then whisk in the stock and let it thicken), if you prefer.

ChickenPotPie-5

ChickenPotPie-6

ChickenPotPie-8

After it boils and thickens, the milk is added. I don’t like it when the sauce breaks, so I like to leave the milk out until the end. Then heat it ever so gently, just until steam rises.

ChickenPotPie-9

Once the seasoning is checked, the skillet is set on a baking sheet (in case of overflow – I’d rather clean that than the inside of the oven).

ChickenPotPie-7

Pie crust is rolled out. I used Alana’s recipe (from her cookbook).  I tried to work quickly, but since the skillet and filling were both so hot, it got a little soft. It didn’t seem to matter in the end though.

ChickenPotPie-10

The crust is brushed with egg and sprinkled with some of the sea salt that we brought back from Paris. Just because it feels fancy and I like the crunch.

ChickenPotPie-11

And then it bakes and bakes and suddenly it’s done and the air smells like so much goodness that I almost can’t contain myself. I want to devour the entire pie before it’s cooled and before my friend arrives for lunch.

But, I don’t. I restrain myself. I eat a normal sized portion and don’t even yell about how good it is in the middle of our conversation (although she did interrupt us to ask about the pie crust). I like when things get interrupted because something is just too good to keep quiet about.

ChickenPotPie-14

Happy Eating!

Chicken Pot Pie

Prep Time: 15 minutes

Cook Time: 50 minutes

Total Time: 1 hour, 5 minutes

Yield: 4

Chicken Pot Pie

Ingredients

  • 2 T olive oil
  • 1 carrot (or parsnip), chopped
  • 2 small potatoes (or combination of 1-1 1/2 C potato, radish, turnip, or rutabaga), chopped
  • 1 small sweet potato (or 1 C peeled acorn or butternut squash), chopped
  • 1 small onion (or 2 shallots), chopped
  • 2 stalks celery (or 1 fennel bulb), chopped
  • to taste salt
  • to taste pepper
  • 1 t fresh rosemary (or thyme), chopped
  • 1 small summer squash, (or 1/2 C cauliflower or peas), chopped
  • 1-2 C chicken, cooked and shredded
  • 2-3 cloves garlic, chopped
  • 1 1/2 C chicken (or vegetable) stock or chicken pan drippings
  • 2 T all purpose flour (or 1 T cornstarch)
  • 1/2 C cold water
  • 1/2 C milk
  • 1 pie crust
  • 1 egg, beaten
  • coarse sea salt
  • lemon wedges, for serving

Instructions

  1. Pre-heat oven to 375F.
  2. Heat an oven proof skillet. Add oil. When oil is hot, add carrot through rosemary. Cook covered, over medium-low heat, stirring occasionally, for 10 minutes. Add summer squash and chicken and cook for about 3-5 minutes more, or until veggies are tender. Add garlic and cook for 1 minute more.
  3. Whisk stock or pan drippings with flour and water. Add to the skillet, turn the heat to high, and bring it to a boil. Let it thicken for about 2-3 minutes. Whisk in the milk, turn heat to medium-low, and cook for 1-2 minutes, or until steam rises, but do not boil. Remove from heat, taste and adjust seasoning if needed. Set on a baking sheet.
  4. Roll out pie crust. Top the filling with the crust (careful, the skillet is hot!). Make a few air vents with a sharp knife. Brush with the egg and sprinkle with the coarse sea salt. Bake for 22-30 minutes, or until crust is browned and flaky.

http://www.de-ma-cuisine.com/chicken-pot-pie-2/