De Ma Cuisine

Meat Archive

Monday

8

September 2014

0

COMMENTS

Massaged Kale and Tuna Salad

Written by , Posted in Dairy-Free, Dinner, Fish, Fruit, Gluten Free, Lunch, Main Dishes, Meat, Quick and Easy, Salads, Sides, Vegetables


MassagedKaleTunaSalad-6Sometimes I just need a good salad. Salads are versatile and delicious, but sometimes aren’t hearty enough to be considered a main course. So I like to add a bit of protein so there’s a bit more to it.

For this salad, I chose tuna. Because it’s what I had. Because I like it. I used canned for this one. But, then a few weeks later I discovered fresh tuna at the grocery store, and the leftovers from that dinner would work just as well (maybe better, hello, fresh!).

You could also use chicken, turkey, ham, quinoa, garbonzo beans, or lentils.

‘Cause why not?!

MassagedKaleTunaSalad-1

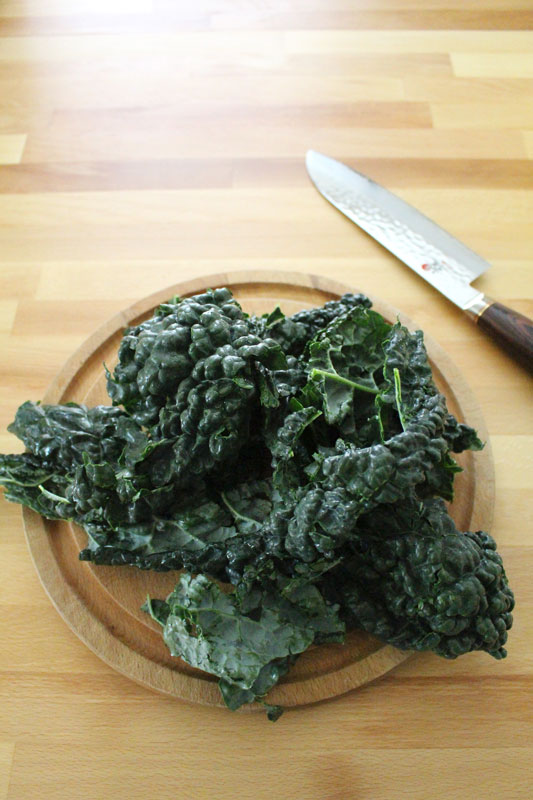
Then there’s the kale. It’s one of my favorite green veggies. But, I also love chard and spinach too. If you don’t have any of these dark green goodies, regular lettuce will work fine too (just don’t do the massaging step). A hearty butter lettuce works great, but use what you have in your fridge.

MassagedKaleTunaSalad-2

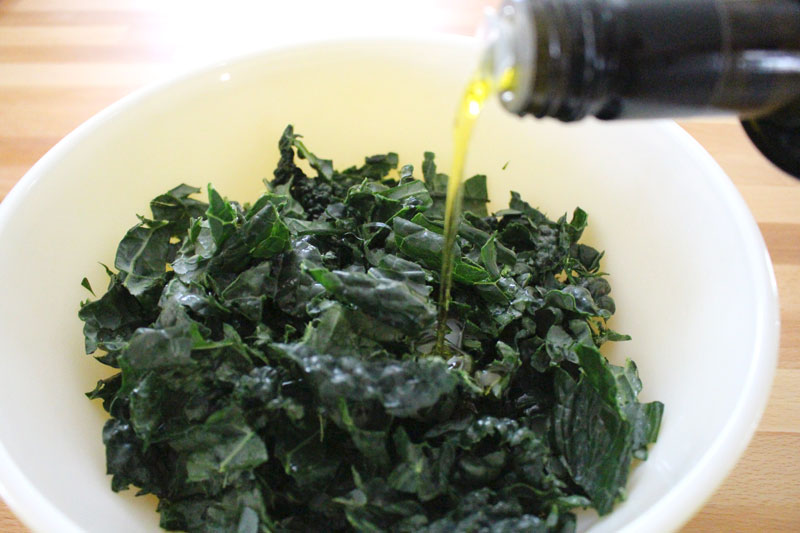
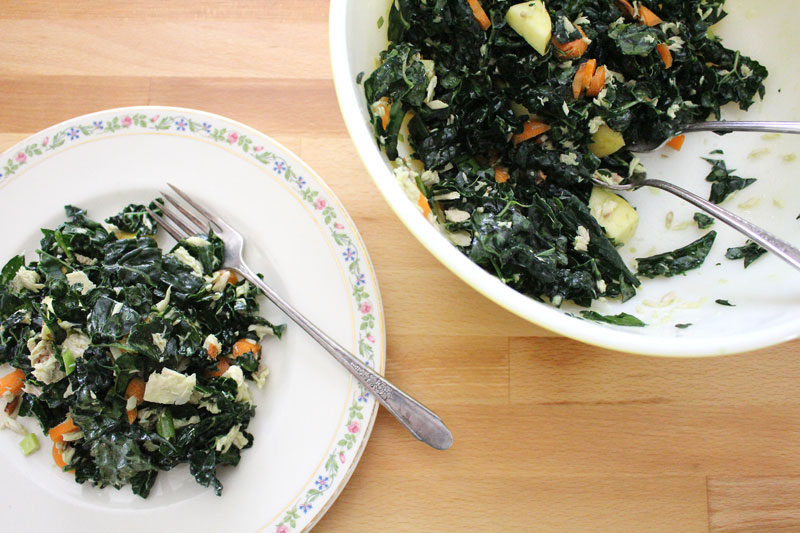
Kale is tossed with a bit of olive oil and some salt, then massaged for a few minutes. Your hands will turn green. That’s normal.

MassagedKaleTunaSalad-3

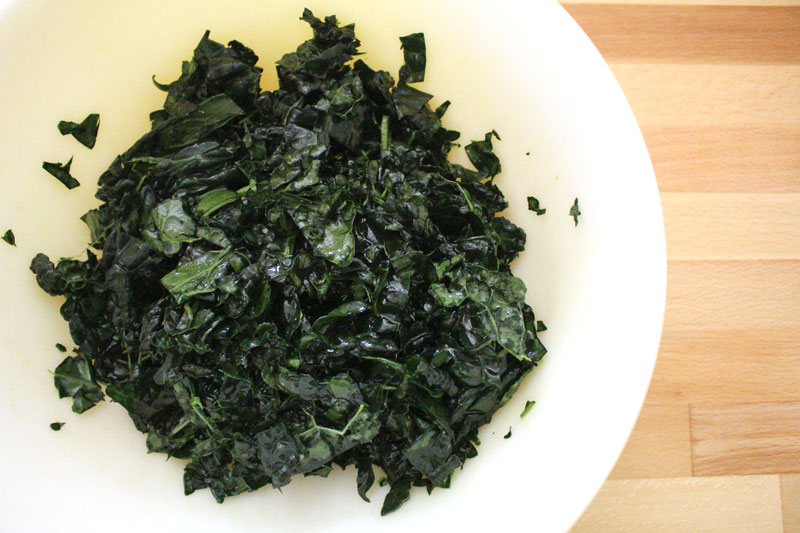
It will get darker and feel a bit limp, like it does when it’s cooked. I love kale this way. Easier to digest and super yummy.

MassagedKaleTunaSalad-4
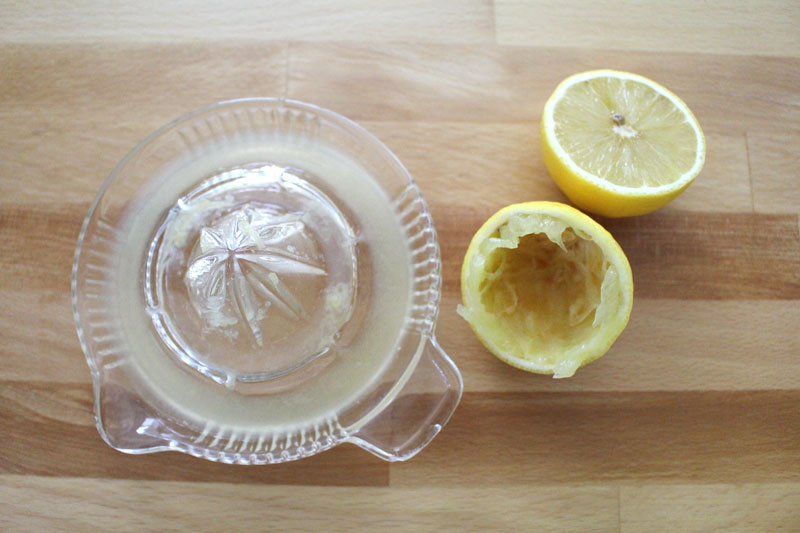
You can really use whatever dressing you’d like. Although I’d suggest some sort of vinaigrette or something lemony. I just squeezed some lemon and drizzled a bit of balsamic over top. Perfect with the olive oil that was already all over the kale.

MassagedKaleTunaSalad-5

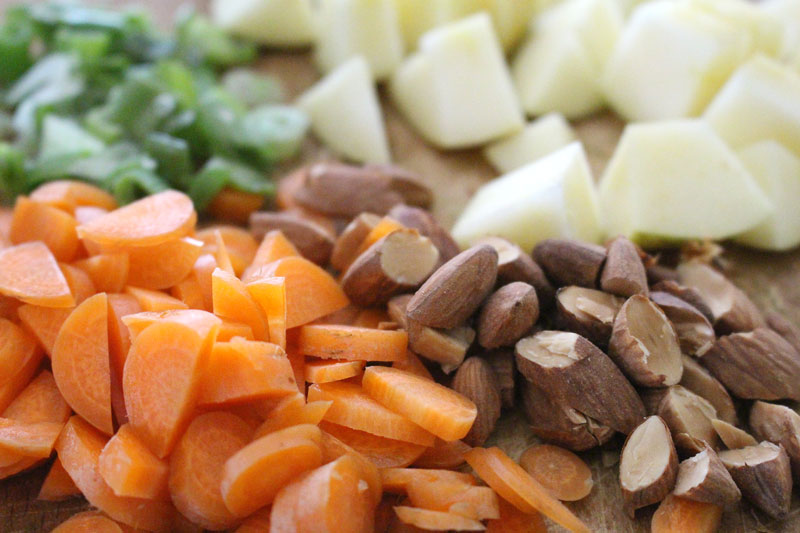
I like a lotta crunch in my salads. Usually nuts and carrots do the trick. Sometimes croutons are added. Here I’ve also got apples, because I happened to have some on hand. But, again, use what you have (and what goes well with tuna, or whatever protein you’ve chosen).

ButterLettuceFruitTunaSalad_1

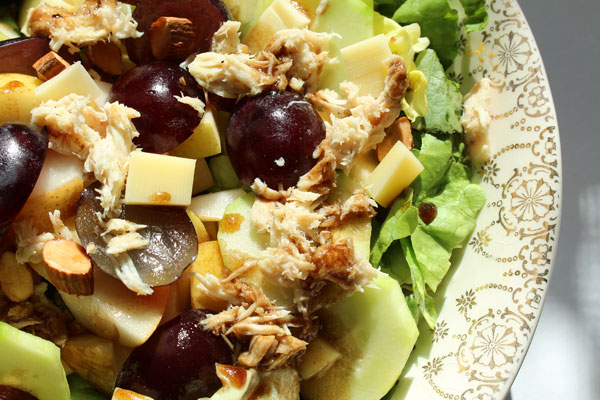
At other times, I’ve also used grapes (in season now, so yummy with tuna!), cucumber, apples, cheddar, and almonds. This is one of my favorite combinations. It would go well with a nice butter lettuce, or the massaged kale.

Tuna-Salad

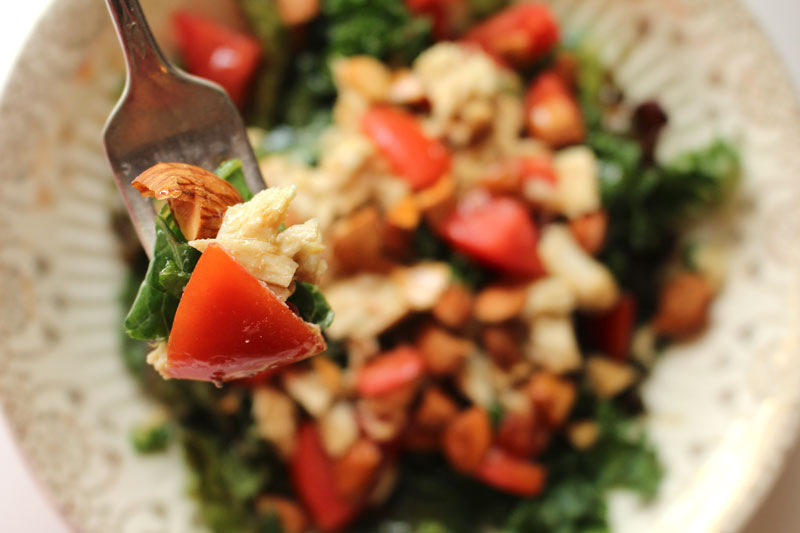
Tomato is also a good addition.

Use what’s in season and what will compliment the other ingredients, and you’re sure to find a winning combination.

MassagedKaleTunaSalad-7

However you toss it together, this hearty salad will hold up well prepared the night before for a work or school lunch. But, like most foods, it’s best eaten fresh, right after you’ve made it, standing at the kitchen island, out of the serving bowl… or maybe that’s just me.

Happy Eating!

Massaged Kale and Tuna Salad
Recipe Type: Main, Lunch, Side, Salad, Fish
Author: Rachel Oberg – De Ma Cuisine
Prep time:
Total time:
Serves: 2
Ingredients
  • Tuna: 1 can tuna, drained (or about 5-6 oz. leftover cooked tuna)
  • 1/2 lemon, juiced
  • 1 t olive oil
  • pinch cayenne
  • to taste salt
  • to taste pepper
  • 2 T green onions, chopped
  • Salad: 3 C kale, torn into small pieces
  • 1-2 T olive oil
  • 1-2 T lemon juice
  • 1/2 to 1 T balsamic vinegar
  • to taste salt
  • to taste pepper
  • 1/4 C carrot, thinly sliced into rounds (or instead of carrots and green onions, try: grapes, cheddar cheese, cucumber, and apple)
  • 1 apple, roughly chopped
  • 1/4 C roasted and salted almonds, roughly chopped
  • (could also add chopped tomato)
Instructions
  1. Combine all tuna ingredients together. Taste and adjust seasoning if needed.
  2. Pour 1 T oil and a bit of salt onto kale. Massage with hands for 2-3 minutes (or until kale looks darker, wiltier, and a bit like it is cooked).
  3. Top kale with tuna and remaining ingredients.


Monday

25

August 2014

2

COMMENTS

Meatball Subs

Written by , Posted in Beef, Bread, Cheese, Dinner, Fruit, Herbs, Kid-Friendly, Lunch, Main Dishes, Meat, Quick and Easy, Sandwiches, Sauces

MeatballSubs-6

I want you to know that I almost had to stop working on this post to go back to the grocery store to buy some ground beef so I can make these sandwiches. They are not on the menu for dinner tonight, but working on these pictures is tormenting me.

Tormenting I say.

The day that I photographed this dish, as soon as I was done, I stood next to the island and inhaled it so fast that I think I gave myself heartburn.

Oops.

Worth it.

MeatballSubs-2

It all starts with meatballs. They’re made with organic beef, an egg, and some honey. Plus herbs. Gotta have herbs.

They start in the pan that an onion has just cooked in.

Some homemade tomato sauce is added, and they cook a bit longer.

I’m drooling here.

MeatballSubs-1

And then there’s a homemade baguette.

Can this meal get any better?!

If you don’t have the time to make homemade baguettes, I understand. They are a lot of work. Buuuut so worth it.

The bread is toasted in a buttered skillet.

Yep. It got better.

MeatballSubs-3

If you can manage to stop yourself from just standing at the stove and scooping the meatballs out of the pan with the bread, you can top it with cheese.

If you can’t, I understand.

Buuuuuuut I think that might actually be a good idea. You know how the best part of eating a plate of tomato sauced spaghetti is wiping down the plate with your buttered bread? This is kinda like that but better, because there’s so much more goodness to scoop up.

Next time I’m trying this.

MeatballSubs-4

If you’ve held yourself together and convinced yourself to not eat like a maniac at the stove, top the sandwich with lots of basil.

MeatballSubs-5

Now you’ve earned a bite.

So have I.

I’m hungry.

Happy Eating!

Meatball Subs
Recipe Type: Main, Sandwich, Lunch, Dinner, Beef
Author: Rachel Oberg – De Ma Cuisine
Prep time:
Cook time:
Total time:
Serves: 3
One of our favorite sandwiches is also one of the messiest. Filled with delicious beef, basil, and cheese, we love a good meatball sub.
Ingredients
  • 1 onion, diced
  • 2 T olive oil, divided
  • 1 egg
  • to taste salt
  • to taste pepper
  • 1 t honey
  • 1 t balsamic vinegar
  • 2 C tomato sauce
  • 1/2 t mustard
  • 1 T fresh (or 1/2 t dried) parsley, divided
  • 1 T fresh (or 1/2 t dried) thyme, divided
  • 1 lb. ground beef
  • 2 C tomato sauce
  • to taste salt
  • to taste pepper
  • 1 t lemon juice
  • 1 T butter
  • pinch salt
  • 3 longish portions of baguette or crusty bread, sliced in half lengthwise
  • cheese, grated
  • fresh basil, for topping
Instructions
  1. Heat a large skillet. Add 1 T olive oil. When it’s hot, add the onion and cook over medium heat for about 5 minutes (or until onion is translucent and softened), stirring occasionally.
  2. Whisk together egg through thyme. Combine beef with egg mixture, mixing together with your hands (do not over mix). Roll into about 12 meatballs.
  3. In the onion skillet, add remaining 1 T olive oil, turn heat to medium-high, and add meatballs. Cook, turning often, until browned all over (about 8-10 minutes total).
  4. Whisk together tomato sauce, salt, pepper, remaining parsley, and thyme. Pour into meatball pan. Bring to a boil, then reduce to a simmer. Cook meatballs until they reach 160F (about 10-15 minutes). Stir in a squeeze of lemon.
  5. Heat another skillet and add the butter and a pinch of salt. Once the butter is hot, add the bread (cut side down) and cook over medium heat it until it’s browned.
  6. Top the bottom piece of bread with some cheese, four meatballs, a couple scoops of sauce, a bit more cheese, and the basil. Scoop a bit more sauce on the top piece of bread and close the sandwich.


Monday

18

August 2014

0

COMMENTS

Beef and Bean Enchiladas

Written by , Posted in Baking, Beans, Beef, Cheese, Dinner, Fruit, Gluten Free, Kid-Friendly, Legumes, Lunch, Main Dishes, Meat, Potlucks, Vegetables

BeefBeanEnchiladas-11

Enchiladas are one of my go-to meals when I want to bring dinner to friends. It’s pretty quick and easy to make, it’s hearty, and it can be pretty healthy.

They’re also one of Tim’s favorites.

I try to have some in the freezer at all times.

BeefBeanEnchiladas-2

I mean, take a look at all of the veggies I’ve piled in here. I had celery on hand, but normally I’d use bell peppers (note: if you’re using celery, make sure it’s really cooked down and soft). I also have been putting summer squash in everything, so why not these too?!

BeefBeanEnchiladas-1

Also corn. In everything. I am addicted.

This winter when we had a million spaghetti squash I cooked a bunch of ’em and froze the flesh. I’ve been slowly using it. If you don’t have any cooked spaghetti squash you could just add more beans and summer squash.

Tim doesn’t mind when I sneak spaghetti squash into things like this. But, he did note that he got a pretty squashy bite, so stir it in pretty well if that might bother someone in your family. 😉

BeefBeanEnchiladas-4

I like to cook up the filling first. That way they take less time in the oven. Plus then I can make sure that all the veggies are soft. No one wants a crunchy this or that, unless it’s supposed to be there.

BeefBeanEnchiladas-5

Tim built me a beautiful, huge kitchen island when we moved. So I have tons of space to lay out all the tortillas I could ever need.

I’m thankful for this workspace.

The sauce gets divided evenly between the tortillas.

BeefBeanEnchiladas-6

The ends get folded in and then it’s rolled up. My whole wheat tortillas cracked a bit. No big deal.

BeefBeanEnchiladas-3

I like a bit of sauce in the bottom of the pan. If you like it extra saucy, add more! I used what I had in the freezer, so normally I’d make it a bit juicier than this looks (the recipe is adapted to be saucier).

BeefBeanEnchiladas-7

Rolled up and ready for cheeeeeeeeese.

BeefBeanEnchiladas-8

You could add way more cheese if you’d like, but I didn’t want to go overboard. Moderation, right?!

BeefBeanEnchiladas-10

After these came out of the oven, I put half of them into freezer safe containers so they will be ready for lunches. The rest we devoured.

BeefBeanEnchiladas-9

If you’re gonna bring these to some friends, send along a container of Greek yogurt (or sour cream), salsa, corn chips, and guacamole (if you’re feeling extra generous). Make them a simple green salad with some chopped fresh tomatoes and a container of homemade Ranch dressing (whisk together a bit of yogurt, mayo, fresh herbs, garlic, salt, and pepper). And for dessert, how about some Fruit Crisp that can be added to the leftover Greek yogurt for breakfast the next morning?

If you’re serving it tonight for your family, serve it exactly the same way.

Happy Eating!

Beef and Bean Enchiladas
Recipe Type: Main, Easy, Beans, Beef, Vegetables, Dinner, Main Dishes
Author: Rachel Oberg – De Ma Cuisine
Prep time:
Cook time:
Total time:
Serves: 4-6
Perfect for a hearty dinner tonight, or to make to take to a friend in need.
Ingredients
  • 1 t olive oil
  • 1/4 to 1/2 C bell peppers (or celery), chopped
  • 1/2 to 1 C summer squash, chopped
  • pinch salt
  • 1-2 C Chili (I used Beef Chili), or 1 lb. ground beef
  • 8-15 oz. kidney beans
  • 1 1/2 C cooked spaghetti squash (or add more beans and summer squash)
  • 1/4 C salsa
  • 1 C corn
  • 1/2 t chili powder (or more if using ground beef)
  • pinch ginger
  • to taste salt
  • to taste pepper
  • 1/2 to 1 C tomato sauce (add an extra 1/4 C if using ground beef)
  • to taste salt
  • to taste pepper
  • 8-10 tortillas
  • 1 C cheese, grated (Monterey/Pepper Jack or Cheddar)
  • Greek yogurt, for topping
  • 1-2 fresh tomatoes, chopped, for topping
  • jalapeño, chopped, for topping (optional – if you like it extra spicy)
Instructions
  1. Pre-heat oven to 350F.
  2. Heat a skillet, add olive oil. When oil is hot, add bell peppers/celery, summer squash, and a pinch of salt. Cook for about 5 minutes, or until veggies are tender, over medium heat, stirring occasionally. (Note: if using raw ground beef, cook first, then add veggies when beef is almost done. Add the extra 1/4 C tomato sauce with the beans in the next step.)
  3. Mix together chili, beans, spaghetti squash, salsa, corn, chili powder, ginger, salt, and pepper. Add to skillet. Bring to a boil, reduce to a simmer, and cook for about 5 minutes. Taste and adjust seasoning if needed.
  4. Mix tomato sauce with salt and pepper. Pour into the bottom of a greased 9×13 baking dish.
  5. Divide the beef and bean filling between the tortillas. Fold ends in and roll up. Place seam side down in tomato sauced pan. Top with salsa and cheese. Bake for 20 minutes, uncovered, or until cheese is melted.
  6. Serve topped with yogurt and fresh tomatoes (and jalapeño if desired).
Notes
Gluten-free if you use corn tortillas.

Monday

30

June 2014

4

COMMENTS

Half Birthday Fun – Beef Chili

Written by , Posted in Beef, Cheese, Dinner, Fruit, Gluten Free, Kid-Friendly, Lunch, Main Dishes, Meat, Potlucks, Sides, Soups, Thoughts, Vegetables

TimHalfBirthday-6

Tim’s birthday is on Christmas Eve. We always try to make it special. But, the day is usually a mixture of birthday and Christmas Eve celebrations.

He is always a good sport about it.

But, this year, I thought that a half birthday celebration would be nice. An entire day devoted to celebrating him.

The day was filled with things that he loves.

We started with doughnuts. We’ve discovered a place that’s close enough to walk to. Often on Saturday mornings we will take the dog for a walk and get ourselves a treat.

TimHalfBirthday-1

Then he went to a movie with a couple friends while I set up for later.

TimHalfBirthday-2

We invited a few friends to continue the celebration of things that Tim loves.

Things like candy, caramel corn, and Blue Moon.

TimHalfBirthday-3

Dinner was more of his favorites: hot dogs, beef chili, store bought potato salad, fruit salad, and chips.

He loves the things that I cook. He’s fine with our healthy lifestyle. So it’s fun to surprise him with things that aren’t so healthy once in a while (although I used organic hot dogs and organic grass fed beef for the chili, so I still felt good about eating it).

It was a fun treat. (I maaaay have felt a little bit sick afterwards, but it was worth it. ;))

TimHalfBirthday-4

There was laughter. Lots of laughter.

TimHalfBirthday-5

Another favorite is ice cream. It’s pretty much an entire food group for Tim.

A serving size for him is a third of a carton.

We’ve discovered a little ice cream shop called Quenelle (pronounced kuh-nell). They make all of their ice cream. It’s insanely good. An ice cream cake from Quenelle seemed like the perfect way to end our little dinner.

It was.

I don’t know that I’ve heard as many exclamations about how good a dessert was as I did that night.

The cake was a layer of nutella, a layer of cookies and crème fraiche, with a devil’s food cake layer at the bottom.

That expression “we all scream for ice cream” – yeah, we did.

I accidentally put trick candles on the cake. I didn’t know that we had them. It was a trick on everyone.

TimHalfBirthday-15

As the light faded, we lit candles and sat for hours around the table.

TimHalfBirthday-14

The evening was one of those times when, as I went inside to get something and looked out the window, I just kinda stopped, and almost got a little bit choked up, looking at some of our dear friends gathered around our table. We’re so thankful for the little community of loved ones we have here in L.A.

TimHalfBirthdayChili-12

I figured I should feed people chili. It’s easy and most people like it. It’s perfect in a bowl, or to top hot dogs. I made it the day before, then re-heated it the day of and kept it hot in the crock pot. Finding as many things to do beforehand made half birthday day so much more relaxed. I don’t think I stressed out at all. We had fun the whole day long.

TimHalfBirthdayChili-7

Tim loves chili with beans. He’s happy eating it when I add tons of veggies. But, since it was his day, I though I’d try something new, and just do it with beef.

TimHalfBirthdayChili-8

It’s pretty simple. The beef is cooked for a little bit with some seasonings. Onions are added partway through.

TimHalfBirthdayChili-9

Since bell peppers are one of his favorite veggies I added two. Plus one hot pepper for just a bit of heat.

TimHalfBirthdayChili-10

I have a hard time cooking without loads of garlic. Whatev.

TimHalfBirthdayChili-11

And then piles of canned diced tomatoes are added in to make it saucy. I cooked it for two hours the first day, then probably a good 4-5 on half birthday day. It doesn’t need the extra day of cooking, but it sure didn’t hurt.

TimHalfBirthdayChili-13

What a fun way to celebrate. It was a good day.

Happy 31 and a Halfth Birthday, Tim!

Beef Chili
Recipe Type: Main, Side, Beef, Meat, Dinner, Soup, Chili, Bell Peppers, Easy, Potlucks
Author: Rachel Oberg – De Ma Cuisine
Prep time:
Cook time:
Total time:
Serves: 8-10
Ingredients
  • 2 lb. ground beef
  • 2 white onions, chopped
  • 1 T chili powder
  • 1/2 T sweet paprika
  • 1 T smoked paprika
  • pinch cumin
  • pepper
  • 2 bell peppers, chopped
  • 1 hot pepper, leave seeds and ribs (optional), chopped
  • 6 cloves garlic, minced
  • 3 T balsamic vinegar
  • 2-28 oz. cans diced tomatoes
  • 1 T lemon juice
  • 1 t sriracha hot sauce
  • 2-3 t salt
  • cheese, grated, for topping
  • onions, chopped, for topping
Instructions
  1. Heat a large soup pot. When hot, add beef and seasonings through pepper. Break apart (or mash using a potato masher) and cook over medium-low heat for about 5 minutes.
  2. Add onion and cook for about 5 minutes.
  3. Add peppers and cook for about 5 minutes more.
  4. Add garlic and cook for about 3 minutes.
  5. Add balsamic vinegar through salt. Stir to combine and bring to a boil. Reduce to a simmer and cook for about 2 hours, stirring every once in a while.
  6. Served topped with cheese and onions.

Friday

16

May 2014

0

COMMENTS

Dandy Sandi – Bacon Sandwich with Dandelion Greens

Written by , Posted in Lunch, Meat, Pork, Quick and Easy, Sandwiches, Sauces, Vegetables

DandySandi7

You guys, did you know that dandelions aren’t just for making your arm turn yellow, or blowing the seeds all over the yard to plant new flowers? (I’m not the only one who did this as a child… right? My parents were thrilled, I’m sure.)

We can eat them!!?

Yes. Yes, we can.

DandySandi6

I learned in this week’s Abundant Harvest Organics newsletter that dandelions are part of the sunflower family. I had no idea. I also learned that this plant that I’ve never eaten can be a substitute for: arugula, broccoli raab, beet greens, choys, kale, collards, chicory, or baby spinach. How fun!

So I did a little bit of research to see what might go well with these new (to me) greens. At first I thought of sautéeing them. That would be fabulous. They’re a little bit bitter, so if you want to tame them, as with any bitter green, you might want to cook them first. And you could totally cook them for this recipe. But, I thought that raw would work nicely too, because it was going on a bacon sandwich, with a savory garlicky mayo.

DandySandi2

And now I. Can’t. Stop. Thinking. About. This. Sandwich. Ugh and I’m all out of bacon.

DandySandi1

It’s simple really. Bacon, cook it. Onions, quick sauté. Easy enough even for lunchtime.

The sauce is a simple mayo-ish spread that has garlic, balsamic vinegar, dijon, and mayo. It’s deeeeelicious.

I can never have enough garlic.

Ever.

Suggestions: 1. Don’t skimp on the sauce. 2. Use a good quality mayo. 3. Don’t skimp on the sauce.

DandySandi3

DandySandi4

DandySandi5

DandySandi8

Everything gets all piled up on the bread.

We’re really into French baking and breads at home right now. I made baguettes the other week. And, since it was my birthday last Thursday, Tim bought us some great croissants to enjoy with friends the other night, and there was one left, perfect for us to split for this sandwich.

DandySandi9

Sigh. I miss Paris.

I also miss this sandwich.

Happy Eating!

Dandy Sandi – Bacon Sandwich with Dandelion Greens
Recipe Type: Sandwich, Lunch, Pork, Bacon, Greens
Author: Rachel Oberg – De Ma Cuisine
Prep time:
Cook time:
Total time:
Serves: 2
Ingredients
  • 6-8 slices bacon
  • 1 T olive oil
  • 1 onion, sliced
  • pinch salt
  • 1/2 bunch dandelion greens (or any other greens), stem ends removed
  • 2 regular sized (or 1 huge) croissants, sliced (or your favorite sandwich bread or baguette)
  • sauce: 1/2 T dijon mustard
  • 1 T balsamic vinegar
  • 2 T mayonnaise
  • to taste salt
  • to taste pepper
  • 1 clove garlic, minced
Instructions
  1. Cook bacon. Drain on a paper towel lined plate.
  2. Heat skillet. Add oil. When oil is hot add onion and a pinch of salt. Cook over medium or medium-low heat for 7-10 minutes, or until onions are slightly browned, stirring occasionally.
  3. Whisk together sauce ingredients. Spread on croissant/bread.
  4. Top with bacon and greens.