De Ma Cuisine

Guest Posts Archive

Friday

4

May 2012

0

COMMENTS

“Magic” Mac and Cheese

Written by , Posted in Guest Posts, Main Dishes, Pasta

“Magic” Mac and Cheese
Recipe Type: Pasta, Dinner, Main
Author: Will Durrance
Prep time: 15 mins
Cook time: 45 mins
Total time: 1 hour
Serves: 6-8
A quick and easy Mac and Cheese. So simple it’s like magic!
Ingredients
  • 3 c. uncooked macaroni noodles
  • 2-3 c. shredded cheese (cheddar, monterey jack, pepper jack, gouda, etc. or a combination)
  • 1 t. salt
  • 4 c. milk
  • Optional: peas, broccoli, tomatoes, sausage, chicken
Instructions
  1. Butter a 9×13 baking dish.
  2. Add all ingredients and stir gently.
  3. Bake at 350 degrees for 45 minutes or until set and lightly browned on top.
Notes

Serves 6-8 as a main dish, more as a side dish.


Friday

27

April 2012

2

COMMENTS

Uncle Jake’s Back Ribs

Written by , Posted in Condiments, Grilling, Guest Posts, Legacy, Low Carb, Meat, Sauces


Uncle Jake’s Back Ribs
Recipe Type: Ribs, Grilling, BBQ, Main
Author: Jake Pries
Cook time: 3 hours
Total time: 3 hours
Uncle Jake’s amazing ribs!
Ingredients
  • Ribs: I like to use 3-4 ribs if a side dish and a rack of 6-8 for main meal. What’s left over is great the second day for a snack or the evening munchies!!!!
  • Chicken broth
  • Rub: 1 tbsp onion powder
  • 2 tsp garlic powder
  • 1 tsp smoked paprika (optional)
  • 1 tsp paprika ( 2 if not using smoked paprika)
  • 1 tsp cayenne (2 if more heat wanted)
  • 1 tsp pepper
  • 1 tsp salt
  • Sauce: ½ cup fancy molasses
  • ½ cup ketchup
  • 2 tbsp minced garlic
  • 1 tbsp Dijon mustard
  • 1 tbsp cider vinegar
Instructions
  1. Calculate the amount of ribs. If they are sized well cut them into single ribs if smaller cut them into 2s.
  2. Get a roasting dish or 2 or 3 depending on the number of folks coming and lay them meaty side down.
  3. Lightly salt and pepper the bone side and then fill so that the ribs are covered mid point with a chicken broth. Then cover with a foil and place in the over at 275 degrees F for 3 hrs. Rotate ribs after 2 hrs and bake meaty side up for the last hr.
  4. Stir rub ingredients together. Put contents into an empty spice container with the larger holes and this will serve you well when applying the rub. I triple this recipe and then have this rub for the next rib meal. Also tastes good when barbecuing chicken as an added flavor. Mix sauce ingredients well in a bowl. Once again I triple this recipe and put it into a retired plastic ketchup bottle. This will work well when applying sauce.
  5. Once ribs have been braised over the 3 hrs. Drain remaining broth into a container. This is still good for future broth needs.
  6. Take out a baking pan and line it with your foil cover. Place ribs on pan side by side, meaty side down and apply rub. Rotate ribs to meaty side up and repeat.
  7. Set oven temp at 400 F and cook uncovered for 30 minutes.
  8. The final touch has 2 options – barbecue or bake. Bake: Set oven to 425F. Baste ribs with sauce cook uncovered for 5 min-rotate ribs baste ribs and cook 5 min final rotate baste and cook for 5 min or till glazed. Barbecue: Set temp to med/high. Pay attention at this point not to blacken the ribs but just glaze them. The meat will be tender on the ribs at this point and can fall off the rib if it sticks to the grilling surface. Baste well and place on grill and rotate and baste again once glazed. I find starting with the meaty side up and last rotation meaty side down reduces the tendency for the meat to stick to the grill.
  9. Once done put in platter and enjoy.
  10. P.S. Don’t forget to give thanks.


Friday

20

April 2012

0

COMMENTS

Josh Again!

Written by , Posted in Guest Posts

I miss my brothers. I wish we lived closer to one another. Skype is good, but in person is better. We all like to cook, and it’s fun to do this together. Guest posts about food will have to do. 🙂

Here’s Josh with one of his culinary creations!

This is Josh again. You may remember me from the astoundingly interesting series of posts about food safety (sarcastic smile). I realize that it may not have been the most exciting way to spend your time, so I decided to share some culinary insight as well.

After highschool, I attended a Culinary School where I focused on the French Style of cuisine. I did not end up pursuing that as a career, but it remains one of my favourite hobbies today.

Being a student again, I find that there are times when it is really difficult to find time to cook something substantial, nutritious, and of course, tasty. However, I have recently discovered the art of procrasticooking and procrastibaking, in which, when papers or assignments need to be written, or exams need to be studied for, there appears to be a tremendous amount of time that can be devoted to creating tasteful masterpieces.

I have an exam tomorrow (at the time I am writing this), so, I decided to put off studying and experiment in the kitchen. Like my sister (Rachel), I have a good feeling about tastes, and what sorts of flavours go well together in the same dish, and what is needed to compliment other flavours in the meal. This is why cooking is so much fun.

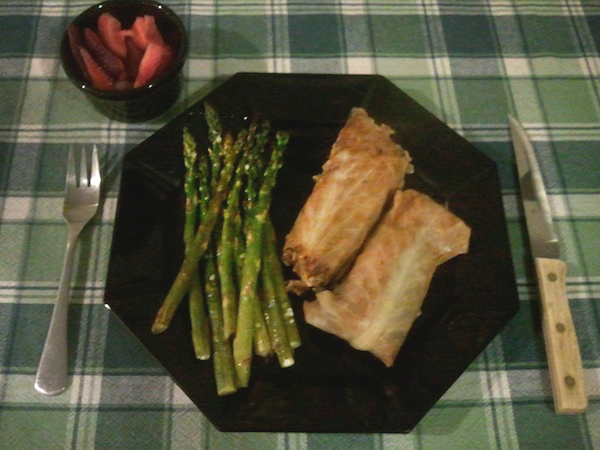
The following is a recipe that I made up as I was cooking, based on what I had in my kitchen, and what flavours I knew would meld nicely. I do apologize that there is only 1 picture, as I wasn’t intending to document this meal (until I tasted it, and realized that it should be shared).

Cabbage Rolls and Roasted Asparagus

Last modified on 2014-03-04 01:45:10 GMT. 0 comments. Top.


Cabbage Rolls and Roasted Asparagus
Author: Joshua Pries
Serves: 3
Ingredients
  • Ingredients:
  • 2 sausages (hot italian), raw
  • 1 cup brown rice, uncooked
  • 1 tbsp fresh garlic, pureed
  • 1 large green cabbage
  • 1 cup tomato sauce/soup
  • 1 cup water
  • 3/4 cup red wine
  • 1 bunch fresh asparagus
  • 2 tbsp olive oil
  • pinch salt
  • pinch pepper
Instructions
  1. In a medium sized pot, place the sausages, bring to a boil, and cook until they reach an internal temperature of 74C/165F (and make sure to wash your hands with soap after handling that raw sausage). When fully cooked, let cool until safe to handle, and then cut into a small dice (approximately 1/3 inch x 1/3 inch).
  2. At the same time, in a large pot, place 6 full leaves from the cabbage, cover with water, and boil for about 5 minutes, or until soft and pliable. When cooked, remove from the water and let stand to cool.
  3. In a medium sized bowl, add the rice, diced sausage, pureed garlic, a pinch of salt and pepper, and 1/2 of the tomato sauce/soup.
  4. Divide the mixture into 6 equal parts and spoon the mixture onto the centre of a cabbage leaf. Fold the outside edges of the cabbage leaf over to make a “roll”. Place it in a 9×9″ un-greased glass pan. Repeat with the other 5 cabbage leaves.
  5. Pour the rest of the tomato sauce/soup over the top of the rolls, along with the 1 cup of water, and the wine (Note: A small amount of vinegar may be used with the wine to add to the flavour. I was using a bottle of wine that had lightly soured).
  6. Cover the pan with a lid or tin foil, and bake at 350F for 40 minutes.
  7. While the cabbage rolls are cooking, wash the asparagus, snap the blunt ends off (instead of cutting them), and toss in olive oil, salt and pepper. Place them in a single layer on a baking tray.
  8. After the cabbage rolls have baked for 40 minutes at 350F, increase the temperature to 375F, and place the asparagus in the oven. Cook for 20 minutes. With about 10 minutes left, (carefully) remove the lid from the cabbage rolls and continue cooking. When the majority of the liquid has been absorbed, it is done.
Notes
This makes 3 generous portions. The richness of the sausage, wine and tomato, coupled with the subtle bitterness and salt from the asparagus makes a great combination. For a nice finish, have a couple fresh strawberries – they will give a nice fresh, sweet, light taste afterwards to cleanse your palate.[br] Notes: If hot italian sausages aren’t your thing, you can substitute for other types, but the flavours cannot be garunteed to mix well. If you are using fresh wine, it is best to add a small amount of vinegar – it will give the cabbage a slightly pickled taste; else you can use wine that is no longer the best to be drunk.


Friday

6

April 2012

0

COMMENTS

Making Meals Easier – Brandy’s Discovery

Written by , Posted in Guest Posts, Thoughts

Brandy and I have known each other for over 10 years! She’s a former roommate/”Faith Ninja”, she was my “best-girl” (matron of honor) and I hers (at the time, I was a maid of honor). I’m so blessed to call her my friend.

Here’s Bran…

Ever since Rach asked me to do this post, my brain has been rolling with ideas as to what I can share with you, her readers. I received my degree in Culinary Arts 7 yrs ago and since then I have worked in pastry, in the kitchen and also as manager in the front of the house of a two different upscale restaurants here in Anchorage. However for the last two plus years, I have had the privilege to be a stay at home mom and put my culinary talents to use in my house, which is one of the biggest reasons I chose this path, because it is something I could/would always be using.

In deciding what to share I landed on what I think to my biggest life changing “ah-ha” meal discovery recently. It’s nothing really new, its just something that I have been able to finally work for me. I am also a stay at home mom to two beautiful children, 2 years and 5 months, so my days are full and when it comes to making dinner, well, I’ve learned why the five o’clock hour is called the “witching hour” and many nights it feels like a pure miracle that there is a meal or something to eat, besides corn dogs and hot dogs (which the 2 yr old would love). I have started buying large amounts of meat and rather than just freezing it raw, I’ve cooked it and frozen it already cooked. That way I can pull out a bag and throw it into a casserole, or heat the meat for tacos, put it into a soup (ok, that’s a nice idea, but we really don’t do soups in this house, husband doesn’t love, nor does the 2 year old, so mostly a waste of my time), enchiladas are a favorite, BBQ chicken sandwiches, sloppy joes, spaghetti with meat sauce, you get the point, there is a lot you can do with a bag of already cooked meat and you don’t have to spend the time thawing the meat, cooking and then starting your dish.

Now, also knowing that I didn’t have tons of time to spend in the kitchen to cook all my meat, I put my crock pot to work! (That’s my second favorite kitchen discovery as of late, LOVE my crock pot)!!! Oh, and times I can put my frozen meat in to the crock pot and then dinner comes out a few hours later, ahhhhh that’s wonderful!! Anyhow, I digress….So, what I did was this:

Bought large quantities of meat at Costco: I bought two whole chickens, a large 6 pound tray of ground beef (you could do the same with turkey meat) and I bought two large roasts, I think they were just rump roasts, or something like that.

So, night 1 when I got home, I made 1# of the hamburger into chili, also adding 1# of ground turkey I had on hand and at the same time while I was at my stove cooking chili, I was cooking the ground beef – getting two things done at once. I seasoned it with salt and pepper, some onions and granulated garlic. I was able to split this up and made 5 – 2 ½ c servings and froze them in Ziploc quart bags.
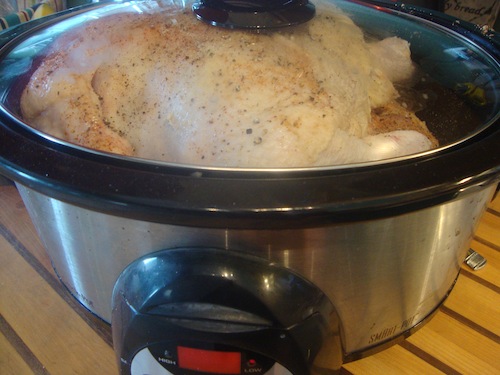
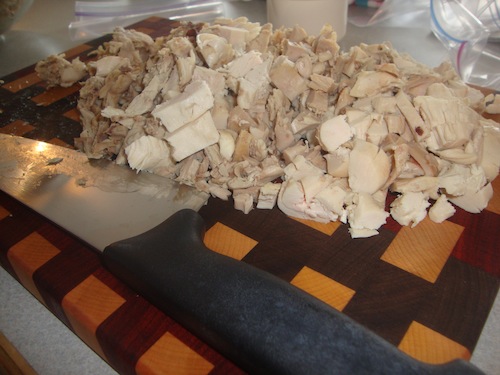
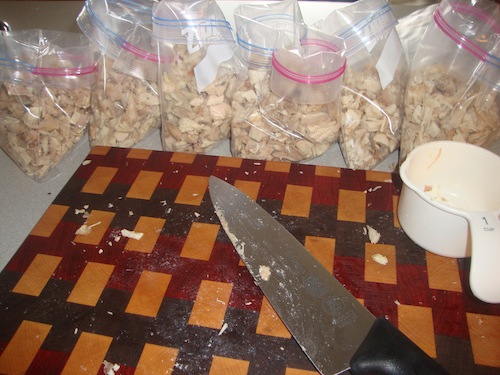
The next two days I put my crock pot to work. One day for chicken and one day for the roast. In the morning I put my two chickens, cleaned out the insides, patted dry the outside and seasoned with salt and pepper and actually put some of my favorite dry BBQ rub on them, and under the skin even. These then cooked for about 5 hrs on low (I find my crock pot cooks hot). I knew they were done when I was going to pull them out to drain off the liquid and as I pulled them out, the meat fell off the bones. I then separated the meat from the bones and cut the chicken up and was able to divide it into 6 bags of a little over 2 cups each. A new tip I read recently and have tried is to roast the chicken breast side down, as then the juices from the thigh meat drains into the breast meat, making it juicier and not drying it out. One time I did this my chickens were really too big for my crock pot so I had to hack them apart until I could get them to fit.
To make the roast I chose to make it into a “Mexican Meat” – we make lots of enchiladas, tacos, burritos, quesadillas, nachos, etc in this house. So I seared the roasts in a pan on the stove, with some olive oil, salt and pepper. This step is helpful, but if you’re hurting for time, not the end of the world, but it does help to seal in the juices. Then I placed them in the crock pot and sprinkled with a hefty amount of taco seasoning, you could also throw in some onion and garlic to roast with meat as well, a can of green chilies would also work well mixed with this meat. I cooked this on low as well for about 5 hours (as I recall). Until it was fork tender, meaning I could pull it apart with my fork. I then used two forks to pull apart the meat, and you could either mix it in with the drippings, or pull it out, your choice, but those drippings, while fatty, will help keep the meat moist. This also made about 5 bags of 2 cup servings.
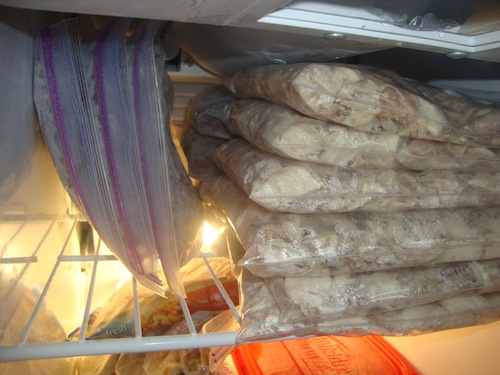
I get so excited about having bags of meat ready to go in my freezer and it makes dinner time seem so much more realistic. I hope that one of these ideas will inspire you to make your weeknights easier too!

 

Friday

30

March 2012

11

COMMENTS

Love That Blackberry Jam! – Guest Post and Giveaway

Written by , Posted in Guest Posts, Thoughts

My husband grew up in the country. His parents still live on Smoking Possum Farm (yes, there’s a story behind the name that has to do with a possum who slowly wandered out of the annual burn pile all aflame). My in-laws have blackberries and boysenberries. They are incredibly delicious. They’re a bit of a pain to pick (hello really sharp thorns), but they are really the best blackberries ever!

My in-laws are also really great. I know people talk about terrible in-laws… I’m happy to report that I’m not one of them. I truly enjoy being with them and feel blessed to be a part of their family. (And, no, I’m not just saying that because I know they’re going to read this. Honest.) My dad-in-law is a great pie baker and jam maker. Over Thanksgiving I got to partake in the jam making. What fun! I think I came home with about 20 jars of jam, most of which (to Husband’s dismay) were given as Christmas gifts. (To those they were given to, yes, he likes you… he may like the jam more. You’ll have to talk to him about this, if it’s a problem for you.) I asked why they started making the jam. Simply, he said they make it because it’s so good, and it’s a great way to use the leftovers from the farmers’ markets. That’s reason enough for me. If you’ve tried it, you understand why. If you haven’t, I hope you get to some day soon!

Maybe really soon. My wonderful in-laws have graciously agreed to give away a precious jar of jam to one lucky reader.

YOU COULD WIN SOME OF THIS JAM!!!

To enter, simply leave a comment on this blog post.

One entry per person. Contest closes April 9th at 9am (PST).

Winner will be chosen using random.org. Open to residents of the United States (sorry – don’t want to have jam confiscated at customs or anything!). 

This contest is now closed.

The winner of the jam is Jennifer!!!

(You were the first person to enter, and random.org chose #1!)

Please contact me with your mailing address and I’ll send you your jam!!

Now, back to the jam making…

Here’s Dad to tell you how to make it for yourself.

Blackberry, Boysenberry, and Olallieberrie Jam from the Farm.

Oberg Blackberry Jam

Last modified on 2012-07-19 20:40:57 GMT. 0 comments. Top.

Oberg Blackberry Jam
Recipe Type: Jam
Author: Terry Oberg
Ingredients
  • 8 cups frozen berries (you want about 5 cups of crushed berries)
  • 7 cups of sugar
  • 1 box fruit pectin
Instructions
  1. Rinse the berries and measure out about 8 cups for frozen, since you want about 5 cups of crushed berries. Fresh berries can be crushed and measured that way.
  2. Measure out 7 cups of sugar into a separate container but do not pour it into fruit yet.
  3. Use a potato masher to crush the berries in a 6 or 8 quart pot. Stir in one box of fruit pectin. (I tried liquid pectin below, since the store was out of dry since it’s not really canning season, and I didn’t like it as well, plus it changes this recipe.)
  4. Bring the fruit and pectin mixture to a full rolling boil (a boil that can’t be stopped by stirring) on high heat, stirring constantly. Stir in the sugar fairly quickly, and return the mixture to a full rolling boil and then boil for exactly 1 minute, still stirring constantly.
  5. Remove from heat and then we pour the berry mix into some sort of pitcher to fill the jars since that’s easier than ladling the fruit into jars as most directions say. Just be very careful as you pour the big pot of boiling berry mix into the pitcher, because if it spills it can be really dangerous.
  6. Fill the clean jars within 1/4 inch of the top, and making sure the rim is clean, put on a lid and ring. The lids have been in a small saucepan of boiling water, and can be drained but we usually keep them in the hot water until we place them on the jar. They always seal that way.
  7. Let the jars cool, and check to make sure they have all cooled by pressing on the lid. Make sure they don’t pop. If some haven’t, just refrigerate them and use them first. Try to let the jars sit for a few hours until they’re cool, and then store them in a cool, dry place.
Notes

We usually use frozen berries since those are what we have left over from our Farmer’s Markets. Fresh berries will work the same.
I have cut the above sugar recipe to 5 cups, so there is more fruit than sugar, and it usually sets fine. We have had some batches not gel too well, but that can be used for pancake syrup.
We usually get about 4-5 pints out of this recipe. The box says 9 cups.

(This is basically the recipe in the pectin box, Sure-Gel.)

This recipe can be adjusted for low or no sugar, or honey or fruit juice sweetening.  Just buy “Low or no sugar” pectin and follow the directions in the box.  We’ve had good luck with all of the above.  The nice purple color of the jam looks a little washed out without sugar, but it’s probably more healthy in most cases.

A few photos of the process.

Mashing the berries.


 Rolling Boil

Pouring into jars.

Lids on and sealing.