De Ma Cuisine

Cheese Archive

Friday

11

October 2013

2

COMMENTS

Bean and Cheese Taquitos – In the Kitchen with Rachel O – Video

Written by , Posted in Appetizers, Beans, Cheese, Dinner, In the Kitchen with Rachel O, Legumes, Lunch, Main Dishes, Quick and Easy, Sides, Vegetarian

 Taquitos

It is time.

Time for an easy dinner, a simple snack, a quick lunch.

Let’s do this.

I did.

Taquitos4

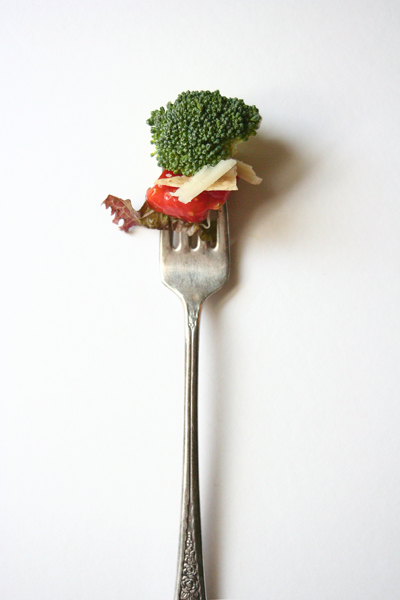
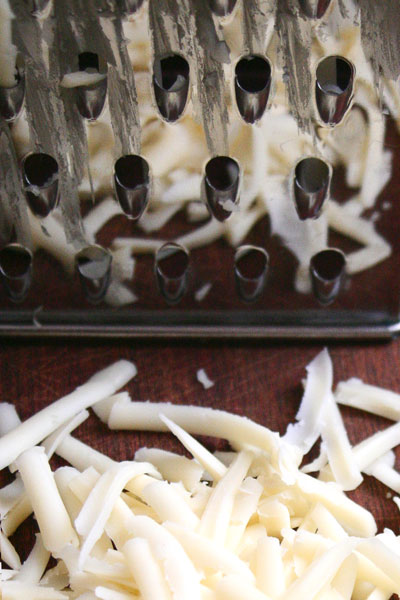
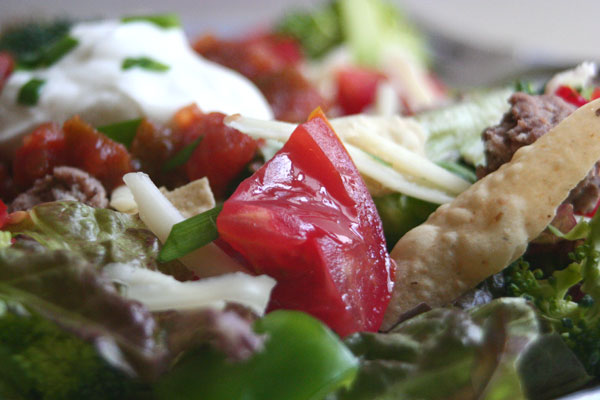
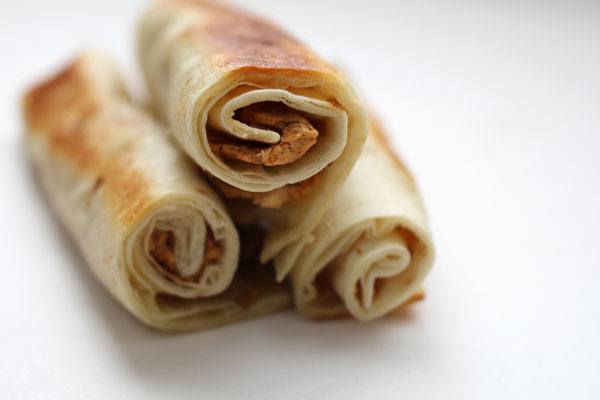
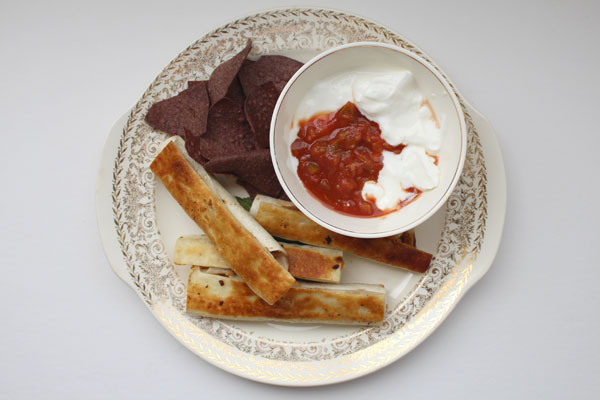
All it takes is a tortilla, some beans, and a sprinkle of cheese. Get some oil nice and hot. Fry ’em up. Eat ’em all. You’re gonna want to. Trust me.

Taquitos5

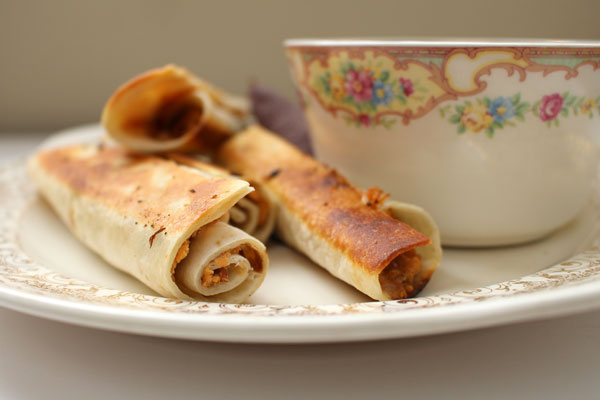
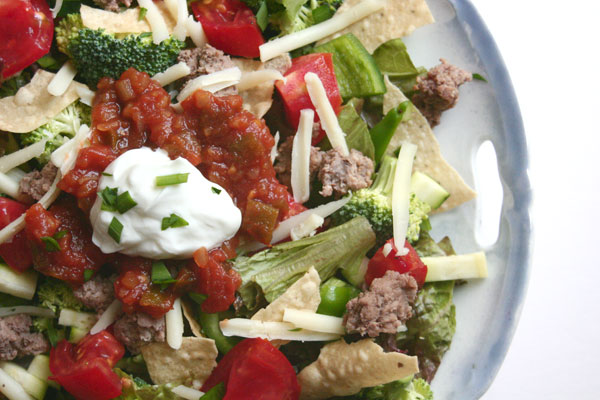
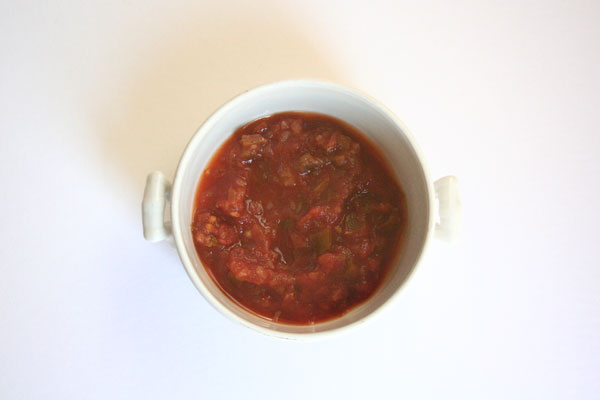
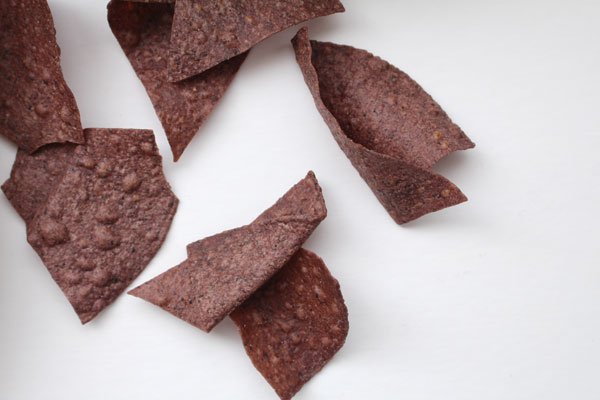
Grab a handful of corn chips. Spoon out some salsa and Greek yogurt. Get ready to dip dip dip.

Taquitos3

Taquitos2

Taquitos6

This was the first episode of the new show that I’m doing for ifood.tv. I hope you enjoy it. More episodes to come soon!

Happy Eating!

Bean and Cheese Taquitos
Recipe Type: Main, Appetizer, Quick and Easy, Side, Dinner, Lunch
Cuisine: Mexican
Author: Rachel Oberg – De Ma Cuisine
Prep time:
Cook time:
Total time:
Serves: 3-4
Ingredients
  • 1 1/2 C cranberry or pinto beans
  • 1/2 t chili powder
  • 1/2 t smoked paprika
  • 1/2 t sweet paprika
  • pinch cayenne
  • pinch ginger
  • pinch cumin
  • to taste, salt
  • to taste, pepper
  • 1 t honey
  • 1 T white vinegar
  • 2 T lemon juice
  • 3 large flour tortillas, cut into quarters
  • 1 C cheddar cheese, grated
  • 2-3 T olive oil
  • Greek yogurt, for serving
  • salsa, for serving
Instructions
  1. Pre-heat oven to 175F.
  2. Combine beans, seasonings, honey, vinegar, and lemon juice in a medium saucepan. Mash to combine. Cook over medium heat, stirring occasionally, for 3-5 minutes, or until beans are heated through.
  3. Top each quarter tortilla with a dollop of beans and a sprinkle of cheese, leaving a bit of space along one long edge. Roll, starting with the shortest edge.
  4. Heat skillet. Add 1 T oil. When hot, add 4-5 taquitos. Cook until browned and crispy, flipping once or twice, about 2-3 min per side.
  5. Place a cooling rack on a baking sheet in the oven. Transfer cooked taquitos to oven to keep warm.
  6. Add another 1 T olive oil to skillet and cook the next batch, repeating until all have been cooked.
  7. Serve with salsa and yogurt for dipping.

Friday

4

October 2013

4

COMMENTS

For a Simple Supper – Argentine Sausage with Zucchini and Bulgur Wheat

Written by , Posted in Cheese, Dinner, Grains, Main Dishes, Meat, Pork, Thoughts, Vegetables

ArgentineSausageBulgurWheat
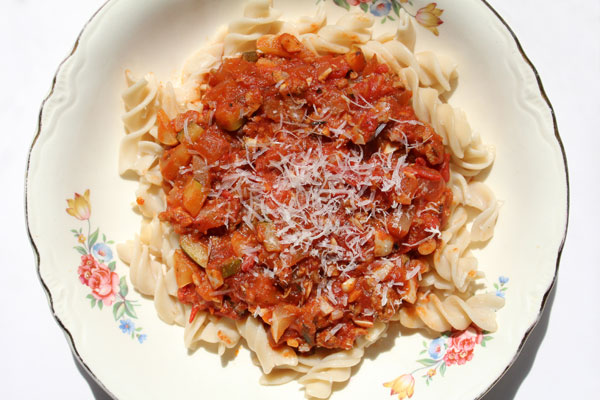
I really love to menu plan. But that doesn’t mean that things always go the way I have intended. Sometimes it means grilled cheese or some sort of re-heated leftovers from the freezer. But, occasionally inspiration hits and a new meal is concocted.

This is such a meal.

ArgentineSausageBulgurWheat6

ArgentineSausageBulgurWheat2

ArgentineSausageBulgurWheat4

We tried this Argentine sausage a while ago. I absolutely love it. It may be my new favorite. I don’t know why I had never tried it before. I didn’t know what I was missing. Now I do. We had a lot of zucchini in the fridge. It needed to be eaten. Perfect, because I wanted to eat it. And then we had bulgur wheat in the pantry. I bought it aaaaaages ago, thinking I would do something with it and never did. I was going to use rice in this meal, but why not switch it up?!

It comes together in a snap. Yeah, the bulgur wheat takes a while to cook, just like rice. But it’s not really that long. Pop it on the stove and then work on the rest. They’ll probably be done closer to the same time than you may have expected.

If you have other veggies that you want to use, I think that’s a good idea. If you have Italian sausage instead of Argentine, please use it! The basics of this dish are that it’s a grain, with some veggies, nuts, a bit of cheese, some fresh herbs, and some excellent olive oil.

ArgentineSausageBulgurWheat5

If you don’t have something in this recipe on hand – here are some other ideas that could work well:
Italian sausage, red pepper flakes, chopped rosemary, lemon zest, broccoli, and bulgur wheat or rice.
German sausage, onions, dijon mustard, parsley, dill, and bulgur wheat or rice.
Italian sausage, kale, onions, bell peppers, red pepper flakes, thyme, bulgur wheat or rice, with a drizzle of cream when you serve.
So many ways you could transform this simple dish.

Argentine Sausage with Zucchini and Bulgur Wheat
Recipe Type: Main, Easy, Dinner, Meat, Vegetables
Author: Rachel Oberg – De Ma Cuisine
Prep time:
Cook time:
Total time:
Serves: 2-4
Ingredients
  • 1 C bulgur wheat
  • 2 C vegetable stock (water or chicken stock are fine too)
  • 2 T olive oil
  • 2 Argentine sausages, cut into rounds
  • 1 medium zucchini, cut into chunks
  • 3 cloves garlic, diced
  • 1/2 t red pepper flakes
  • salt, to taste
  • pepper, to taste
  • 1 T lemon juice
  • 1 T fresh parsley, chopped
  • 1 T fresh basil, chopped
  • 1 tomato, chopped, for topping
  • parmesan cheese, grated, for topping
  • 1/4 C walnuts, chopped, for topping
  • olive oil, for drizzling
Instructions
  1. Cook wheat (similar to cooking rice): Add stock and wheat to a medium pan. Bring to a boil. Reduce to a simmer and cook, partially covered, for 30-45 minutes.
  2. Heat skillet, add oil. When oil is hot, add sausage and zucchini (if using fully cooked sausage – if not, cook sausage until it’s almost done and then add zucchini). Cook over medium heat for 10 minutes.
  3. Add seasonings, lemon juice, and garlic to skillet. Cook for 1-2 minutes.
  4. Add wheat and herbs. Stir and cook 1-2 minutes.
  5. Serve topped with tomato, walnuts, parmesan cheese, and a drizzle of excellent olive oil.

Happy Eating!

Wednesday

25

September 2013

1

COMMENTS

Something Kinda Sweet – Pear and Gorgonzola Pizza

Written by , Posted in Baking, Cheese, Dinner, Fruit, Main Dishes, Pizza, Thoughts, Vegetables, Vegetarian

PearGorgonzolaPizza5The pears are here!! The pears are here!! The pears are here!!

Ok, they’ve been here for a few weeks, but let’s get excited none-the-less. Because because because we’re paring pears with sweet caramelized onions, and tangy gorgonzola cheese, all on a pizza crust.

You’re welcome.

This pizza (or flatbread if I’m using crust from the freezer) is pretty rich. I’d recommend serving it with something light, like a crisp spinach salad with a bright dressing. I’d recommend sharing it with someone that you love while watching a movie that’s equally rich and sometimes a bit goopy. I’d recommend eating it slowly, savoring the way the honey compliments the cheese which compliments the pears which are complimented by the caramelized onions. I’d recommend plenty of napkins. That’s what we did for Pizza Friday a few weeks ago. It was marvelous.

If you’ve got figs instead of pears, you could do a straight switch. Mmm that would be good too. Have you ever tried roasted figs? They’re as good as roasted pears… as roasted anything.

Roasting fruits and veggies brings out a deep richness that we may otherwise not know is there. It’s a complex taste. It could be likened to the way a good movie, a great song, a lovely piece of art can resonate in our souls.The way an aged cheese, a full bodied wine, or reduced balsamic vinegar have a depth to them that lends a broader sense of the original flavor.

Food goes beyond the nourishment, enjoyment, and strength that it provides. It can be art.

And it sure does taste good.

I like edible art.

PearGorgonzolaPizza6

PearGorgonzolaPizza3

PearGorgonzolaPizza4

PearGorgonzolaPizza

Happy Eating! 

Pear and Gorgonzola Pizza
Recipe Type: Main, Pizza, Fruit, Vegetables, Cheese, Dinner
Author: Rachel Oberg – De Ma Cuisine
Serves: 2-4
Ingredients
  • 1 large red onion, thinly sliced
  • 1 T honey
  • 1-2 ripe pears, thinly sliced
  • 1/4 to 1/2 C gorgonzola
  • 1-2 t olive oil
  • 1 pizza crust
  • pepper
  • honey, for serving
Instructions
  1. Pre-heat oven to 425F.
  2. Add onion and honey to a dry skillet. Cook over medium-low or low heat for 20-30 minutes, or until onions are caramelized, stirring occasionally.
  3. Roll out crust on a greased baking sheet. Poke all over with a fork, if desired. Bake for 5 minutes.
  4. Top crust with a drizzle of olive oil, pear, onion, pepper, and gorgonzola. Bake for 7-10 minutes, or until crust is done and cheese is melted.
  5. Drizzle with honey and serve.
3.2.1255

Friday

13

September 2013

3

COMMENTS

Saving Dinner – Rotini Pasta with Fresh Tomato Sauce

Written by , Posted in Beef, Cheese, Dinner, Fruit, Gluten Free, Main Dishes, Meat, Pasta, Sauces, Thoughts, Vegetables

PastaFreshTomatoSauce4

Picture this: You’ve had a long day. You’re tired, kinda grumpy, and gosh you’re hungry. Maybe you’re cooking for 1, maybe it’s for 7… and you don’t have dinner planned. Does this ever happen to anyone else? No? Just me? That’s ok. Because I almost always have pasta on hand.

Add to it a bit of tomato sauce, some fresh veggies, and you’ve got dinner. If you have ground beef, that’s a bonus. If not, don’t worry. I think you’ll be just fine.

Maybe you haven’t made it to the store yet this week. You’ve got some cheese and veggies, but no tomato sauce in the pantry. I’ve got you covered. Sauté some veggies (the ones from this recipe if you have them, minus the tomatoes). Once they’re cooked, remove them from the pan. Then make a béchamel sauce (fancy sounding way to say a white sauce): add 2 T olive oil to a pan, heat it until it shimmers, then add 2 T all purpose flour and whisk. Cook for about 30-60 seconds, then slowly add some milk (1 to 2 C should do), whisking and letting it thicken between additions. Let it heat up, but don’t boil (the sauce may break) – just heat until steam rises. Remove from the heat and whisk in 1/2 to 1 C cheese, a little at a time. (You could add the fresh tomatoes now. Just let them warm through.) Add your sautéed veggies, some salt, pepper, and Italian seasonings.

Or, you could do both… I call it Spaghetteroni and Cheese. It’s any sort of pasta with tomato sauce that gets topped with cheese sauce. In our home, we think it’s crazy good.

I don’t think you can really go wrong with any of these options. And I’m not sure if I can choose a favorite. But, if I’m going with easiest, this Rotini Pasta with Fresh Tomato Sauce is super simple and doesn’t take too long to go from starving to eating.

Dinner is saved.

PastaFreshTomatoSauce

PastaFreshTomatoSauce3

Leftovers can be frozen, so don’t be shy about making a double or even triple batch. Store a few single servings in freezer-safe containers – they’ll be great for lunches if you’re tired of PB&J (I mean, who doesn’t love PB&J?! I do, but it can get old…). I don’t know that I’d recommend freezing the pasta, but you could make enough for dinner and for everyone to take some for lunch the next day. The sauce would also be delicious over top of some Roasted Summer Squash (toss thinly sliced squash with olive oil, salt, and pepper, then bake at 350F for 15-20 minutes, or until slightly crispy), mixed in with a roasted spaghetti squash, as Stuffed Tomatoes (heat sauce, hollow out large tomatoes, fill with sauce, serve topped with parmesan cheese), or mixed with rice to stuff a Zoo Boat (Stuffed Summer Squash)… the possibilities are endless!

Aaaand now I’m craving PB&J.

PastaFreshTomatoSauce2

Happy Eating!

Rotini Pasta with Fresh Tomato Sauce

Prep Time: 10 minutes

Cook Time: 45 minutes

Total Time: 55 minutes

Yield: 4

Rotini Pasta with Fresh Tomato Sauce

Ingredients

  • 1/2 lb ground beef
  • 1 T olive oil (opt.)
  • 1 small red onion, chopped
  • 2 small zucchini, chopped
  • 3-4 medium tomatoes, chopped
  • 1 bell pepper, chopped (opt)
  • 1 carrot, grated (opt)
  • 3 cloves garlic, diced
  • Salt, to taste
  • Pepper, to taste
  • 1/4 t dried savory
  • 1/2 t dried Parsley
  • 1/2 t dried basil
  • 1/4 t dried oregano
  • Pinch coriander
  • 1 T balsamic vinegar
  • 2 T lemon juice, divided
  • 2-3 8oz cans tomato sauce
  • 1/2 C pasta water
  • 1/2 pkg rotini rice pasta (or your favorite kind of pasta)
  • Parmesan cheese, grated, for topping

Instructions

  1. Cook beef. Remove from pan and set aside. Wipe out pan if desired.
  2. (If pan has been wiped out, add 1 T olive oil. Let it get hot.) Add veggies and some salt. Cook over medium-low heat until tender, 10 min or so.
  3. Add seasonings, balsamic vinegar, 1 T lemon juice, tomatoes, and tomato sauce. Bring to a boil then reduce heat and simmer for 20-30 min.
  4. Cook pasta according to package directions.
  5. Before draining pasta add 1/2 C pasta water to tomato sauce and stir in. Add 1 T lemon juice. Taste and adjust seasoning if needed.
  6. Top pasta with sauce and some parmesan cheese.
http://www.de-ma-cuisine.com/saving-dinner-rotini-pasta-with-fresh-tomato-sauce/

Friday

6

September 2013

5

COMMENTS

Veggies and Beef – Taco Salad

Written by , Posted in Beef, Cheese, Dinner, Gluten Free, Lunch, Main Dishes, Meat, Salads, Vegetables

TacoSalad9513

Are you ever too lazy to wash lettuce? Right. Me neither… It’s never a problem. That’s false. I don’t know why washing lettuce is a bother. It’s not like it takes all that long. And, I have a salad spinner, so I’m not even washing by hand. Sheesh, I say. Sheesh.

TacoSalad9513-3

We have 3 heads of lettuce in our fridge right now. And while I’m cool with using any that gets a little past its prime in vegetable stock, I’d much rather eat it raw. (Plus, I’m making vegetable stock right now, a lot of vegetable stock, and I may never have room in my freezer for anything else, let alone MORE vegetable stock… good thing it’s almost soup season.)

So let’s talk about lettuce for a minute. There are so many different varieties. I don’t know if I have a favorite. I tend to prefer the not so bitter ones, but other than that, not too picky. I have noticed that certain varieties (the less heavy leaves) don’t stand up as well to being prepared in advance and can get soggy if they’re not dried properly or if they’re dressed too soon. Simple solution: dry the lettuce well and dress it right before eating. Ok, that was easy.

I’ve never made anything like lettuce soup (is that a thing?). The craziest I get with lettuce is putting it on a sandwich or in a salad. Of all the salads, I’d say the Taco Salad is my favorite. I love it with any combination of the following: beans, beef, shredded chicken, chips, corn, shredded carrot, tomatoes, zucchini, broccoli, cauliflower, chives, cheese, Greek yogurt, salsa, guacamole… anything else? Oh ya, and lettuce, duh.

Taco Salad is one of two or three salads that Husband considers a meal. He’s not picky when it comes to food, but has mentioned this particular preference (he also doesn’t prefer overcooked asparagus and some squash, but he usually eats without complaint and sometimes the dog just gets a little more to clean off the plate ;)).

TacoSalad9513-4

TacoSalad9513-5

TacoSalad9513-6

Today, I don’t have any beans cooked (I tend to use dried beans, which require overnight soaking and then hours of cooking – definitely a time investment, but quite simple when I plan ahead… today I did not). So I’m going with what would be a regular old taco, in salad version. Almost regular. I’m definitely going to add zucchini and broccoli. And while I might be fine with that on a taco, I know that someone else in this household might not prefer it (but I think he would still eat it… after asking if there really was broccoli on it). There will be ground beef, bell peppers, tomato, corn chips, chives, Greek yogurt and salsa for dressing, and cheddar cheese.

I’m ready. Let’s eat!

TacoSalad9513-2

Taco Salad

Prep Time: 10 minutes

Cook Time: 5 minutes

Total Time: 15 minutes

Yield: 2

Taco Salad

Ingredients

  • 1/4 to 1/2 lb. ground beef
  • 1/4 t chili powder
  • 1/4 t smoked paprika
  • 1/4 t sweet paprika
  • pinch cumin
  • pinch salt
  • pepper
  • pinch red pepper flakes
  • 3-4 C lettuce, torn
  • 1 small bell pepper, chopped
  • 1/2 C zucchini, finely chopped or grated
  • 1/2 C broccoli, chopped into small pieces
  • 1 tomato, chopped
  • 1/2 T chives, chopped
  • 1/4 C cheddar cheese, grated
  • corn chips, crumbled slightly, if desired
  • Greek yogurt
  • salsa

Instructions

  1. Cook beef with seasonings. Drain and discard fat. Set aside.
  2. Divide lettuce into two bowls and top with remaining veggies, chives, cheese, yogurt, and salsa.
http://www.de-ma-cuisine.com/veggies-and-beef-taco-salad/

Happy Eating!