De Ma Cuisine

Dessert Archive

Tuesday

29

May 2012

2

COMMENTS

Bruléed Pluots and Nectarines – Episode 25

Written by , Posted in A Cooking Show with Rachel O, Abundant Harvest Organics, Dessert, Fruit, Gluten Free, This Week's Feast, Thoughts
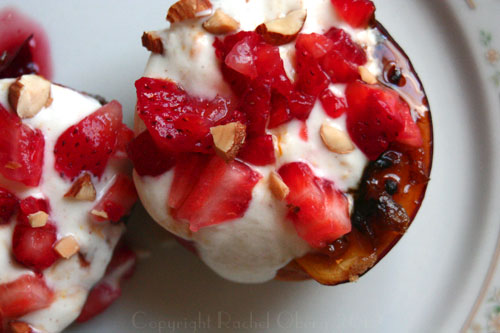
Summer fruits: Peaches, nectarines, pluots, plums, apricots, and apriums… are simply wonderful on their own. But, it’s always fun to have a new way to eat them. A fancy way.

Invite some friends over, they’ll be impressed (just don’t tell them how simple it was).

Picture in your mind: Nectarines and pluots (from this week’s Abundant Harvest Organics box), orange zest, cinnamonbruléed brown sugar (bruléed means burned)… Should I go on? OK, I will… Maple syrup, strawberries, almonds, reduced apple cider vinegar… Imagine these flavors after a nice dinner of Grilled Steak and Veggies, or Roasted Tomato Pasta and Cucumber Salad, or BBQ Chicken, Garlicky Potato Skins, and Roasted Green Beans. These little gems will satisfy your sweet tooth! 
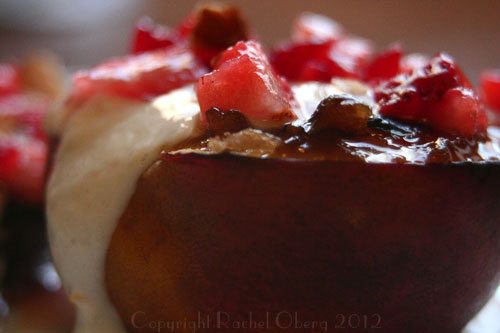
Is it time for dessert yet?!

Happy Eating!

Bruléed Pluots and Nectarines

Bruléed Pluots and Nectarines

Ingredients

  • 1 nectarine, halved
  • 1 pluot, halved
  • 4 T brown sugar (or granulated or raw sugar)
  • 3/4 C plain Greek yogurt
  • 1 T maple syrup
  • 1/4 t cinnamon
  • 1 t orange zest, grated (optional)
  • 1 T reduced apple cider vinegar (reduced from 1/2 C)
  • 2 strawberries, chopped
  • 1 T roasted almonds, chopped

Instructions

  1. Halve fruit and remove pit. Bake at 350F for 30-45 minutes (in toaster oven, conventional oven may require less time), until fruit is tender and warmed through.
  2. In small saucepan bring vinegar to a boil over medium heat. Reduce (about 10 minutes) until thickened and syrupy. Keep an eye on it so it doesn't burn.
  3. Mix yogurt, maple syrup, cinnamon, and zest together. Set aside (you could freeze it and have frozen yogurt).
  4. Remove fruit from oven. If any juices have accumulated in the middle of the fruit (where the pit was), spoon out (otherwise the sugar will just soak in). Top fruit with sugar and carefully melt the sugar using a kitchen torch. If you don't have a torch, place in the broiler and cook until sugar is browned (keep an eye on it so it doesn't burn - it will just take a couple of minutes). Let the sugar cool for a minute or so. It should harden and form a sort of crust.
  5. Top with a dollop of yogurt, a sprinkle of almonds and strawberries, and a drizzle of the reduced vinegar.
http://www.de-ma-cuisine.com/bruleed-summer-fruit-ep25/

This episode is sponsored by Abundant Harvest Organics and Molly Jenson!

(Please excuse the half French, half English word. I know it’s not correct. It’s a play on words. You hadn’t noticed? Oh. Now it might bother you. I hope not.)

Friday

23

March 2012

0

COMMENTS

Natali’s “Sugar Dream” Cookies

Written by , Posted in Baking, Cookies, Dessert

Natali’s “Sugar Dream” Cookies
Recipe Type: Dessert, Cookies
Author: Natali Carrera
Ingredients
  • 2 sticks of butter (1/2 lb.)
  • 3 T cream cheese (full fat please)
  • 1 T milk (I used non-fat)
  • 1.5 t vanilla extract
  • 2 c. + 2 T sugar
  • 1 egg yolk
  • 1 c. vegetable oil
  • 1 t. baking soda
  • 1 t. salt
  • 4 c. flour
Instructions
  1. Cream together the butter, cream cheese, milk, vanilla and sugar until well blended. (About 3 minutes on medium speed)
  2. Add the egg yolk and oil, mixing on low speed.
  3. Once the previous ingredients are incorporated, add the baking soda salt and flour. It is best to mix the baking soda and salt into the flour with a whisk prior to adding to the mixing bowl.
  4. Refrigerate the dough for 2-4 hours.
  5. Roll the dough into balls and press to flatten slightly on a cookie sheet lined with either parchment paper or a silicone baking sheet. You want the cookies to be a pretty good size, abound 2 inches or a little larger. Space cookies at least an inch apart.
  6. Bake for approximately nine minutes. The cookies should be only slightly golden on the edges. Overcooking this recipe significantly alters the texture of the cookie, so be sure to set a timer and check by eight minutes.
  7. Allow the cookies to cool for 2-3 minutes before moving to a cooling rack to avoid breakage.
  8. Enjoy!

Friday

16

March 2012

1

COMMENTS

Oma’s Moon Cookies, by Jill

Written by , Posted in Baking, Cookies, Dessert, Guest Posts, Legacy, Thoughts

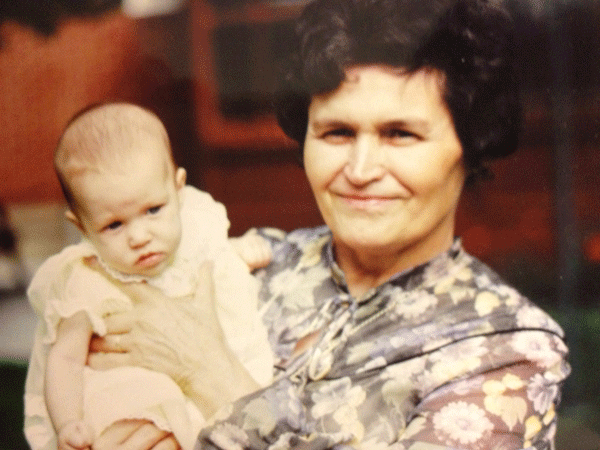
I’m blessed to have two brothers. But, until I got a sister-in-law last year, I had zero sisters. However, my cousin, Jill and I are as close as sisters. She’s one of my best friends. She lives in Colorado with her family, so we make up for the distance with visits, Skype chats, phone calls, emails, and texts. She and I were devastated at the loss of our Oma a couple of months ago. We both inherited a love for cooking from her. Jill, however, must have inherited the baking side of it much more than I. She’s a great baker. I asked if she would share Oma’s recipe for Moon Cookies.

Here’s Jill.

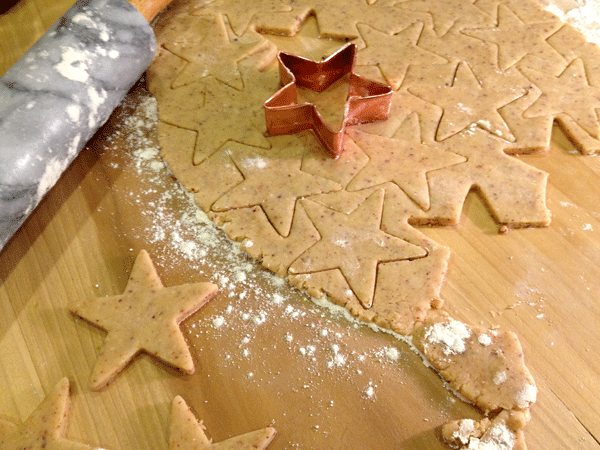
I know what you are thinking, it’s why are these called moon cookies yet they are shaped like stars?  Well honestly it is just because I don’t have a moon shaped cookie cutter.  Every time I make these cookies I am already far too deep in the process to stop, go to the store and get the proper shape, and every year I seem to forget that I don’t have a moon shape so I choose the next best celestial object, a star.  But Oma, whose recipe this is, always made them in moon shapes, hence the name.  Everyone in the Pries family knows what a moon cookie is.

This recipe is special for many reasons, most importantly because it was Oma’s.  And everything from Oma is special.  Secondly, they are insanely delicious.  One of the ways Oma loved her family was through food. She always had lovely treats and amazing meals waiting for us whenever we would visit.  Some of my fondest childhood memories take place in her kitchen, whether it was baking Zwieback and honey cookies, or sitting under the kitchen table first thing in the morning to warm up by the vent, or having Opa help me crush my crunchy buns into my bowl of “Opa” soup.  Of all the many traditions Oma passed down, a love of the kitchen was definitely one of them.  She was always eager to teach us and to pass down these special family recipes.  She had a servant’s heart and loved her family so much through everything she did.  I can only hope that I can make my family feel as loved and as precious as she made us feel.  Oma – I love you and I will keep trying to learn to crochet dish clothes, even though they always end up looking like cat toys!!

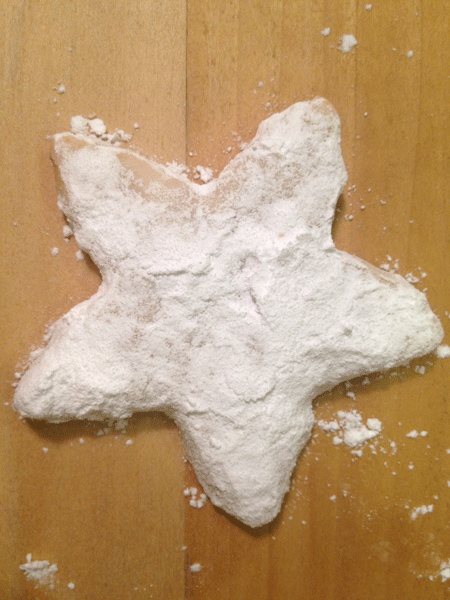
And now a special word of caution…..do not eat these cookies while wearing black.  The evidence will be all over you. And that is especially bad if you happened to indulge yourself when you really shouldn’t have or were flat out told not to, like a certain three year old boy who disappeared behind the sofa for a few minutes and then reappeared with lovely white fluff all down his front.

Oma’s Moon Cookies, by Jill

Oma’s Moon Cookies, by Jill

Ingredients

  • 2 Cups flour
  • 1/2 lb unsalted butter
  • 1/2 cup white sugar
  • 1 1/2 cups ground hazelnuts
  • Icing sugar, about 3 cups

Instructions

  1. Mix together flour, butter and sugar. Add the nuts (use your food processor to grind the nuts if you had to buy whole ones). Mix well. Refrigerate for about 3 hours. Roll out the dough about 1/4 " thick (thicker is better because they can be quite fragile).
  2. Bake at 350 for 8 minutes or until golden.
  3. After the cookies bake you can cool them until warm, them give them a bath in the icing sugar. Not just a light dusting. Carefully place the cookie in the bowl of sugar and gently pack it on so there is a nice coating. Store between layers of wax paper in the freezer.
http://www.de-ma-cuisine.com/omas-moon-cookies-by-jill/

Friday

10

February 2012

0

COMMENTS

Red Velvet Brownies with White Chocolate Buttercream Frosting

Written by , Posted in Baking, Dessert, Holiday

Red Velvet Brownies with White Chocolate Buttercream Frosting
Recipe Type: Dessert, Brownie
Author: Alexandra Joy
No one can deny the charm of red velvet cake, so here’s a fun version as a chewy brownie with white chocolate buttercream frosting. It’s easy and irresistible.
Ingredients
  • For the brownies: 3 tbsp unsweetened cocoa powder
  • 1 oz red food coloring
  • 2 tsp pure vanilla extract, divided
  • 1/2 cup unsalted butter, at room temperature
  • 1 1/2 cups granulated sugar
  • 2 large eggs, at room temperature
  • 1 1/4 cups all-purpose flour
  • 1/4 tsp salt
  • For the white chocolate buttercream frosting: 1/2 cup unsalted butter, at room temperature
  • 2 1/2 cups powdered sugar
  • 1 tsp pure vanilla extract
  • 4 oz good-quality white chocolate (not chips), melted
  • 1 – 2 tbsp heavy cream
Instructions
  1. To make the brownies: Preheat the oven to 350 degrees F. Butter and flour an 8″x8″ baking pan.
  2. In a small bowl, slowly stir together the cocoa powder, food coloring, and 1 tsp vanilla into a thick paste until no lumps of cocoa remain. Set aside.
  3. In the bowl of a stand mixer fitted with the paddle attachment, beat together the butter and sugar on medium speed until light and fluffy, about 2 minutes. Add eggs one at a time, mixing well after each addition, then stir in the remaining 1 tsp of vanilla. With the mixer off, add in the cocoa mixture, then turn the mixer to medium and beat the two mixtures together until they are one uniform color. Slowly add in the flour and salt and mix on medium-low speed, just until combined. Do not overmix.
  4. Remove the bowl from the mixer and stir up the batter with a rubber spatula once or twice just to ensure all of the flour has incorporated from the sides of the bowl and there isn’t anything stuck on the bottom of the bowl. You’ll want one uniformly colored (red) batter.
  5. Pour the batter into the prepared pan and bake for 30-40 minutes or until a toothpick comes out clean when inserted into the center of the brownies. Allow brownies to completely cool in the pan on a baking rack, about 45-60 minutes. Frost brownies in the pan, cut into 12 bars, and serve, or remove the entire batch from the pan to a cutting board, cut into 12 bars, frost, and serve.
  6. To make the frosting: In the bowl of a stand mixer fitted with the paddle attachment, cream butter until soft and fluffy then beat in the vanilla. With the mixer on low speed, slowly add in powdered sugar 1/2 cup at a time; allow the sugar to mix in before adding the next 1/2 cup. Once all of the sugar has been added, beat on medium speed for 30 seconds and scrape down the sides of the bowl. Add in the melted white chocolate and beat on medium speed until incorporated. With the mixer on low, add in heavy cream 1 tbsp at a time and beat at medium speed until the frosting has reached your desired consistency.

Monday

6

February 2012

1

COMMENTS

A Legacy – Oma’s Lemon Buns

Written by , Posted in Baking, Dessert, Legacy

Family is so important. Something I’m realizing more as I get older. I have wonderful friends, many of whom are like family (especially since we live so far away from any relative), but they could never replace our parents, siblings, cousins, aunts, uncles, nieces, nephews, and memories of our grandparents.

Some of my fondest memories have to do with food and family. I’ve been blessed with a family that loves to eat well. From my Oma on my Dad’s side, to my Mom, there was no shortage of good cooking growing up. I didn’t really discover my passion for food until I got married and had someone to cook for. But now that I’ve discovered it, I cherish it, and use it as a way to connect to my family. I’ve learned how to make my Oma’s Zwieback in person, talked with Mom on the phone while trying to make her Cinnamon Buns, and have taken photos of the process as I’ve made Oma’s Paska, so I could show her, and have her tell me what I did wrong (and she amazed me – she told me, from a photograph, that the dough was too sticky). I love that cooking connects me to my family.

This heritage, this legacy is so precious to me. So I want to begin to share some of those recipes on here in my new Legacy Recipes section.

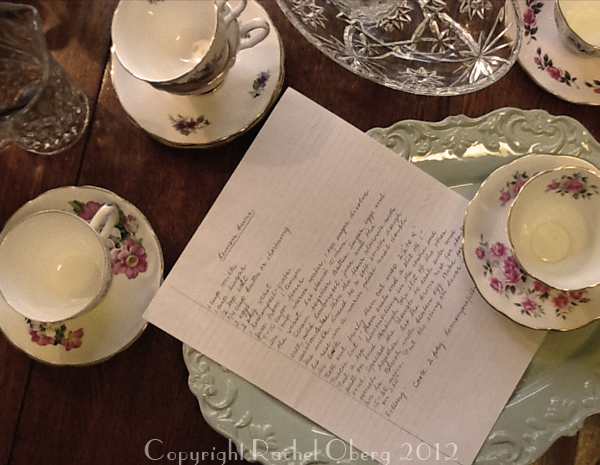
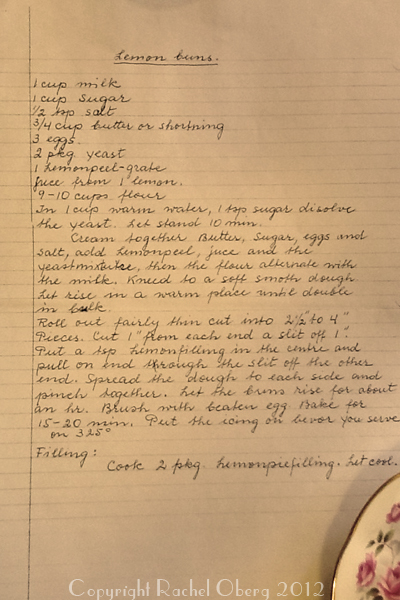
This first one is Oma’s Lemon Buns. Oma was an exceptional cook. I can’t tell you if she was a better baker or a better cook. She was simply wonderful at both. I don’t remember a visit where there weren’t at least cookies and Zwieback (and by cookies, I mean at least 5 different kinds), and maybe even Lemon Buns. Oma said that when she turned 90 last October, she would be done baking. That didn’t happen. At the family gatherings before and after her funeral two weeks ago, there were Lemon Buns, cookies, Platz, Fleisch Perishky… her baking outlived her. I think the Lemon Buns were my favorite dessert (other than the Paska, which we only ate at Easter). So I’ll share that recipe with you today. It’s in Oma’s handwriting, but I’ll also type it out, so you can print it if you’d like. If you have any questions, I can’t help you, I’ve never made them. But I intend to, soon. 🙂


Oma's Lemon Buns

Ingredients

  • 1 C milk
  • 1 C sugar
  • 1/2 t salt
  • 3/4 C butter or shortening
  • 3 eggs
  • 2 pkg yeast
  • zest from 1 lemon
  • juice from 1 lemon
  • 9-10 C flour
  • 1 C warm water
  • 1 t sugar
  • Filling: 2 pkg lemon pie filling.

Instructions

  1. Cook 2 pkg lemon pie filling. Let cool.
  2. Dissolve 1 t sugar and yeast in warm water. Let stand 10 min.
  3. Cream together butter, sugar, eggs and salt, add lemon peel, juice and the yeast mixture, then alternate the flour with the milk.
  4. Knead to a soft smooth dough. Let rise in a warm place until double in bulk.
  5. Roll out fairly thin, cut into 2 1/2"x4" pieces. Cut a 1" slit, 1 " from each end. Put a tsp lemon filling in the center and pull on end through the slit off the other end. Spread the dough to each side and pinch together. Let the buns rise for about an hour.
  6. Brush with milk beaten egg. Bake for 15-20 minutes at 325F. Put the icing on before you serve.
http://www.de-ma-cuisine.com/a-legacy/