De Ma Cuisine

Sides Archive

Monday

20

April 2015

1

COMMENTS

Warm Beet and Walnut Salad

Written by , Posted in Dairy-Free, Dinner, Fruit, Gluten Free, Grains, Herbs, Lunch, Main Dishes, Nuts, Potlucks, Quick and Easy, Quinoa, Rice, Salads, Sides, Vegan, Vegetables, Vegetarian

 WarmBeetWalutSalad-11

It’s spring. But, here in L.A. it seems like the weather’s not sure what it wants to do. One week it feels like summer, the next, we’re back to our winter weather.

But, this salad can be eaten rain or shine.

It’s a simple one. And it goes kinda like this…

You start with a grain: Quinoa, brown rice, bulgur wheat, wild rice, or couscous.

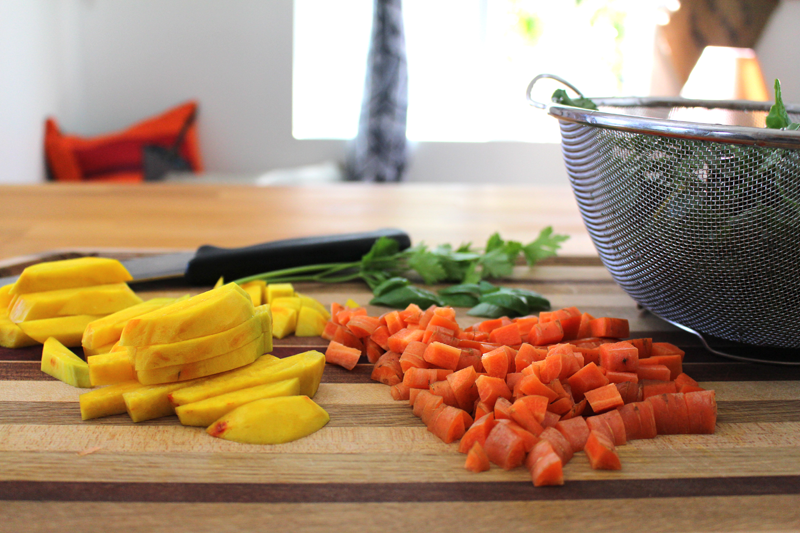
You choose your veggies (any or all): Beets, carrots, greens, tomatoes (ok, technically a fruit), or summer squash.

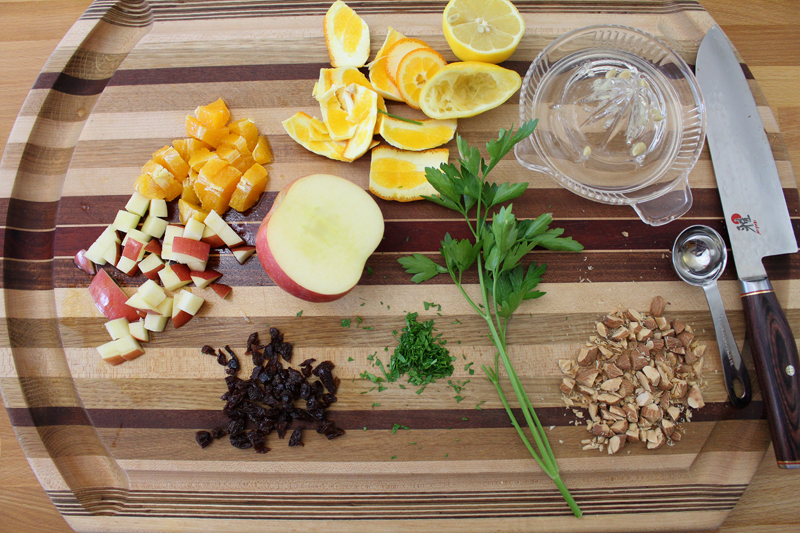
Then you choose your add ins: Walnuts, almonds, raisins, apples, pumpkin seeds, or sunflower seeds.

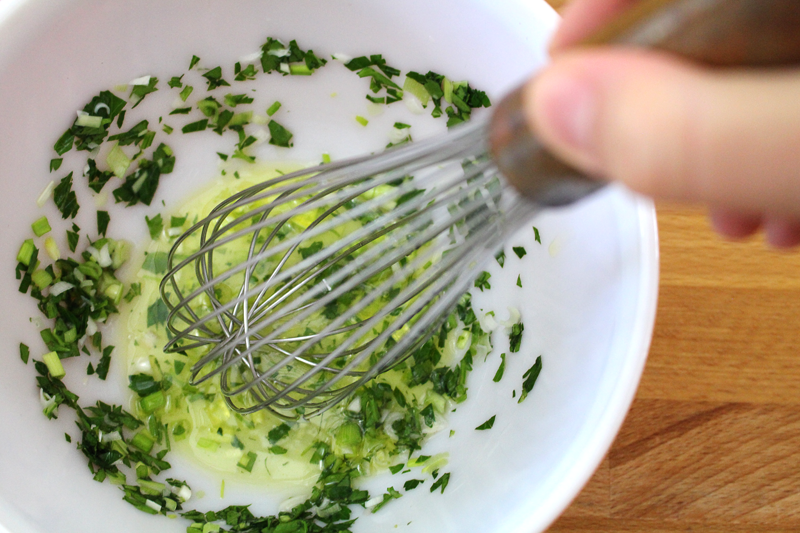
Fresh herbs are added: Parsley, basil, or thyme.

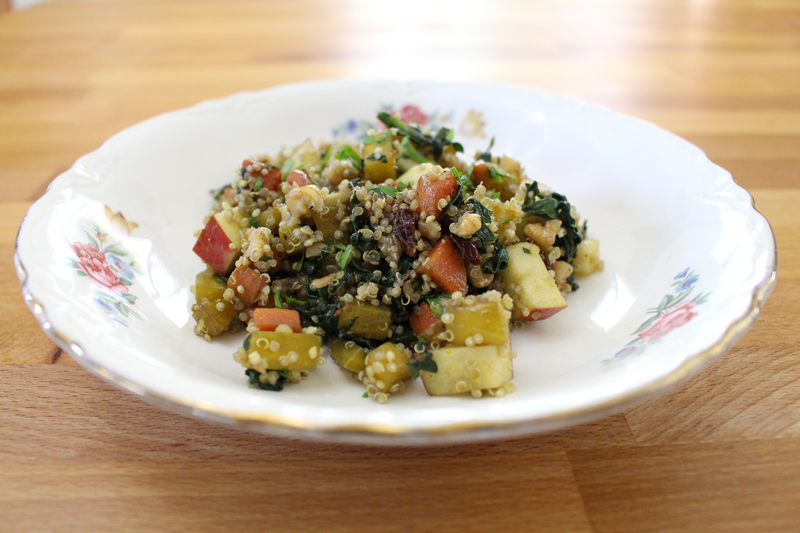
And you’re ready to eat!

WarmBeetWalutSalad-2

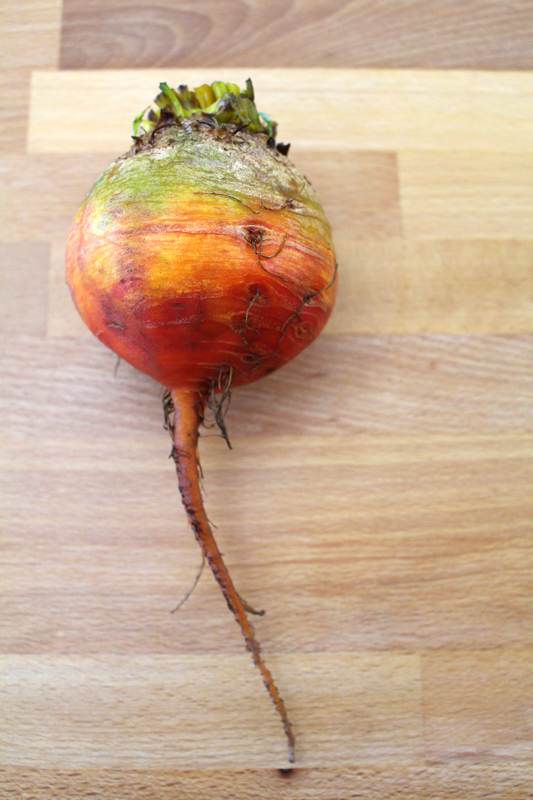
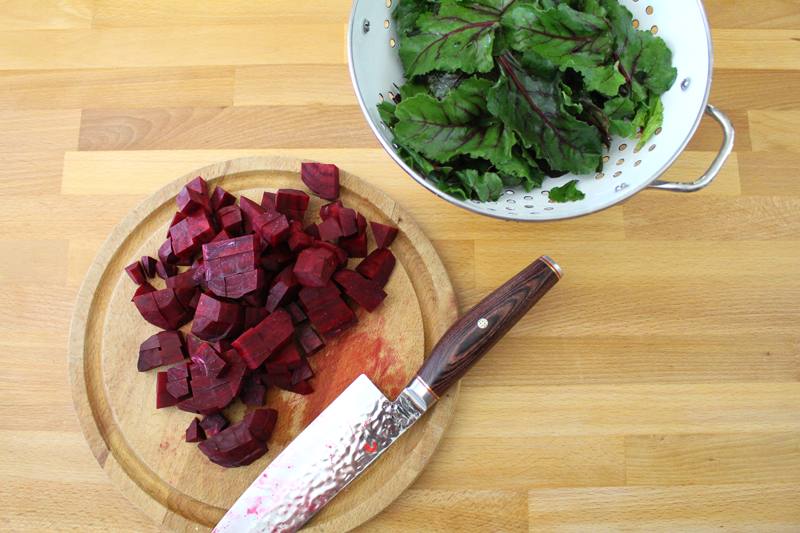
Since we get beets year round here, we can eat this hearty salad whenever we want. I had golden beets on hand, but red beets would work well too.

WarmBeetWalutSalad-3

I love the feeling of sunshine that golden beets bring to my kitchen. They’re such a happy root veggie.

WarmBeetWalutSalad-5

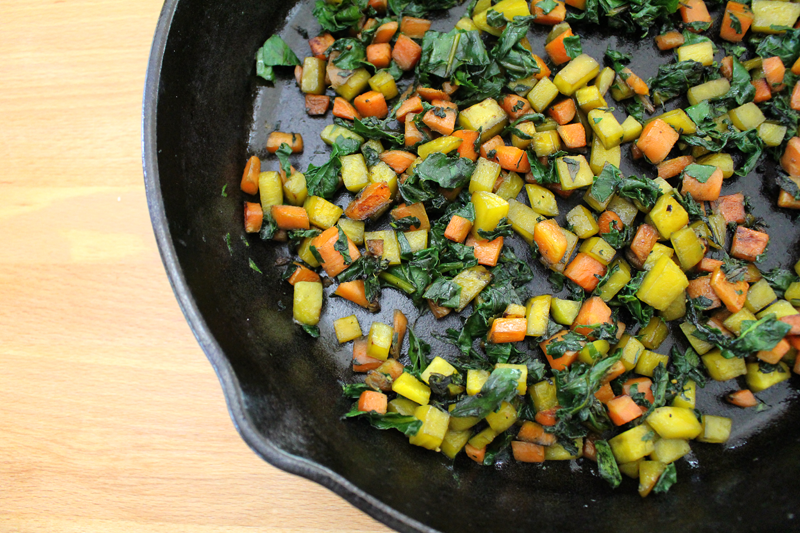
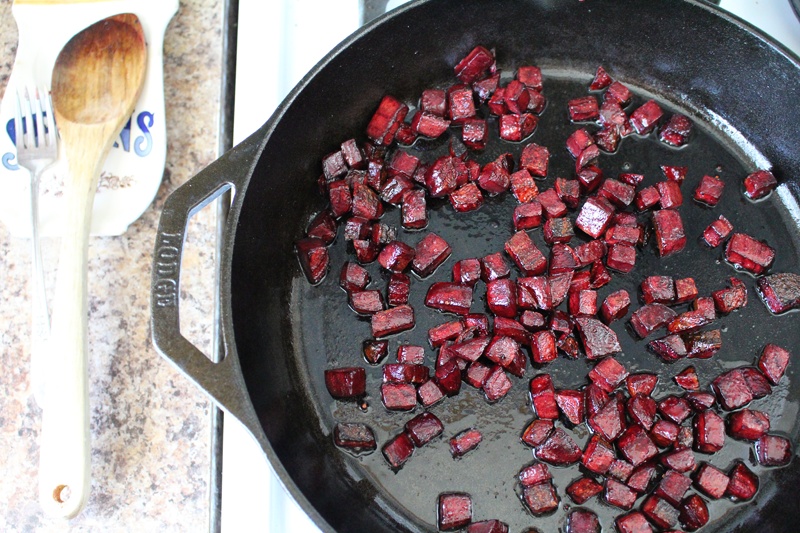
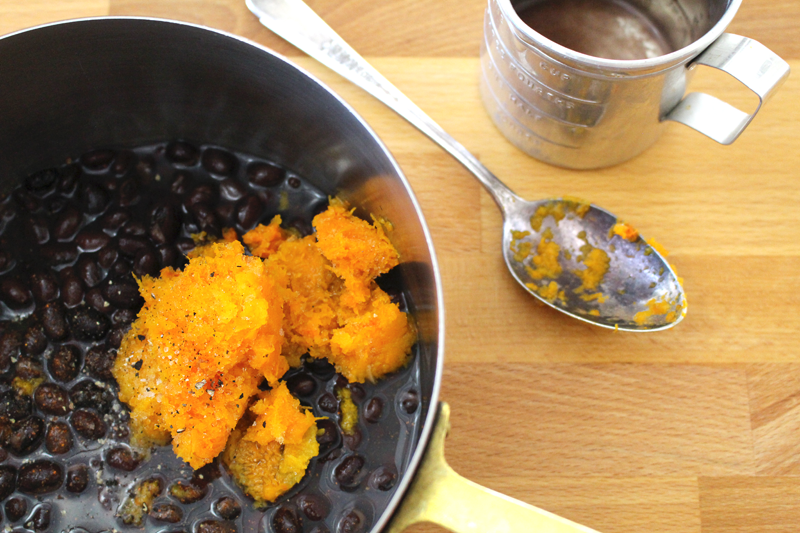
Veggies are cooked in a skillet – easy! Beets are a pretty dense root veggie, so be sure to give them enough time to cook (20 minutes or so seemed to do the trick for me).

WarmBeetWalutSalad-6

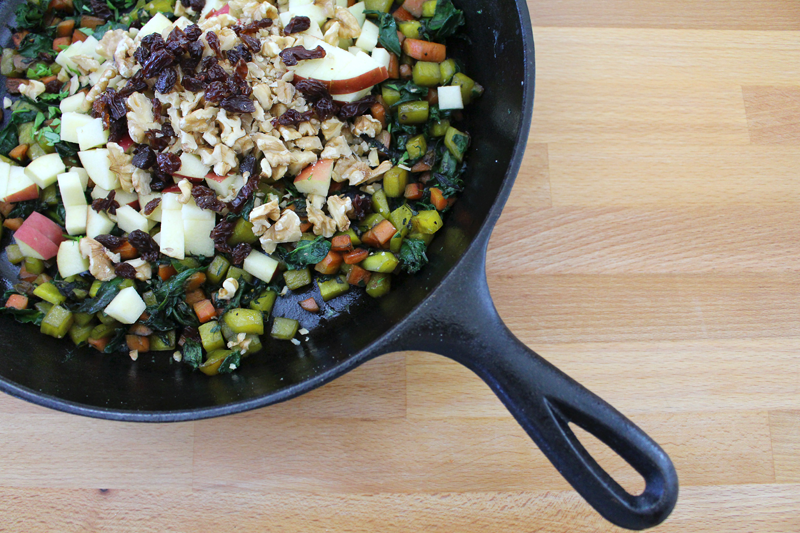
I love raw walnuts, so they were a perfect choice. Some raisins and apples added a bit of sweetness to the already sweet beets and carrots. Sweet, but not too.

WarmBeetWalutSalad-7

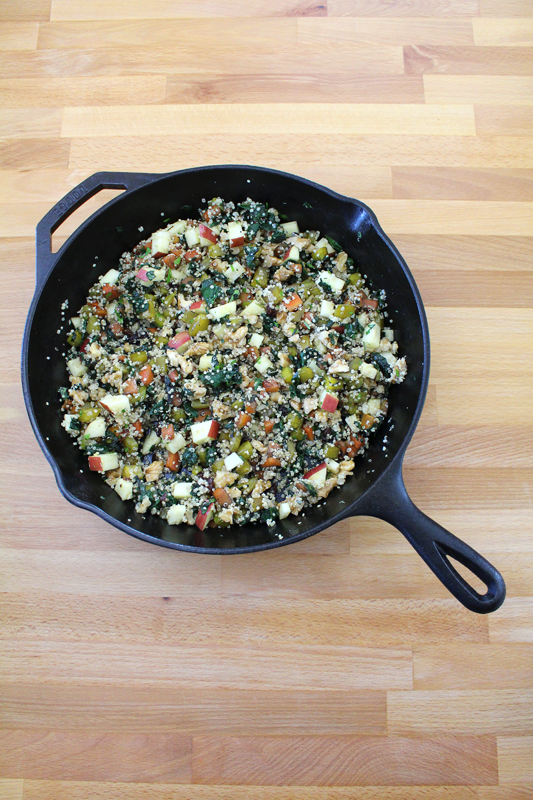
For my grain, I chose quinoa. Packed with protein, it seemed like a great fit for a vegan dish.

WarmBeetWalutSalad-8

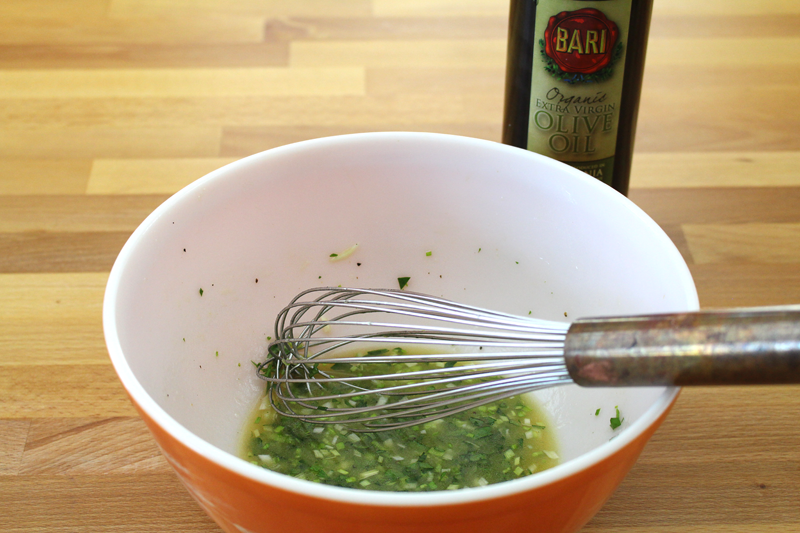
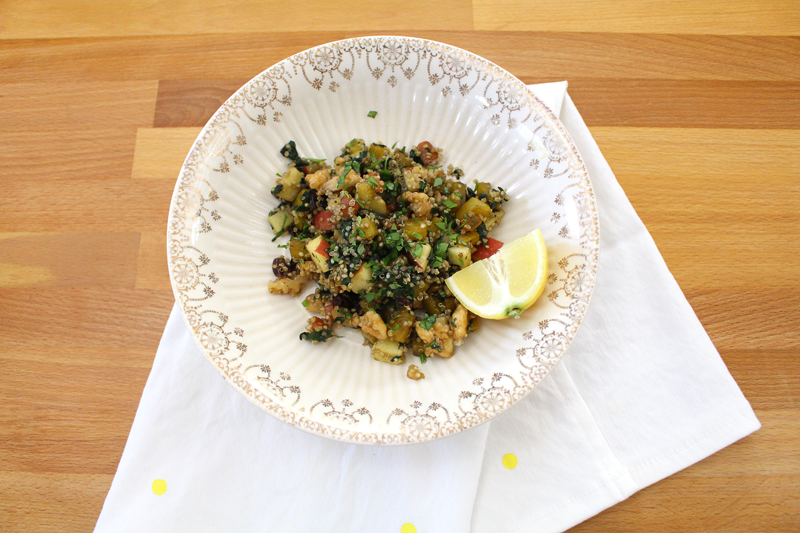
Some quality olive oil and a good squeeze of lemon brighten and round out the dish.

WarmBeetWalutSalad-9

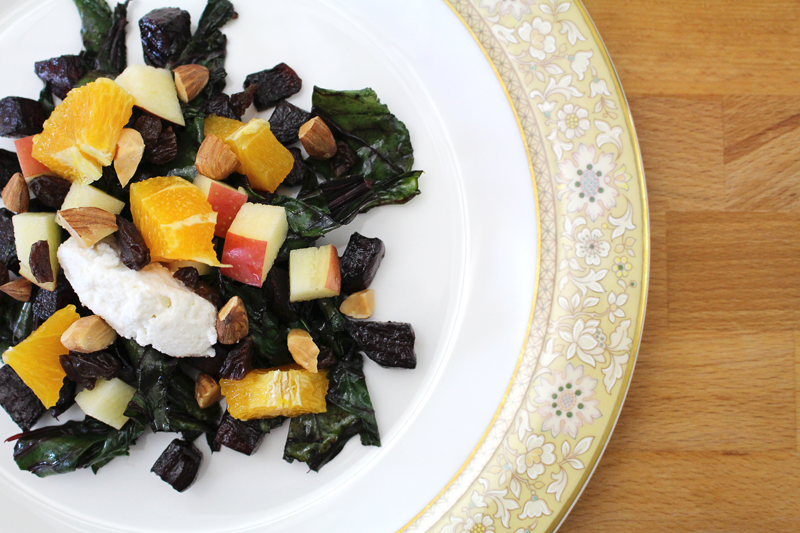
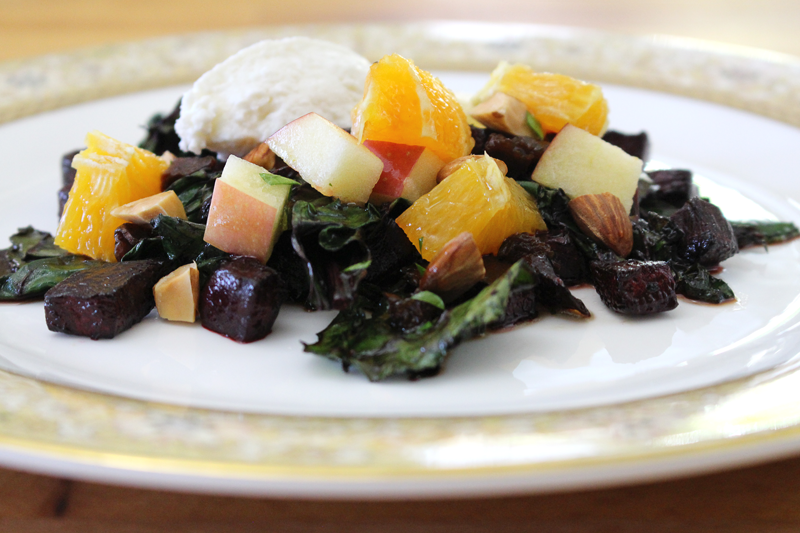
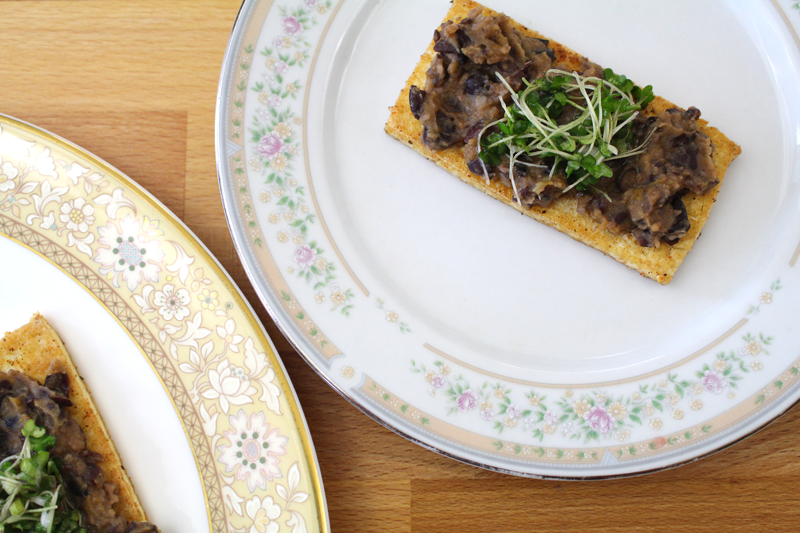
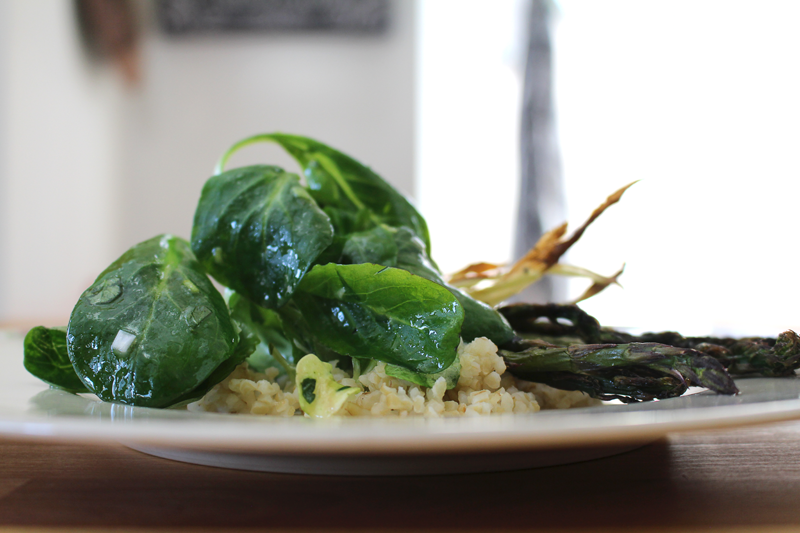
The finished product is a warm salad. The beets warm the add ins slightly, while the add ins cool the cooked veggies. You could also refrigerate and eat it a few hours later.

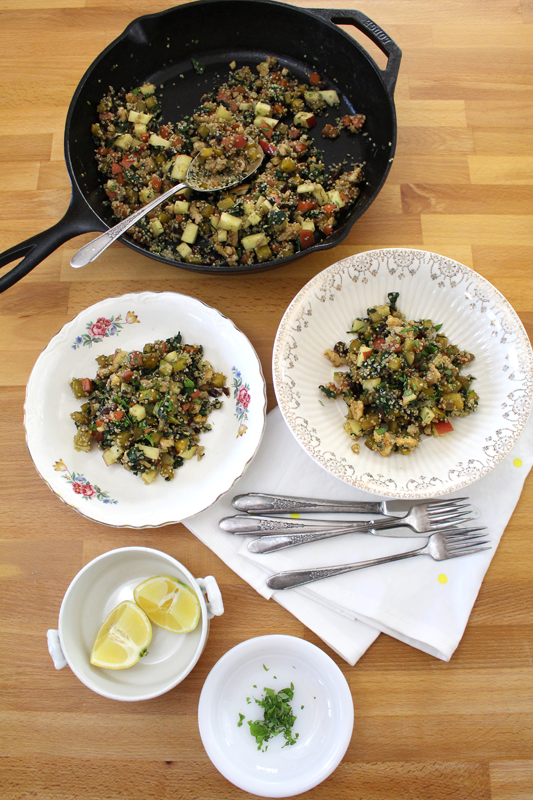
Quick and easy to prepare, packed with nutrients and protein, this one was a hit at our house. Even Tim, who isn’t crazy about beets, thought it was really good.

Happy Eating!

Warm Beet and Walnut Salad

Prep Time: 10 minutes

Cook Time: 35 minutes

Total Time: 45 minutes

Yield: 3-4

Warm Beet and Walnut Salad

Ingredients

  • 1 C water or vegetable stock
  • 1/2 C uncooked quinoa (rinsed) (or couscous, wild rice, bulgur wheat, or brown rice with appropriate amount of water)
  • 1 T olive oil
  • 1 C golden beets (red beets would work great too), peeled and chopped
  • 1 C carrots (or summer squash), chopped
  • to taste salt
  • to taste pepper
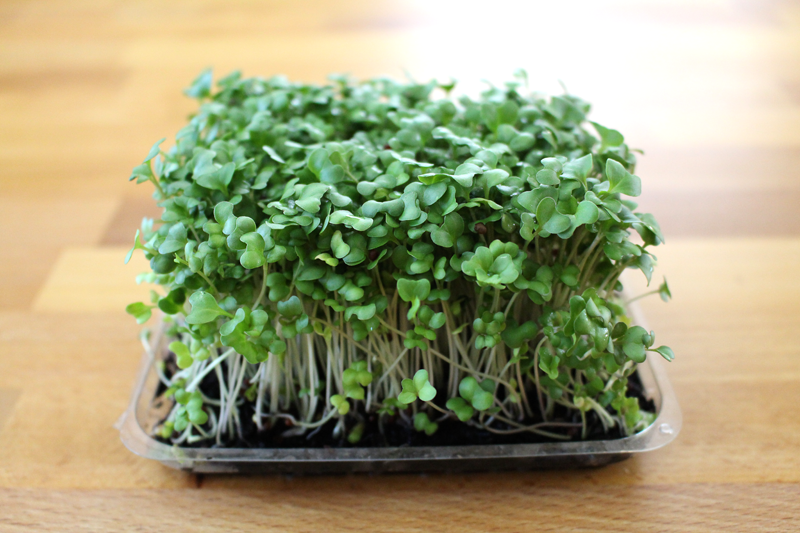
  • 3 C greens (like spinach, chard, or kale), chopped
  • sprinkle cayenne
  • 1 t fresh parsley, chopped (divided)
  • 1 t fresh basil, chopped (divided)
  • 2 T raisins, chopped
  • 1/4 C apple, chopped
  • 1 C walnuts, chopped
  • 1/2 C pumpkin seeds (optional)
  • 1 T olive oil
  • 2 T lemon juice
  • lemon wedges, for serving

Instructions

  1. Bring the water to a boil. Add the quinoa. Bring back to a boil, then reduce to a simmer and cook for about 15 minutes, or until done. (If using other grains, cook according to package's instructions.)
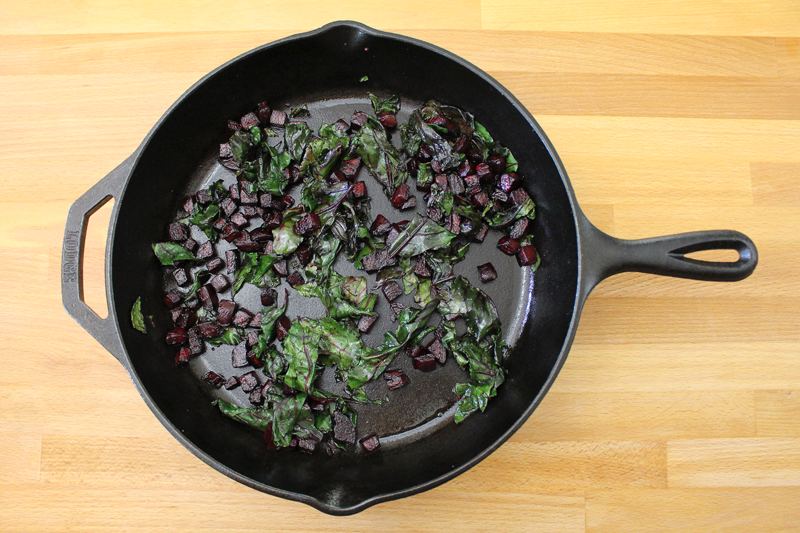
  2. Heat a skillet over medium-low. Add olive oil. When the oil is hot add the beets through pepper. Cook for about 20 minutes (or until veggies are tender), adding greens after about 10-15 minutes (depending on type of greens - more tender greens will require less time to cook).
  3. Remove skillet from the heat. Stir in half of the herbs (reserving the rest for topping), and then raisins through lemon juice, and cooked quinoa. Taste and adjust seasoning if desired.
  4. Serve warm, at room temperature, or cold, with a lemon wedge for squeezing over.
http://www.de-ma-cuisine.com/warm-beet-and-walnut-salad/

Monday

6

April 2015

0

COMMENTS

Warm Beet Salad with Fruit and Nuts

Written by , Posted in Cheese, Dairy-Free, Dinner, Fruit, Gluten Free, Herbs, Lunch, Nuts, Quick and Easy, Salads, Sides, Vegan, Vegetables, Vegetarian

SauteedBeetsRicottaNuts-5

It’s spring. It’s time for flip flops and tank tops, warm breezes and sunshine, and a change in fruits and veggies. But, before we get to all things spring, let’s compromise with winter a bit. Let’s ask her to stay a while longer before we rush in to summer.

SauteedBeetsRicottaNuts-1

I want to keep eating beets, oranges, and apples. But, I’m starting to crave salads and lighter foods. So, this dish is a happy medium.

SauteedBeetsRicottaNuts-2

Beets are sautéed in some olive oil with salt and pepper. Simple. They taste similar to the way they do when they’re roasted, with a little less crunch. But, they still retain that kinda crispy outside, tender inside quality that I love for food to take on.

SauteedBeetsRicottaNuts-4

Then the greens are added. I like the taste of beet greens. If you don’t have any on hand, kale, chard, or spinach would also work well.

SauteedBeetsRicottaNuts-3

After the greens are wilted down, all that’s left to do is drizzle everyone with a bit of dressing and add some toppings. Apples, oranges, nuts, and raisins were perfect. You can vary it depending on what’s in season and what you like. You could use fresh blackberries and grapefruit, or maybe some watermelon. You could use almonds, or switch them up for sunflower or pumpkin seeds.

SauteedBeetsRicottaNuts-6

I topped it with some ricotta and the dressing has honey. If you want to make this a vegan dish, you could try some silken tofu and sweeten things up with maple syrup instead of honey. Easy changes to make.

SauteedBeetsRicottaNuts-7

This one feels simple and light. Bright, but with depth. Perfect for a warm spring day.

Happy Eating!

Warm Beet Salad with Fruit and Nuts

Prep Time: 10 minutes

Cook Time: 13 minutes

Total Time: 23 minutes

Yield: 2

Warm Beet Salad with Fruit and Nuts

Ingredients

  • 1 T olive oil
  • 2 beets, peeled and chopped
  • to taste salt
  • to taste pepper
  • 1 T lemon juice
  • 1 T balsamic vinegar
  • 1/2 t honey or maple syrup
  • to taste salt
  • to taste pepper
  • 1/4 to 1/2 t fresh parsley, chopped
  • 1 T olive oil
  • 1 bunch beet greens, de-stemmed and torn
  • 1/4 C orange, chopped
  • 1/4 C apple, chopped
  • 2 T almonds (or pumpkin seeds or sunflower seeds), chopped
  • 2 T raisins, chopped
  • 1/4 C ricotta (optional) (or silken tofu - sweetened, if desired)

Instructions

  1. Heat skillet, add olive oil, add beets, salt, and pepper. Cook over medium-low heat for about 10 minutes, or until the beets are tender, stirring occasionally. Add the greens and wilt down, about 3 minutes.
  2. Whisk lemon juice through parsley, stream in olive oil and whisk. Taste and adjust seasoning if needed.
  3. Top beets and greens with fruit, nuts/seeds, and raisins. Drizzle with dressing and top with ricotta/tofu.
http://www.de-ma-cuisine.com/warm-beet-salad-fruit-nuts/

Monday

30

March 2015

1

COMMENTS

Artichoke Heart Dip

Written by , Posted in Appetizers, Cheese, Condiments, Dairy-Free, Fruit, Gluten Free, Herbs, Lunch, Sides, Snacks, Vegan, Vegetables, Vegetarian

ArtichokeHeartDip-9

When I was a kid we ate artichokes dipped in mayo. Nothing fancy. We each got a whole artichoke and we dipped then scraped it all off with our teeth. That’s the simple way to do artichokes. And you could do that here too. Just steam the artichokes, dip the leaves, then when you get down to the heart, scrape out the choke and dip it too. But, I liked the idea of dipping the artichoke leaves into a dip that contains the heart. It feels a little bit like eating an egg and some chicken in the same dish. Kinda wrong, but maybe really right.

Definitely right.

ArtichokeHeartDip-1

The artichokes that I had didn’t take long to steam. Maybe 15 or 20 minutes once the water came to a boil. It could take longer depending on their size.

ArtichokeHeartDip-3

While the artichokes steam, the dip comes together quickly. It’s a combination of things like chickpeas, fresh parsley, and olive oil. I used some ricotta and Greek yogurt for creaminess, but if you want this to be a vegan dish, try using silken tofu instead.

ArtichokeHeartDip-2

The cooked artichokes hop into an ice bath. This stops the cooking and cools them down so they don’t burn the fingers.

ArtichokeHeartDip-4

The artichoke leaves are removed and saved for later.

ArtichokeHeartDip-5

ArtichokeHeartDip-6

The fuzzy choke is removed and the hearts and stems are chopped up (be sure to discard any tough leaves that may be left on there). They’re added to the dip and stirred in. You could blend them if you want, but I like the added texture that the chunks of tender artichoke bring.

ArtichokeHeartDip-8

I ate this for lunch today: carrot sticks, artichokes, and a few slices of homemade bread. Other raw veggies like snap peas, green beans, fava beans, bell peppers, celery, fennel, mushrooms, and tomatoes (ok, not a vegetable, but close enough) could be fabulous too.

ArtichokeHeartDip-7

Perfect for lunch, snack, or an appetizer at your next dinner party.

Happy Eating!

Artichoke Heart Dip

Prep Time: 30 minutes

Cook Time: 20 minutes

Total Time: 50 minutes

Yield: 2.5 cups

Artichoke Heart Dip

Ingredients

  • 10-12 medium sized artichokes, stems trimmed, bottom 2-4 rows of leaves removed
  • 5 oz. ricotta cheese or soft (silken) tofu
  • 1/2 C Greek yogurt or soft (silken) tofu
  • 2 T carrot greens (just the tops, no stems) (optional)
  • 1/2 C chickpeas
  • 1/4 C fresh parsley
  • 1 stalk green garlic, roughly chopped
  • 1-2 cloves garlic
  • 1/4 C olive oil
  • 2-3 T lemon juice
  • to taste salt
  • to taste pepper
  • good pinch cayenne
  • ice water
  • juice from 1/2 lemon
  • carrots, sliced, for serving

Instructions

  1. Place artichokes in a steamer basket in a pot with 1 1/2 -2" water. Cover and bring it to a boil then simmer and steam for 15-20 minutes (or until tender and stems pierce easily with a sharp knife).
  2. Blend (with a hand blender or in a food processor, regular blender could work too) ricotta or tofu through cayenne. Blend for about 1 minute, or until it's as smooth as you'd like it. Taste and adjust seasoning if needed. Chill it in the fridge until you need it.
  3. When artichokes are tender, remove them from the pot and plunge into ice water that has the juice of half a lemon mixed in. When they're cool enough to handle, pull off most of the leaves (stop when you get to the small ones) and set them aside for later. Slice off the tougher top part off the leaves (you can save the tender bottom part for dipping) and slice through the top of the heart. Scrape out the choke (the fuzzy center) in the heart (and if there's any on the leaves scrape that, if you're going to eat them). Once each heart is done, return it to the lemon water. Once all hearts are done, chop up and stir in to the ricotta mixture (or you can blend it in if you prefer). Taste and adjust seasoning if needed.
  4. Serve dip with carrots and artichoke leaves for dipping.
http://www.de-ma-cuisine.com/artichoke-heart-dip/

Wednesday

18

March 2015

0

COMMENTS

Crispy Tofu with Black Bean Purée and Microgreens

Written by , Posted in Appetizers, Beans, Dairy-Free, Dinner, Fruit, Gluten Free, Herbs, Legumes, Lunch, Main Dishes, Quick and Easy, Sandwiches, Sides, Snacks, Vegan, Vegetables, Vegetarian

CrispyTofuBlackBeanPureeMicrogreens-8

I think of this dish as a sort of open faced sandwich. We eat bread in our house. We also eat gluten. But, there are plenty of folks who don’t. There are also plenty of vegan-loving people out there. This is a shout out to all of you. But, but but but, not just for you GF+V friends! Because let me tell you, as a carnivore and gluten-eater, I loved this meal. So much so that I re-heated the leftovers and ate it again for dinner the day that I made it.

CrispyTofuBlackBeanPureeMicrogreens-1

My goal was to make a bean purée (ish) topping. I love to eat beans. They’re full of protein and add so much to most any dish. But, I didn’t want it to taste like I’d just opened a can of beans and mashed them up. So I added things like a touch of lemon and vinegar for acidity and brightness, butternut squash for creamy richness, and cayenne for a hint of spice.

CrispyTofuBlackBeanPureeMicrogreens-2

Which all tasted great topped with these super cute microgreens. Hello yum! Hello packed with nutrients!

CrispyTofuBlackBeanPureeMicrogreens-3

I mixed up a lemony dressing to toss the microgreens in. Note: wait until right before serving to toss them. They will wilt if left too long (lesson learned). If you have extra dressing, just save it for tomorrow’s lunch, use it for drizzling on some soup, or make a double batch of these yummy treats and have a party!

CrispyTofuBlackBeanPureeMicrogreens-4

I’m seriously digging crispy pan fried tofu these days. I love to sprinkle it with lots of cayenne and a bit of ginger (plus salt and pepper). In a super hot pan they’ll cook in no time at all.

CrispyTofuBlackBeanPureeMicrogreens-7

The tofu gets spread with beans and topped with the microgreens (mine were kinda swimming in the dressing, so I had to quickly consume as many as possible – not a problem).

CrispyTofuBlackBeanPureeMicrogreens-5

The perfect little gluten-free, vegan treat for lunch, dinner, snack, appetizer… maybe even for breakfast!

Happy Eating!

Crispy Tofu with Black Bean Purée and Microgreens

Prep Time: 10 minutes

Cook Time: 22 minutes

Total Time: 32 minutes

Yield: 2-3

Crispy Tofu with Black Bean Purée and Microgreens

Ingredients

  • 1 C black beans (if canned, drained and rinsed)
  • 1/4 C water
  • 1 T lemon juice
  • 1 t rice vinegar
  • sprinkle cayenne
  • 1/4 C mashed butternut squash or sweet potato
  • to taste salt
  • to taste pepper
  • 1/4 C lemon juice
  • 1 T parsley, minced
  • 1 t mint, minced
  • 1 T green garlic/green onion/chives/garlic, minced
  • to taste salt
  • 2-3 T olive oil
  • 1-2 C microgreens
  • olive oil, for frying
  • 14 oz. tofu (extra firm or firm)
  • to taste salt
  • to taste pepper
  • to taste cayenne
  • to taste ground ginger

Instructions

  1. Heat beans, water, 1 T lemon juice, rice vinegar, cayenne, squash, salt, and pepper in a saucepan over medium-low heat for about 10 minutes, stirring occasionally. Mash, taste and adjust seasoning if needed, and set aside and keep warm.
  2. Whisk lemon juice, parsley, mint, green garlic, and salt. Stream in olive oil while whisking. Taste and adjust seasoning if needed. Set aside.
  3. Heat a large skillet over medium-high. Add olive oil. Add tofu and sprinkle with salt, pepper, cayenne, and ginger. Cook for about 2-3 minutes per side, or until golden brown and crispy. Work in batches so the pan isn't overcrowded, adding more oil as needed. Set on a paper towel lined plate as they are done.
  4. Spread beans on top of tofu, toss microgreens with dressing (right before serving, being careful not to overdress, as they will get soggy) and place them on top of the beans.
http://www.de-ma-cuisine.com/crispy-tofu-with-black-bean-puree-and-microgreens/

Wednesday

11

March 2015

0

COMMENTS

Roasted Fennel and Asparagus with Mâche and Lemon Vinaigrette

Written by , Posted in Dairy-Free, Dinner, Fruit, Gluten Free, Herbs, Lunch, Main Dishes, Quick and Easy, Salads, Sides, Vegetables, Vegetarian

RoastedFennelAsparagusMache-6

For me, it’s not officially spring until we get asparagus in our Abundant Harvest Organics box. Guess this means that spring is here. I’ve planted my garden, baseball is back on with some spring training games, and the weather is pretty nice. It all adds up.

RoastedFennelAsparagusMache-1

The asparagus that we got this week is that super delicate, thin stalked, first batch. They’re just lovely.

RoastedFennelAsparagusMache-2

Especially when they’re tossed with some olive oil, salt, and pepper and roasted in a hot oven.

RoastedFennelAsparagusMache-4

I’m not sure that fennel is a sign of spring, but roasted, just like most any veggie, it’s sure to be yummy.

RoastedFennelAsparagusMache-3

To go with our spring theme, I have a bright and cheerful dressing that’s full of lemon, herbs, and delicious Bari olive oil. Right now I just can’t get enough of lemon and herbs. I want to eat it on everything. It’d be great with fish, to brighten most any roasted veggies (broccoli and cauliflower in the winter months, summer squash when it’s hot out, and even on hearty harvest veggies like winter squash in the fall), and as a great finish to soups.

RoastedFennelAsparagusMache-5

I served the veggies a-top some bulgur wheat. If you want to keep it gluten-free, wild rice would be great too. Be sure to spoon some extra dressing over to let the bulgur wheat or rice get nice and coated. You could also serve it as a hot and cold salad to go alongside some Parmesan Risotto or Gnocchi.

RoastedFennelAsparagusMache-7

We ate this outside, enjoying the sunshine and cool breeze. Tim, who is really into writers and Paris was reminded of absenthe, by the licorice notes in the fennel. He feels like this is a dish that Hemmingway would have eaten. Me, I just thought it tasted good, Hem or not.

Happy Eating!

Roasted Fennel and Asparagus with Mâche and Lemon Vinaigrette

Prep Time: 10 minutes

Cook Time: 20 minutes

Total Time: 30 minutes

Yield: 2

Roasted Fennel and Asparagus with Mâche and Lemon Vinaigrette

Ingredients

  • 1 T olive oil
  • 1 fennel bulb, thinly sliced
  • 20 asparagus, ends snapped off
  • to taste salt
  • to taste pepper
  • 1/4 C lemon juice
  • 1 t dijon mustard
  • 1 t honey
  • 1 T parsley (or basil or tarragon), chopped
  • to taste salt
  • 1 T green garlic (or garlic or shallots), chopped
  • 3 T to 1/4 C olive oil
  • 1 pint (2 C) mâche
  • Pre-heat the oven to 425F.

Instructions

  1. Toss fennel and asparagus with olive oil, salt, and pepper. Place on a baking sheet and roast for 20 minutes, flipping once.
  2. While veggies roast, whisk lemon juice through green garlic. Stream in olive oil as you whisk. Taste and adjust seasoning if needed.
  3. Toss the mâche with the dressing and serve over the roasted veggies. (Great served on top of bulgur wheat, but would also be great over wild rice, or alongside some parmesan risotto or gnocchi.)
http://www.de-ma-cuisine.com/roasted-fennel-and-asparagus-with-mache-and-lemon-vinaigrette/