De Ma Cuisine

Guest Posts Archive

Friday

17

February 2012

1

COMMENTS

Food Safety

Written by , Posted in Guest Posts, Thoughts

I’d like to introduce you to my brother. One of my two brothers, to be exact. He is the littlest of the three of us. He’s not really little anymore, although I still have photos of him with his white blonde bowl cut from kindergarten to remind me of those days. All 3 of us kids inherited the cooking gene, I think. Josh and I have cooked quite a bit together, when we’re visiting, or when he’s visiting us. We cook well together. It may get a bit silly, but it usually turns out pretty tasty. I asked Josh to talk a bit about food safety, because it’s something that I think is important. He knows a lot about it, as he’s going to school to be a Health Inspector.

I’ll let him tell you more…

Hey there, my name is Josh. I am Rachel’s little brother.

For the longest time I have been interested in cooking. I believe that Rach already talked about how our Mom inspired her love of cooking. For me it is the same thing. Though deep down, I think it may also have had something to do with the fact that if we cooked dinner when growing up, we did not have to help with the dreaded “after meal activities”.

My interest in cooking led me to Culinary School, where I found my true passion – food hygiene and the control of communicable diseases. This is what I am studying right now in school (Public Health). I learn how to recognize, assess, control, prevent and evaluate hazards in the Public sector. A major part of that is dealing with food hygiene, which is what I will talk a little bit about today.

Food hygiene is a broad topic, so I will touch on a few things today that I think are important for maintaining hygiene in a home kitchen. I will talk about proper cooking temperatures, food thermometers, and a few common misconceptions.

Different foods require different temperatures to achieve proper “done-ness”. Doneness in meats especially is essential in keeping food prepared at home safe. Public Health Inspectors (Canada) and Environmental Health Officers (USA) ensure proper hygiene in restaurants, but they really have no say in how things are done in the home. The majority of food-borne illnesses in North America are attributed to meals cooked at home.

When determining the “done-ness” of a food, the following temperatures are a good guideline to follow. These are the regulated temperatures for Ontario, Canada, so the regulated temperatures in your area may be different.

Whole Poultry (a whole chicken, turkey, duck, squab, etc) – 82C (180F)
Poultry (pieces, ground poultry, anything other than whole) – 74C (165F)
Beef, Pork (ground, whole, parts) – 71C (160F)
Fish – 70C (158F)
Mixtures (adding meat or egg to foods, for example, a casserole) – 74C (165F)
Egg – this one is tricky. My suggestion is at least 65C (150F)

Note: Some products that require raw eggs can be safe by using a process called pasteurization, which, when properly done, won’t make the egg curdle, but will make it safe. If you are cooking something that requires raw egg (egg nog, dressings) I would suggest using a commercially available pre-pasteurized egg product.

I hope you all enjoyed reading this, and I really hope that you will consider the safety of the food that you prepare more often. If nothing else, these could be fun facts to impress people at a cocktail party or something.

Take care, and thanks for reading,

Joshua (Onks)

Stay tuned for the next Friday’s Guest Post. Josh will follow up and talk about Food Thermometers.

Friday

10

February 2012

0

COMMENTS

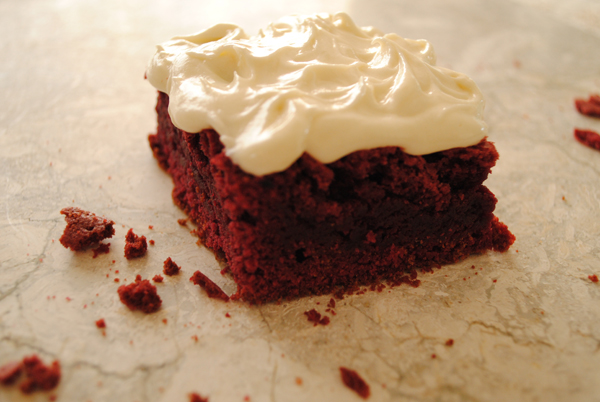
Alexandra Joy’s Red Velvet Brownies

Written by , Posted in Guest Posts, Thoughts

I’ve known my dear friend AJ for almost 9 years. We met in Texas, and have stayed friends over the many miles, as she’s now in Calgary, AB, and I’m in California. She is a talented, creative, beautiful, wonderful gal. I’m so thankful for her. She has a sweet treat to share with you – perfect for Valentine’s Day, or just a regular weeknight, if you feel so inclined.

Here’s A.J.!

Happy Valentine’s Day sweet De Ma Cuisine readers! My name is Alexandra Joy, and I love love. As the owner of Pink & Honey event styling and writer of Alexandra’s Joys, I am passionate about pretty details, DIY celebrations and warm hospitality. And a thoughtful, homemade treat is always the perfect way to show your love for others.

(Adapted from How Sweet It Is)

Red Velvet Brownies with White Chocolate Buttercream Frosting

Last modified on 2012-06-05 01:47:51 GMT. 0 comments. Top.

Red Velvet Brownies with White Chocolate Buttercream Frosting
Recipe Type: Dessert, Brownie
Author: Alexandra Joy
No one can deny the charm of red velvet cake, so here’s a fun version as a chewy brownie with white chocolate buttercream frosting. It’s easy and irresistible.
Ingredients
  • For the brownies: 3 tbsp unsweetened cocoa powder
  • 1 oz red food coloring
  • 2 tsp pure vanilla extract, divided
  • 1/2 cup unsalted butter, at room temperature
  • 1 1/2 cups granulated sugar
  • 2 large eggs, at room temperature
  • 1 1/4 cups all-purpose flour
  • 1/4 tsp salt
  • For the white chocolate buttercream frosting: 1/2 cup unsalted butter, at room temperature
  • 2 1/2 cups powdered sugar
  • 1 tsp pure vanilla extract
  • 4 oz good-quality white chocolate (not chips), melted
  • 1 – 2 tbsp heavy cream
Instructions
  1. To make the brownies: Preheat the oven to 350 degrees F. Butter and flour an 8″x8″ baking pan.
  2. In a small bowl, slowly stir together the cocoa powder, food coloring, and 1 tsp vanilla into a thick paste until no lumps of cocoa remain. Set aside.
  3. In the bowl of a stand mixer fitted with the paddle attachment, beat together the butter and sugar on medium speed until light and fluffy, about 2 minutes. Add eggs one at a time, mixing well after each addition, then stir in the remaining 1 tsp of vanilla. With the mixer off, add in the cocoa mixture, then turn the mixer to medium and beat the two mixtures together until they are one uniform color. Slowly add in the flour and salt and mix on medium-low speed, just until combined. Do not overmix.
  4. Remove the bowl from the mixer and stir up the batter with a rubber spatula once or twice just to ensure all of the flour has incorporated from the sides of the bowl and there isn’t anything stuck on the bottom of the bowl. You’ll want one uniformly colored (red) batter.
  5. Pour the batter into the prepared pan and bake for 30-40 minutes or until a toothpick comes out clean when inserted into the center of the brownies. Allow brownies to completely cool in the pan on a baking rack, about 45-60 minutes. Frost brownies in the pan, cut into 12 bars, and serve, or remove the entire batch from the pan to a cutting board, cut into 12 bars, frost, and serve.
  6. To make the frosting: In the bowl of a stand mixer fitted with the paddle attachment, cream butter until soft and fluffy then beat in the vanilla. With the mixer on low speed, slowly add in powdered sugar 1/2 cup at a time; allow the sugar to mix in before adding the next 1/2 cup. Once all of the sugar has been added, beat on medium speed for 30 seconds and scrape down the sides of the bowl. Add in the melted white chocolate and beat on medium speed until incorporated. With the mixer on low, add in heavy cream 1 tbsp at a time and beat at medium speed until the frosting has reached your desired consistency.


Enjoy the gooey goodness with someone you love!

 xoxo 

Alexandra Joy

Friday

3

February 2012

1

COMMENTS

Amazing Pizza by Jo – Guest Post

Written by , Posted in Guest Posts, Thoughts

I’ve known Joanna for just a few months. But, in that short time, she’s become a really dear friend. We have lots of things in common, one of them being food. We both love to eat, and enjoy cooking. Joanna is also a talented graphic designer, and she’s responsible for my awesome logo and business cards! I’m so thankful for her, and am happy to have her as a guest today!

Here’s Jo!!

Hello there De Ma Cuisine readers! My name is Joanna Waterfall. I’m a graphic designer, and wanna be chef. When Rachel asked me to do a guest post for her amazing cooking blog, I must admit, I was a little intimidated. I’ve always been the kind of girl who was fine with eating cereal for dinner… until I got married 6 months ago. Then I had to learn how to cook. It’s been a rocky road, but hanging out with Rachel, reading her blog and seeing how easy cooking can be has really helped me along.

So I’m going to share with you a recipe that I’ve grown to love – and so has my husband, which is always good! It’s easy, versatile, and good for any night of the week! We’re gonna cook up some Tomato and Mozzarella Pizza! Super yums.

Having a great pizza dough recipe is so great, because once you have that, you can modify it and put whatever you like on top! I’ve made bar-b-que chicken pizza, veggie pizza, even an egg breakfast pizza! All have been hits, but this one is my favorite, probably because it calls for basil and I’m really proud to say I’ve successfully kept a basil plant alive for a few months now (I’ve been known to kill plants) and I LOVE the taste of the fresh basil. There’s something refreshing about using an ingredient you grew yourself. Its very rewarding – I highly recommend it. 🙂 So here is my recipe, concocted from numerous other recipes and put into one!

So yummy!!

Add in your own toppings, and get creative with what kind of pizza you make! This is my favorite, experiment until you find yours!

(Recipe adapted by Joanna from Joy the Baker.)

Jo’s Tomato and Mozzarella Pizza

Last modified on 2012-06-02 01:48:59 GMT. 0 comments. Top.

Tomato and Mozzarella Pizza
Recipe Type: Pizza
Author: Joanna Waterfall adapted from Joy the Baker
I’ve made bar-b-que chicken pizza, veggie pizza, even an egg breakfast pizza! All have been hits, but this one is my favorite, probably because it calls for basil!
Ingredients
  • 1 1/2 cups all-purpose flour
  • 1 teaspoon salt
  • 1 teaspoon active dry yeast
  • 1/2 cup warm water
  • 1 tablespoon olive oil
  • Toppings:
  • 8 oz Fresh Mozzerella (change amount to how much cheese you desire!)
  • 2 med size tomatoes
  • 2 tablespoons fresh basil
  • 1 large garlic clove (I’m a huge fan of garlic, so feel free to add more!)
  • Salt and freshly ground pepper to taste
  • Any other spices/toppings you desire!
Instructions
  1. In a large bowl, whisk together flour, salt, and yeast. Create a well in the center of the flour mixture and pour in the warm water and olive oil. Using a fork, bring together the dough so that all of the dry mixture is moistened by the water and olive oil.
  2. Dump shaggy dough onto a lightly floured surface. Knead for about two minutes until the dough comes together into a ball. The dough may be slightly sticky, that’s fine!
  3. Add a teaspoon of olive oil to the large bowl that the dough was mixed in. Use your fingers to spread the oil around the bowl. Place the dough into the bowl, sprinkle with a bit of flour and cover the bowl with plastic wrap. Place in a warm place and let the dough rise for 1 hour, or until doubled in size.
  4. When dough has doubled, remove from bowl and place on a lightly floured work surface. Use a rolling pin to roll the dough out to a 1/4-inch thickness. The dough can be rolled perfectly round, but a rectangle, or totally odd shape is fine as well.
  5. Preheat oven to 450 degrees F.
  6. Flip a cookie sheet upside down and sprinkle with flour. Place pizza dough on baking sheet.
  7. Sprinkle with olive oil, garlic, salt and pepper. Then place on the tomatoes and cheese evenly across your dough. Throw on half your basil now, and keep half for after it comes out of the oven.
  8. Place in the oven and bake for 10 minutes, until crust is golden brown and cheese is perfectly melty.
  9. Remove from oven. Throw on the rest of your basil, allow to cool for a few minutes. Then slice and serve!

Friday

16

December 2011

5

COMMENTS

The Best Chocolate Fudge Sauce!

Written by , Posted in Guest Posts, Thoughts

My Aunt Sue makes the best chocolate fudge sauce! It’s soooo good. We had some for the first time when we visited a couple of months ago. I had to have the recipe. And, now I’ll share it with you. It would be a great homemade Christmas gift, or a nice treat for you and yours with some peppermint ice cream, or for guests at a Christmas dinner or party… It’s just plain good, so you should make it. I know I’m going to.

Here’s Aunt Sue!

Hi everyone – I am Rachel O’s Aunt Sue – and I love to cook and I love to try new recipes – even whole meals. The only thing is I try them out on my friends and family and when guests come for dinner?? I know – they say thats not a good thing to cook something new you’ve never done before when company comes but I figure by reading the ingredients you get a pretty good idea if you will like a recipe or not and its an adventure for everyone. How fun is that!!!

Anyway here is a recipe I hope you will enjoy this Christmas Season – guaranteed to please both young and old.

Aunt Sue’s Chocolate Fudge Sauce

Last modified on 2012-05-26 01:08:04 GMT. 0 comments. Top.

Aunt Sue’s Chocolate Fudge Sauce
Recipe Type: Sauce, Dessert
Author: Aunt Susan Pries
Prep time: 5 mins
Cook time: 20 mins
Total time: 25 mins
This is a recipe you will be reaching for your spatula to scrape every last sticky gooey bit from the jar – or someone else in your family will if they are so lucky!!
Ingredients
  • 1 cup butter
  • 1/2 cup cocoa powder
  • 3 cups sugar
  • 1 can evaporated milk
  • 1 teaspoon vanilla
Instructions
  1. Combine butter, cocoa, sugar, evaporated milk in a sauce pan, over medium heat. Stir often. Bring to a boil and boil stirring constantly for 7 minutes. Put your timer on.
  2. Remove from heat. This next step if VERY IMPORTANT you may think you can omit but it truly will change the sauce. Pour the hot sauce into a blender (remove middle plug, cover with a towel and hold down your lid) and blend for 2 to 4 minutes.
  3. I pour it in a 1 quart canning jar and store it in the fridge.
  4. Enjoy!

If you want to give it as a homemade Christmas gilt – using pinking sheers cut a large circle and secure it over the lid of the canning jar with a decorative ribbon and ‘wa -la’ you are done

Merry Christmas everyone.

Monday

12

December 2011

1

COMMENTS

Travis’ La Habra Sourdough Bread

Written by , Posted in Baking, Bread, Guest Posts

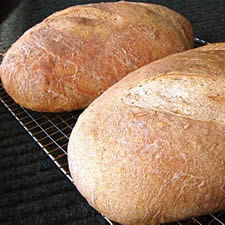
My brother-in-law, Travis, is a great baker (in addition to being a talented musician!). He makes awesome sourdough bread. Over Thanksgiving, I asked him to teach me, and together we made a starter (which we named, “Olga’s Starter”) and of course he made some of his bread from the La Habra Starter. I asked if he would be willing to share his knowledge with you. I hope you enjoy! (And if you’d like to make your own starter, he will be doing a follow-up post in the new year!) I took Olga’s starter home with me to care for. It’s almost ready to bake with… I can’t wait to try it!

Here’s Travis…

Hello, my name is Travis and Rachel married my brother, so now we’re family. She asked me if I would be into sharing what I’ve learned about bread here and I couldn’t have been more excited to share. I have an interest in bread. I love it. I love it with jam. I love it plain, with a spread of butter or peanut butter, I love it with sandwich things between it. And the smell of baking bread is definitely a favorite of mine. There is nothing better than fresh bread. Except maybe bacon.

So, about ten years ago I started looking into baking my own bread, and being kind of a science nerd I started learning about the way bread starters are used and made. I like sourdough bread and found that essentially a bread starter is a sourdough starter, so I dug a little deeper and found out that with a little patience and time it’s simple to make your own. And with a stable healthy starter you can make so many types of bread it’s crazy. You may also buy many good sourdough starters and each has a different story, which in itself is interesting especially if you like history. Check out the story of San Francisco sourdough.

Like many essential things, when you dig you find a lot of really sweet and interesting things.

Anyway so, here is an easy recipe for a simple sourdough bread, named after a starter I began in La Habra, CA. All good starters should have a good name.

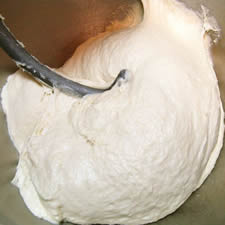
MixingDough

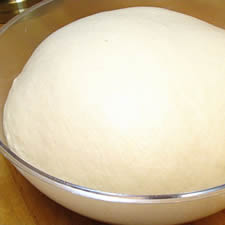
RisingDough

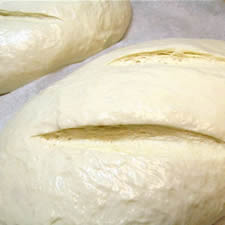
RisingBread

BakedBread

La Habra Sourdough Bread
Author: Travis Oberg
Prep time:
Cook time:
Total time:
Serves: Two Loaves
Ingredients
  • 1 cup “fed” sourdough starter
  • 1 1/2 cups lukewarm water
  • 5 cups flour
  • 1 tablespoon sugar
  • 2 1/4 teaspoons salt
Instructions
  1. Combine the starter, water, and 3 cups of the flour. Beat vigorously.
  2. Cover, and let rest at room temperature for 4 hours. Refrigerate overnight, for about 12 hours.
  3. Add the remaining ingredients, kneading to form a smooth dough.
  4. Allow the dough to rise in a covered bowl until it’s relaxed, smoothed out, and risen. Depending on the vigor of your starter, it may become REALLY puffy, as pictured; or it may just rise a bit. This can take anywhere from 2 to 5 hours. Understand this: sourdough bread (especially sourdough without added commercial yeast) is as much art as science; everyone’s timetable will be different. So please allow yourself to go with the flow, and not treat this as an exact, to-the-minute process.
  5. Gently divide the dough in half.
  6. Gently shape the dough into two oval loaves, and place them on a lightly greased or parchment-lined baking sheet. Cover and let rise until very puffy, about 2 to 4 hours. Don’t worry if the loaves spread more than they rise; they’ll pick up once they hit the oven’s heat. Towards the end of the rising time, preheat the oven to 425°F.
  7. Spray the loaves with lukewarm water.
  8. Make two fairly deep horizontal slashes in each; a serrated bread knife, wielded firmly, works well here.
  9. Bake the bread for 25 to 30 minutes, until it’s a very deep golden brown. Remove it from the oven, and cool on a rack.
Notes
Hands-on time: 15 mins. to 20 mins.[br] Total time OVERNIGHT, about 23 hrs

In keeping a usable starter you use a lot of flour, and are discarding about a cup of starter every three days or so. I started to think about ways to use the removed cup of starter and made up this sweet pancake or waffle recipe.