De Ma Cuisine

Tuesday

7

January 2014

1

COMMENTS

Menu Planning Series – Part One – The Reason and the Research

Written by , Posted in Menu Planning, Thoughts

AHOBox-1

It’s the new year. Happy Happy New Year to you! I hope that it is starting out exceptionally well.

I think it’s generally true that on January 1st many people like to have a few resolutions for the coming year. Often they are centered around losing weight, exercising regularly, or eating better…

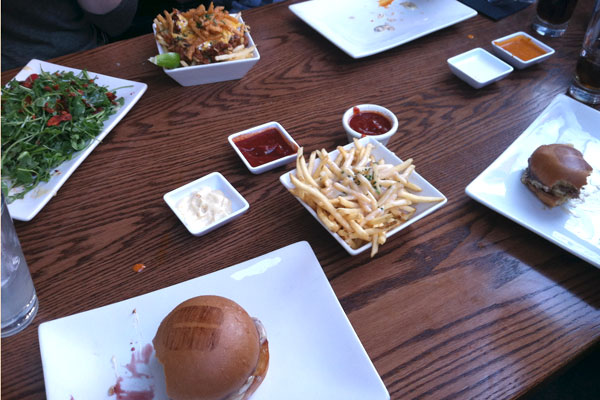
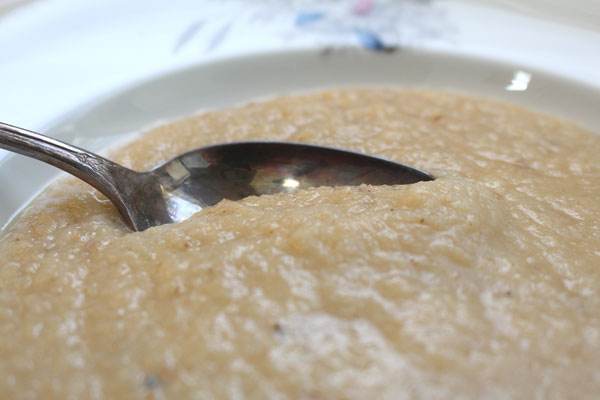
Eating better can mean a myriad of things.

Maybe some of these sound familiar:

I ate peanut butter and jelly sandwiches for lunch every day last year and want to branch out.

I ate too much take-out food and forgot to eat homemade meals.

I was too busy to cook dinners so I bought pre-made meals.

I never had anything planned for meals and was always too tired to think about it at the end of the day. So it was pasta most nights, with some sort of sauce from a jar. Because I didn’t have meals planned, so much food‚ went to waste. 

I didn’t have a grocery list planned, so my trips to the store were expensive and resulted in lots of wasted food.

I had a menu planned most of the time, but I didn’t always prepare in advance, so often didn’t stick to it. (This would be mine.)

None of these are the end of the world when they happen occasionally. But, when they become the norm, that’s when we can feel trapped by our eating habits. And as a result, our wallets, waistlines, and trash piles take the hit.

Some Things to Consider

The annual cost to eat out for lunch every day (and the ingredients you’re paying to put into your body). The foods you may be missing out on by limiting yourself to the same meals day after day. The money, your hard earned money, that gets wasted when you go to the grocery store and buy a bunch of things that you aren’t going to use (not to mention the food that gets thrown out as a result). The fun you may be missing out on by not cooking (who knows, you may love it!)… Food for thought.

I’m going somewhere with this. It’s not meant to be a guilt-trip. Instead, it’s supposed to be an encouragement. I want to help you learn to menu plan and have a place to start your meals, even when you’re too tired to think after a long day.

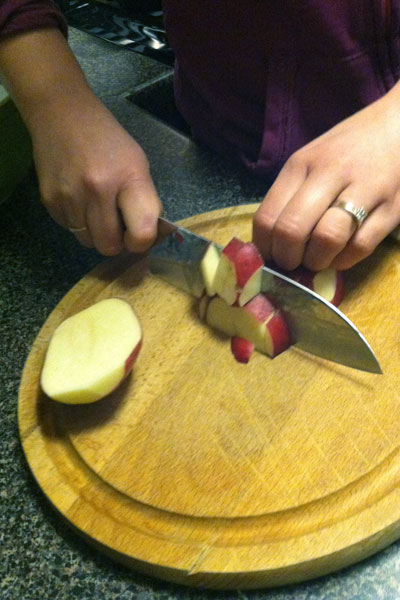
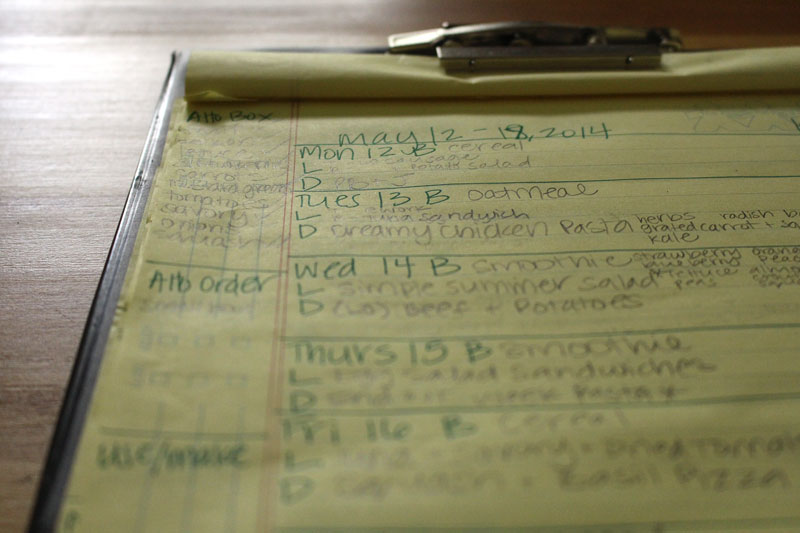
The reason I started menu planning, about 7 years ago, was to stretch our small grocery budget. I found that I was going to the store with nothing in mind and spending way too much money. The menu reigned that in and helped me to learn to use what we had. It was also around the same time that we started ordering our box of Abundant Harvest Organics produce. I started planning around the box so I wouldn’t waste it. It took time to get used to it and to figure out what worked for us. So don’t give up. If it doesn’t work perfectly the first time, give it another try. And, as always, if you’re so overwhelmed and need a bit more guidance, I’m available to answer questions or to start you out with an affordable customized menu plan. I had a great time writing this series. I love to grocery shop, to make lists, and above all, to menu plan. So seriously, if you need help, please ask.

It’s going to take some planning ahead, and a little bit of extra work in advance, but it’s so worth it. Trust me. Please.

I’ve broken this series down into three posts, so to (hopefully) not overwhelm you. This first one just deals with why it’s a good idea, and starting to do some research into what you and your family enjoy eating. It’s the easy step.

Step two will be the most daunting. Push through. Persevere. You can do this. It’s the menu planning phase. Yes, you can.

Step three might be something you have already done: stocking your kitchen with tools, food, and supplies to equip you to succeed in this menu plan.

How to Get Started 

This can be a daunting task, so let’s start small. Let’s plan for a week.

Step 1. Sit down with any members of your household who will be consuming meals. Discuss food preferences. This would be a great time to ask if anyone wants to be in charge of a meal each week. They can do as little as cook, or take on the planning and shopping too. If you have small children, here’s a great opportunity to get them involved in the cooking and eating of foods they may think they can’t stand. 😉

Now that wasn’t so bad, was it?! Come back on January 10th to find out what to do next. 😉

Monday

6

January 2014

2

COMMENTS

So That Was Christmas – Baguette Pizzas

Written by , Posted in Appetizers, Cheese, Dinner, Herbs, Kid-Friendly, Lunch, Main Dishes, Meat, Pizza, Quick and Easy, Snacks, Thoughts, Vegetables

Christmas2013-12

Looking through our photos, I’ve concluded that our holiday consisted mostly of family, friends, and food. There were some gifts thrown in there, a movie or two (ok, more than two), and a few games here and there. But mostly, we were with family and friends for two weeks. Can’t get much better than that.

We put about 1,200 miles on our car. We spent Christmas morning here together, just Tim, the dog, and I. It was nice. Then we packed up and headed out.

Our first stop was the farm Tim grew up on, and his family. Lots of good family time sharing about our adventures this year, eating, gifting… being together.

Christmas2013-1

Partway through the visit my youngest brother, Josh, and his girlfriend, Karensa, arrived. We took them to see the Giant Sequoias and had some great family dinners before heading home for a few days.

Christmas2013-2

(Photo credit Shannon Oberg – I think??! Or did Josh take this one?)

I think I’ve lost count of how many french fries I ate. I’m ok with this. We needed to introduce Karensa to In-n-Out, a road trip staple. Done.

Christmas2013-3

There was also a need for Quenelle.

More than once.

Tim’s birthday is on the 24th, so before we started our Christmas Eve celebrations we had lunch at Quenelle. We had ice cream. For lunch. It was delicious.

The next week we had to go back with Josh and Karensa.

Christmas2013-14

Having guests in town is a fun excuse to visit some of our favorite places. Umami Burger is a fun treat. I can’t order anything but the Truffle Burger and Truffle Fries. I’m sure there are other things that are good, buuuut I don’t want to branch out. I like my favorites.

Christmas2013-6

Guests are also an excuse to play tourist in our town (this is Tim giving a tour of the WB lot – I think he’s showing J&K the spot where Spiderman hangs upside down and kisses Mary Jane… he might also just be pointing at a wall).

Christmas2013-7

We had our third Christmas morning with J&K while Skyping with my parents so they could watch us open our gifts. It’s not the same when we’re not with the whole family, but we will take what we can get. One of my favorite gifts of all was this magnet of our super cute niece. It makes me want to cry every time I see it because I miss her so much, but I love having her little face on my fridge.

Christmas2013-4

My other favorite gift: a new knife. I’ve been wanting this knife for a year. I yelled when I opened it, I was so excited. It cuts through potatoes like they are room temperature butter.

I love it. I love it. I love it.

Christmas2013-13

After a few days at home we went to the coast to visit with our aunt and uncle. To say that the sun setting over the ocean is majestic is an understatement. I don’t think I could ever get tired of this view.

Christmas2013-11

Christmas2013-10

Christmas2013-8

While at the coast we stopped by the Honeymoon Cafe. We’ve been going there since our honeymoon (I know, how cute), and go back anytime we’re in the area. If the food wasn’t so scrumptious it would be easier to skip it. But, there’s the sentimental and delicious factors that keep bringing us back.

Christmas2013-9

For our last dinner together, which happened to be at the coast, Josh, Karensa, and I made Baguette Pizzas. I totally love pizza with real crust, but these were super yummy. See all that cheese that dripped on to the pan and browned?! That’s the best part!

Christmas2013-16

Happy New Year, friends! Here’s to a great one, filled with family, friends, and lots of good food!

Happy Eating!

Baguette Pizzas
Recipe Type: Main, Dinner, Pizza, Cheese, Vegetables
Author: Rachel Oberg – De Ma Cuisine, with Josh, Karensa, and Tim
Prep time:
Cook time:
Total time:
Serves: 6
Ingredients
  • 1-2 T olive oil
  • 1 bell pepper, sliced
  • 1 onion, sliced
  • salt, to taste
  • 6 baguettes, sliced in half lengthwise and widthwise (in the middle)
  • 1 head garlic, diced
  • 2 C tomato sauce
  • 1 zucchini, thinly sliced
  • 1/2 head broccoli, chopped in small pieces
  • pepperoni (optional)
  • additional veggies like: mushrooms, olives, and tomatoes; sliced
  • 1 brick mozzarella cheese, grated
  • basil, chopped
Instructions
  1. Pre-heat oven to 375F.
  2. Heat a medium-sized skillet over medium or medium-low heat. Add olive oil. When oil is hot add bell pepper, onion, and salt. Cook, stirring occasionally, until veggies are tender, about 5-8 minutes.
  3. Place baguettes cut-side up on a baking sheet. Bake for 5-7 minutes, or until slightly toasty.
  4. Add garlic to skillet and cook 1-2 minutes. Remove from heat.
  5. Let everyone top their own pizza, starting with tomato sauce, sautéed veggies, pepperoni (optional), raw veggies, cheese, and basil.
  6. Place back onto a baking sheet and bake until cheese is melted, about 5-10 minutes.


Tuesday

24

December 2013

3

COMMENTS

I’m Ready for Christmas and some Vegan Roasted Cauliflower and Potato Soup

Written by , Posted in Appetizers, Dinner, Gluten Free, Kid-Friendly, Lunch, Main Dishes, Potatoes, Roasting, Soups, Vegan, Vegetables, Vegetarian

VeganCauliflowerSoup_1

I’m ready. So so so ready for Christmas. Most of our shopping was finished in Paris, and the gifts are wrapped and under the tree. (Speaking of Paris, I can’t wait to share about our trip, in the new year!) There’s egg nog in the fridge (not for me, but Tim loves it), and cider to heat up each night, to be drunk by the light of the Christmas tree. I love this season.

We Skyped with my family on Sunday. That’s when they did Christmas morning. We can’t be there every year, which is hard for me, but that’s what happens when you live far away. So I take the moments I can get. My favorite from Sunday was our niece, Anja, who is 15 months old, giving us (and the laptop she was looking at) kisses, over and over and over. My heart nearly burst with happiness. I will treasure that memory always.

Even though we won’t be traveling to see my family, Tim’s family is not as far away, and we are looking forward to spending time with them. And then, my youngest brother and his sweet girlfriend are coming to visit us. We have weeks full of fun planned with these special family members, and some dear friends.

In light of all the festivities, I will be taking the next two weeks off to play.

VeganCauliflowerSoup_4

Since I’m smitten with soup, it seemed appropriate to share a great recipe with you to close out the year.

It’s a Vegan Roasted Cauliflower and Potato Soup. Veggies are roasted to deepen their flavor. Hot sauce is added for a hint of spice. And coconut milk is used for a creaminess. Then it’s all blended up to make a nice, happy, soupy dinner that is dairy-free, vegan, gluten-free, and vegetarian. I served it with some of our favorite biscuits.

VeganCauliflowerSoup_2

VeganCauliflowerSoup_5

VeganCauliflowerSoup_3

With that, dear friends, I bid you good eating, Merry Christmas, happy holidays, and wishes for a most wonderful New Year.

Vegan Roasted Cauliflower and Potato Soup
Recipe Type: Vegan, Dairy-Free, Gluten-Free, Vegetarian, Dinner, Main Dishes, Soups, Vegetables, Roasting, Oven, Stove Top
Author: Rachel Oberg – De Ma Cuisine
Prep time:
Cook time:
Total time:
Serves: 6
Ingredients
  • 3-4 C potato, large chunks
  • 1 onion, large chunks
  • 2 large red radishes, large chunks
  • 10-12 C cauliflower, large chunks
  • 1 small head garlic
  • olive oil
  • to taste, salt
  • to taste, pepper
  • 6-8 C water or vegetable stock
  • 2-3 C coconut milk (almond milk would work too)
  • 1 t of your favorite hot sauce
  • pinch chili powder
  • pinch ginger
  • 4 t red wine vinegar
  • 1/2 t lemon balsamic vinegar
  • to taste salt
  • to taste pepper
  • olive oil, for serving
Instructions
  1. Pre-heat the oven to 375F.
  2. Toss veggies with a bit of olive oil, salt, and pepper. Place on two baking sheets (keep onions in one section in case they’re done sooner and you need to remove them).
  3. Cut top off the head of garlic, drizzle with olive oil, and wrap in foil. Place on one of the veggie baking sheets.
  4. Roast veggies for about 45 minutes, or until tender inside, slightly crispy outside.
  5. Bring water/stock to a boil. Add veggies, milk, hot sauce, seasonings, and vinegars. Cook for a few minutes.
  6. Blend with a hand blender (or in batches in a regular blender, with the middle plug removed and the lid covered with a clean towel) until smooth. Taste and adjust seasoning if needed.
  7. Serve topped with a drizzle of your favorite olive oil.
Notes
Leftovers can be frozen and reheated to go with your favorite sandwiches!


Wednesday

18

December 2013

1

COMMENTS

Rachel Reviews: Quenelle

Written by , Posted in Reviews, Thoughts

RachTimesThreeSm

Quenelle_4780RTSmI have a problem with some aspects of LA living. One of them is that I don’t find it acceptable that it’s even close to 80 degrees F in December. I know that many people disagree. I’m entitled to my opinion.

However, one benefit to having a warm day in December: I can go eat ice cream with my friend Jo, of Waterfall Creative.

JoSm

We went to one of my new favorites: Quenelle. Quenelle, meet everybody. Everybody, meet Quenelle.

If you need to stop reading right now to go get a treat, I understand.

Quenelle_4797RTSm

Here’s what I like about Quenelle: the owner was there. He seems like an easy-going, relaxed guy. He served us our ice cream. He made sure we had the right flavors (after many samples), explaining that they give so many samples because they want to be sure the customer gets their perfect flavor. It worked for me.

Quenelle_4787RTSm

I went in planning to order the Hot Chocolate with Marshmallows (one of their many dairy-free flavors). It sounded yummy and tasted great (I couldn’t tell it was dairy-free, it was creamy and delicious). But, I thought I should try a couple others just in case… Strawberry Shortcake (whoa, yum!) and Crème Brûlée (oh wow!!)… I still got the Hot Chocolate with Marshmallows, but I couldn’t resist a scoop of the Crème Brûlée, which was definitely the winner. It had ribbons of caramel throughout. I almost shouted each time I got a mouthful of that amazing, chewy goodness. I’m a sucker for caramel.

Quenelle_4812RTSm

It’s a little shop (but cute and quaint), so plan to get your ice cream and take a stroll down Magnolia Blvd. They only take cash, but somehow that just adds to the charm. It feels like a place straight out of the “good old days” when things were homemade and there was pride in the quality of a product.

Quenelle_4803RT

Tim loves ice cream, so I had to bring him a treat. I chose the Bourbon Eggnog (as he totally hearts both) and I had to make him try the Crème Brûlée… He enjoyed while I sat next to him, hoping for a bite, but not wanting to ask. He offered me one. What a nice guy. I could go for another scoop today. Especially since I’m having a bit of a disconnect in my brain, thinking about creamy, dreamy ice cream, but smelling the beans that are cooking for tomorrow’s Chili.

Happy Eating!


(Photos of me taken by Joanna of Waterfall Creative. All other photos taken by me.)

Monday

16

December 2013

2

COMMENTS

Sliders with Caramelized Onions and Gorgonzola – In the Kitchen with Rachel O – Video

Written by , Posted in Appetizers, Beef, Cheese, Dinner, In the Kitchen with Rachel O, Main Dishes, Meat, Sides, Snacks, Vegetables

Sliders3

What can I really say about Sliders? I mean, how many ways can I say delicious? I love a good burger. I really love a good slider… because then I get to eat more than one!! (Plus, they’re little and cute.)

Sliders5

I think it’s fun to get creative with food. There is absolutely nothing wrong with a pickle, mustard, and onion burger. You know, the usual. But, let’s try something else.

You know how delectable caramelized onions are on a crostini with melty gorgonzola? You do know this, right? If not, stop reading and make a quick snack. You’ve got to try these flavors together. Ok, now that you’re back, let’s discuss the sweet caramelized onions and how well they pair with tangy gorgonzola. Is your mind blown? I know. I’ve been there. (Another mind blowing option: gorgonzola, roasted figs, baguette, and honey. Do this. Go there. You gotta!)

If you are not the biggest fan of gorgonzola, Tim can sympathize. I made his without. But with mustard and pickles. That’s cool. Cool cool cool. We don’t have to have the exact same taste in food.

Sliders4

Sliders2

Caramelized onions are one of my favorite things. Does it ever just flabbergast you that this vegetable, so pungent, so intense, could ever be mellowed out? I’m amazed at what a little heat and some honey can do. I’m glad that we don’t just have to eat bland, flavorless, boring food. That’d be so lame. I’m totally not into that. I want big, bold flavors. I want surprising new tastes (um, I don’t mean like trying Bertie Bott’s Every Flavour Beans, where you expect lemon and get rotten egg). I crave the experience of enjoying food.

For all this, we have Sliders topped with caramelized onions and gorgonzola. C’est très très bon.

Sliders

Happy Eating!

Sliders with Caramelized Onions and Gorgonzola
Recipe Type: Main Dish, Appetizer, Dinner, Meat, Beef, Cheese, Vegetables
Cuisine: American
Author: Rachel Oberg – De Ma Cuisine
Prep time:
Cook time:
Total time:
Serves: 2-3
Cute little sliders with big taste.
Ingredients
  • 1 onion, sliced
  • 1 T honey
  • pinch dried thyme
  • 1/2 lb. ground beef
  • 1 T red wine vinegar
  • 1/4 t salt
  • pinch pepper
  • 1/4 t thyme
  • 1 T olive oil
  • Gorgonzola cheese, sliced
  • 6 mini burger buns, halved
Instructions
  1. Add onion, pinch thyme, and honey to a dry skillet. Cook over low heat for 25-30 minutes, or until onions are caramelized.
  2. Combine beef, vinegar, salt, pepper, and thyme in a bowl. Mix with hands (do not over mix). Shape into 6 small patties. Press thumb into center to create a small indent.
  3. Heat skillet. Add oil. When hot, add patties, and cook over medium heat for about 3-5 minutes. Flip, and cook covered, for 3-5 minutes more, or until a meat thermometer registers 160F.
  4. Remove from heat. Top with gorgonzola and cover. Let stand for a few minutes.
  5. Serve on a bun topped with caramelized onions.